The Chase MileagePlus Explorer card is a card I have kept for six years running. Initially, I kept the card mainly to avoid the checked bag fee, especially as our family continued to grow with little ones, and checking in bags became unavoidable. Some benefits have remained in place, such as two United Lounge passes that Chase gives yearly upon renewing the card and priority boarding. These perks have further appeal in the realm of basic economy, and having an airline credit card assures you of being allowed to carry a bag that can be checked in or carried on (if you book a basic economy fare). What happens if you don’t have an airline-branded credit card and book the basic economy fare? You can only bring a bag that can fit under your seat. Anything that goes into the overhead bins would have to be paid for, and airlines are starting to enforce this policy at the gate.
Many airline credit cards are popular for churning. This means you sign up and get approved for the card, rack up the bonus miles after hitting the minimum spend threshold, and cancel the card within a year. Then you can apply those miles to that destination you’ve been saving up for. Since I find myself traveling between Chicago and the East Coast several times a year, I’ve held on to the United MileagePlus Explorer card as well as the Citi American AAdvantage Platinum to save on baggage fees and for the convenience of priority boarding (on super busy routes such as LGA to ORD, it assures overhead bin space). If there was only one credit card you wanted to pay an annual fee for, I wouldn’t recommend an airline-branded card since you’re married to that one airline if you want to reap the benefits. A credit card such as the Chase Sapphire Preferred or Reserve would be the better option since you have multiple airlines whose frequent flier programs you can utilize via transfer. But if you’re willing to pay for two cards and you live near a United hub (Chicago, D.C., Houston, Denver, San Francisco, Newark/NYC, and Los Angeles), the United MileagePlus Explorer credit card might be one of the most appealing airline-branded credit cards available. In addition to the benefits I outlined above, United offers exclusive mileage redemptions to card members only.
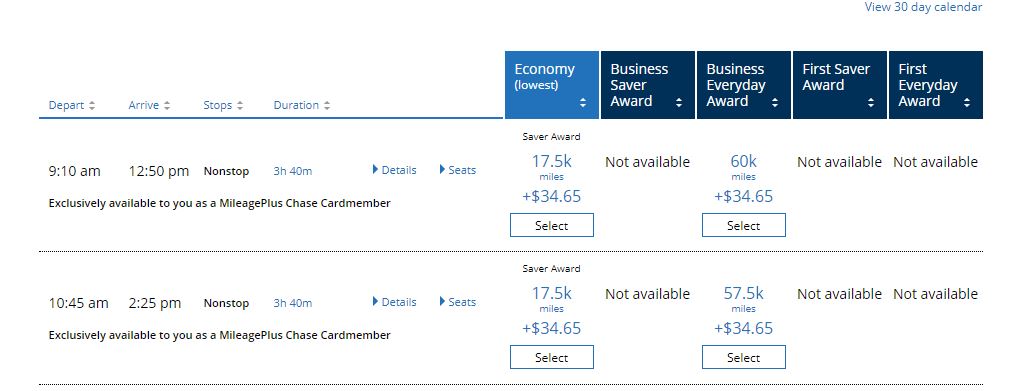
I used an example itinerary from Chicago (ORD) to Cancun from July 29th to August 4th. In both instances, we’re going to use award redemptions. The first example is the redemption available to Chase United MileagePlus credit card holders.
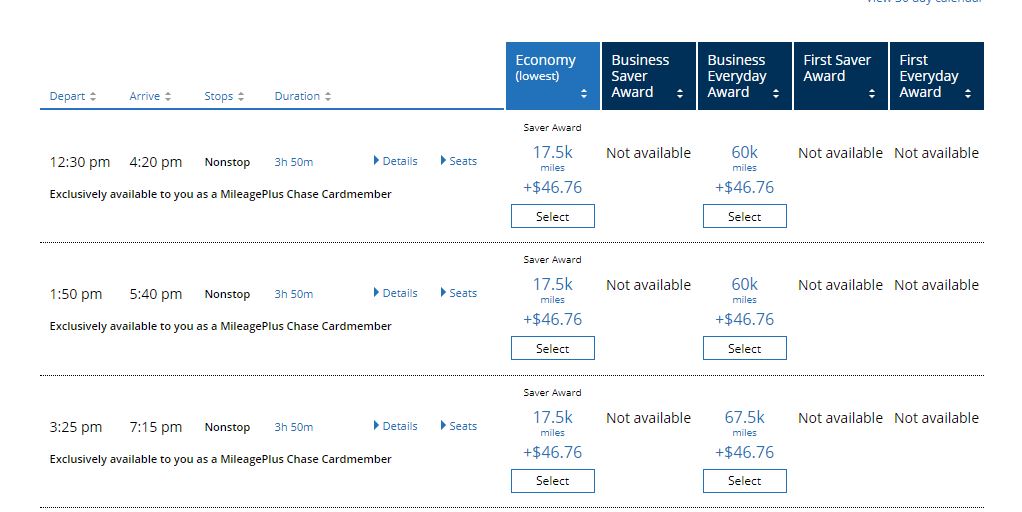
This is the segment from Chicago to Cancun. Two non-stop options, worth 17.5k miles, are available exclusively with the MileagePlus credit card.These are the options for the return. Three non-stop options if you hold the credit card. 35k miles for the roundtrip for one passenger.
Now let’s look at redemption availability if you want to book this same trip using United Miles, but don’t hold the United MileagePlus Explorer credit card:
If you want the non-stop option, it will cost 25k miles rather than the 17.5k miles seen above.
They have one 17.5k redemption to get to Cancun, but look at that disgusting itinerary. Not only are you departing at 6 a.m., but you have to switch airports in D.C. By the time you’re in Cancun, you’re spent.The return trip to Chicago would cost 25k miles. There is no 17.5k option available for the return.
As you can see in the example above, having the Chase MileagePlus Explorer card means you’re using only 35k miles (plus the applicable taxes) with the benefit of having a non-stop flight on both legs of the journey. Without it, you’re using, at a minimum, 42.5k miles, and likely 50k miles if you want to have a non-stop each way and a productive first day in Cancun. How much is that 15k miles savings worth? The Points Guy values each United mile at 1.5 cents. 1.5 x 15k = $225. This is just an estimate, but even if you value it a bit lower, it becomes obvious that the miles you saved by having the card are worth far more than the annual fee of $95 you’d be paying to keep the card. Again, this card isn’t for everyone; travelers who live near a United hub would benefit the most. If you are a Chase Sapphire Preferred/Chase Sapphire Reserve cardholder and find yourself transferring Ultimate Rewards points into United often, pairing the MileagePlus Explorer card with either of them only enhances their value.
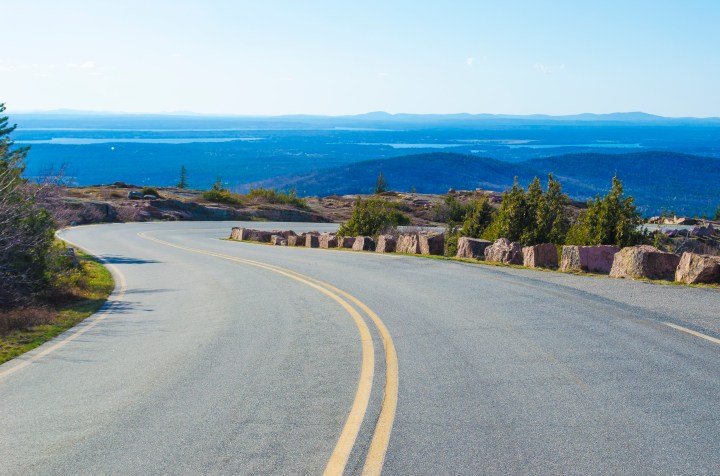
Acadia National Park had been on the bucket list for quite a while. Acadia National Park encompasses a large area of Mount Desert Island off the coast of Maine. This beautiful setting is known for its stunning vistas, scenic hikes, and ocean views from Cadillac Mountain. This is also the first place in the U.S. where you can see the sunrise between October and early March. If you’re visiting in the peak of summer, you can swim at Sand Beach when the water temperature is more tolerable. We drove from Albany, NY, and it took us about 7 hours to get there. Acadia National Park is about a 4.5-hour drive from Boston and an 8-hour drive from New York City. If you’re not close enough to drive, you can fly into Bangor International Airport, about 50 miles from Bar Harbor. We used Bar Harbor as our base camp and gateway into Acadia National Park.
Kauai was the second island my wife and I visited during our last trip to Hawaii. We started in Maui (you can read that itinerary here) and took a one-way flight from Maui to Kaui on Hawaiian Airlines via JetBlue miles. Kauai is known as the Garden Isle for its lush tropical landscape. Based on my experience, Kauai offers more seclusion than Maui and Oahu and more lush greenery than Big Island. The islands are special in their own way, so I’d recommend experiencing all four. Here’s a rundown of what we did during our four days in Kauai.
Day One: Arrival
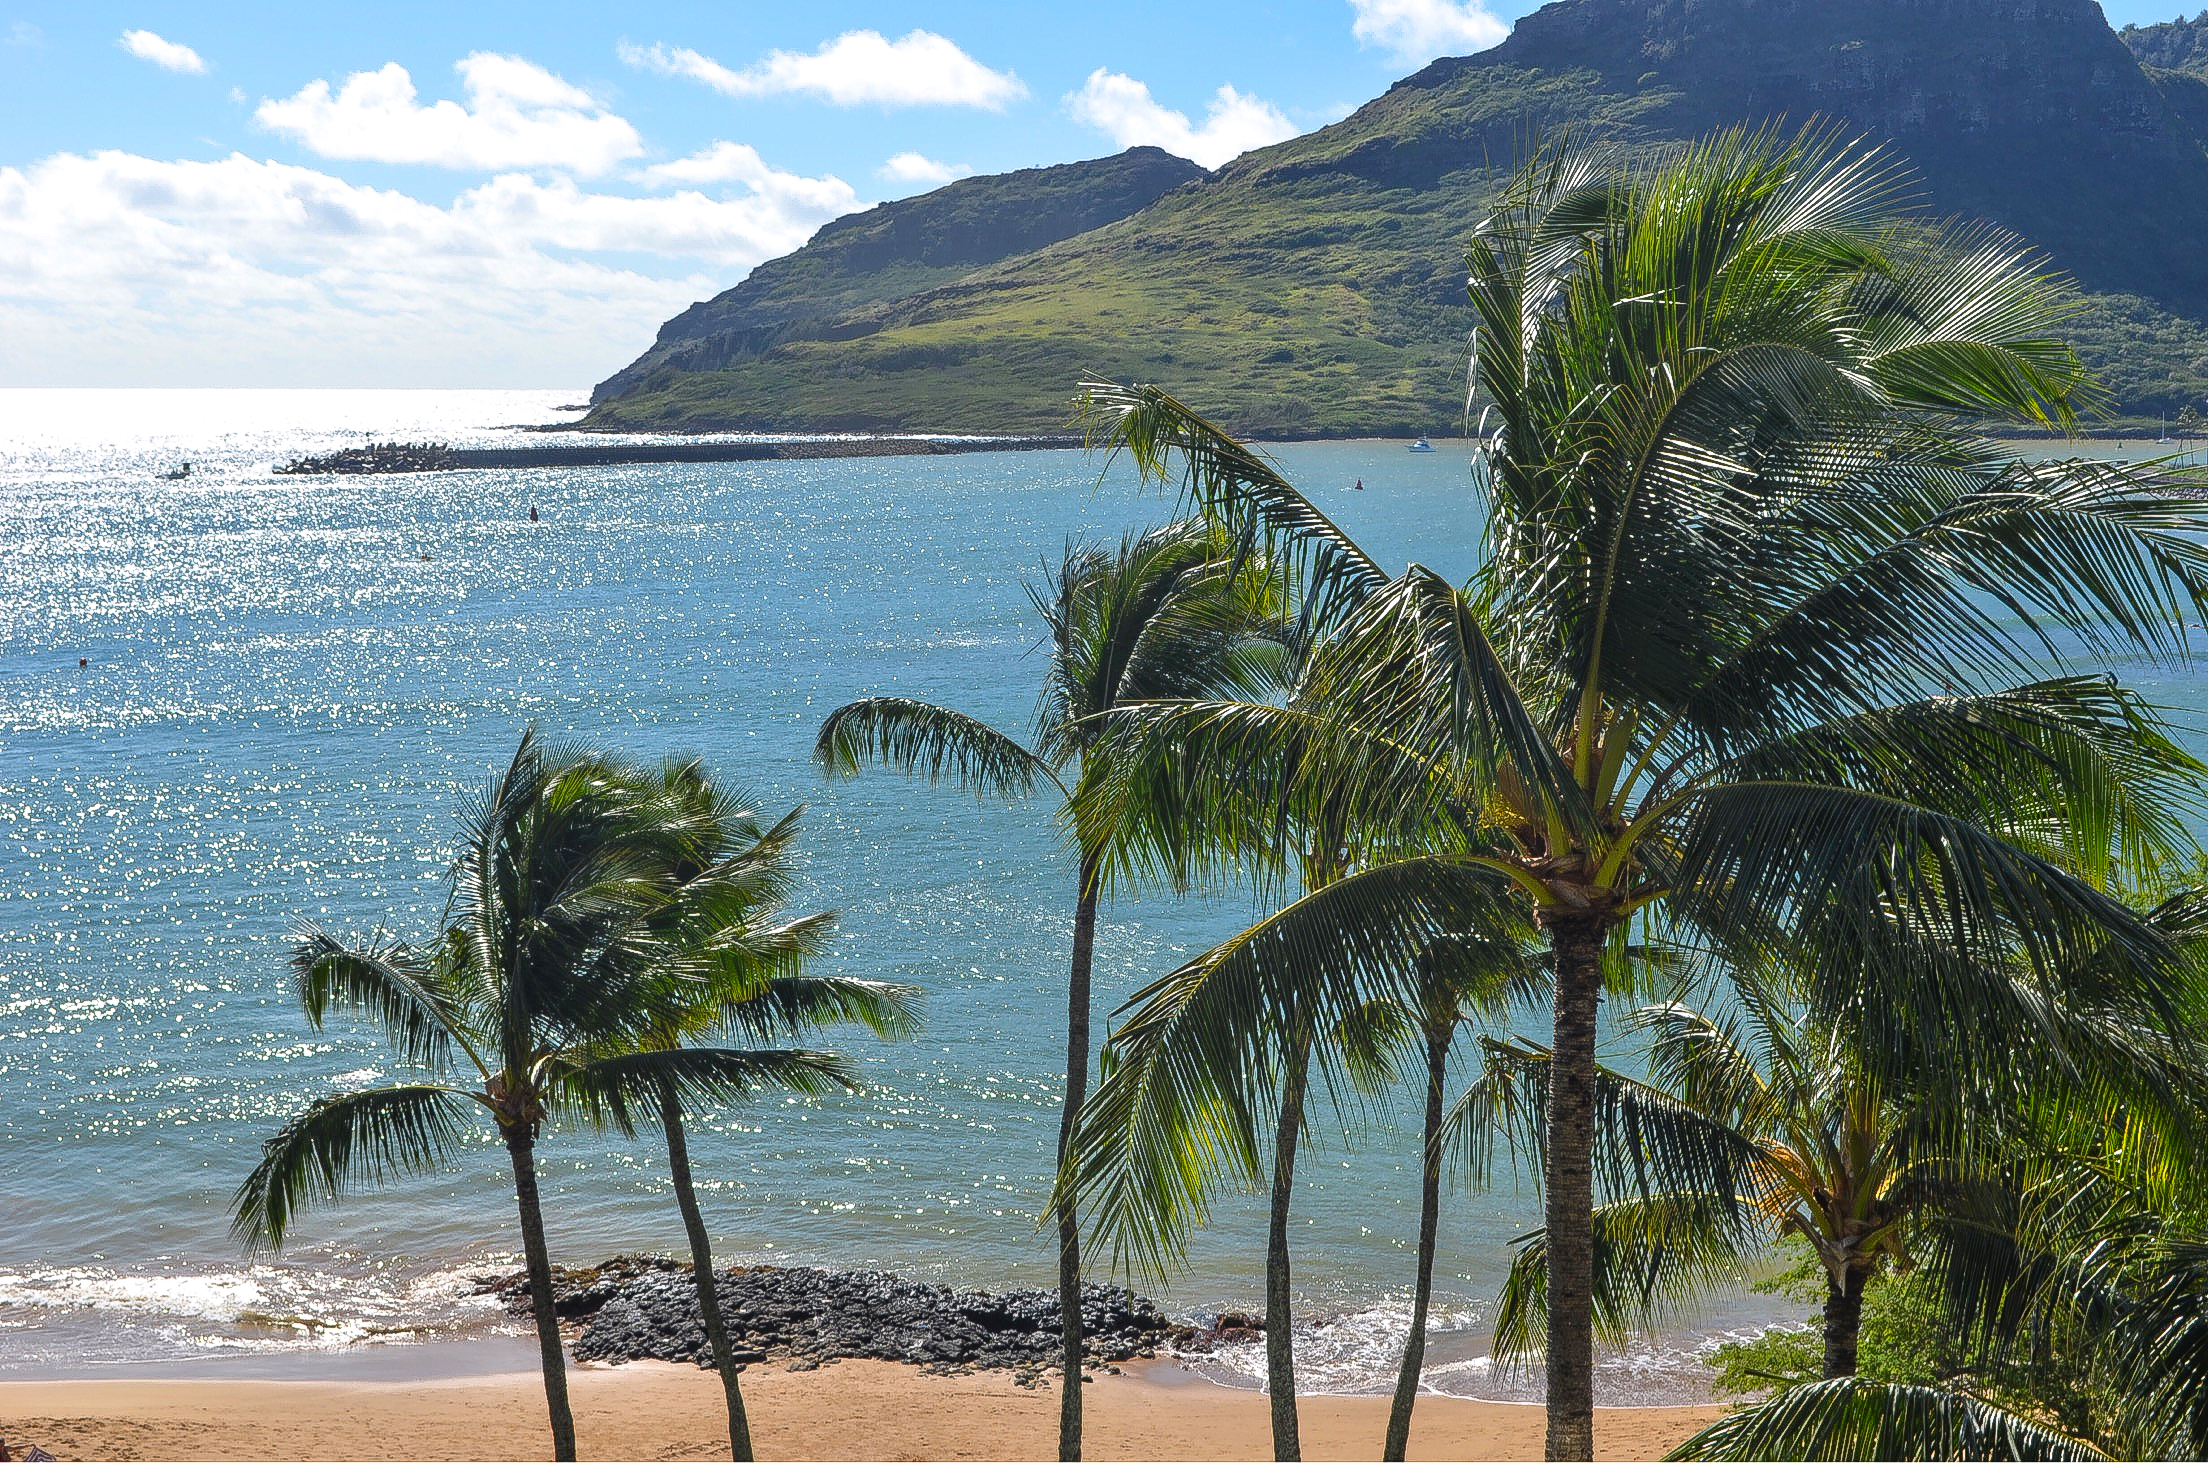
My wife and I stayed at Mariott’s Kauai Beach Club Hotel during our stay in Kauai. Great property that wasn’t expensive and located right on the beach, just 10 minutes from the airport. We rented a car in both Maui and Kauai and if you want to make the most of your time there, I’d recommend doing the same. We arrived in the late afternoon from Maui, so we spent the evening at Kalapaki Beach, right in front of our hotel, and took in the live entertainment that was offered by Marriott.
View of the beach from our balcony
Day Two: Poipu Beach
We spent almost the entire day at Poipu Beach on the second day. Of all the beaches I’ve been to in Oahu, Maui, and Kauai (I’ve been to many), this was my favorite in Hawaii. Plenty of space, clean, an abundance of marine wildlife, and a perfect place to snorkel. If you’re in Kauai, this beach is a must-see. You also get spectacular sunsets if you stick around until the late evening.
I was very fortunate to swim alongside a green sea turtle. If you snorkel in Hawaiian waters, get a GoPro or underwater camera. You’ll see some cool wildlife, and it’s worth getting on video.
Day Three: Waimea Canyon State Park
Waimea Canyon State Park is another must-see place in Kauai. From our hotel near the airport, it was about 32 miles to the entrance and took about 45 minutes. You can also take a 3.4-mile hike to the bottom of the canyon, which will take about 3 hours round-trip. The cool thing about Waimea Canyon is that the surrounding area looks like Sedona, Arizona. You’ll find red clay, orangish water, and a landscape that almost seems out of place for Hawaii.
The landscape on the periphery of Waimea Canyon
The main lookout at Waimea Canyon
Once you’re at the main lookout point at Waimea Canyon, you’ll find local farmers selling delicious local produce such as mangos, star-fruits, and papayas. If you purchase the fruits, you’ll support locals.
Day Four: Napali Coast State Park
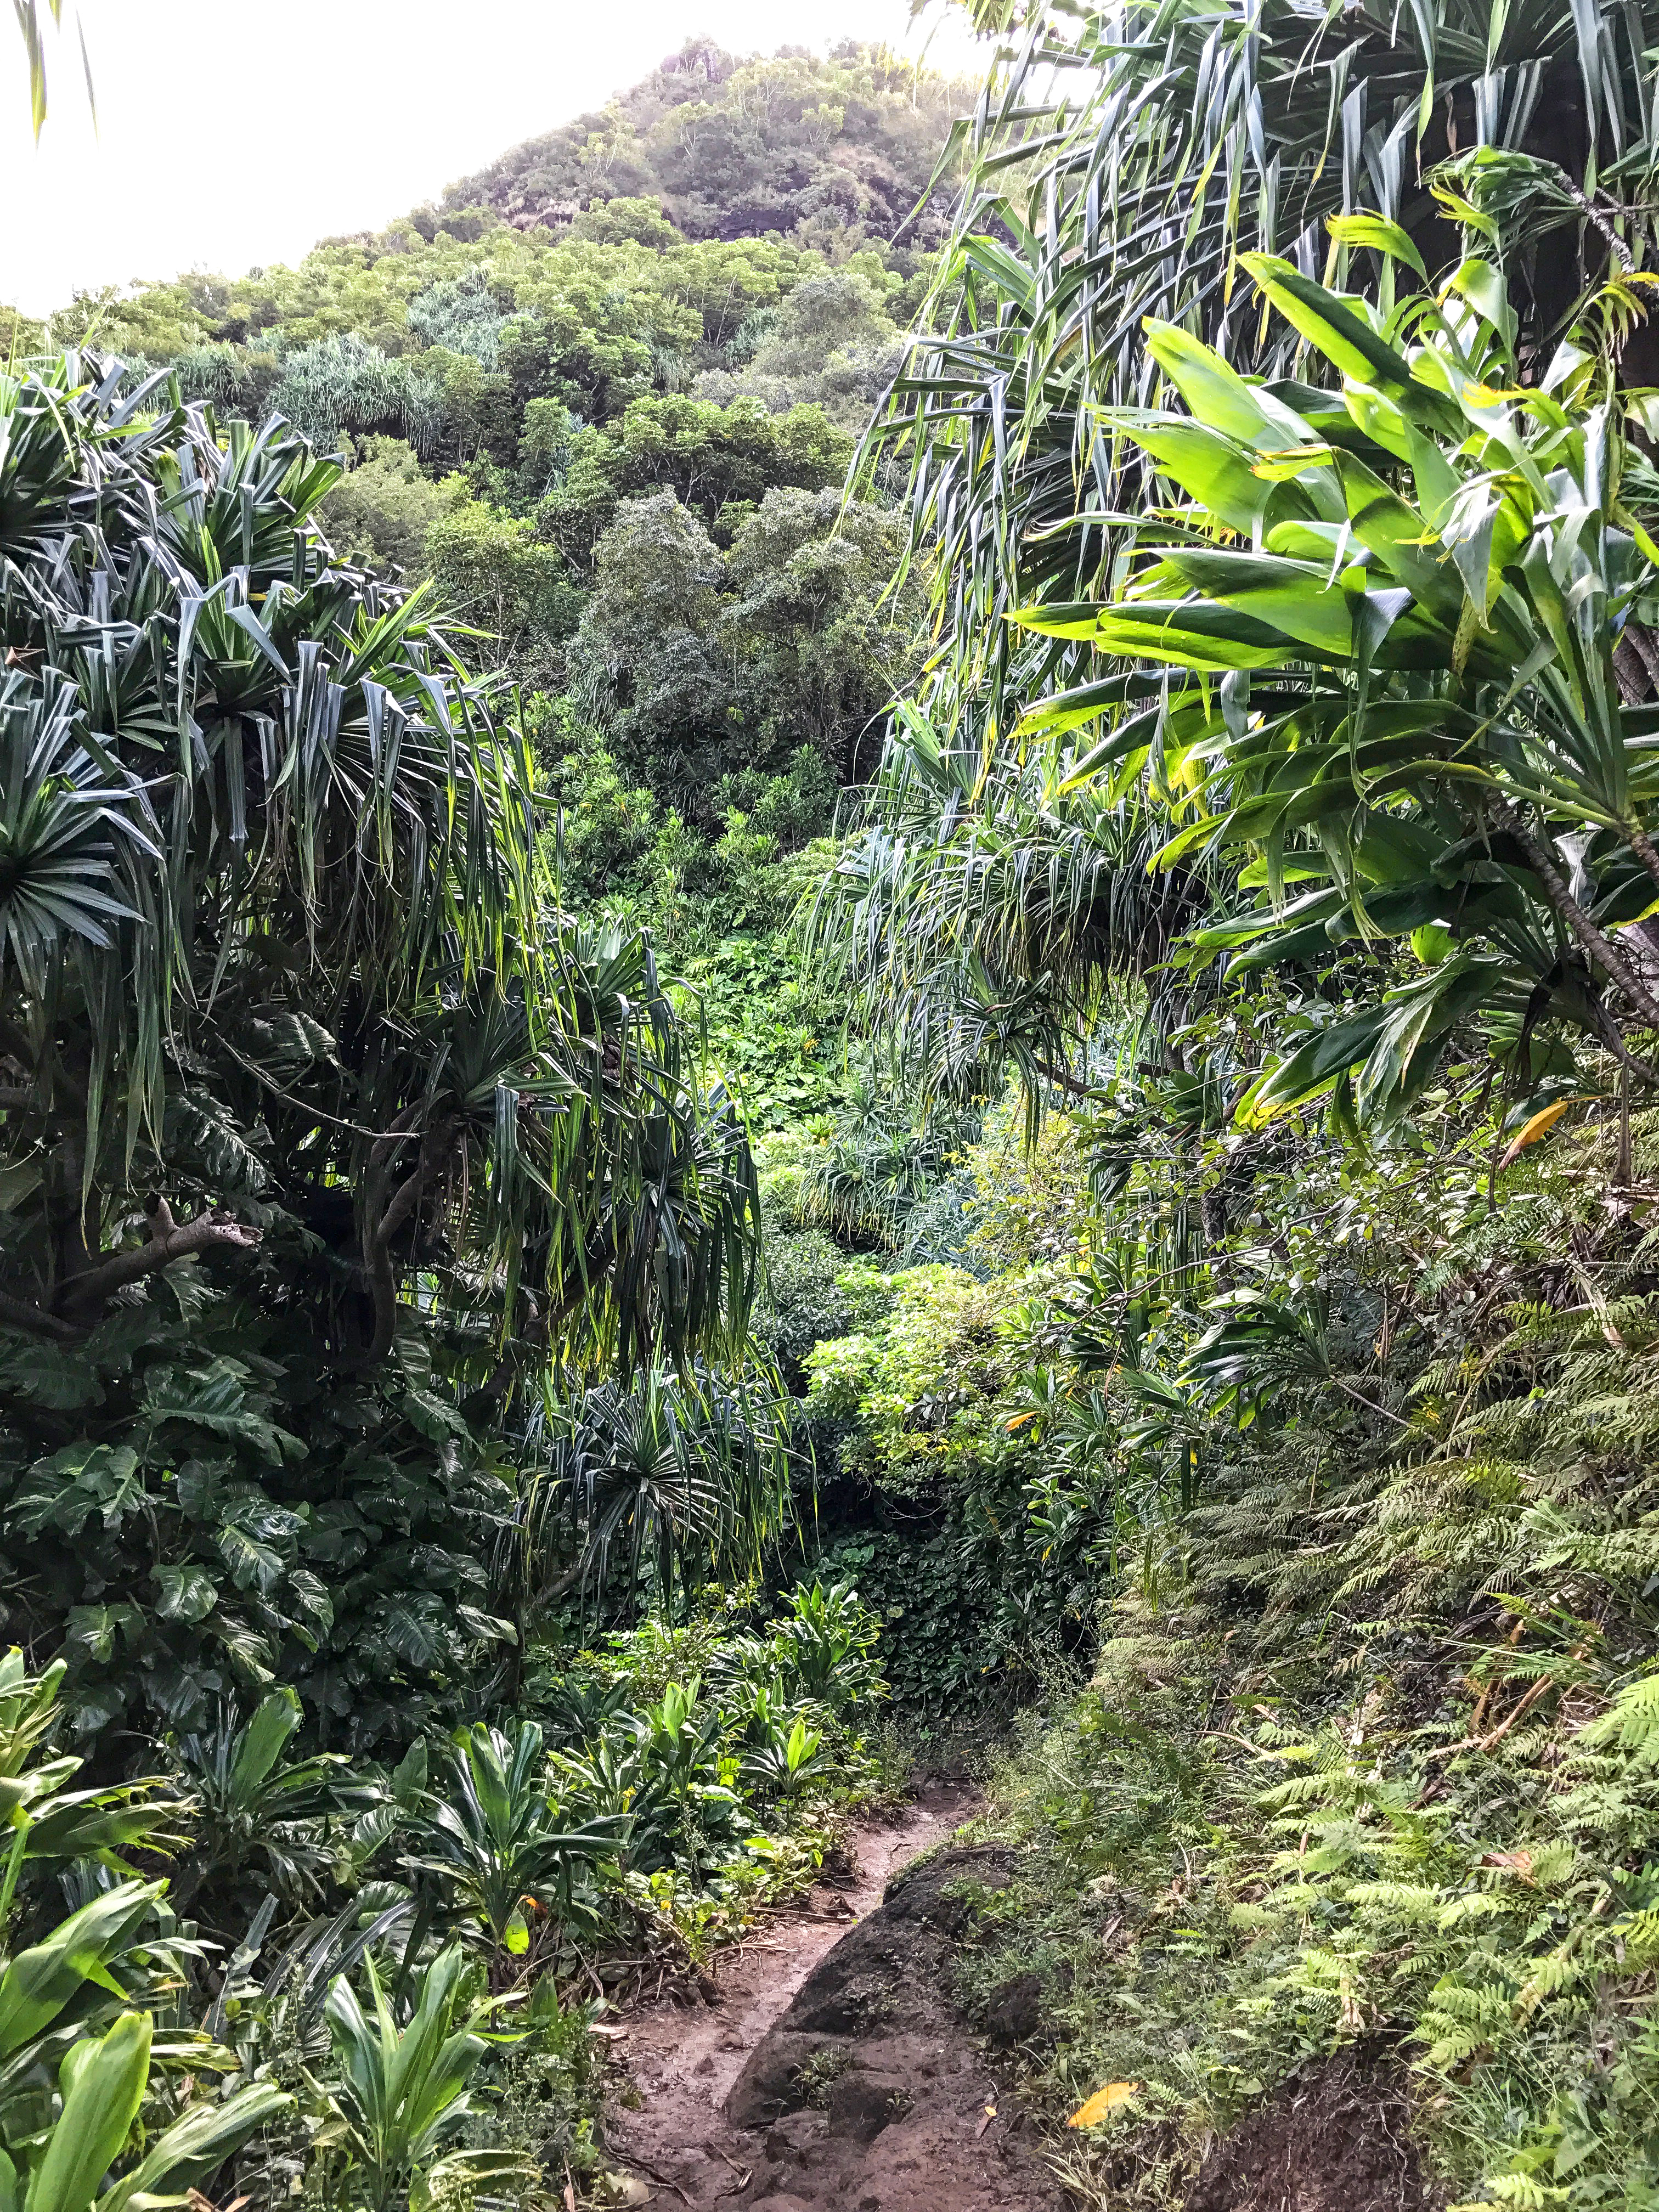
No trip to Kauai is complete without seeing Napali Coast State Park. This was one of the settings for Jurassic Park; the minute you get to the entrance, it will look familiar. My wife and I were dead set on doing the hike, and we did about 3/4 of it until park rangers told us we couldn’t go any further due to flooding from heavy rainfall the previous night. The hike is challenging, particularly the first quarter mile, where there is a lot of steep uphill climbing. Bring some solid hiking shoes, plenty of water, and a couple of granola bars if you do the hike. I saw a few people with flip-flops, and they were getting killed by mud and wet rocks. Please don’t do this hike with flip-flops or sneakers. You don’t need expensive hiking shoes; a $60 pair would do the job. I’d also bring a light raincoat since this part of Kauai gets a lot of rain, and the weather can change from hour to hour. Other options for seeing the cliffs are by boat or helicopter. I have heard the helicopter takes four people and that if you’re one of the two sitting in the rear, you’re kind of blocked off from the views compared to those sitting in the front. Just something to be aware of.
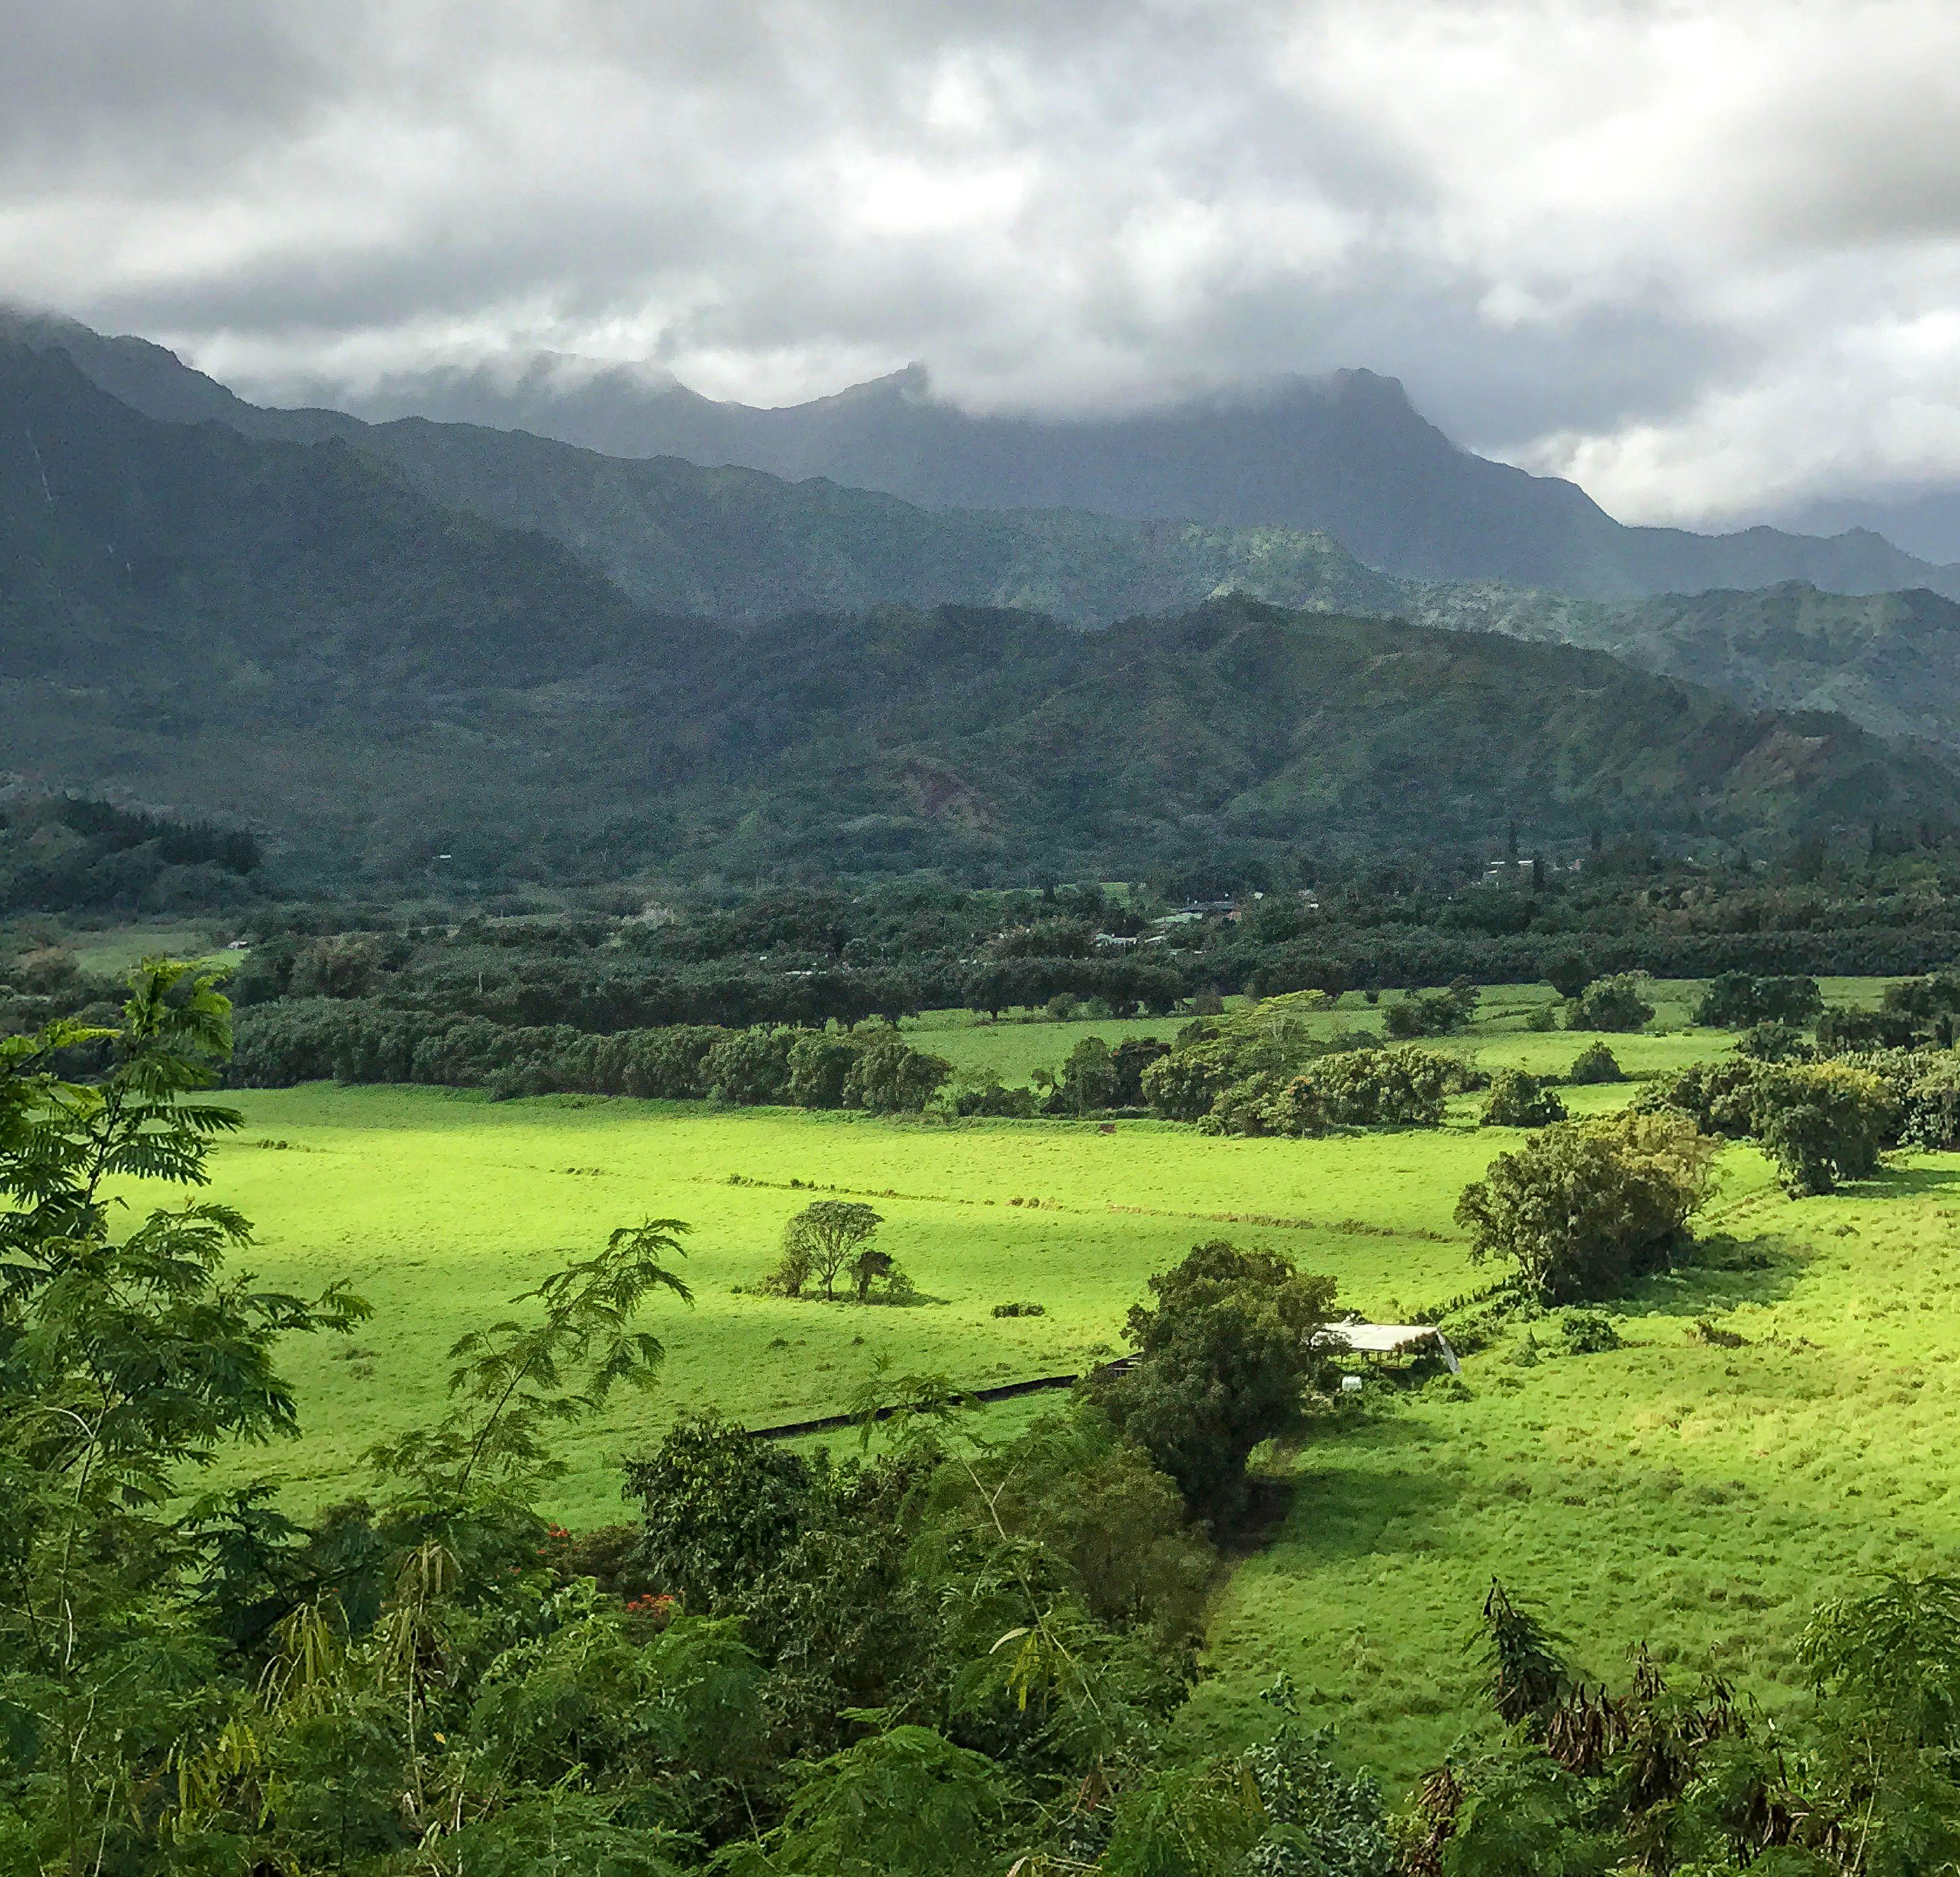
Overcast skies on our way to Napali Coast.
The weather on this part of the island changes from hour to hour. If you open any weather app on your smartphone and see rain for the entire day, take that with a grain of salt. On our drive there, we had mostly overcast skies with drizzle here and there. When we started the hike, the clouds cleared up and gave way to sunshine. Don’t be disappointed if you see overcast skies while driving there. Just wait it out, and hopefully, the sun will appear.
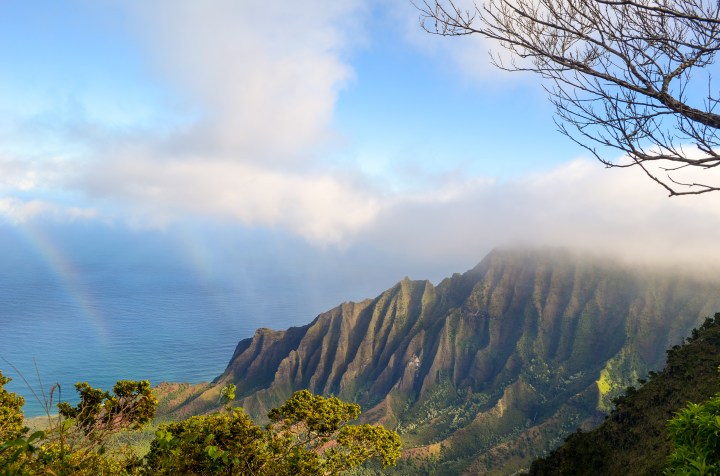
A view from the hiking trail. The skies cleared up about 40 minutes after we started hiking.The majestic cliffs and a rainbow from a distance
So this was Kauai in a nutshell. A special place and a beautiful island home to my favorite trail among the ones I have hiked in Hawaii. I wish we had an extra day here, and I know I’d be saying the same thing even if we did. If you visit Hawaii, try including Kauai in your itinerary. But only if you can do the three must-see places above. If you want to read about our most recent trip to Hawaii (Big Island), you can do that here. As always, thanks for reading.
Over the last few months, I’ve been fortunate to transit through airports with an AMEX Centurion Lounge. Ezeiza Airport in Buenos Aires, Argentina, happened to be another one of those airports. Centurion Lounge access is complimentary for those holding an American Express Platinum card during our visit. At the time of our visit, cardholders were also allowed to bring in one guest (and children under 16), so my wife was able to benefit. As of 2023, AMEX Platinum cardholders must spend $75k annually on the card for complimentary guest access.
This lounge is in Terminal C, past immigration/customs and security. Take the elevator or stairs to the second floor right past gate 15, and you will find the lounge entrance.
Upon entering the lounge, the front desk staff will ask for your AMEX Platinum card and boarding pass. Once they have scanned both, you’re good to go.
The food options were sweet croissants, wheat and white bread, cheese, pastrami sandwiches, and banana nut muffins with powdered sugar. It was not quite the selection I’ve seen at other Centurion Lounges, but certainly better than many non-Centurion Lounges I’ve visited. Fresh orange juice and apple juice were also available.
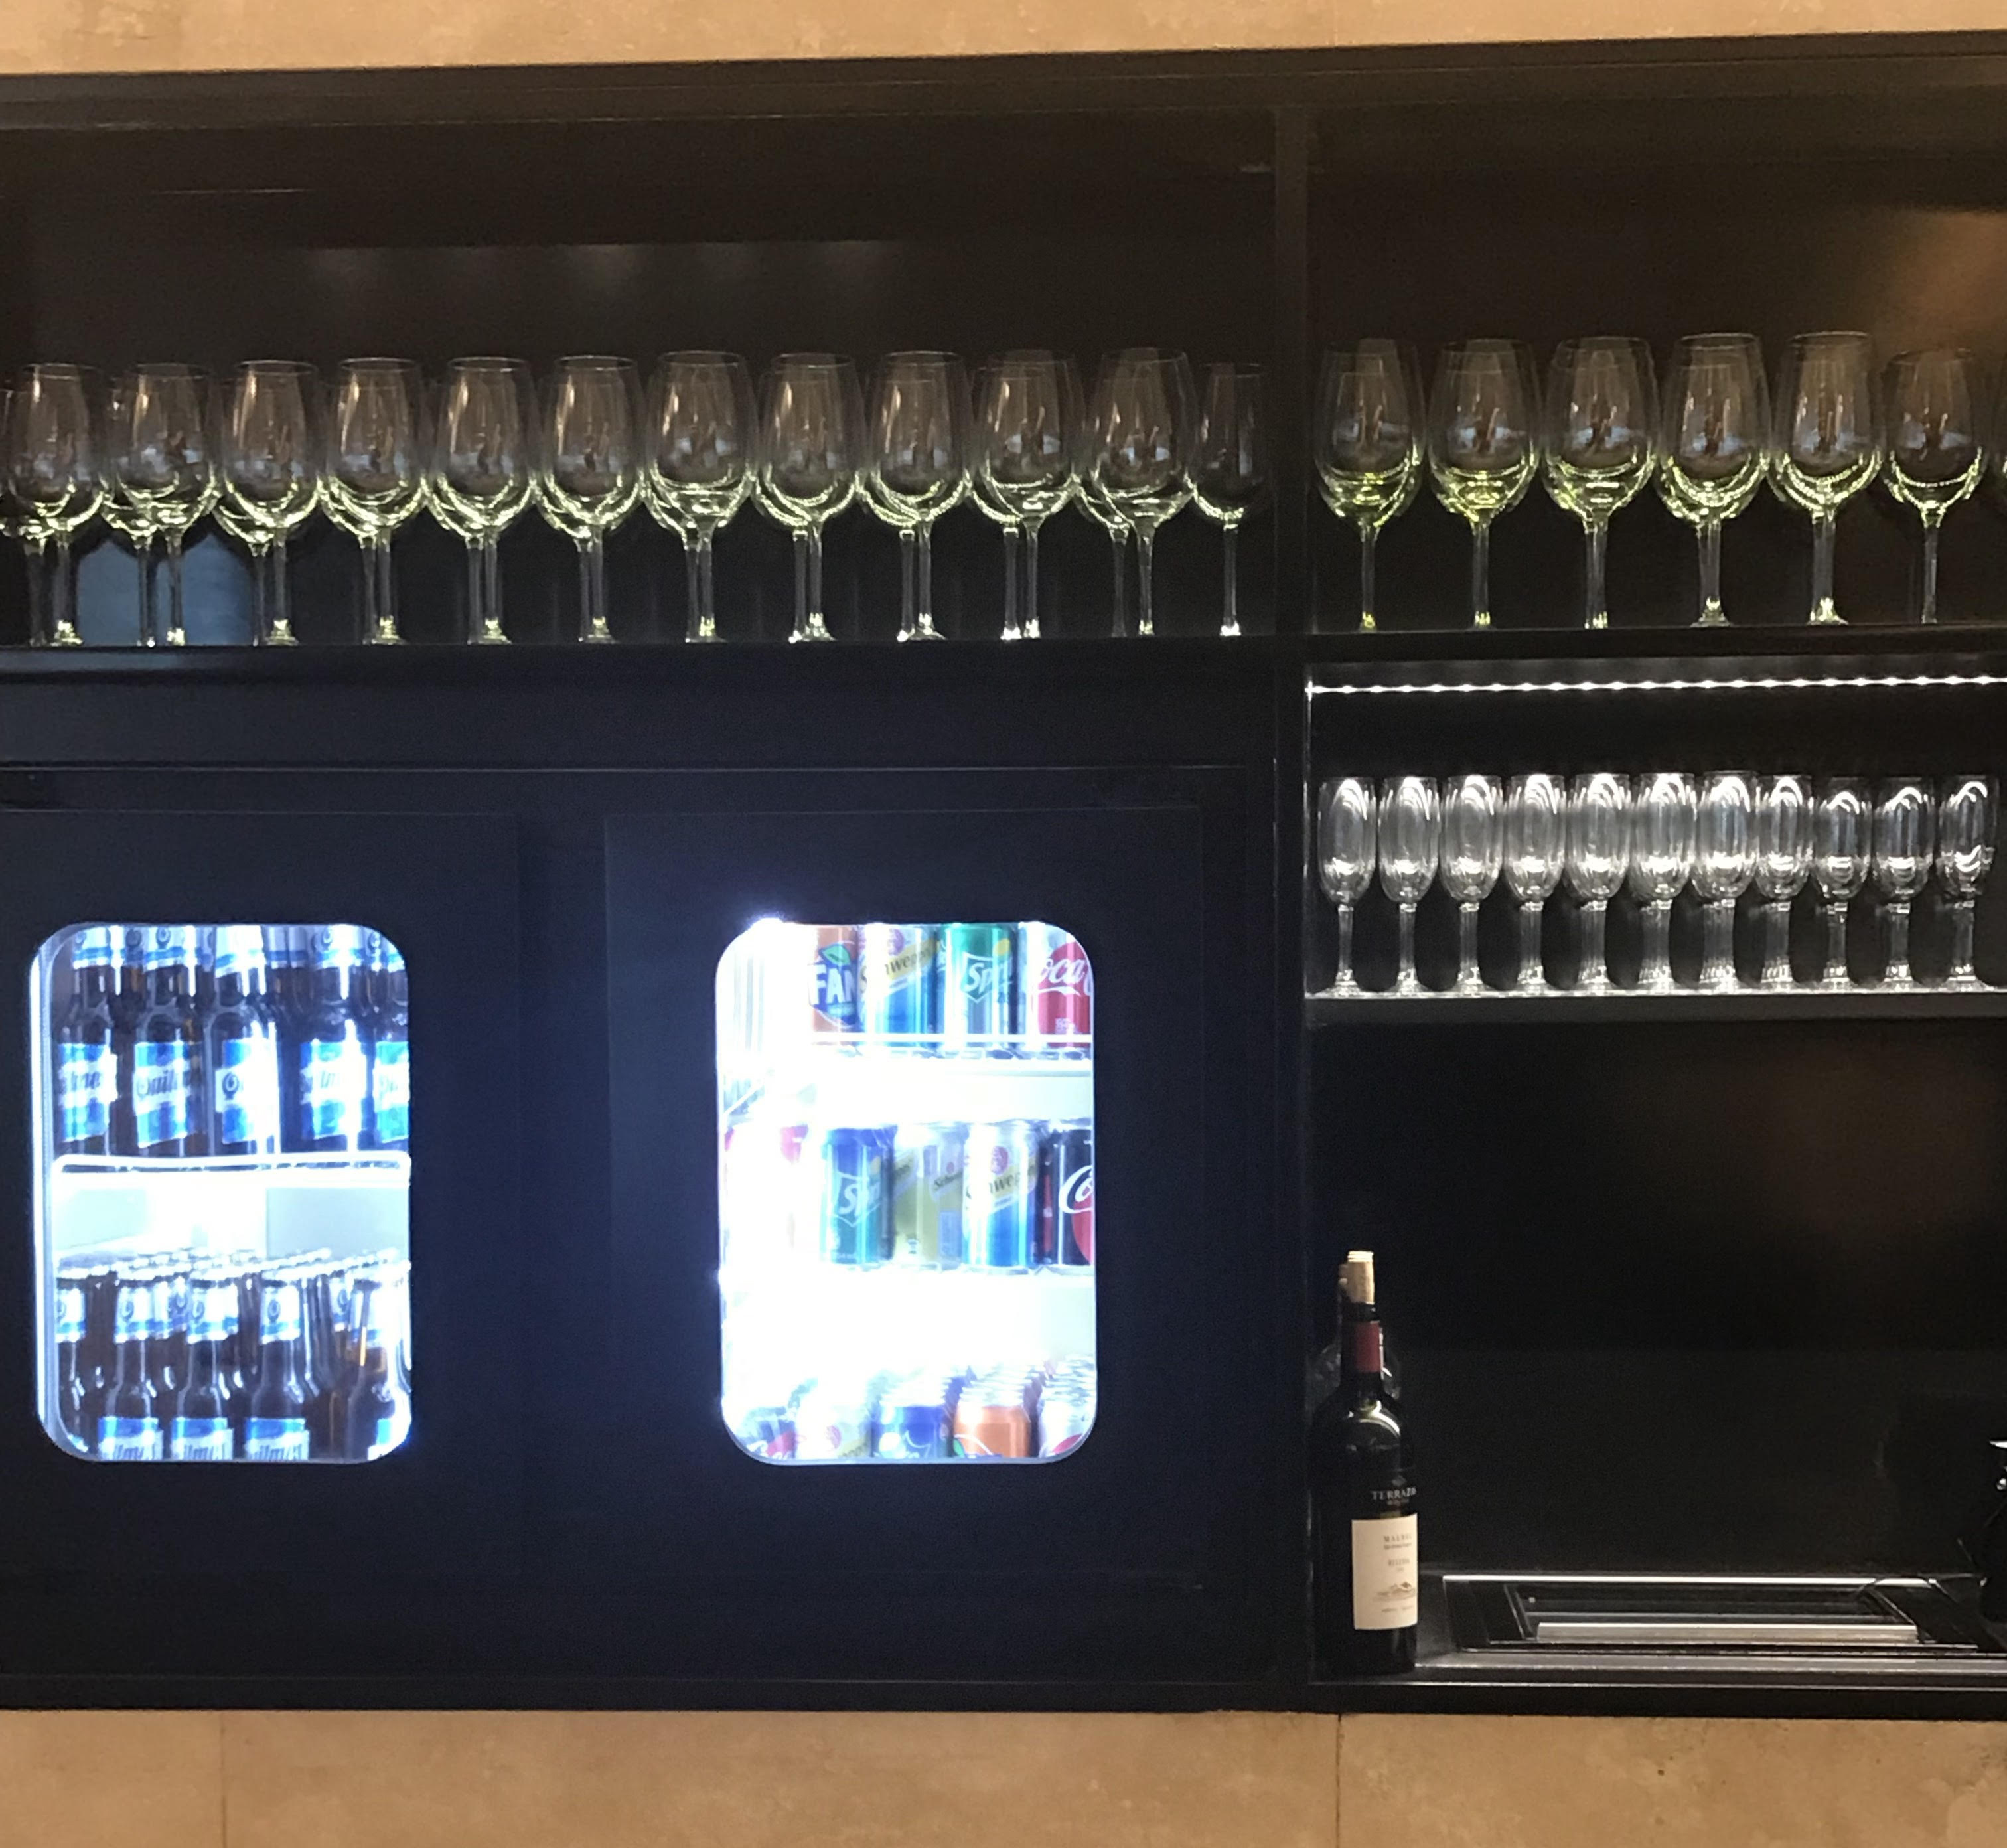
The beverage cooler was fully stocked with soft drinks and adult beverages.
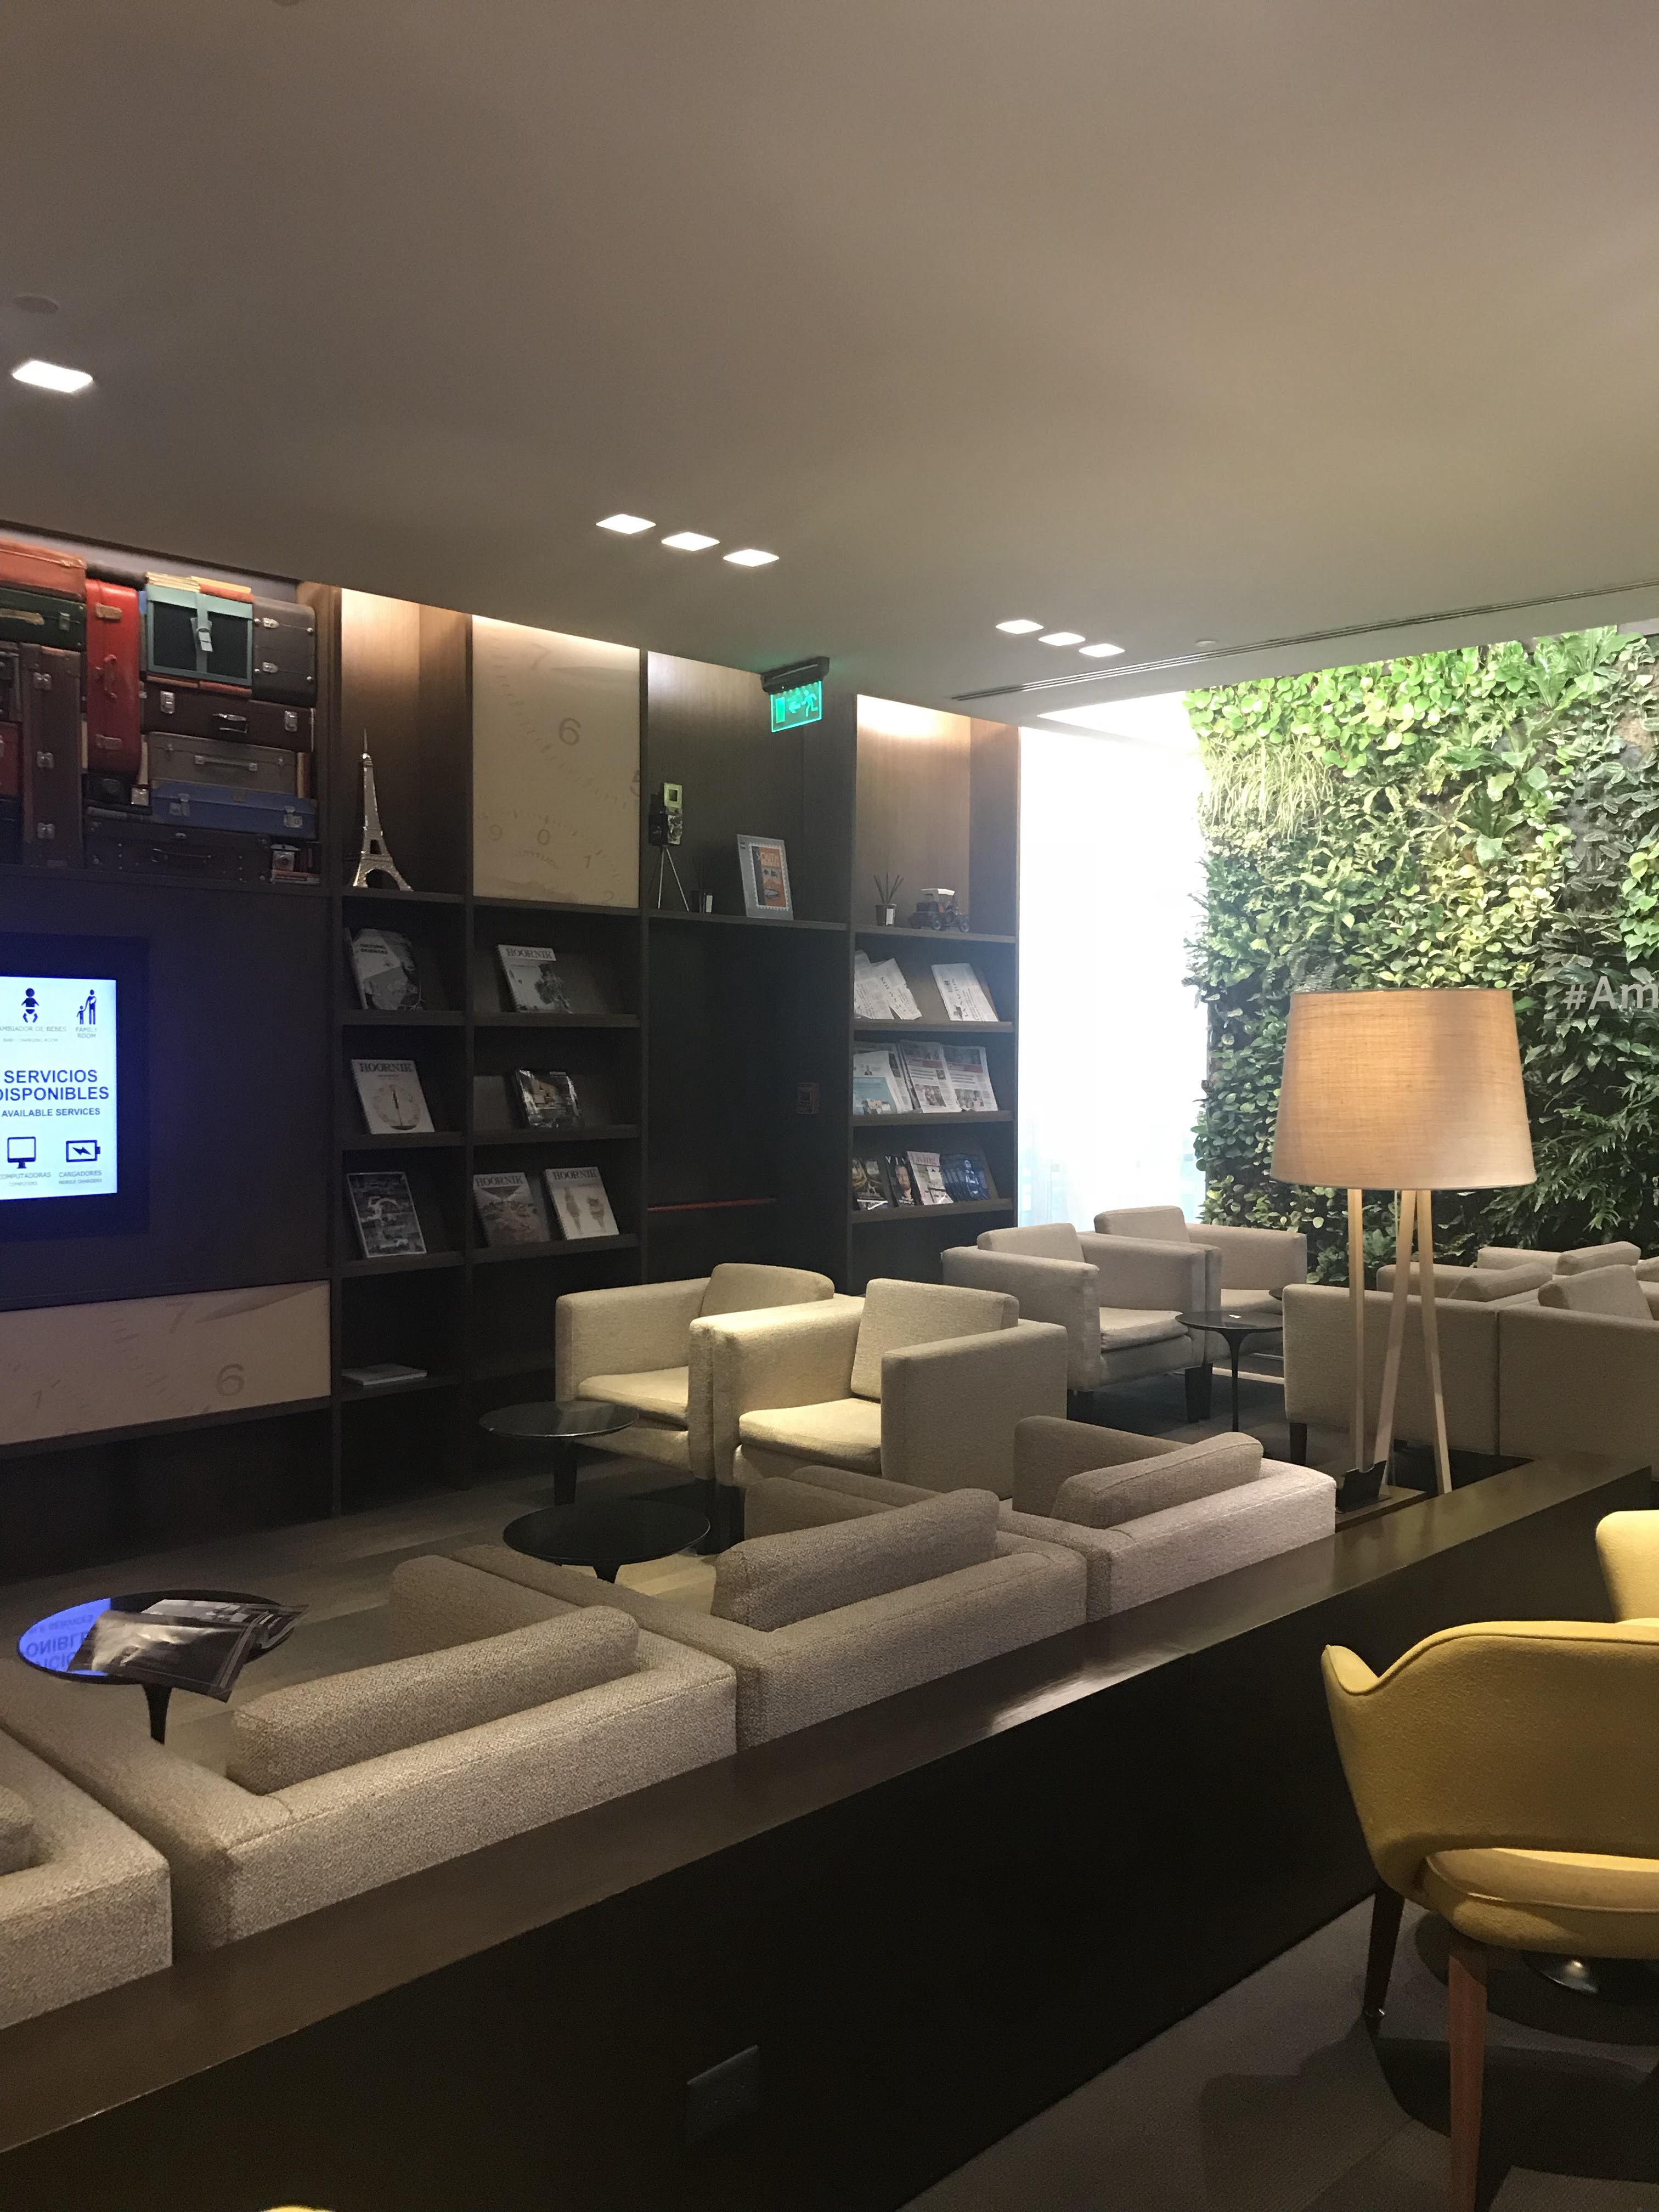
Common area
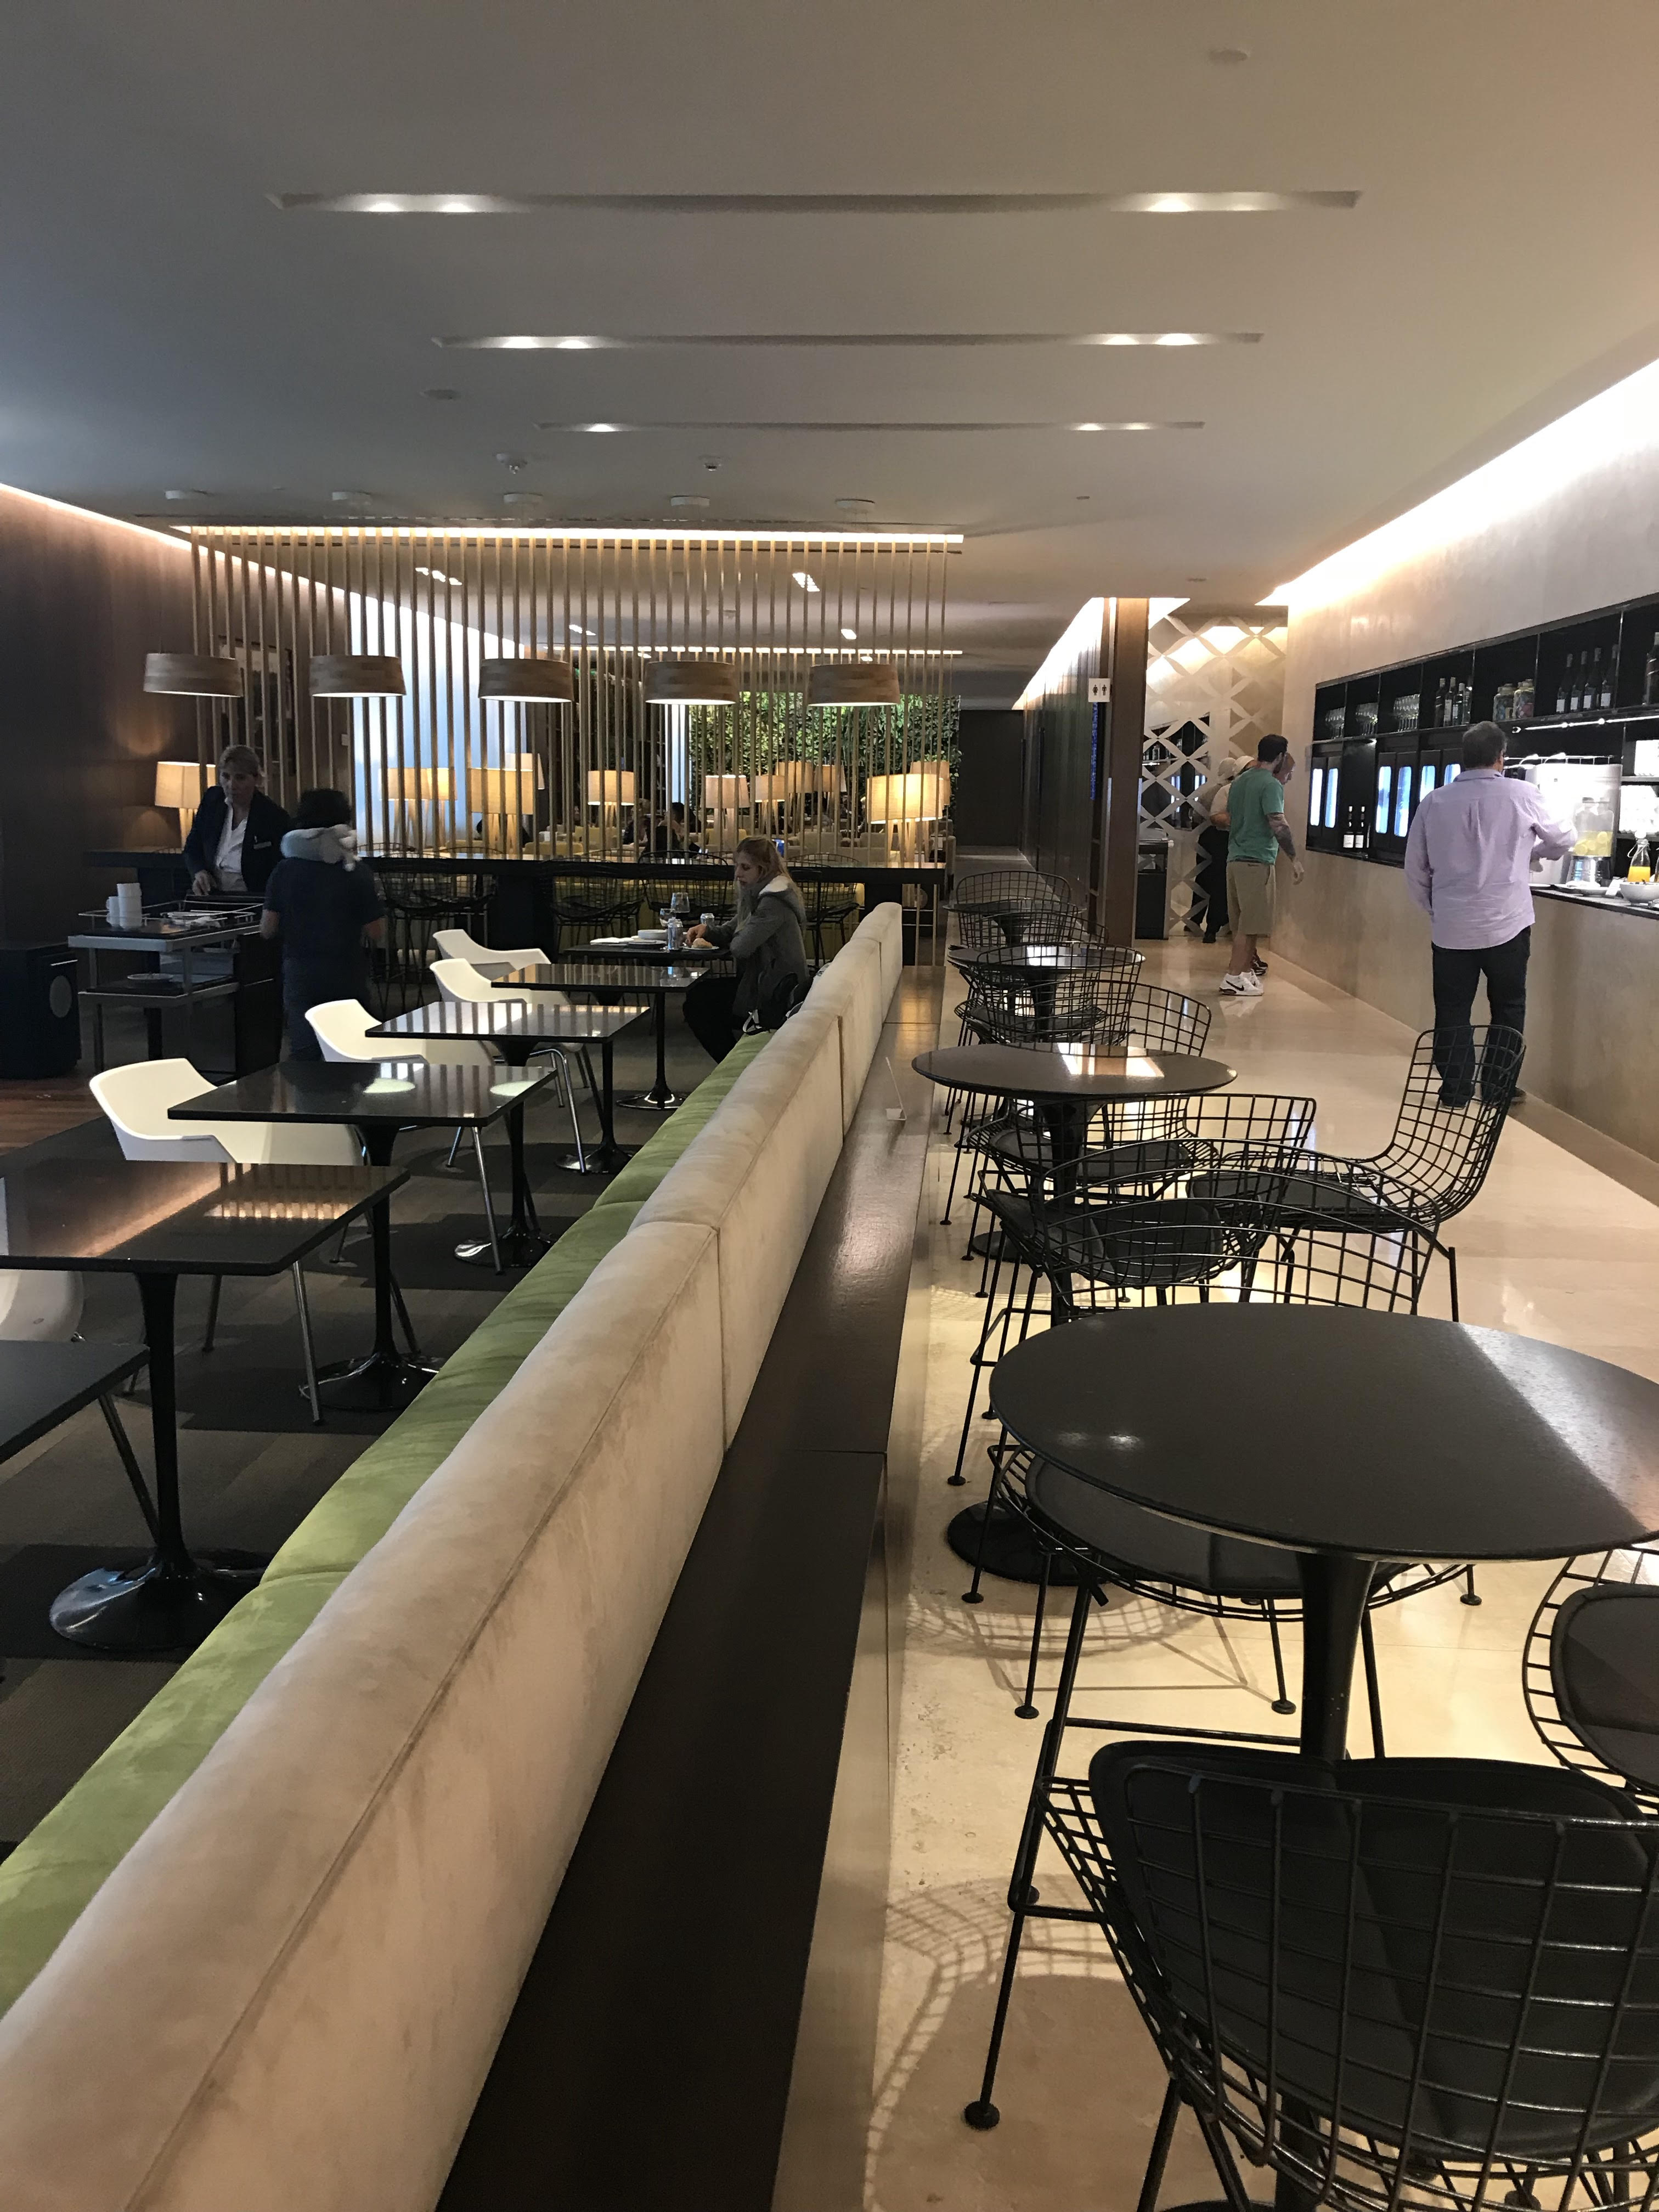
This lounge had plenty of seating and did not suffer from being overcrowded when I was there. Perhaps traveling on a Sunday, which also happened to be New Year’s Eve, had a lot to do with that.
The dining area of the lounge
One thing I noticed and appreciated about this lounge was the attentiveness of the staff. They would check on tables every 2-3 minutes to make sure any dishes, soda bottles, and cans were removed.
Plenty of empty seats in the common area. Big time plus
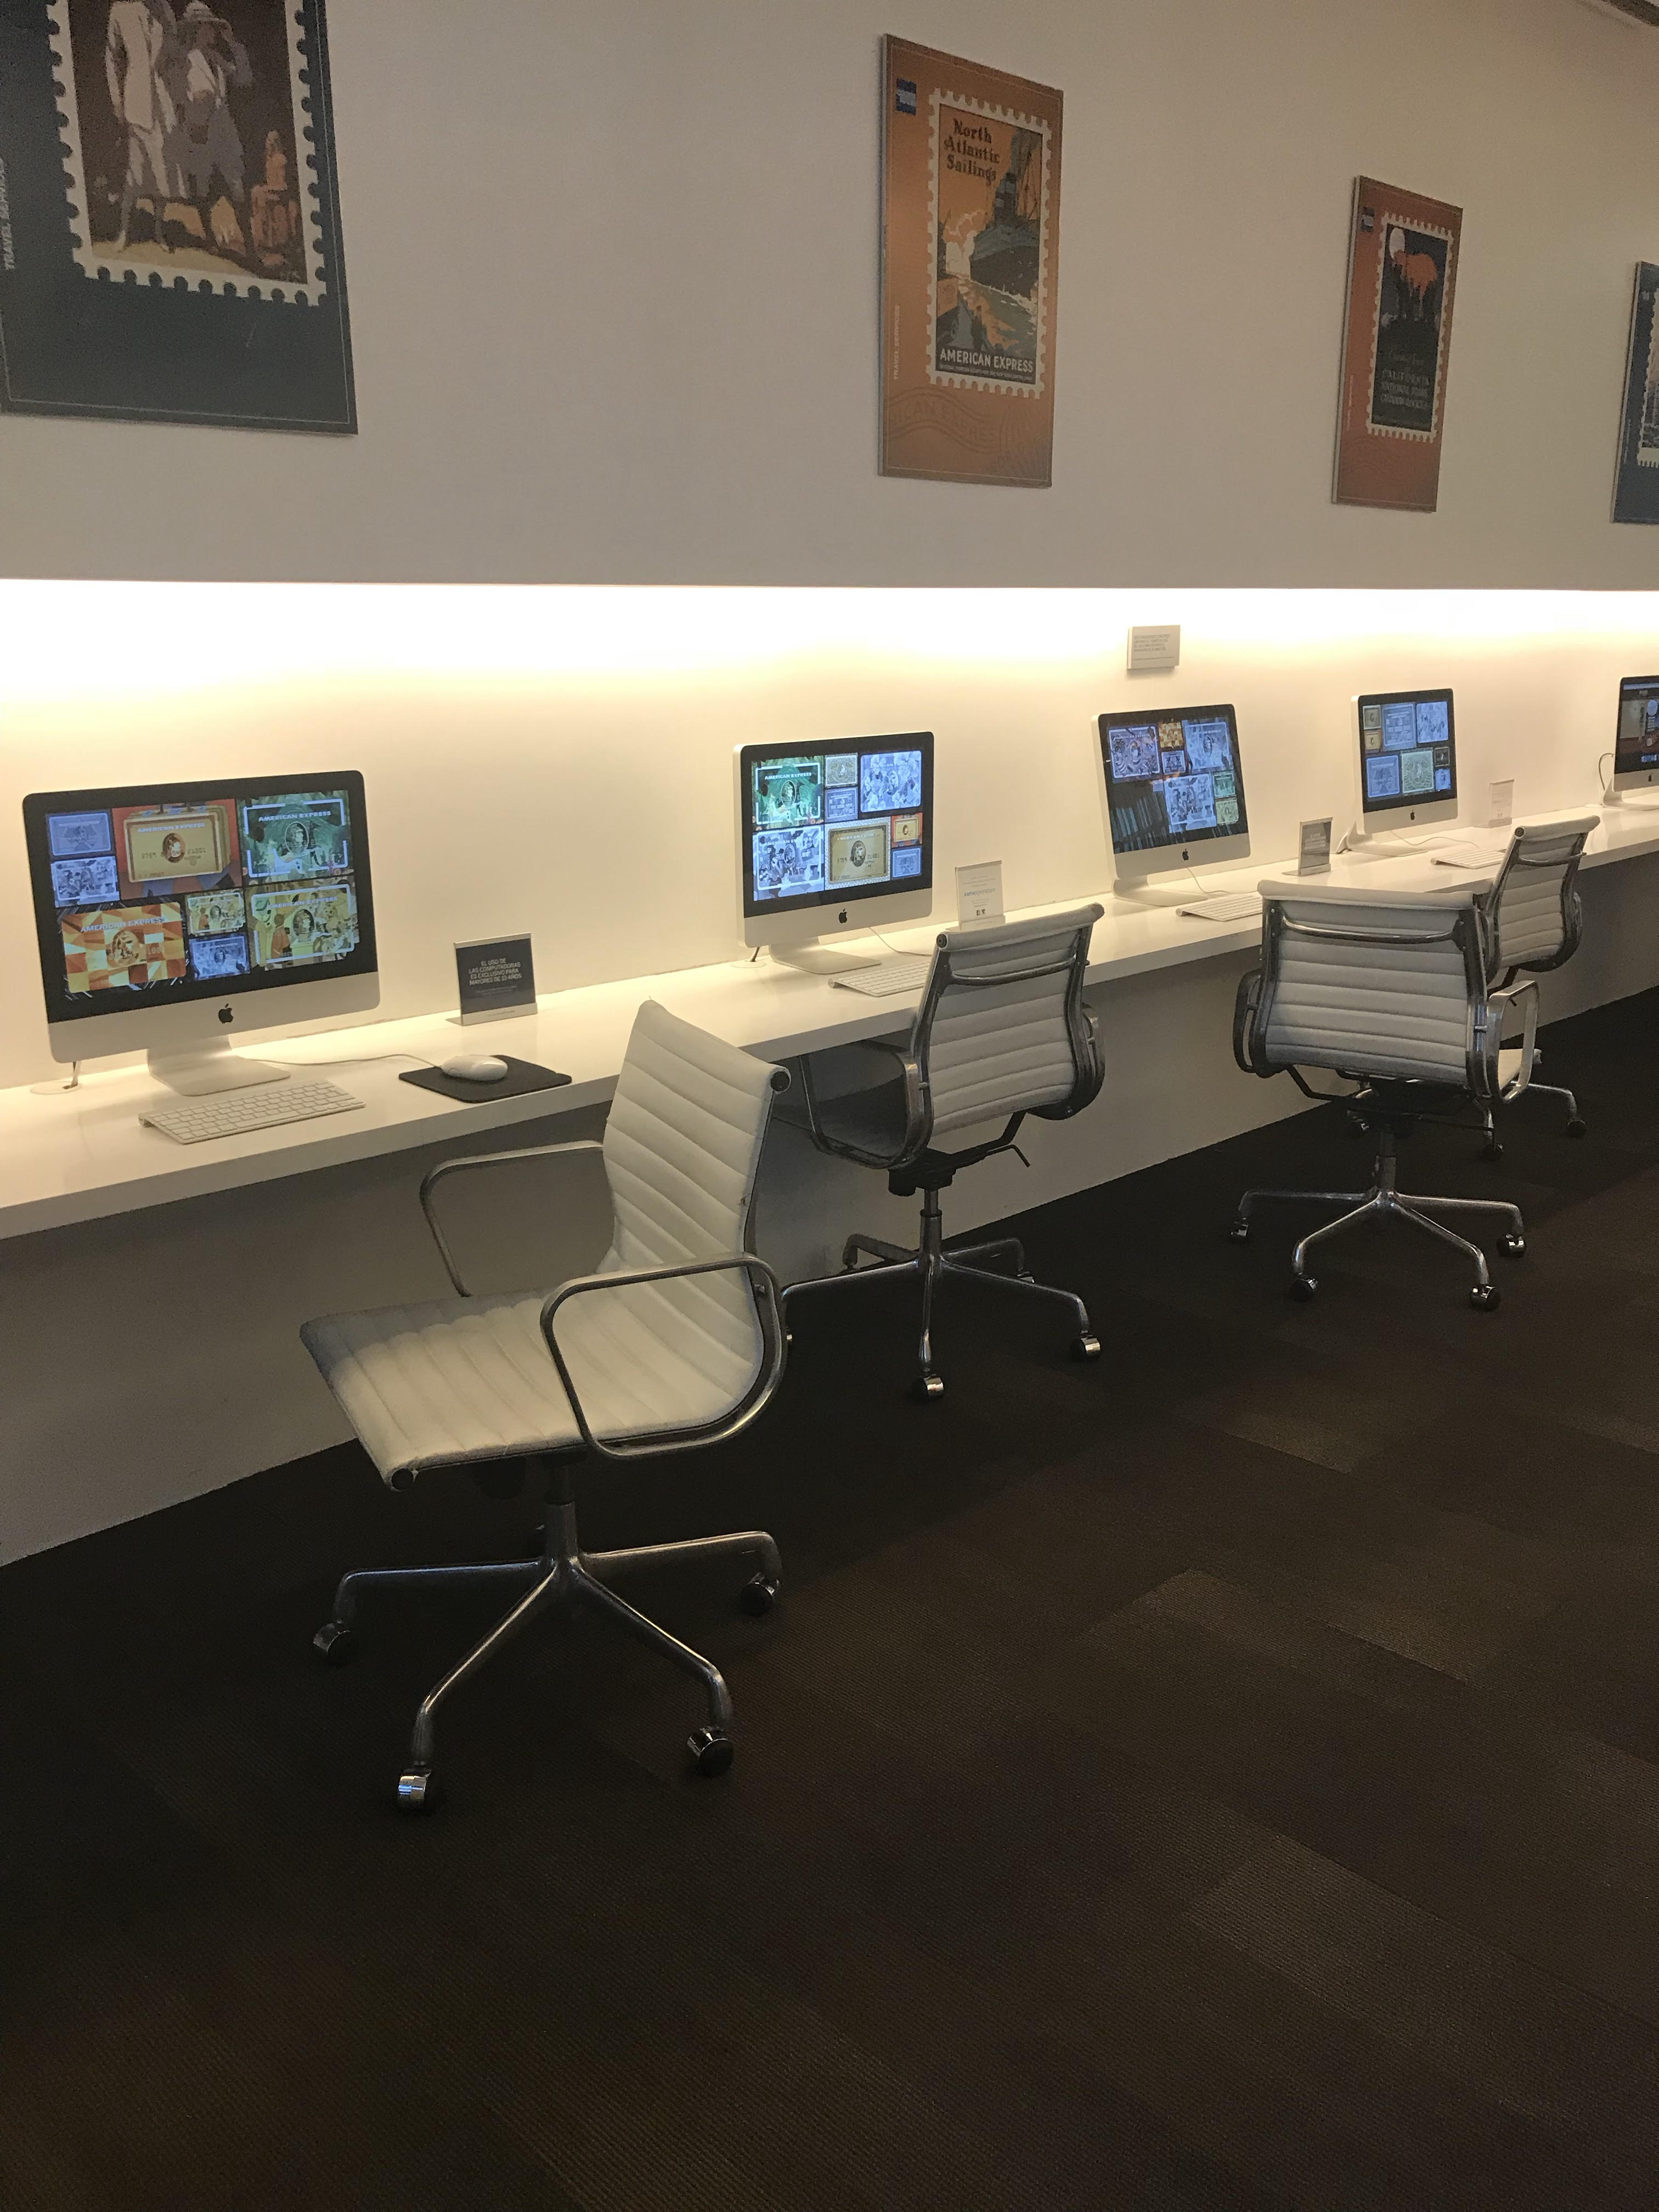
The lounge was equipped with Apple iMacs. It might be the first lounge I’ve seen featuring Apple, and as a long-time Apple guy, I appreciated this.
They also had a room for the kids. Centurion Lounge is doing a great job making its lounges kid-friendly. I didn’t want to take pics while the kids were there (that would be creepy), so I waited until it emptied out. During my two hours there, it was undoubtedly being utilized for most of that time.
Great job by AMEX for remembering the population that may become future AMEX Platinum cardholders.
Wi-Fi connectivity could have been better.
Overall, I’d give this lounge a 4.5/5. It could use a slightly enhanced food selection and faster connectivity, but it scored well on everything else: Plenty of seats, spacious Apple iMacs, and a playroom for children. The staff was very friendly and worked hard to keep the lounge clutter-free. If you’re an AMEX Platinum card holder flying out of Buenos Aires (EZE), visit this lounge.
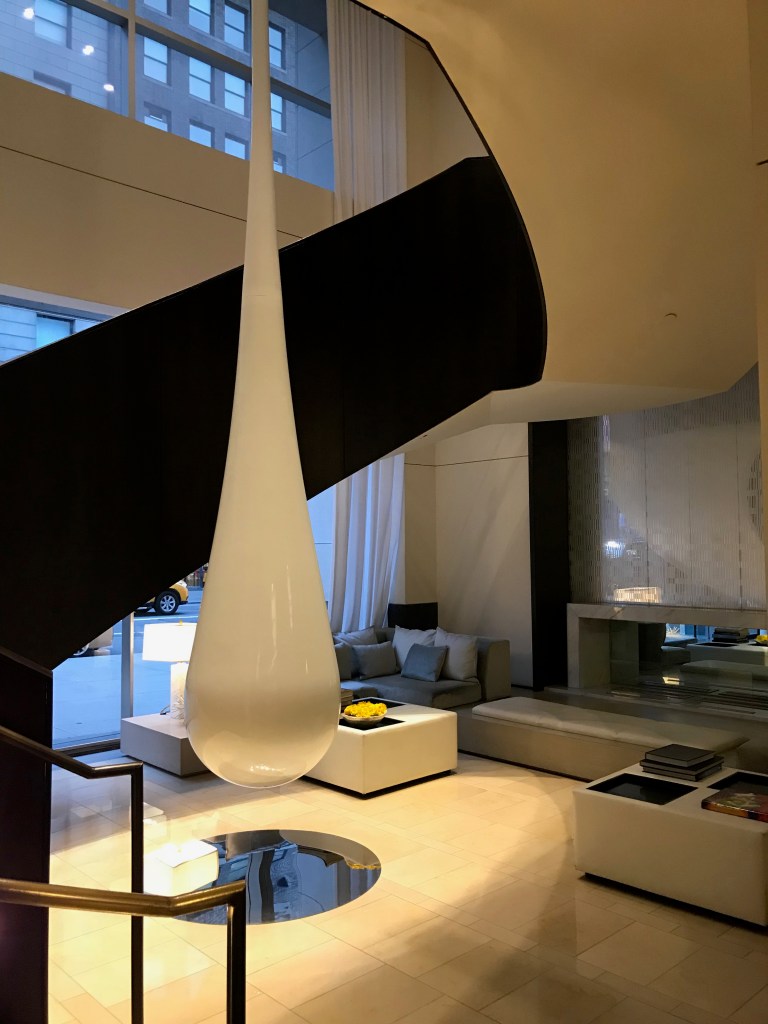
This was my second time staying at the Langham in NYC, but my first time staying at the Langham as an AMEX Platinum cardholder—a whole new experience! Don’t get me wrong, I had a great first stay; it was what I expected for a 5-star hotel; however, as an AMEX Platinum cardholder, I felt like the experience was so much better. One of the card’s benefits is a $200 credit for booking hotels that are part of Fine Hotels & Resorts or The Hotel Collection. When I checked in, the staff immediately upgraded me to an executive suite with a kitchen on the 21st floor. Along with the upgrade, I was informed that I had a $100 credit for any of the following: spa, room service, or breakfast for two at their Michelin-star restaurant, Ai Fiori. I was also informed that I could check out at 4pm, which was very convenient since our flight was at 5:30pm on Sunday.
When we went to our room, my cousin and I first noticed the view through the large windows—we could see down 5th Avenue and the beautiful Chrysler building.
View of Bank of America Tower and the Conde Naste Building (with H&M sign)
Beautiful view of the Chrysler building and looking down on Fifth Avenue
The second thing we noticed was that we had a powder room—when does that ever happen? Needless to say, we had more than enough room. We even had some of our friends and cousins come up to hang out with us in the room; six adults and a baby were hanging out comfortably. All the cafes around us were closed, so we ordered lattes from room service (using my $100 credit), and they were excellent!
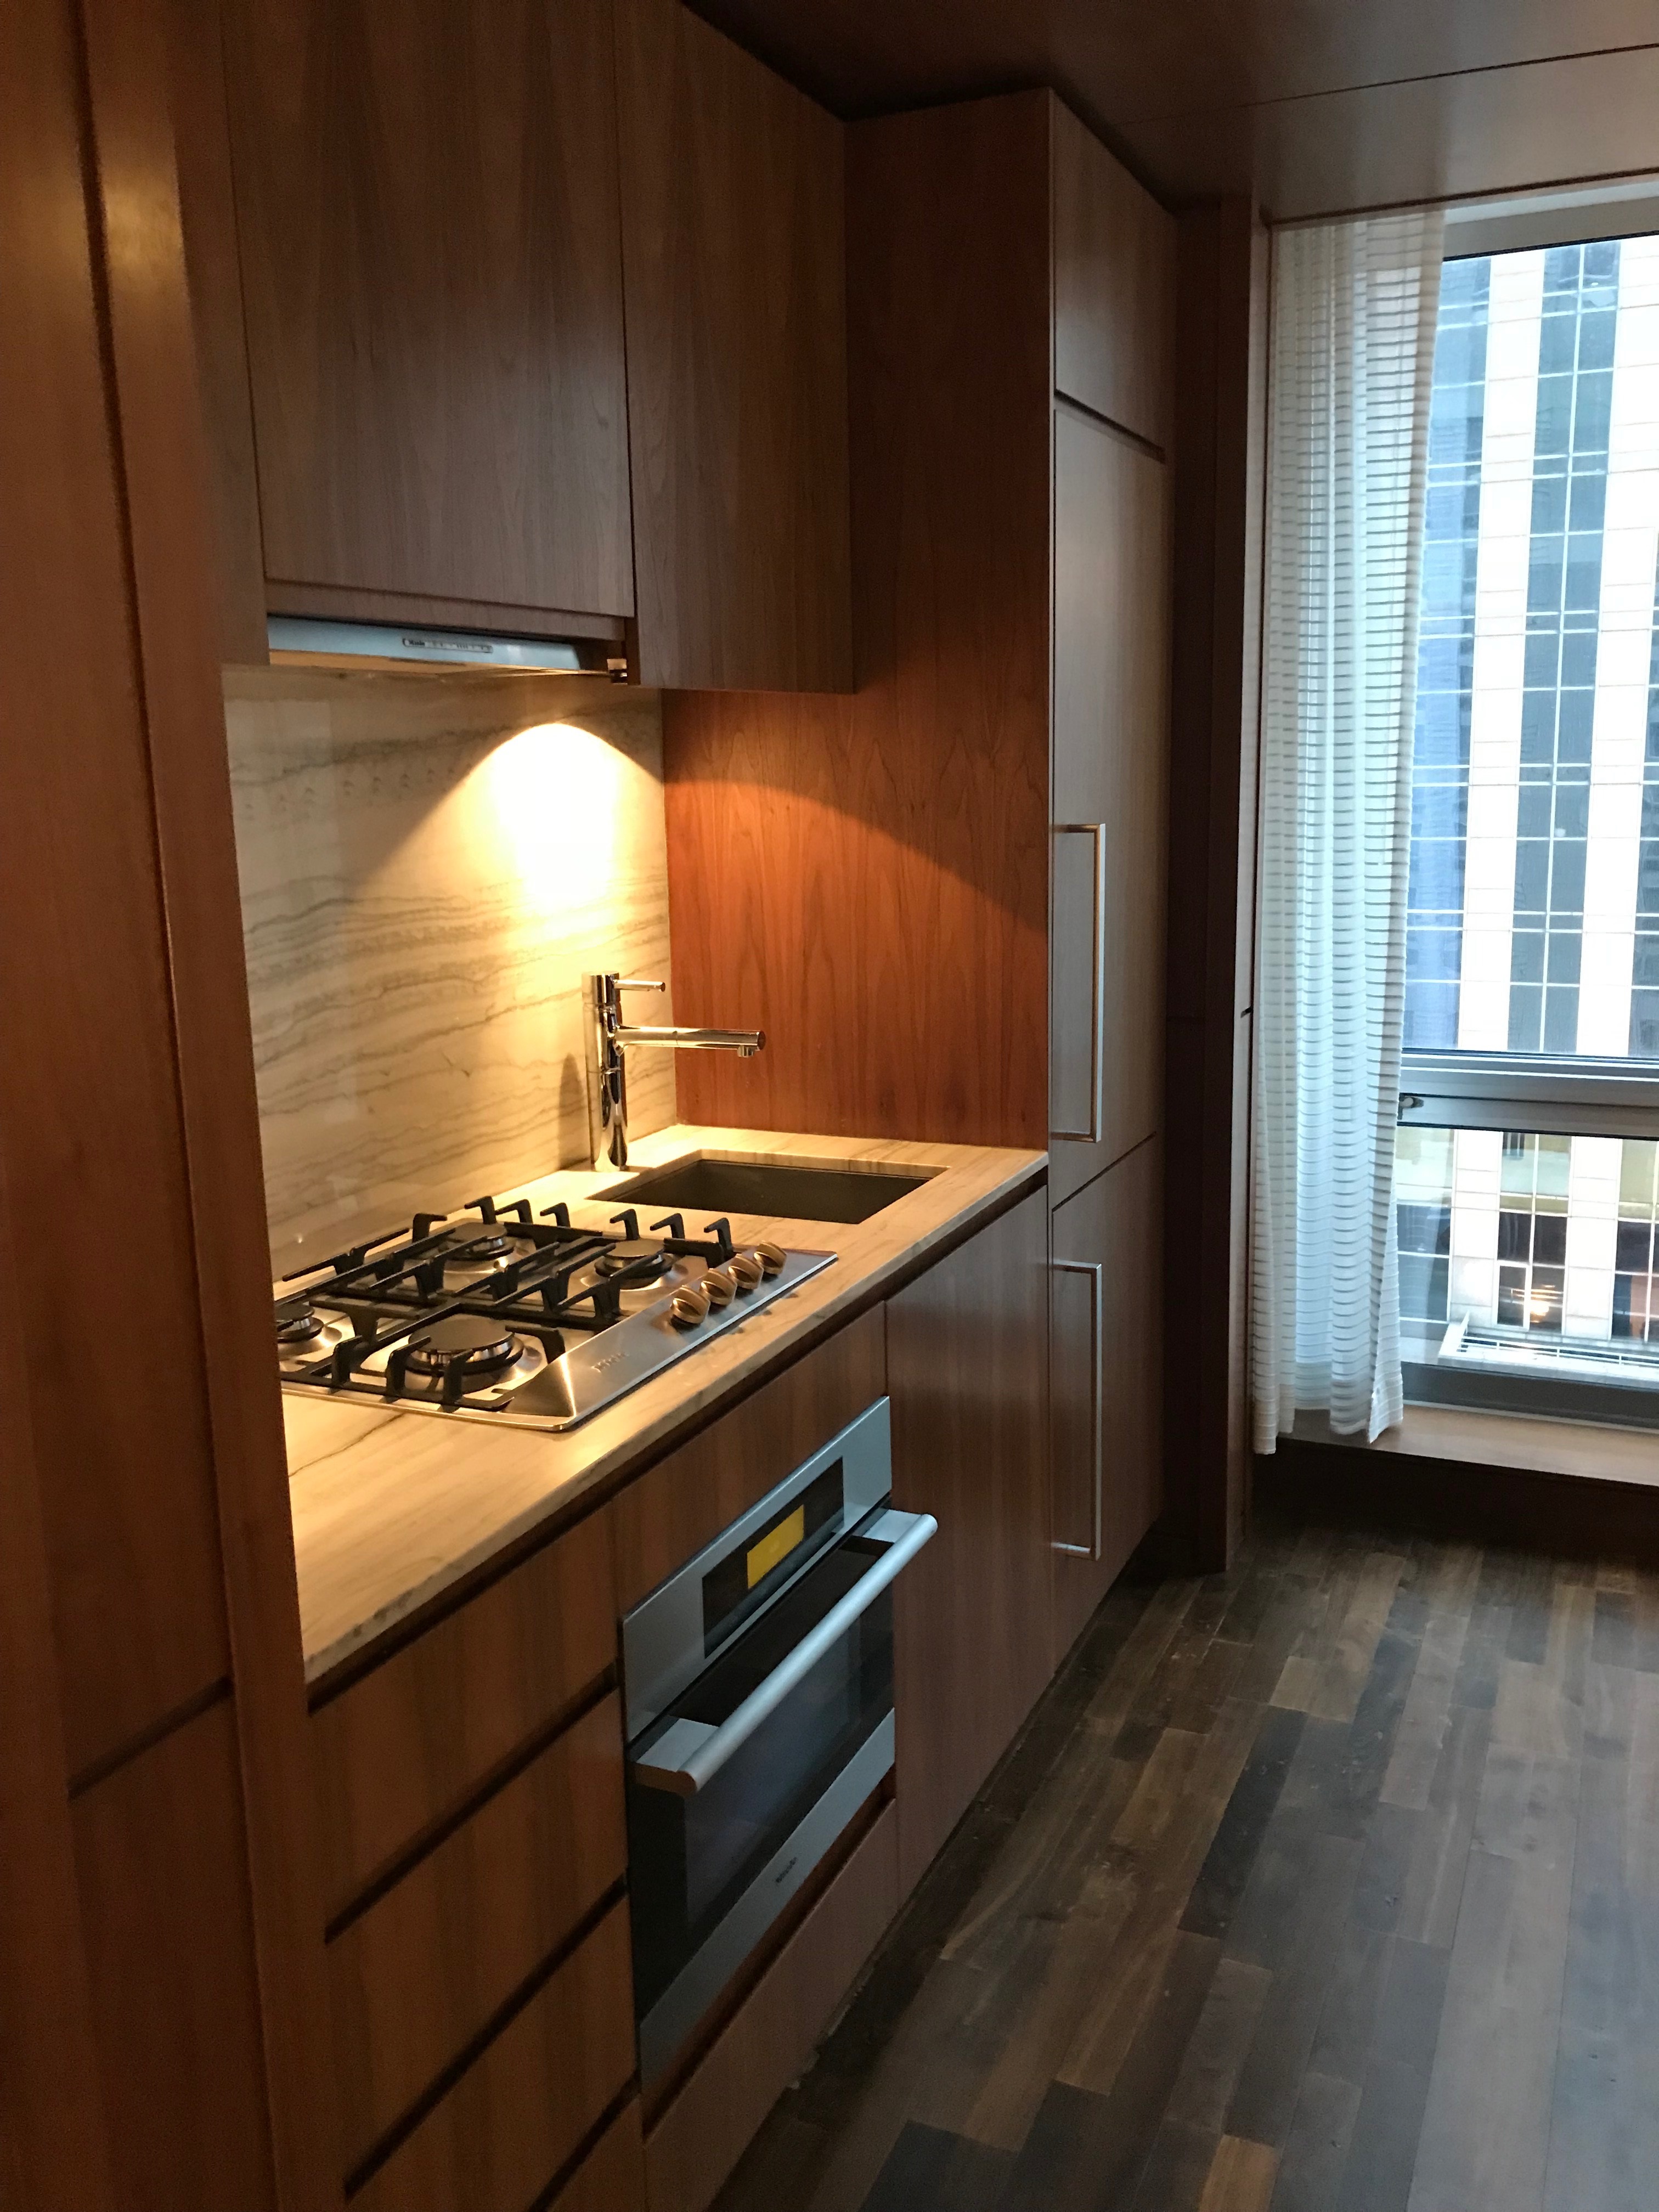
Full kitchen via AMEX Platinum upgrade
Views of Manhattan from the bathroom
Soap, shampoo, and conditioner were all Chuan, a holistic proprietary brand owned by Langham.
Another huge selling point for the Langham is its location. The hotel is centrally located in Manhattan, so we could walk to most of our destinations on Saturday. We walked to Washington Square Park, Times Square, and the Highline. The next day, we had to check out by 4pm and catch our flight at 5:30pm, so we didn’t have much time to waste. We woke up at 8am and called the doorman to arrange a ride to Central Park at 11am using the hotel car service (which is free!).
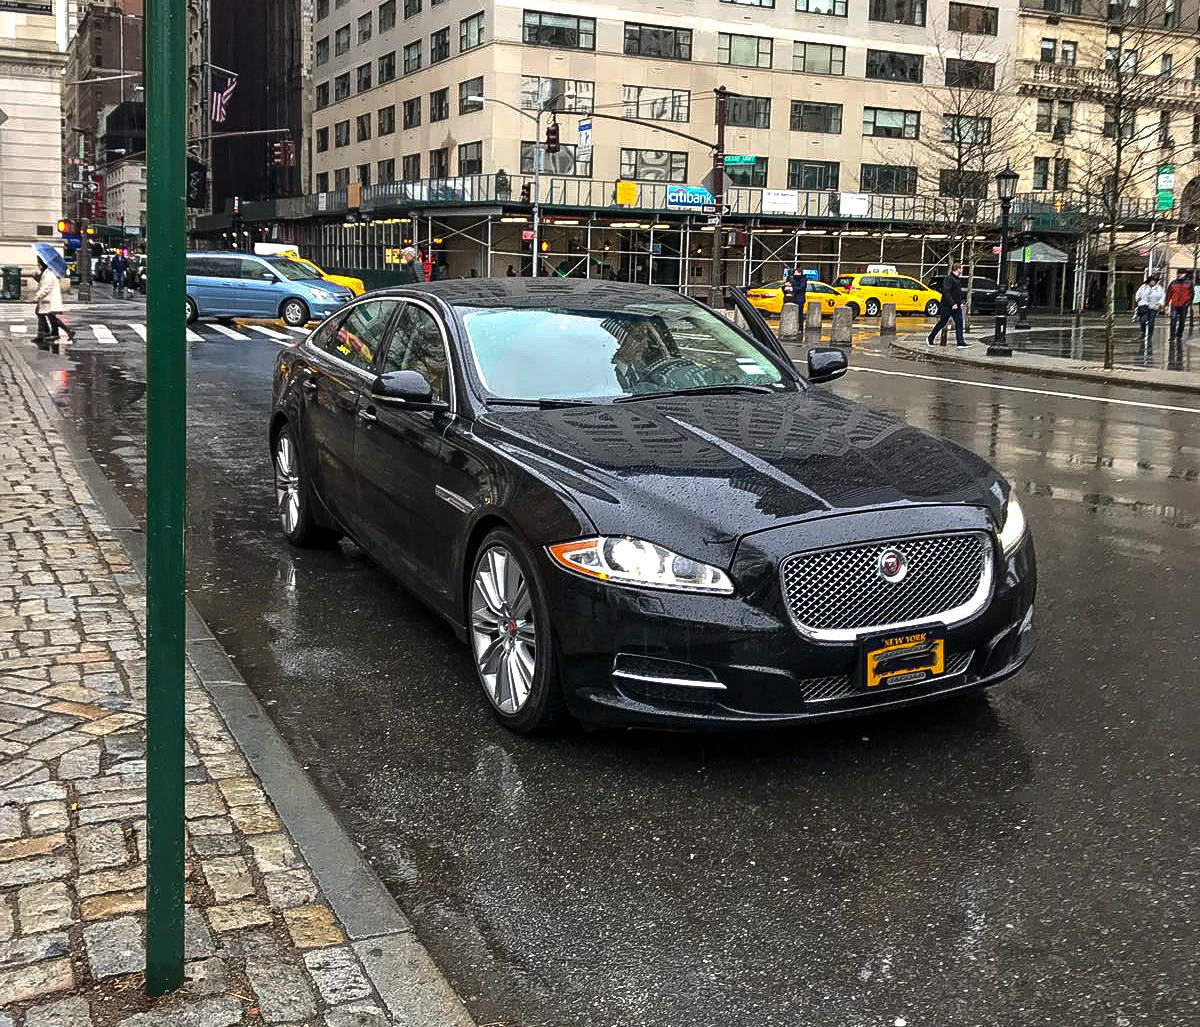
Pro Tip: The hotel has a Jaguar that will drop you off wherever you want to up until 59th Street. They start taking appointments at 8 a.m., and they are on a first-come, first-served basis.
Jaguar that’s provided for guests of The Langham
After our ride set up, we got ready and cashed in on our complimentary breakfast at Ai Fiori—which was phenomenal! My cousin and I decided to order a couple of things and share. We ordered the buttermilk pancakes, uova in Purgatorio, and the house potatoes—everything was phenomenal. You can see the picture below.
If you asked me what the stay was like after my first time, I would’ve said it was great—all the basics of a 5-star hotel. But staying here as an AMEX Platinum cardholder made this experience next-level amazing, to say the least! It is rare to have a travel experience where you don’t compromise on something, whether it be the room, service, or location. But I can genuinely say there was no compromising at the Langham NYC; everything was at the top of its game—the room, the service, the amenities, the location, and the (free) food were all a 5 out of 5.
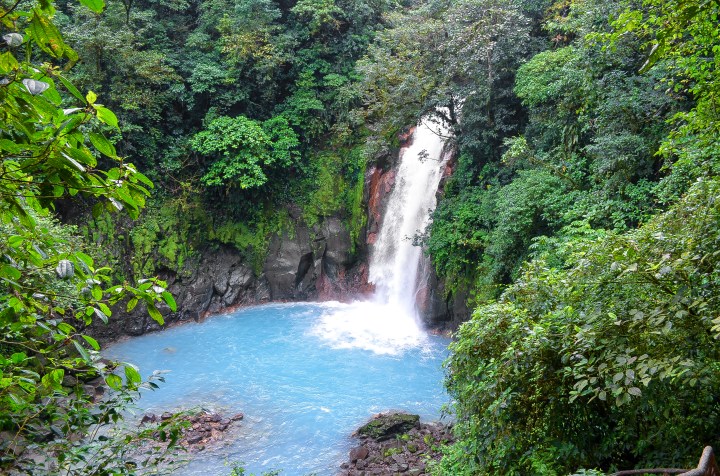
Costa Rica is a beautiful, affordable destination with a relatively short flight time for most Americans. It has such a diverse landscape that you can be on the beach, taking in the sun one day, while trekking the trails near Arenal Volcano the next day. There is something for everyone in this beautiful country; you’ll see wildlife, landscapes, and other sites you might have never seen before. My wife and I took a flight from Albany, NY, to Liberia, Costa Rica, and rented a small SUV to get around. We started on the northwest side of Costa Rica and made our way southeast. We returned the car to San Jose International Airport. It’s not really far in terms of distance, but there are roads where you will have to drive slowly, either due to the speed limit or the poor conditions of the streets. If you are going to rent a car, I highly recommend an SUV. It doesn’t have to be huge; anything with decent ground clearance will suffice. You can see the distance between the two airports below.
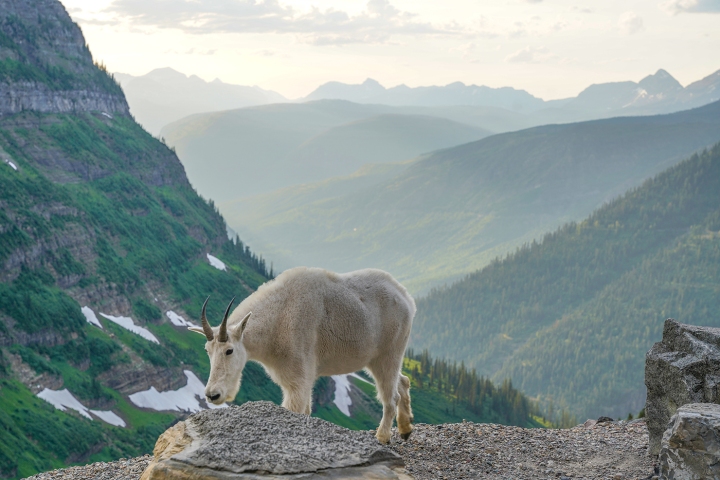
Update February 2025: The National Park Service has required timed-entry reservations to drive the scenic Going-to-the-Sun road in Glacier National Park over the last four years due to increased visitor traffic. This is still in effect as of 2025 if you want to enter the park between 9am and 3pm. Tickets become available four months in advance on a rolling basis, and the reservation costs two dollars. This is in addition to the National Park fee. Vehicle reservations will become available on February 13th, 2025, at 8pm MST. Next-day vehicle reservations will be available at 7 pm MST for next-day entry starting on June 12, 2025, on a daily rolling basis. Visit this page for updated information on Glacier National Park, including reservation information.
I’ll review our itinerary to Argentina and Chile and the miles/points we used on different segments. I’ll review what we did well about planning while touching upon the aspects we could have done differently. Everyone’s purpose for a trip is different, but my wife and I had one main goal: To make the Patagonia region of Argentina and Chile our priority. We had six full days in Argentina, so our goal was to make the most of it. Here is a recap of our memorable trip to this beautiful part of the world:
Getting There:
Non-stop flights to Buenos Aires, Argentina, depart from NYC, Newark, Miami, Dallas, and Houston. We traveled during the busy holiday season and would not use cash to book this ticket. Round trip airfare was at least $1,300 a person on American, United, and Latam Airlines. United Airlines was charging 70k miles one way from Newark or Houston for this trip. American Airlines was charging over 70k miles from JFK, Miami, and Dallas (DFW). We caught a huge break when we searched for a one-way trip from Miami on British Airways. They only charged 25k miles per person from Miami to Buenos Aires via American Airlines. Since they are One World partners with American Airlines, we used British Airways Avios (BA’s mileage currency) to fly on American. Since neither my wife nor I had ever visited Miami, we figured we’d use our JetBlue miles to fly from Albany to Ft. Lauderdale and escape the ensuing blizzard that was en route to Albany, NY. This allowed us to spend two days there and enjoy the city. The flight to Buenos Aires departed on the 24th from Miami during the evening. A one-way ticket on the same flight would have cost us over $1,900 per person (!). We got significant value on this redemption, possibly one of our best ever. British Airways is a transfer partner of several credit card companies (Chase, AMEX, Capital One, Wells Fargo, Citi, Bilt, etc), so it’s one of the easier mileage currencies to accrue.
The damage had we booked using cash. Insane.
Day One: Buenos Aires
Our flight landed at 6:45 am, and this would be our only full day in Buenos Aires. I tried to sleep as much as possible, but anyone who travels economy class knows you can’t sleep well when sitting for that long. My wife and I were both tired and our hotel, Dazzler Polo (part of the Wyndham portfolio of hotels) was all the way on the other side of town. We just hoped that even if the hotel didn’t let us check in early, they would at least hold our bags until the 2 pm check-in time. Once we got our luggage, we hailed an Uber (more on this later) and took the nearly 1-hour ride to the other side of town. By the time we got to the hotel, it was 9 am. I walked to the front desk and told the lady we just arrived from Miami and kindly asked her if there was any possible way she would let us check in early. She quickly checked her computer and said a room was available and she would give it to us. This was a HUGE deal. It allowed us to take a much-needed 2-3 hour nap and still have the entire day to explore the city. Since it was summer in South America, sunset was not until 8:10 pm. So, a massive shout out to the lady at Dazzler Polo for helping us salvage that day. The hotel itself was fantastic, and I booked it using a hotels.com gift card that I redeemed using Ibotta (you can read about that app here).
Front Entrance to the Dazzler Polo Hotel
Hotel Room
The complimentary breakfast was far better than what you would get at American hotels.
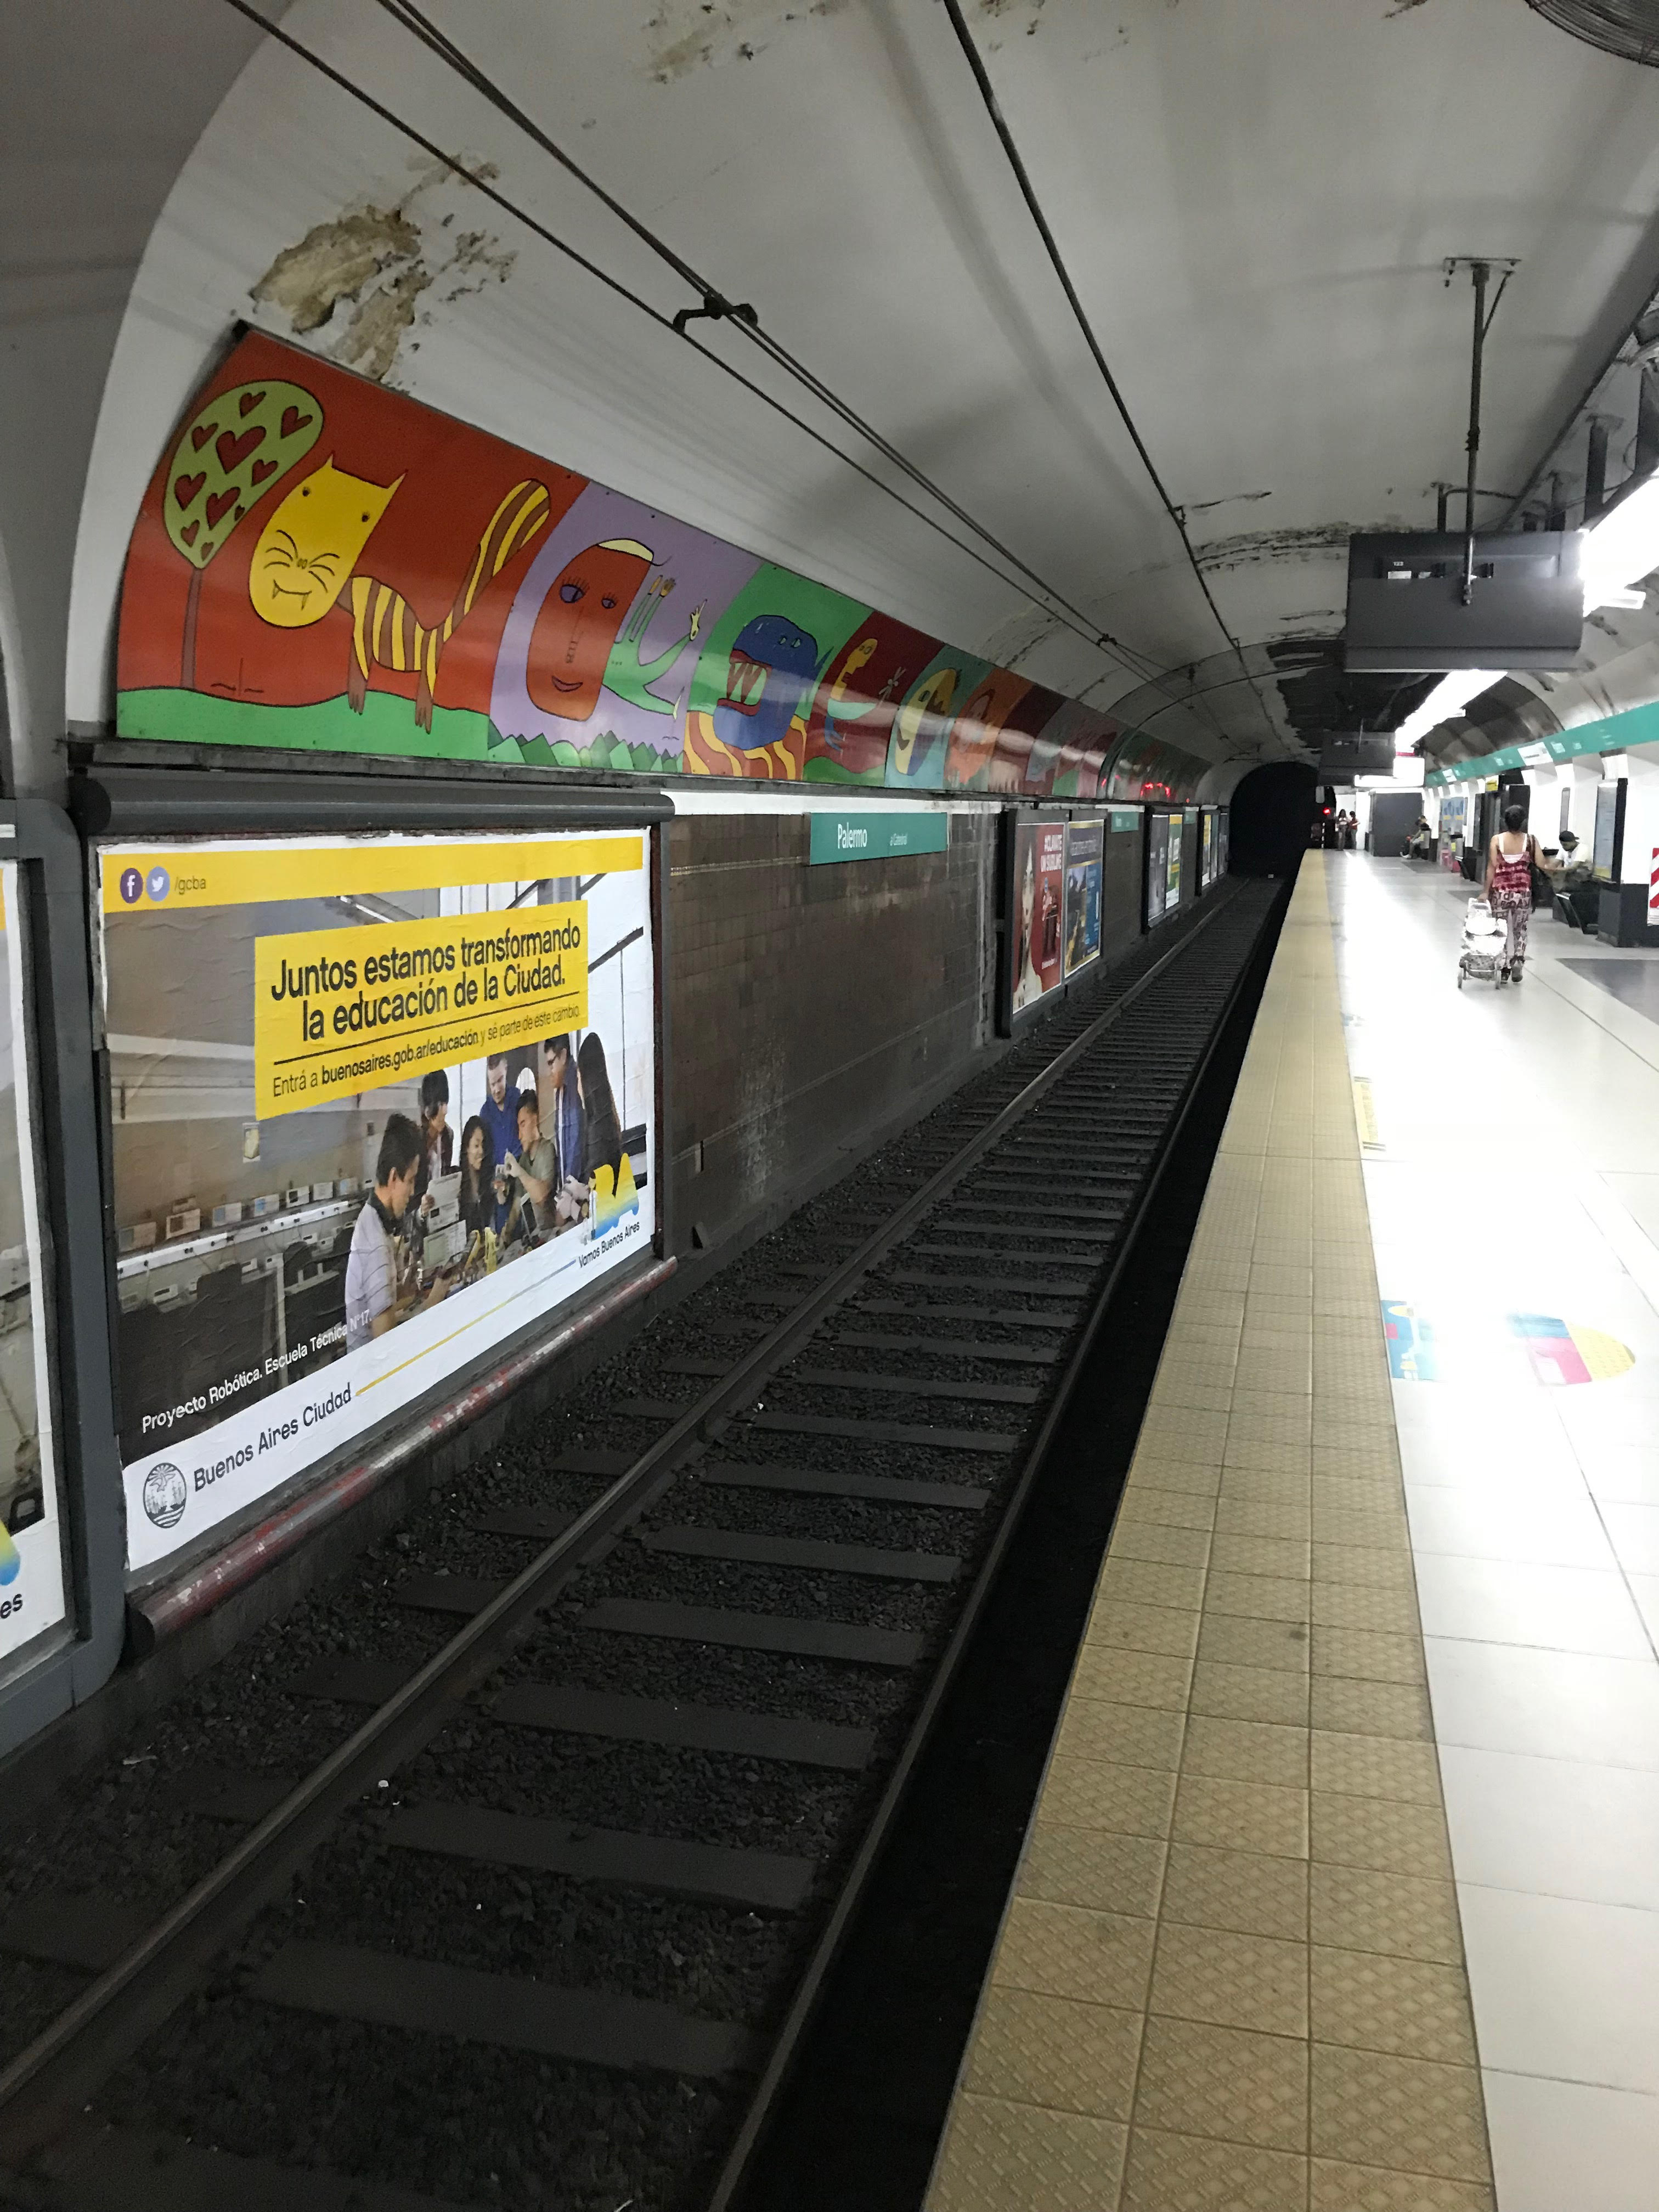
This hotel is located in the northwest part of Buenos Aires, in the neighborhood of Palermo. We took the subway and got off at the last stop (Catedral) to visit some of the main sites near the city center. The subway system is straightforward to use, and if you need help, the employees will gladly assist you.
Once we got off the subway at the Catedral station, everything we wanted to see was a short walk away. Plaza de Mayo is a beautiful central plaza with a pink building called Casa Rosada, the statue of San Martin, and the Catedral Metropolitana. Many picture opportunities will present themselves here. Walking further into the hip and trendy Puerto Madera neighborhood, you’ll find the Puente De La Mujer or Women’s Bridge. This neighborhood also has many restaurants and brunch spots and is lively at night. We happened to be there during Christmas, so most places were closed.
The best way to explore any city is by walking. Could you get around between some of these sites using a taxi or Uber? Sure you can. Speaking of Uber, I prefer using it for long distances in Buenos Aires. A taxi was also an option, but with Uber, you’re locked into a fare, and you know approximately how much you will be paying before you step into the car. With a taxi, there’s always that chance that we might be taken advantage of as foreigners. The app worked seamlessly; a one-hour ride from one side of the town to the other cost about $25 USD. The taxi company quoted me double that price. But most of the time, we walked around and saw many of the sites we wanted. We loved Buenos Aires, and now it was time to get back to the hotel and prepare for the flight to El Calafate the following day.
Day Two: Buenos Aires to El Calafate
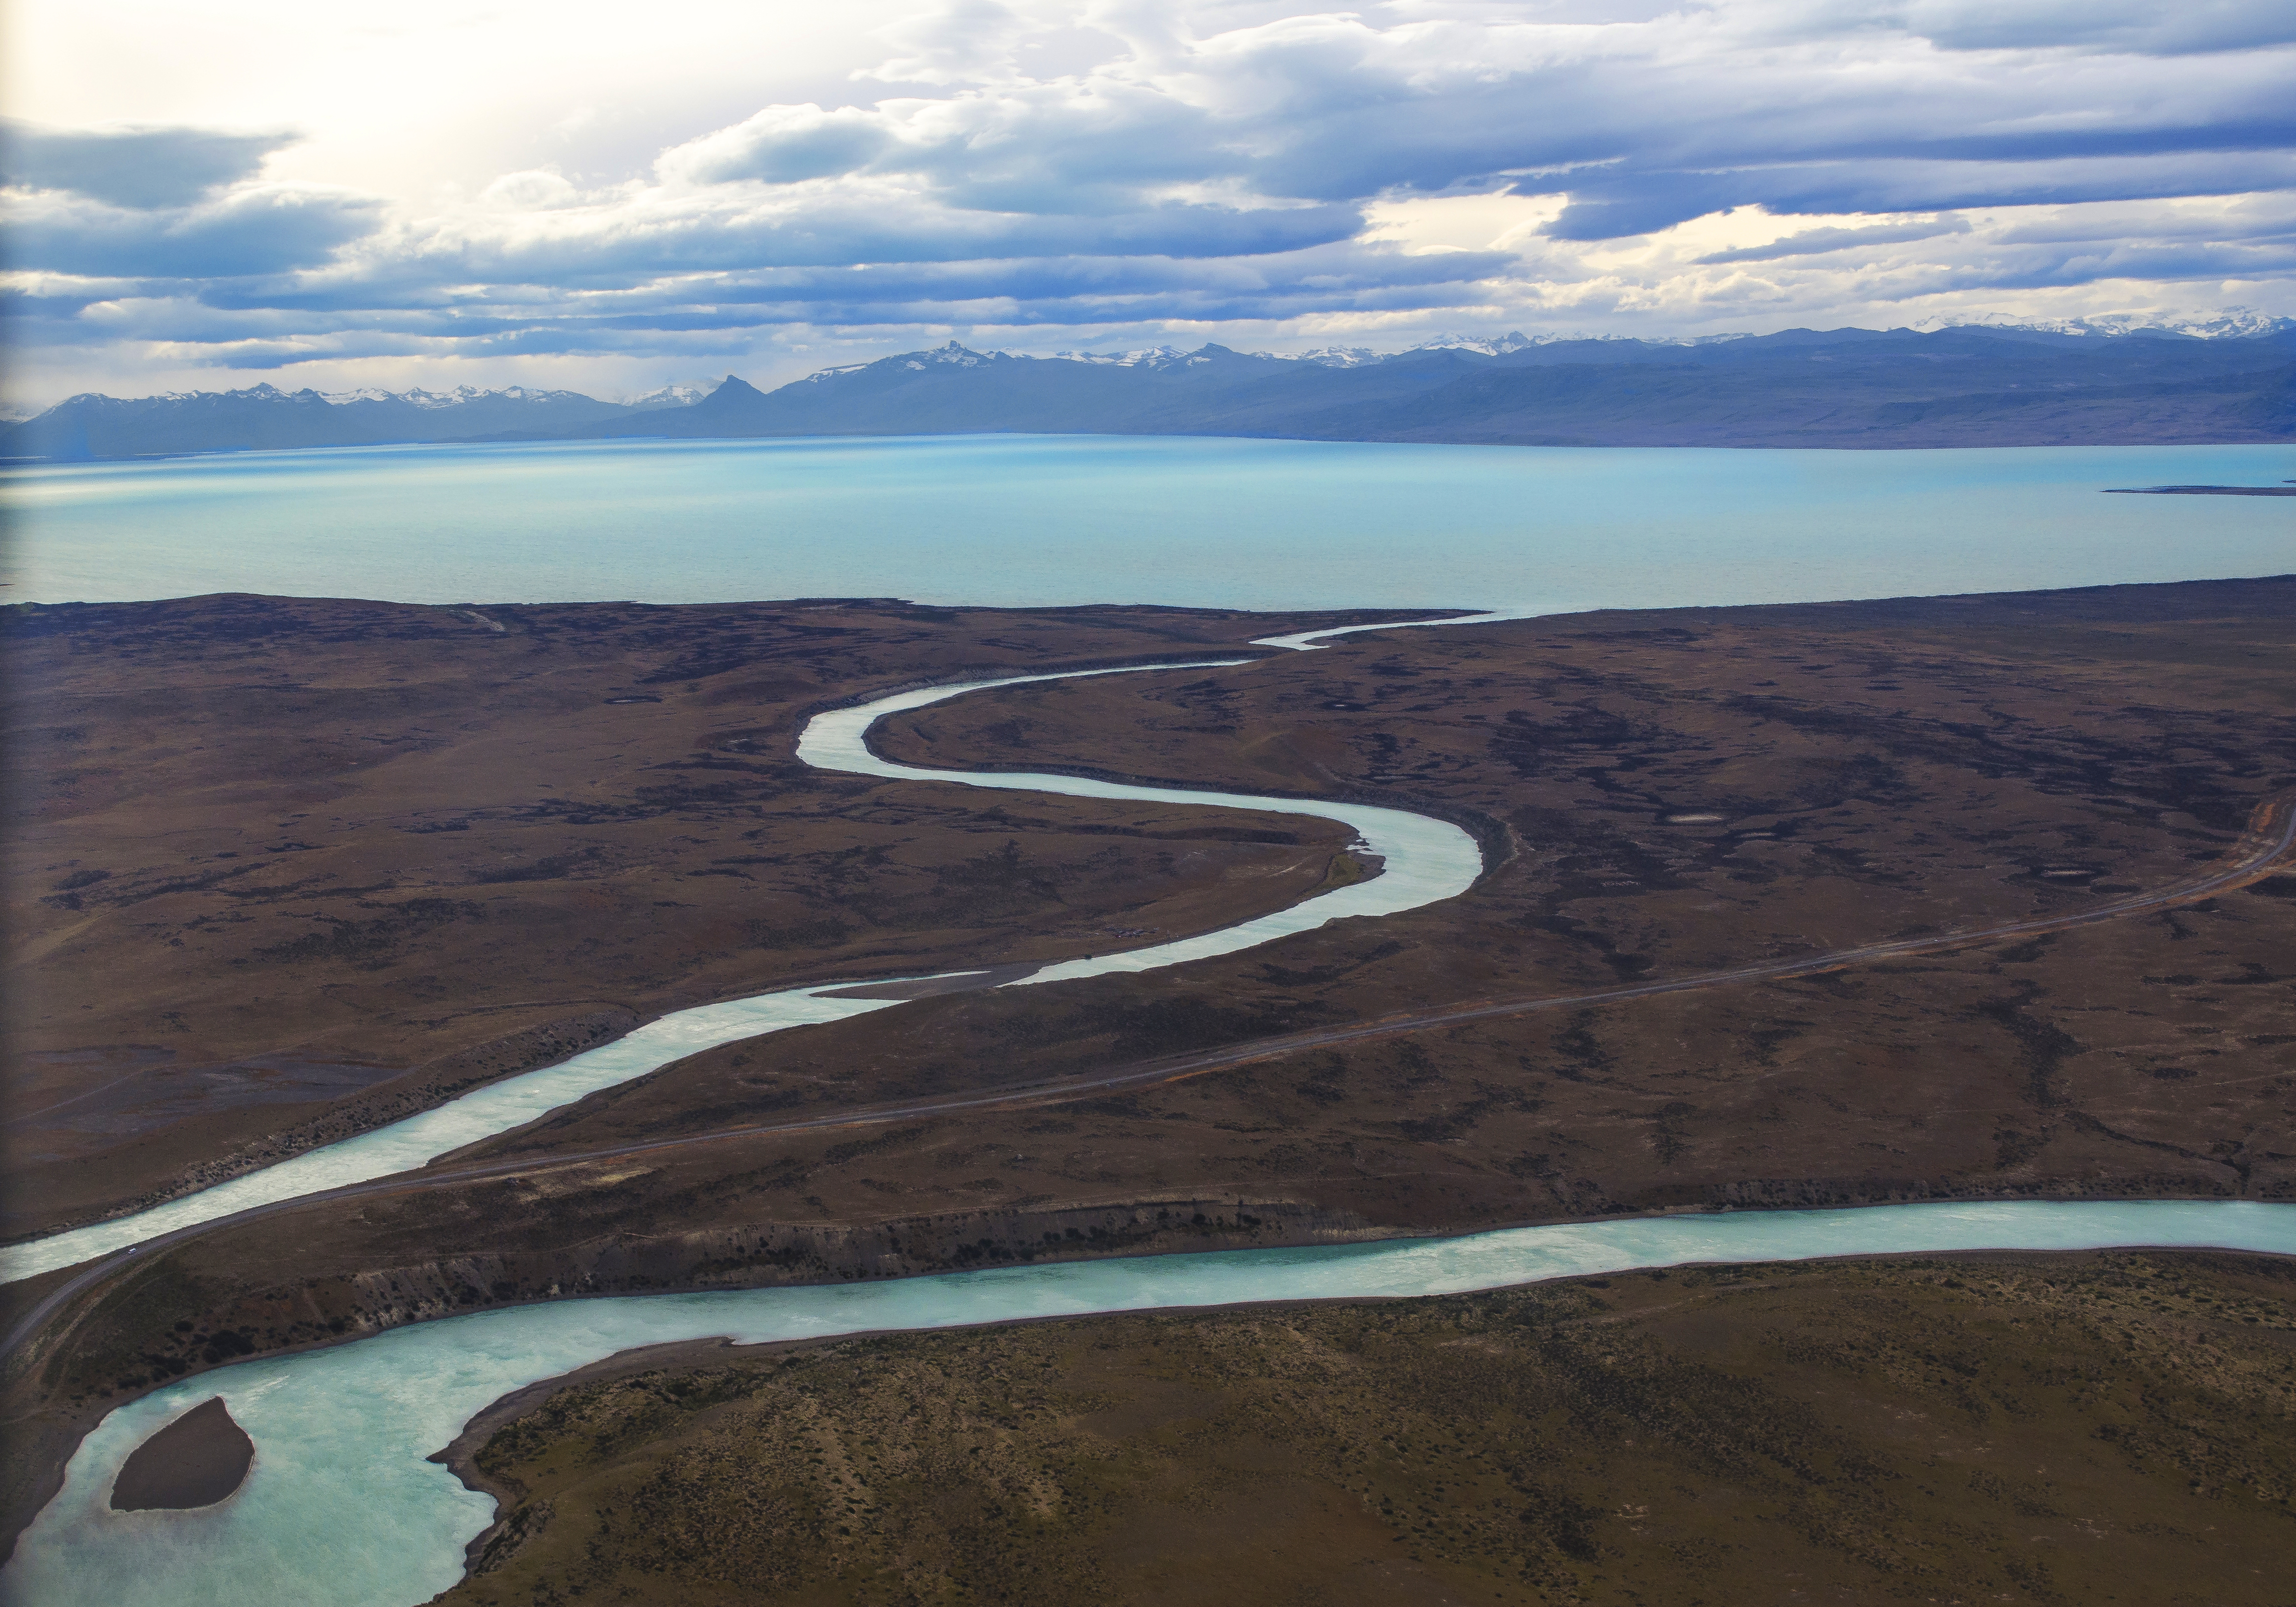
I booked this flight using Chase Ultimate Rewards points on Aerolineas Argentinas. El Calafate is the gateway city to the Patagonia region of Argentina. Had I used cash, the flight would have cost $450 round trip per person. Again, I was set on not paying cash airfare. As a Chase Sapphire Reserve credit card holder, I got 1.5 cents per point for booking flights. This cost us 30k points per person for this roundtrip from Buenos Aires to El Calafate. This trip was taken from Buenos Aires’ other airport, Jorge Newbery International Airport, located on the north end of Buenos Aires, about 1.5 miles from the Dazzler Polo. It’s much smaller than their main airport, and I chose it because of the cheaper fares to El Calafate. The total flight time was about 2 hours 45 minutes. Once we got there, we booked a round-trip transfer with VES. It’s a smaller bus that took us to our hotel and dropped us off at the airport while flying out of El Calafate. The total for two people was 480 pesos, or about USD 26. This was far more cost-effective than taking a taxi, and Uber did not offer service here. Here’s a tip: Request a window seat and sit on the plane’s right side (Any seat that is F). This will give you spectacular photo opportunities as you land in El Calafate. You can see an example below.
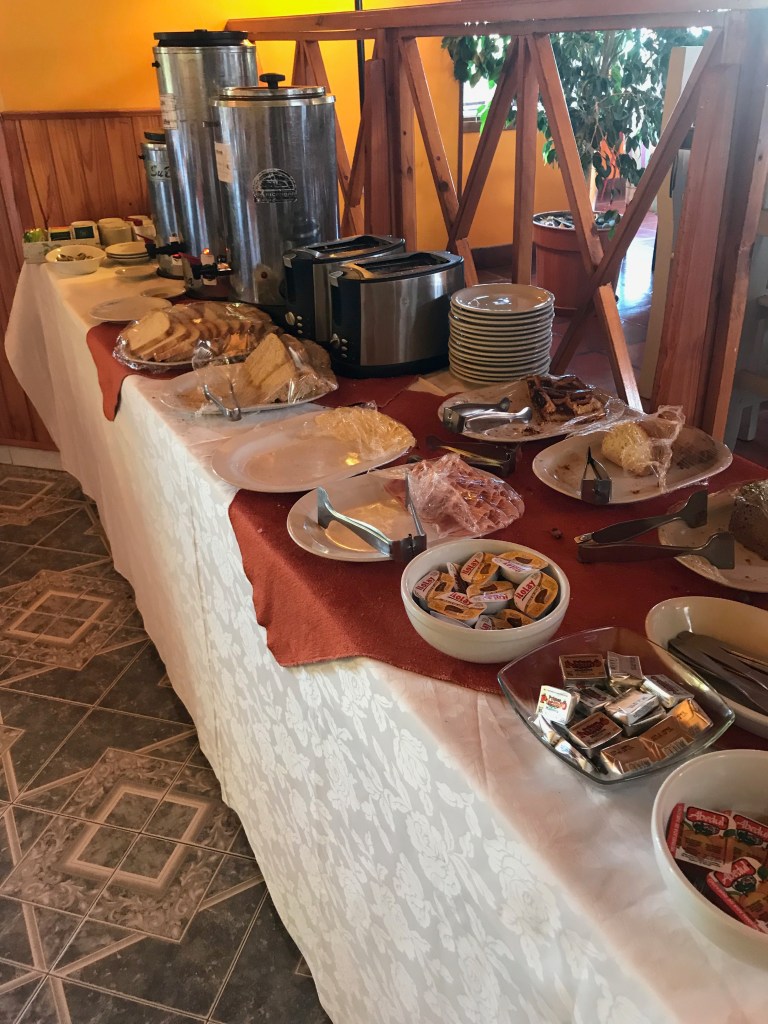
I booked a hotel named Picos Del Sur for our stay at El Calafate. For $56 a night, this hotel offered complimentary breakfast and free WiFi and was just a quarter mile from the city center, where all the shops, restaurants, and cafes are located. The staff was fantastic and super friendly, and the premises were adequate. The breakfast was okay, as most of their offerings were high-carb items such as sweet croissants, muffins, toast, cereal, etc. Most of these hotel stays were paid via hotels.com gift card via Ibotta (I love that app).
Day Three: El Calafate
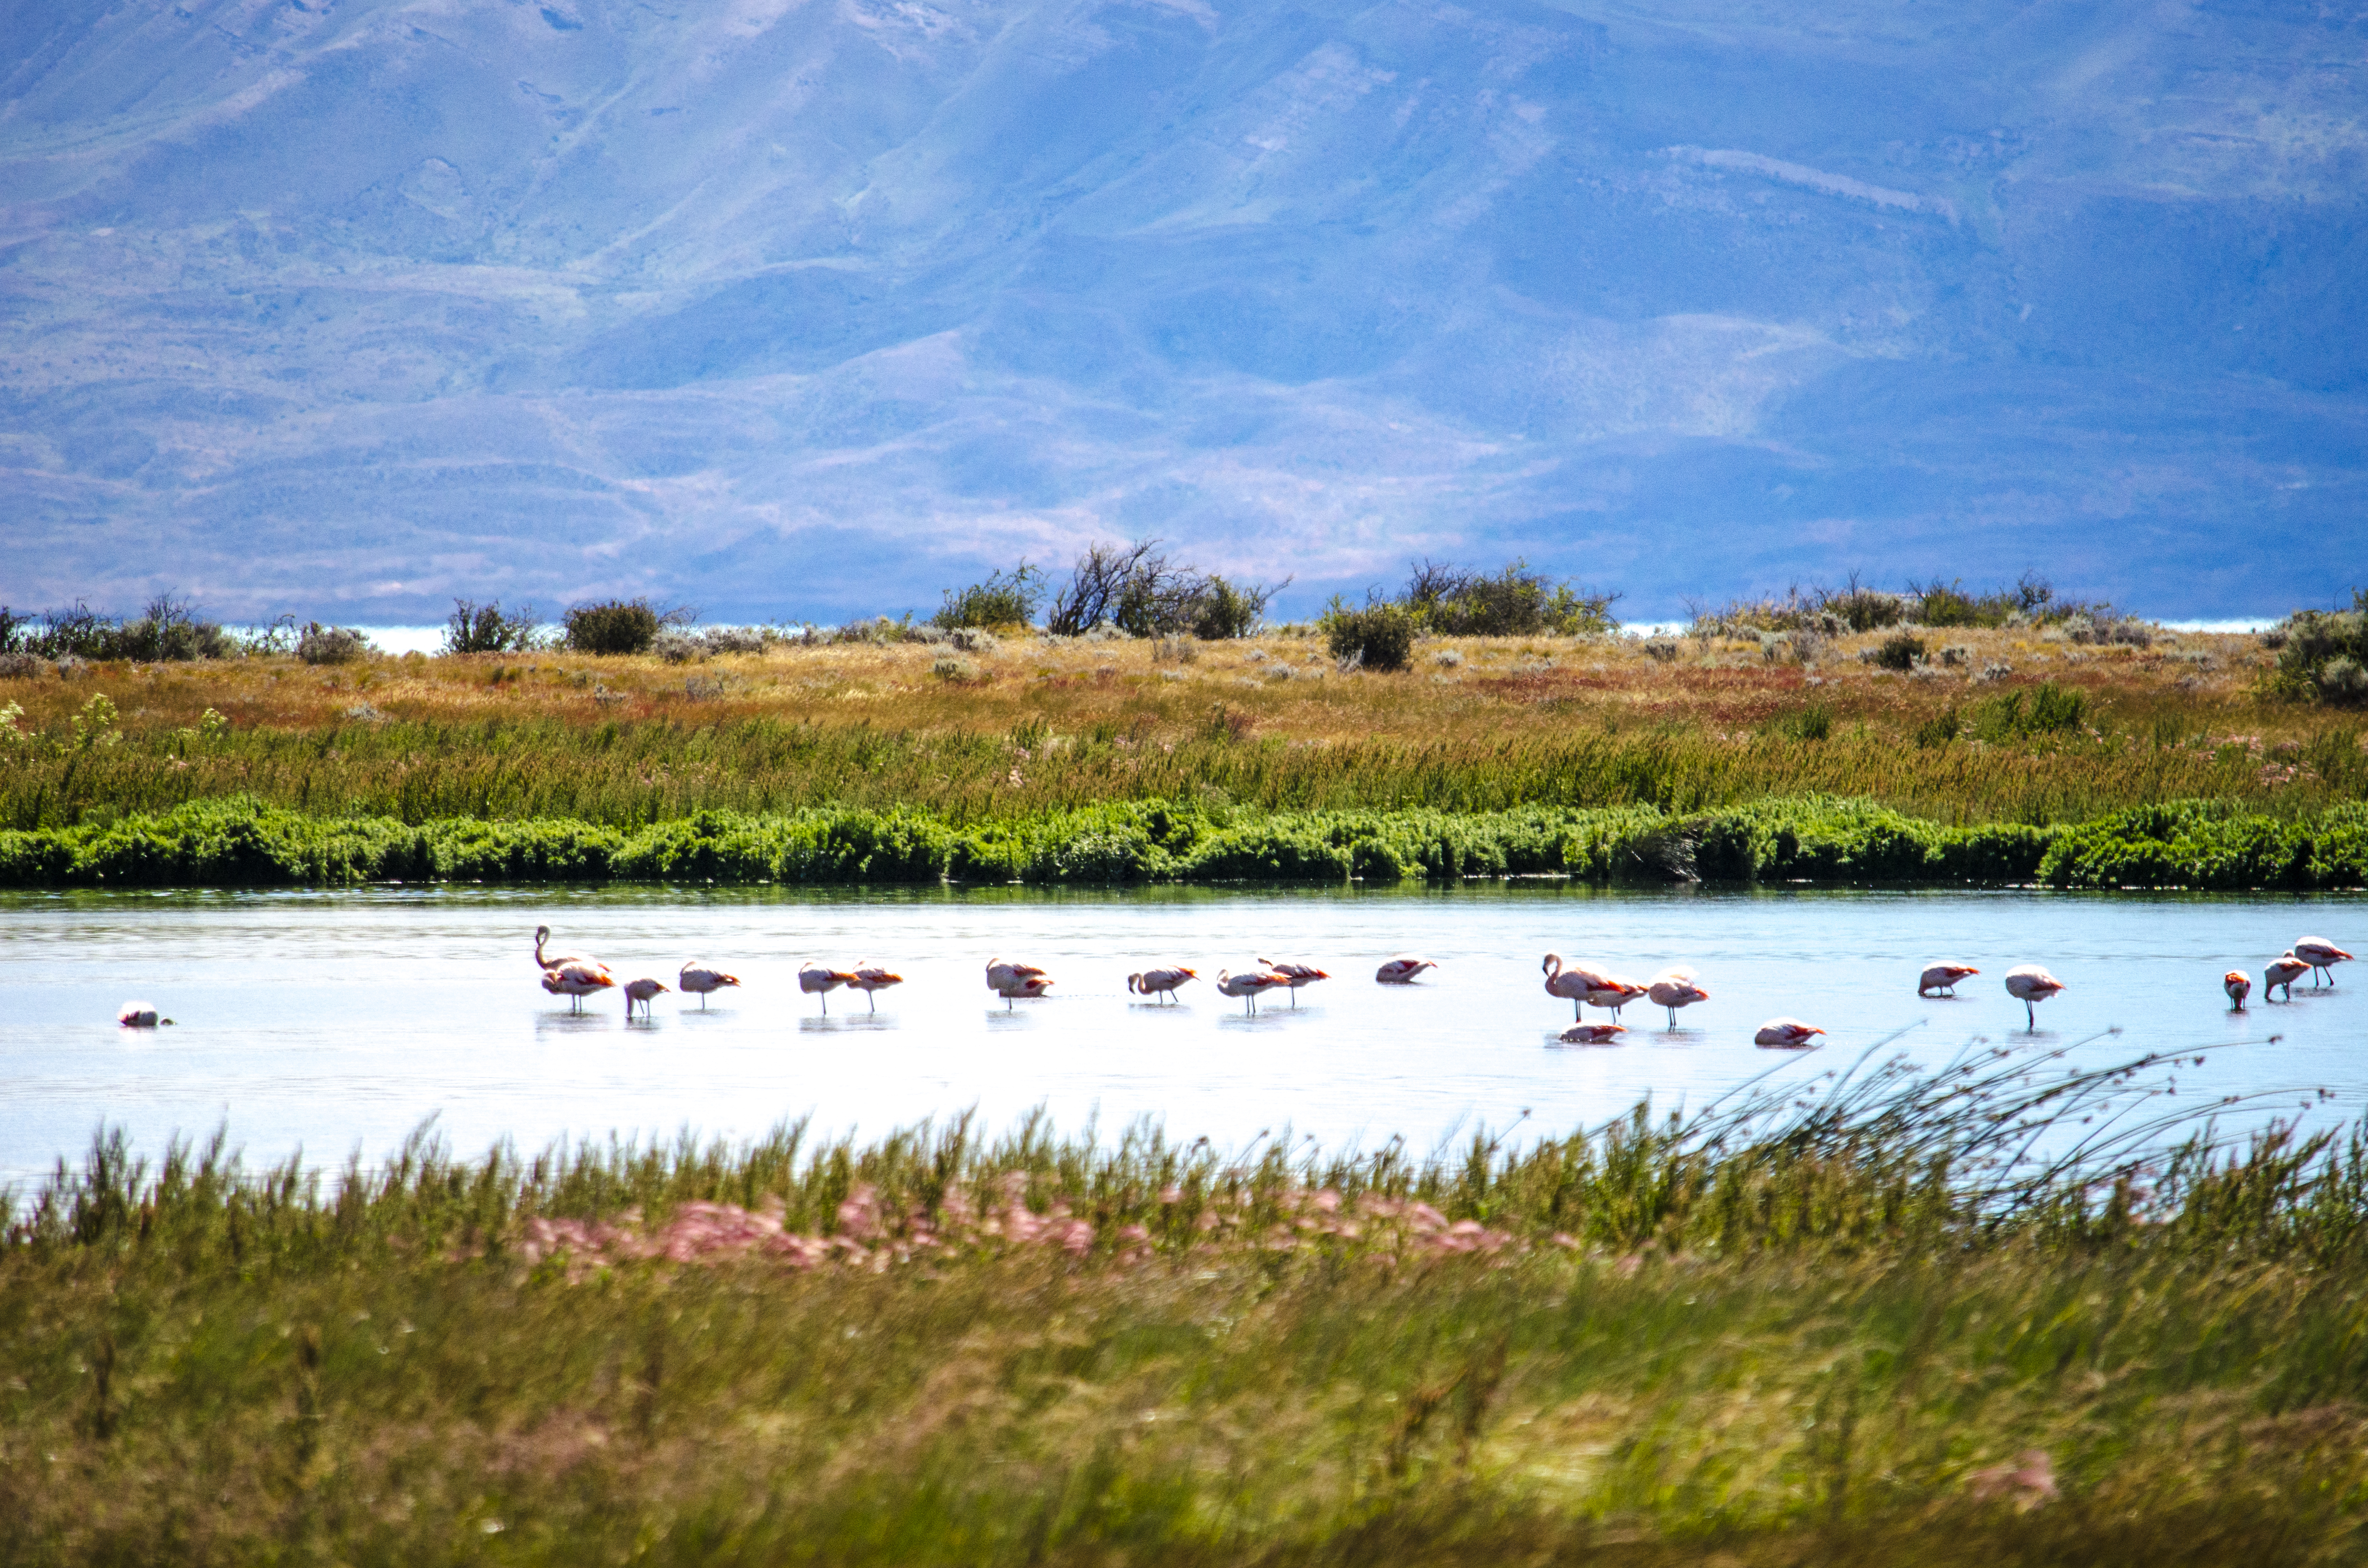
For any of you who might travel to Patagonia in the future, let me give you some advice: Throw the weather forecast out the window. This is one of those places where you can try to plan around the weather, which means absolutely nothing. We saw days where torrential downpours were forecasted only to see clear skies (much to our delight). The weather here changes hourly because the Atlantic and Pacific coasts are separated by just a few hours’ drive. On this day, we decided to stay in El Calafate and explore the town and nearby places. One gem we encountered was the Laguna Nimez Reserve. This place is a sanctuary for flamingos, owls, birds of prey, and other unusual birds I had never seen anywhere else. The entrance fee was 150 Argentinean pesos or roughly $8. The entire circle around the sanctuary takes about 90 minutes to walk and offers fantastic views of Lago Argentino and the mountains in the background. If you’re in El Calafate, I highly recommend it. For the second half of the day, we walked around the city center and checked out the town vibes. El Calafate has many lovely boutique shops that are worth checking out.
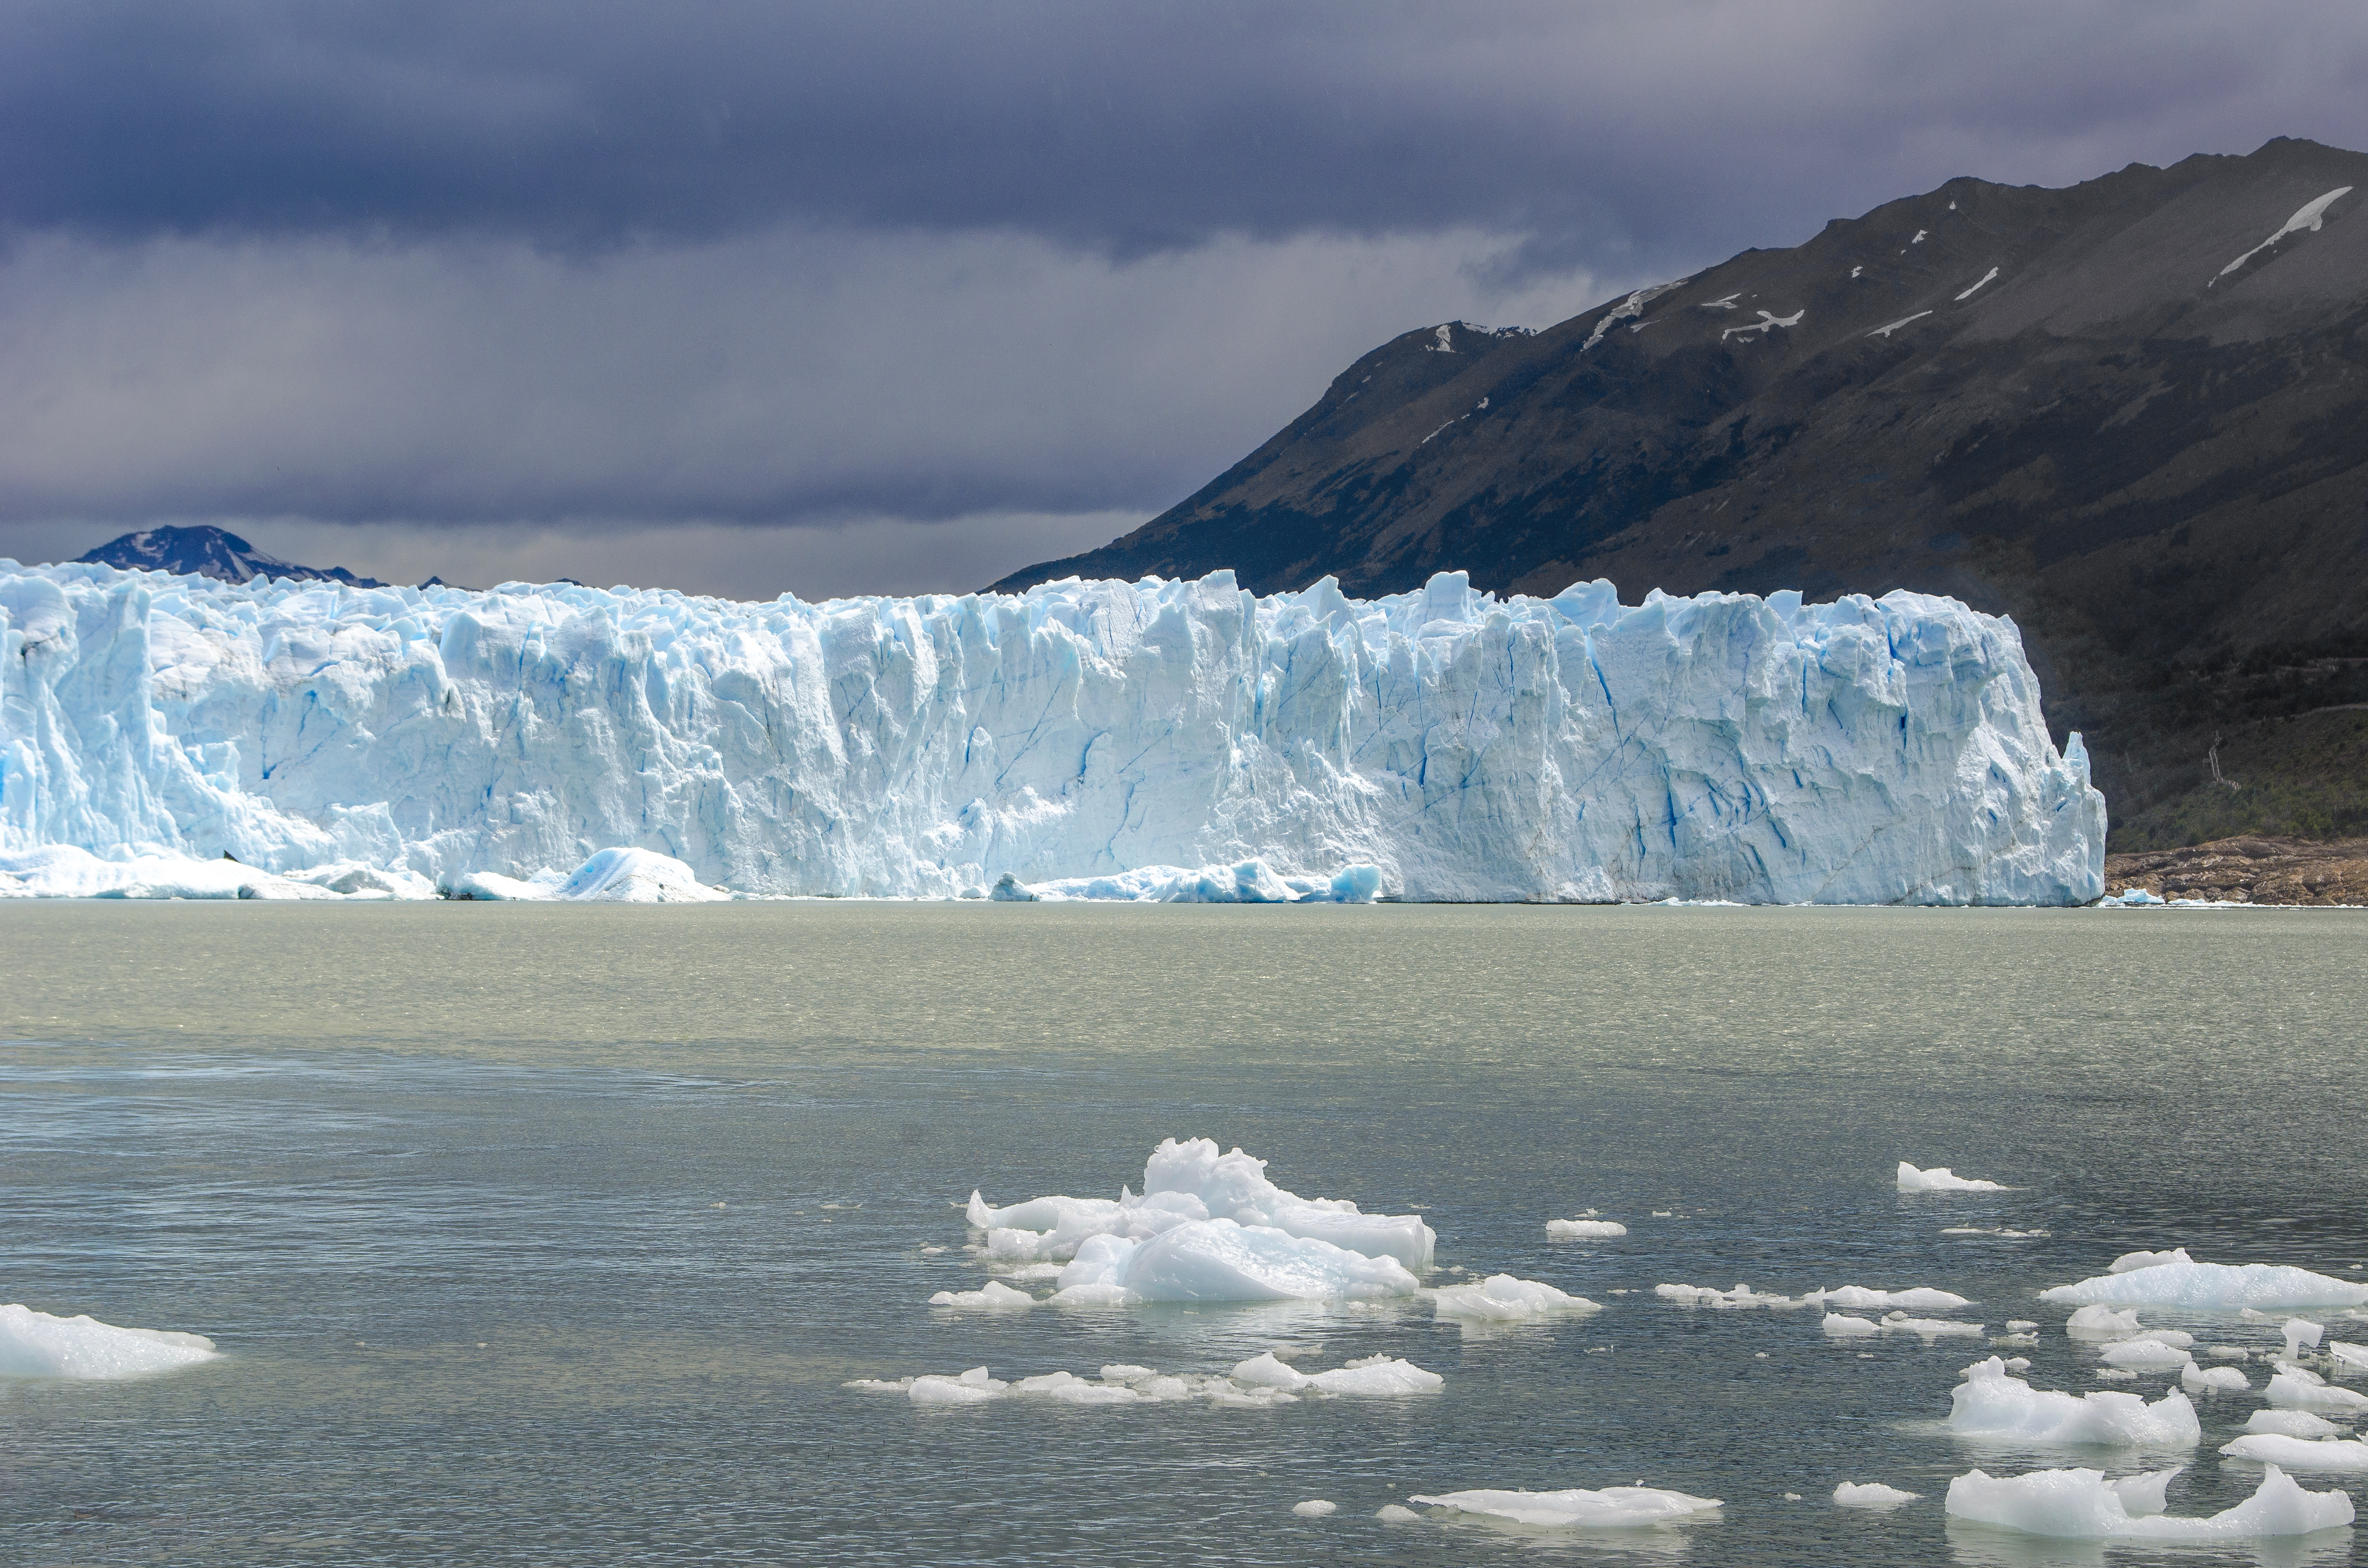
Day Four: Perito Moreno Glacier
We booked a tour to Perito Moreno Glacier on this day with Hielo & Aventura. You can visit their website and see everything they offer right here. They picked us up from the hotel at 7:30am, and we went on the 90-minute journey to Parque Nacional Las Glaciares. The first stop was a scenic overlook for about 10 minutes. This spot provided a glimpse of the awe-inspiring scenery yet to come. The second stop took us to the multiple viewing decks before the glacier. We saw a few smaller chunks of glacier calve off into the lake, which was incredible. The third thing on the agenda was the boat ride to the southern face of the glacier so we could actually hike on it. If you’re coming to Patagonia, I highly recommend doing this activity. For you Game of Thrones fans, it felt like we were north of the wall in wildling territory. The scenery is incredible and unlike anything I have ever witnessed. The ice has a lovely shade of blue, and even the water in certain crevasses seems to have a deep blue color. This activity costs about $180 per person, including pickup and drop-off from your hotel. As a Chase Sapphire Reserve credit card holder, I applied my $300 annual travel credit for 2018 for this excursion, effectively bringing our cost down to about $60 combined for two people. That’s a hell of a way to use the travel credit. Something to keep in mind: There is an entrance fee to Perito Moreno that is separate from the tour cost. It’s 500 Argentinean Pesos (equivalent to about $27 USD). The park ranger will collect that fee at the park entrance, and from what I remember, they don’t accept any other currency. Be sure to exchange your currency before you get there. My wife and I booked the 90-minute hike for this trip rather than the 6-8 hour hike. In retrospect, this is one of the things we wish we had done differently. It wasn’t as challenging as we initially thought, and if you’re physically fit and have done longer hikes before, the longer hike might be of interest to you. Just be sure to dress in layers for either one you may choose. Even though they give you snow clamps, it’s still important you have a decent pair of hiking shoes for this trek. Merrell, Keen, Columbia, etc would all suffice. They also require gloves so you don’t cut yourself on the jagged ice if you fall. Sunglasses are a great idea if you’re there on a sunny day since the glare reflecting off the glacier can sometimes be blinding.
The boat ride to the glacier is also incredible; you can view it for yourself. It does get windy, and there will probably be rain at some point, so it’s best to wear waterproof clothing and a raincoat.
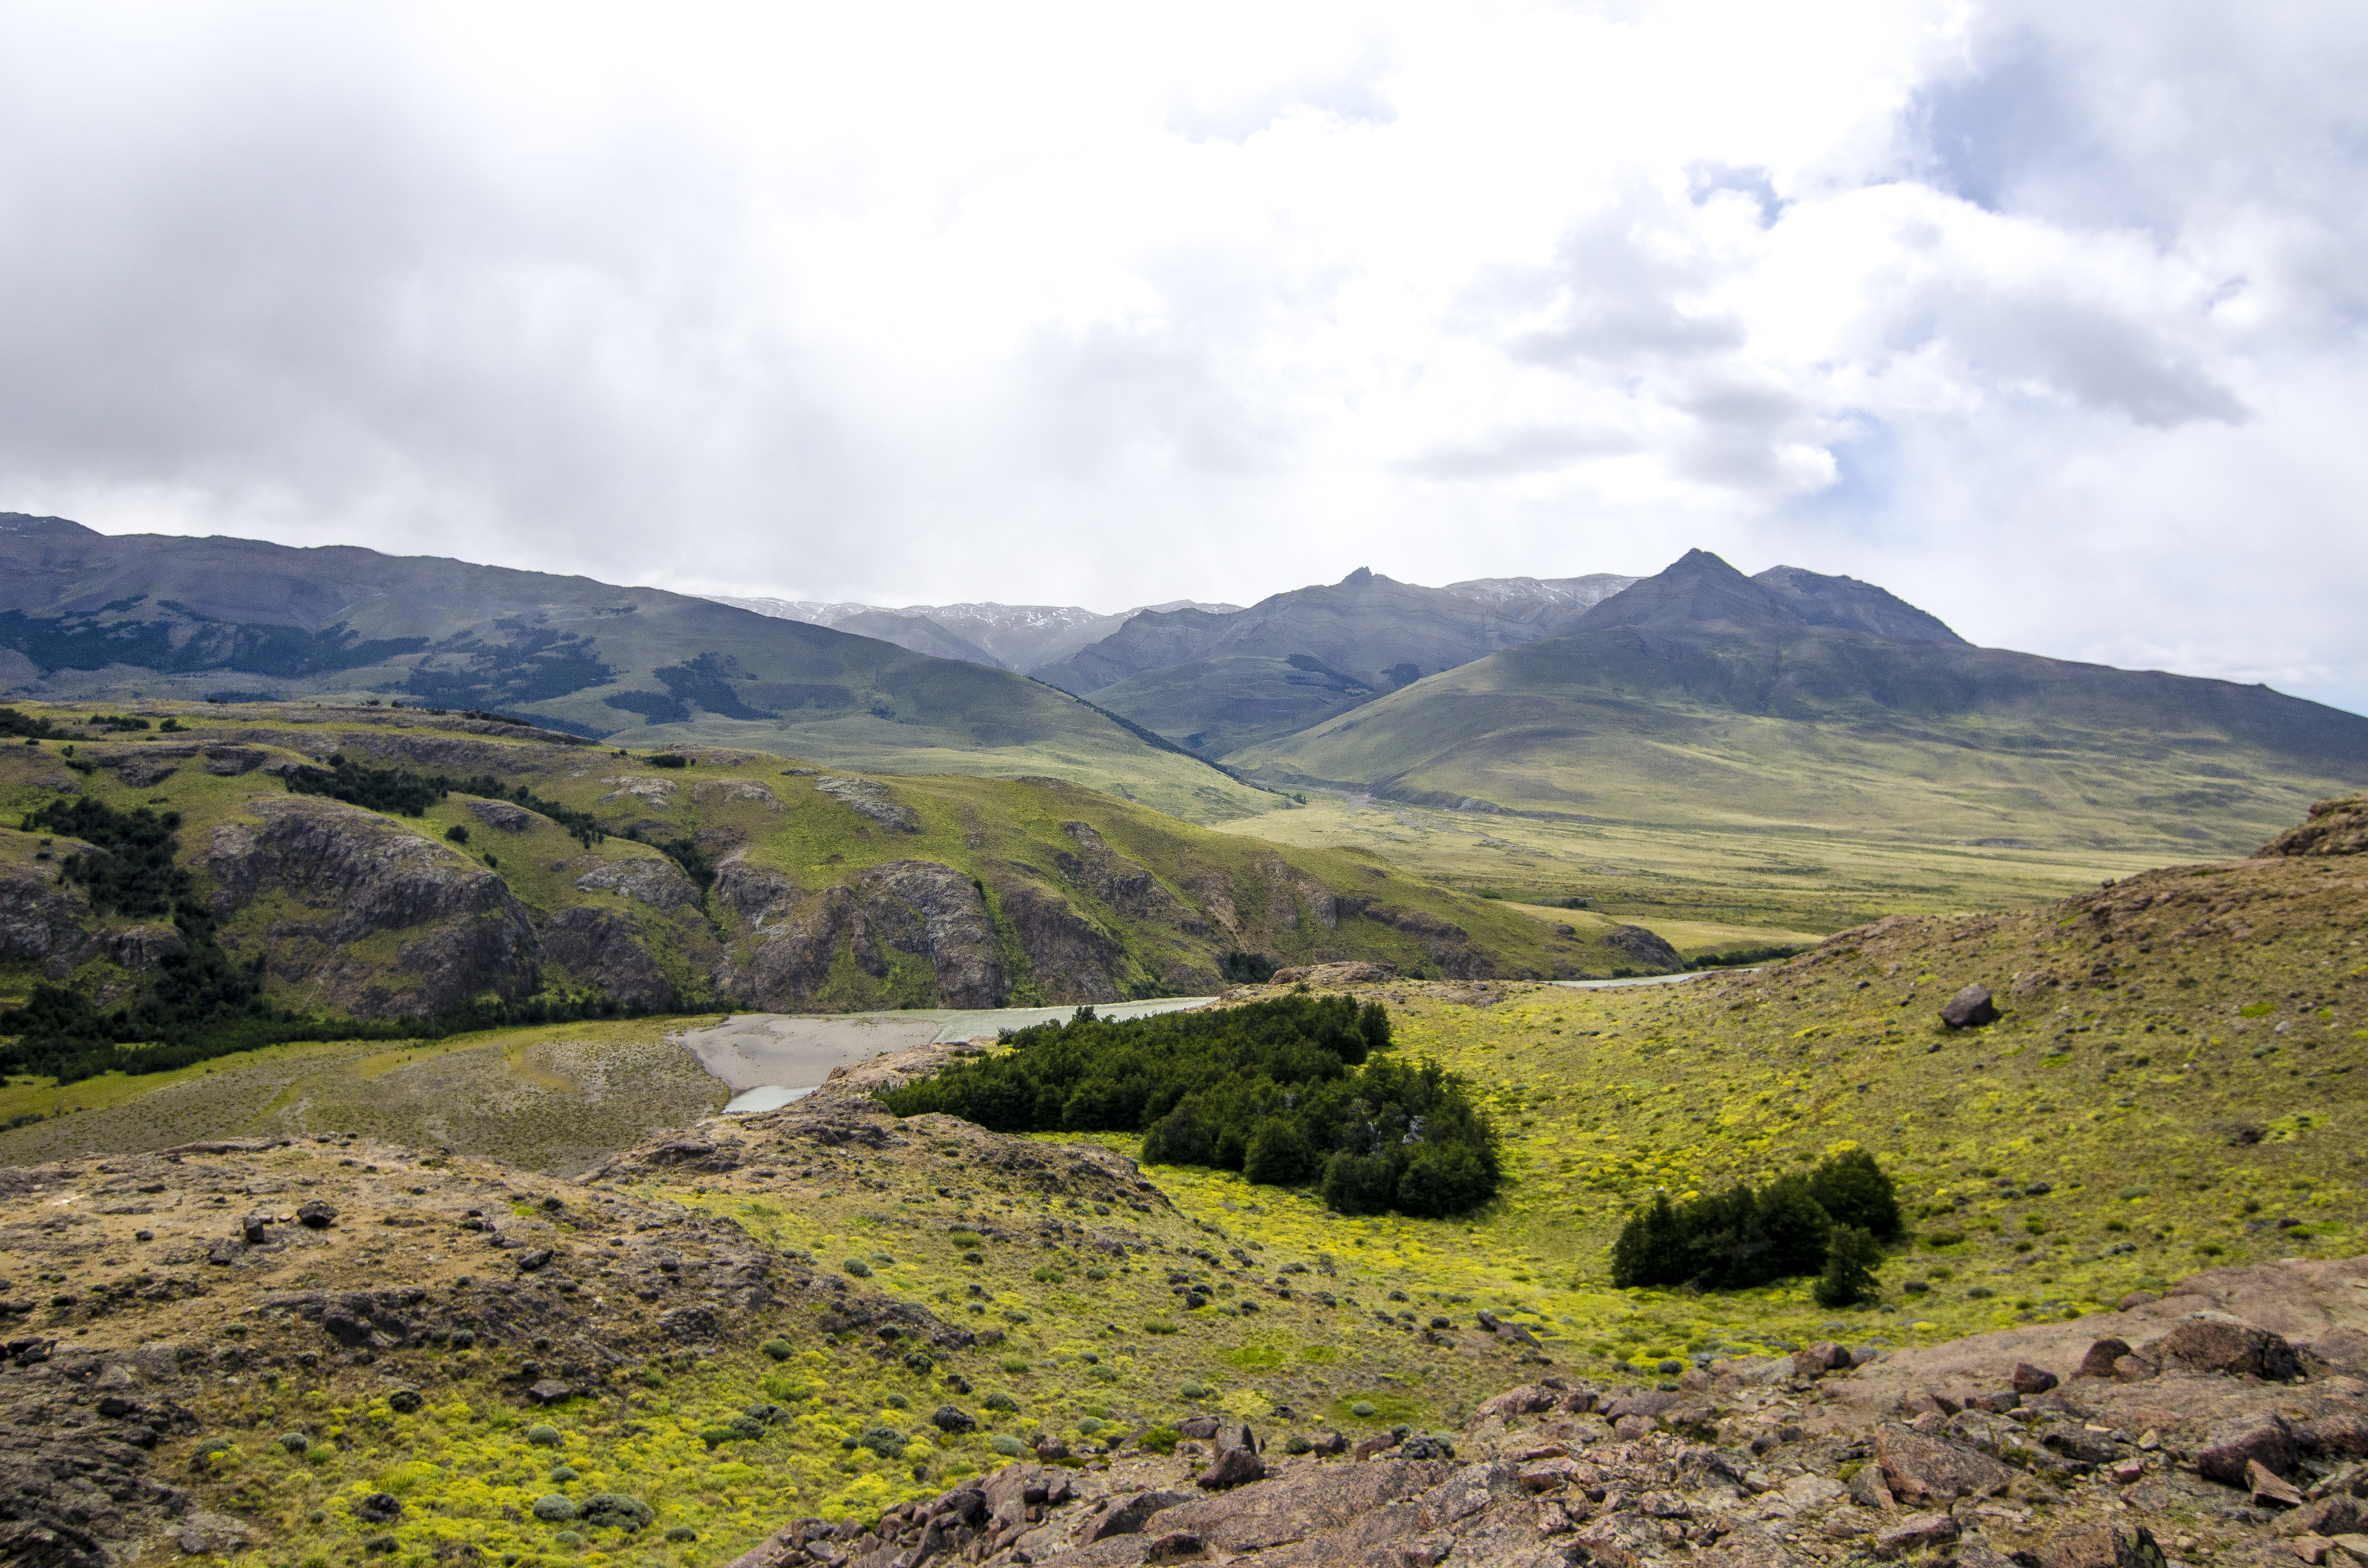
Day Five: El Chalten
On day five, we did a day trip to El Chalten, about 3 hours north of El Calafate. El Chalten is known for its hiking, scenery, and Mt. Fitz Roy. Unfortunately, Fitz Roy was hidden by clouds for the entire day we were there. But we still didn’t pass up the opportunity to hike a few trails. Some of the trails are moderately challenging and require much steep climbing. You will get wet, muddy, and messy, which might be painful if you’re not physically fit. But on a clear day, the reward at the end is majestic postcard-worthy views of Fitz Roy. The best thing about El Chalten? It’s one of the few places to access the trails without paying an entrance fee. If you’re into camping, it’s a very popular spot to set up camp.
A viewpoint from one of the trails at El ChaltenThe viewpoint at the end of the Mirador trail
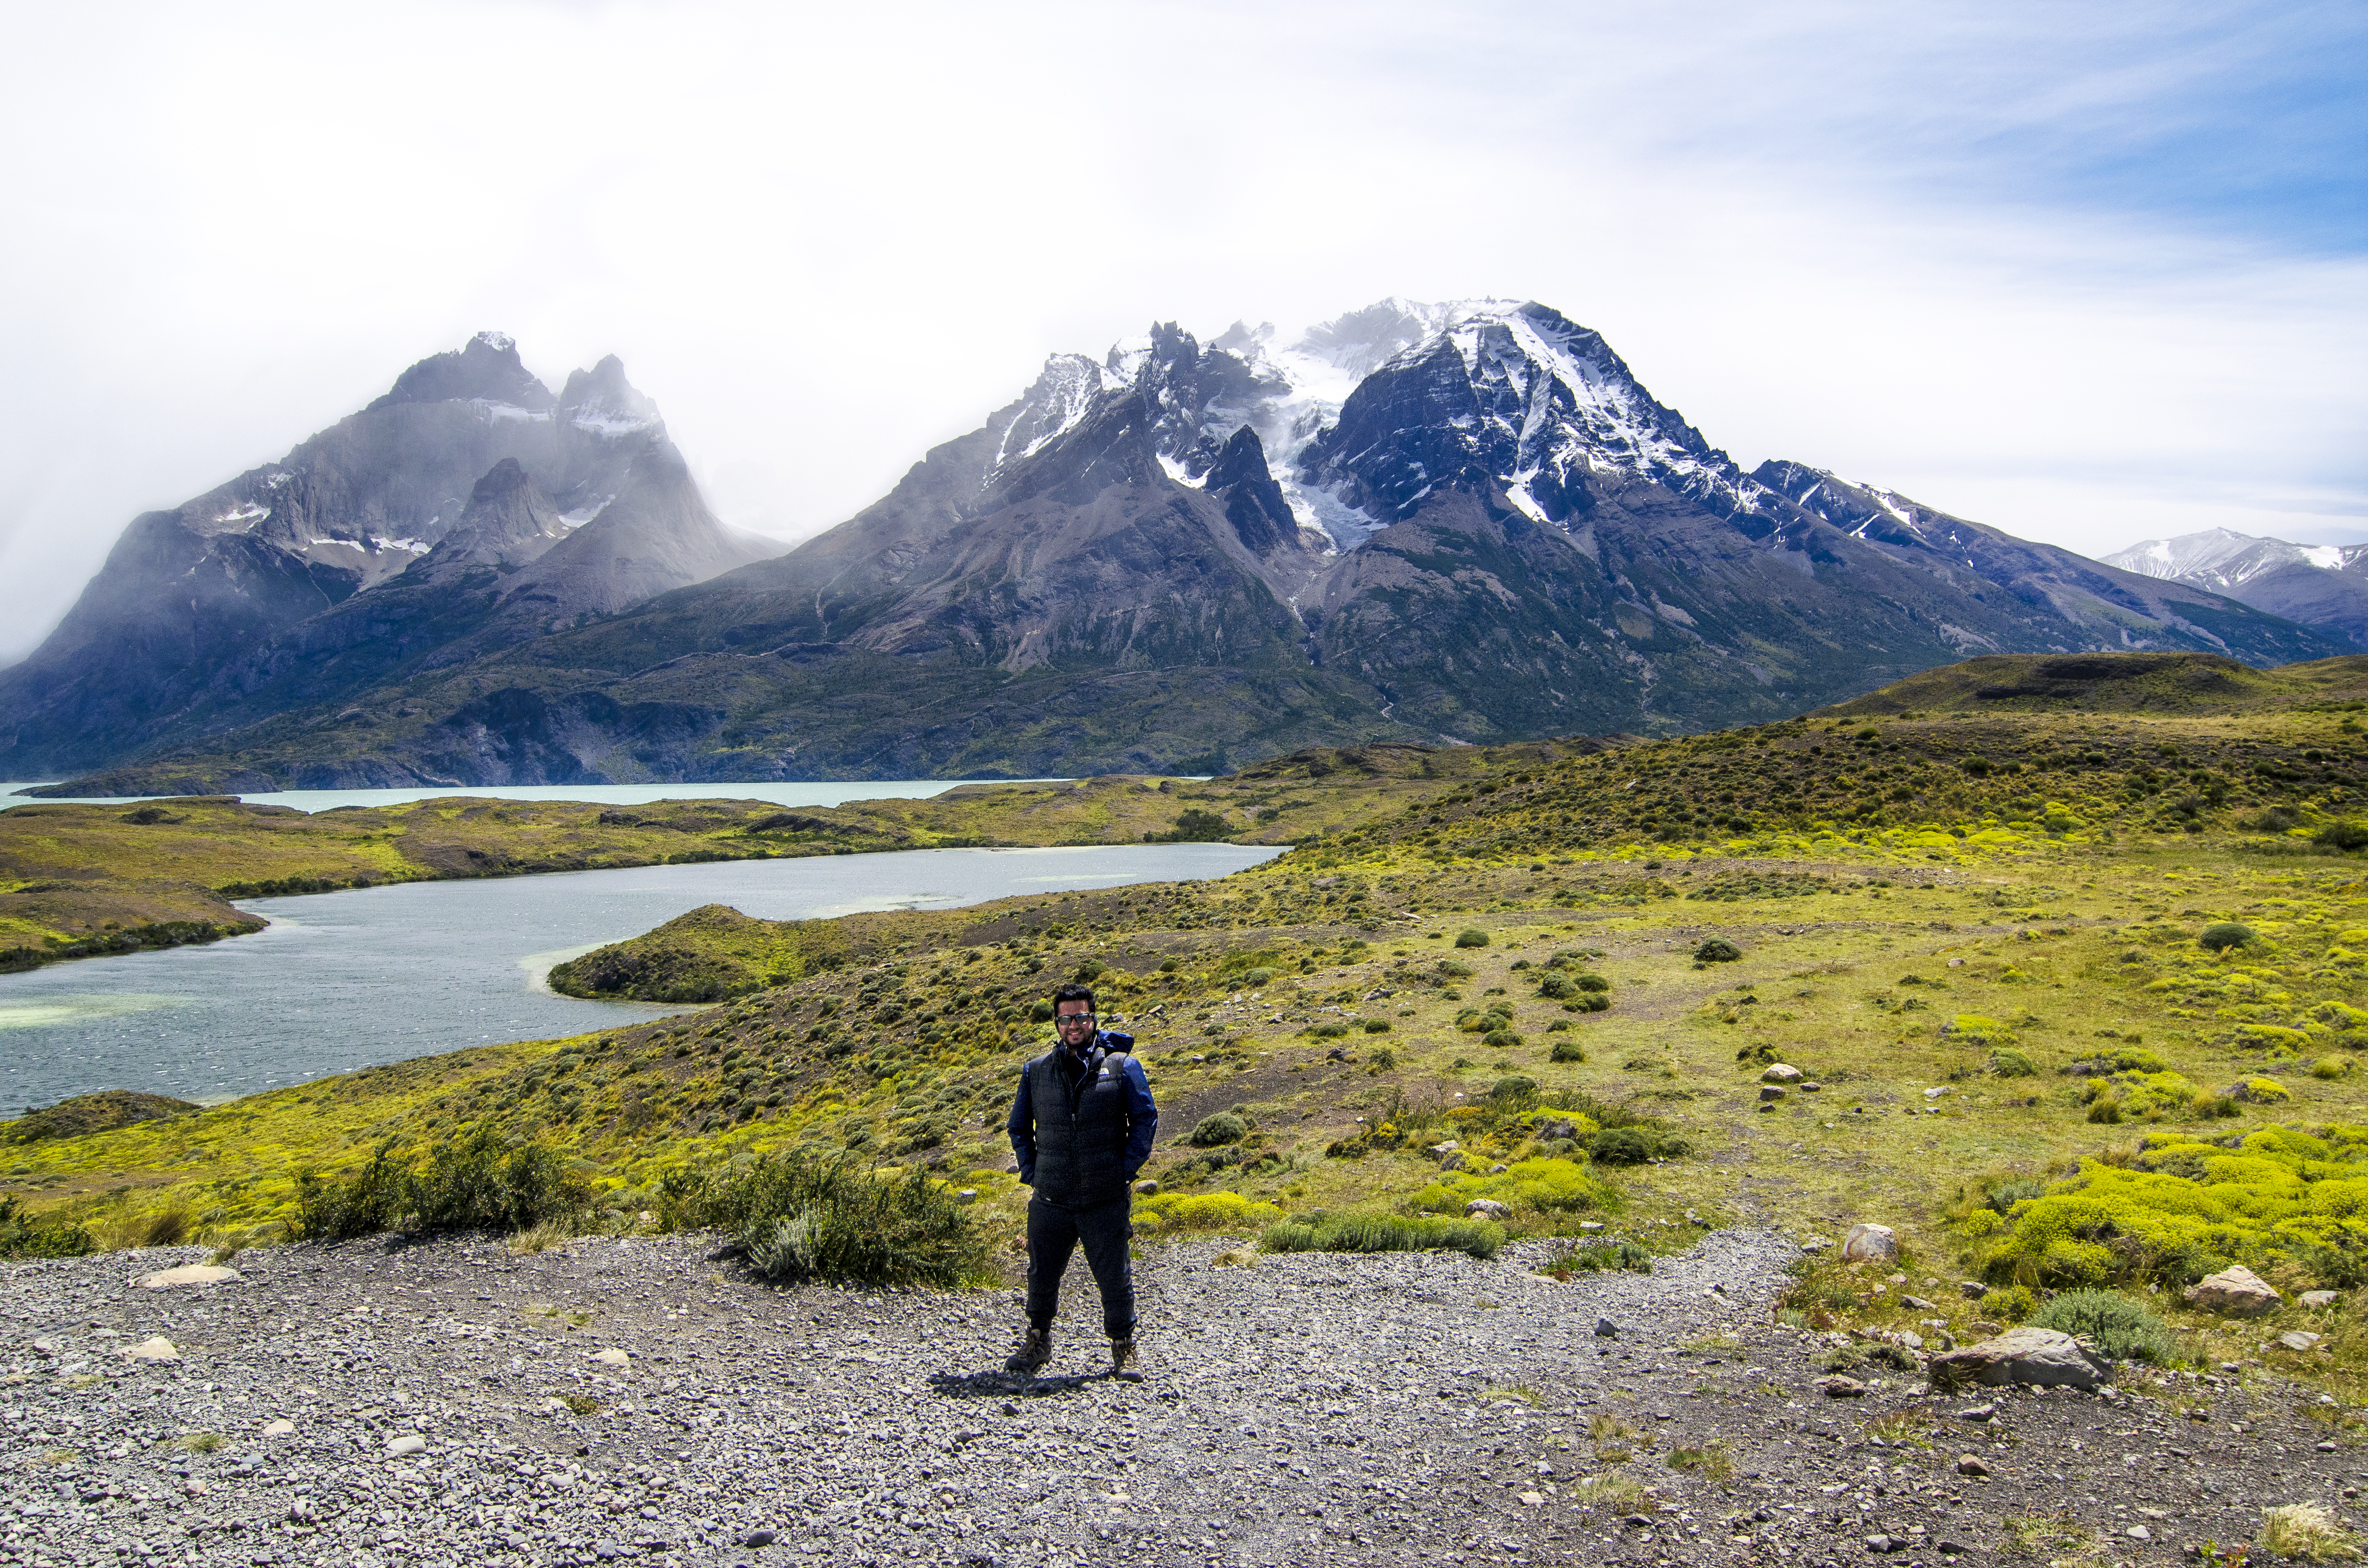
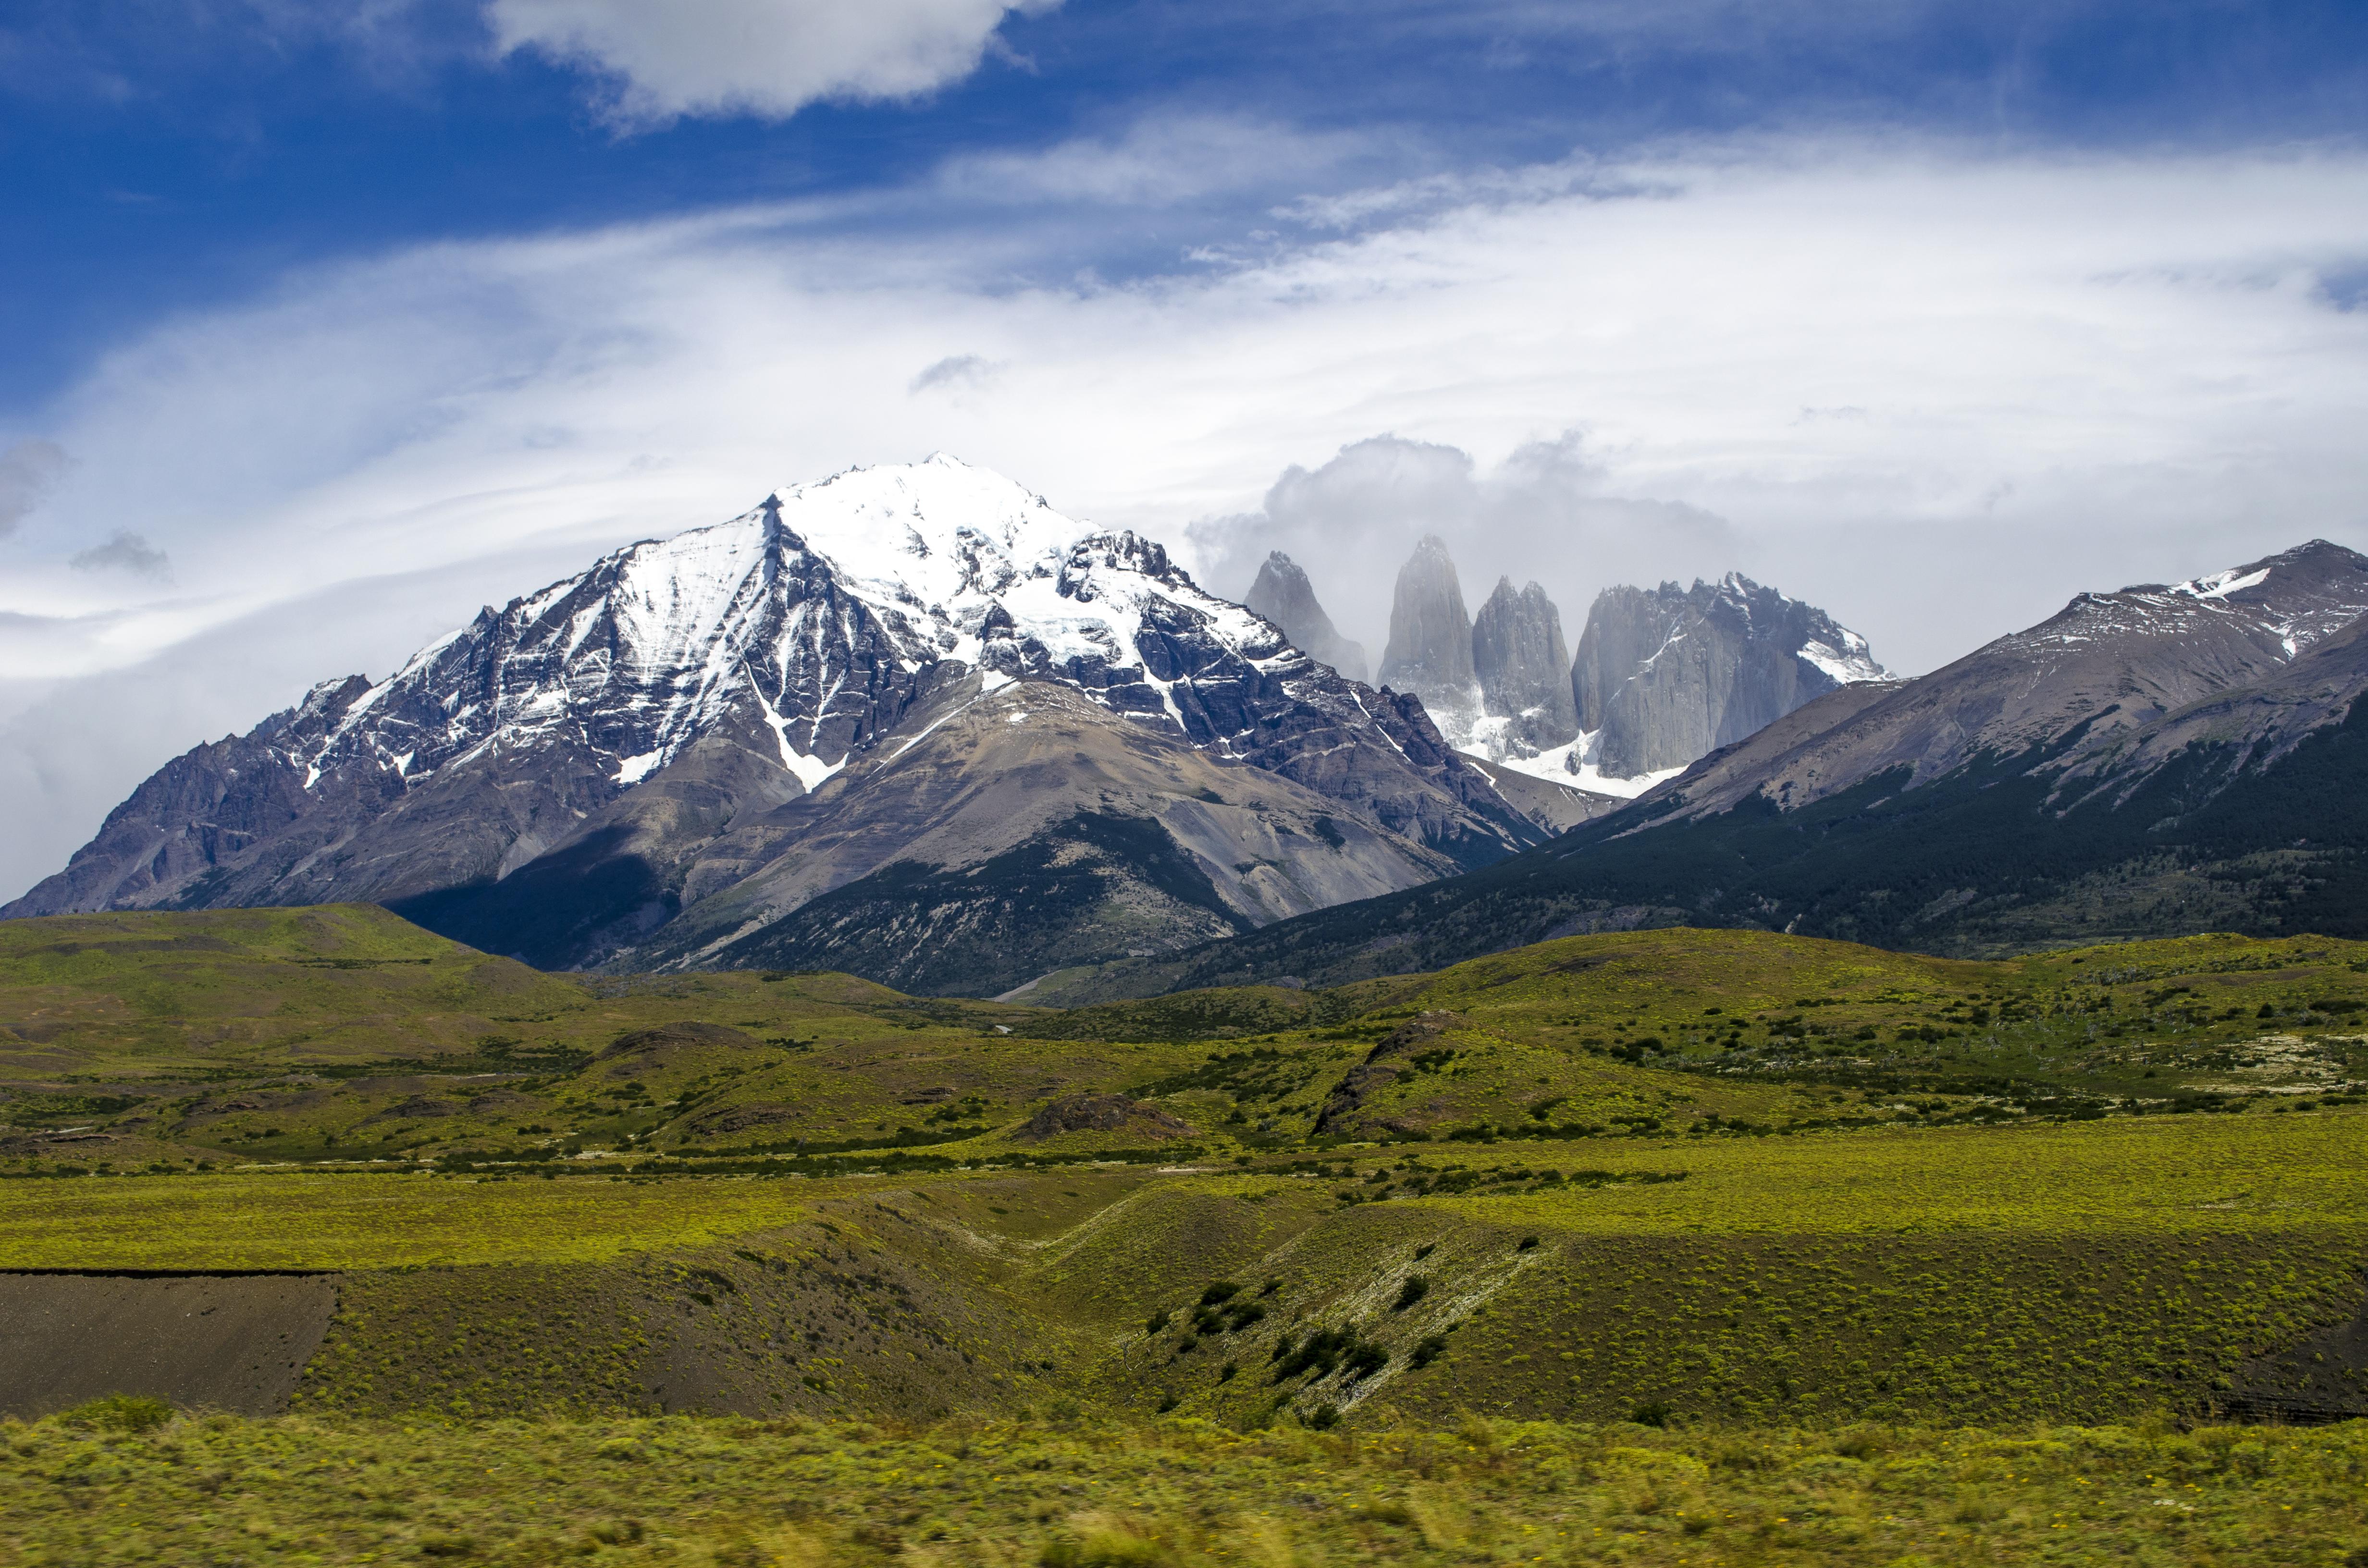
Day Six: Torres Del Paine National Park, Chile
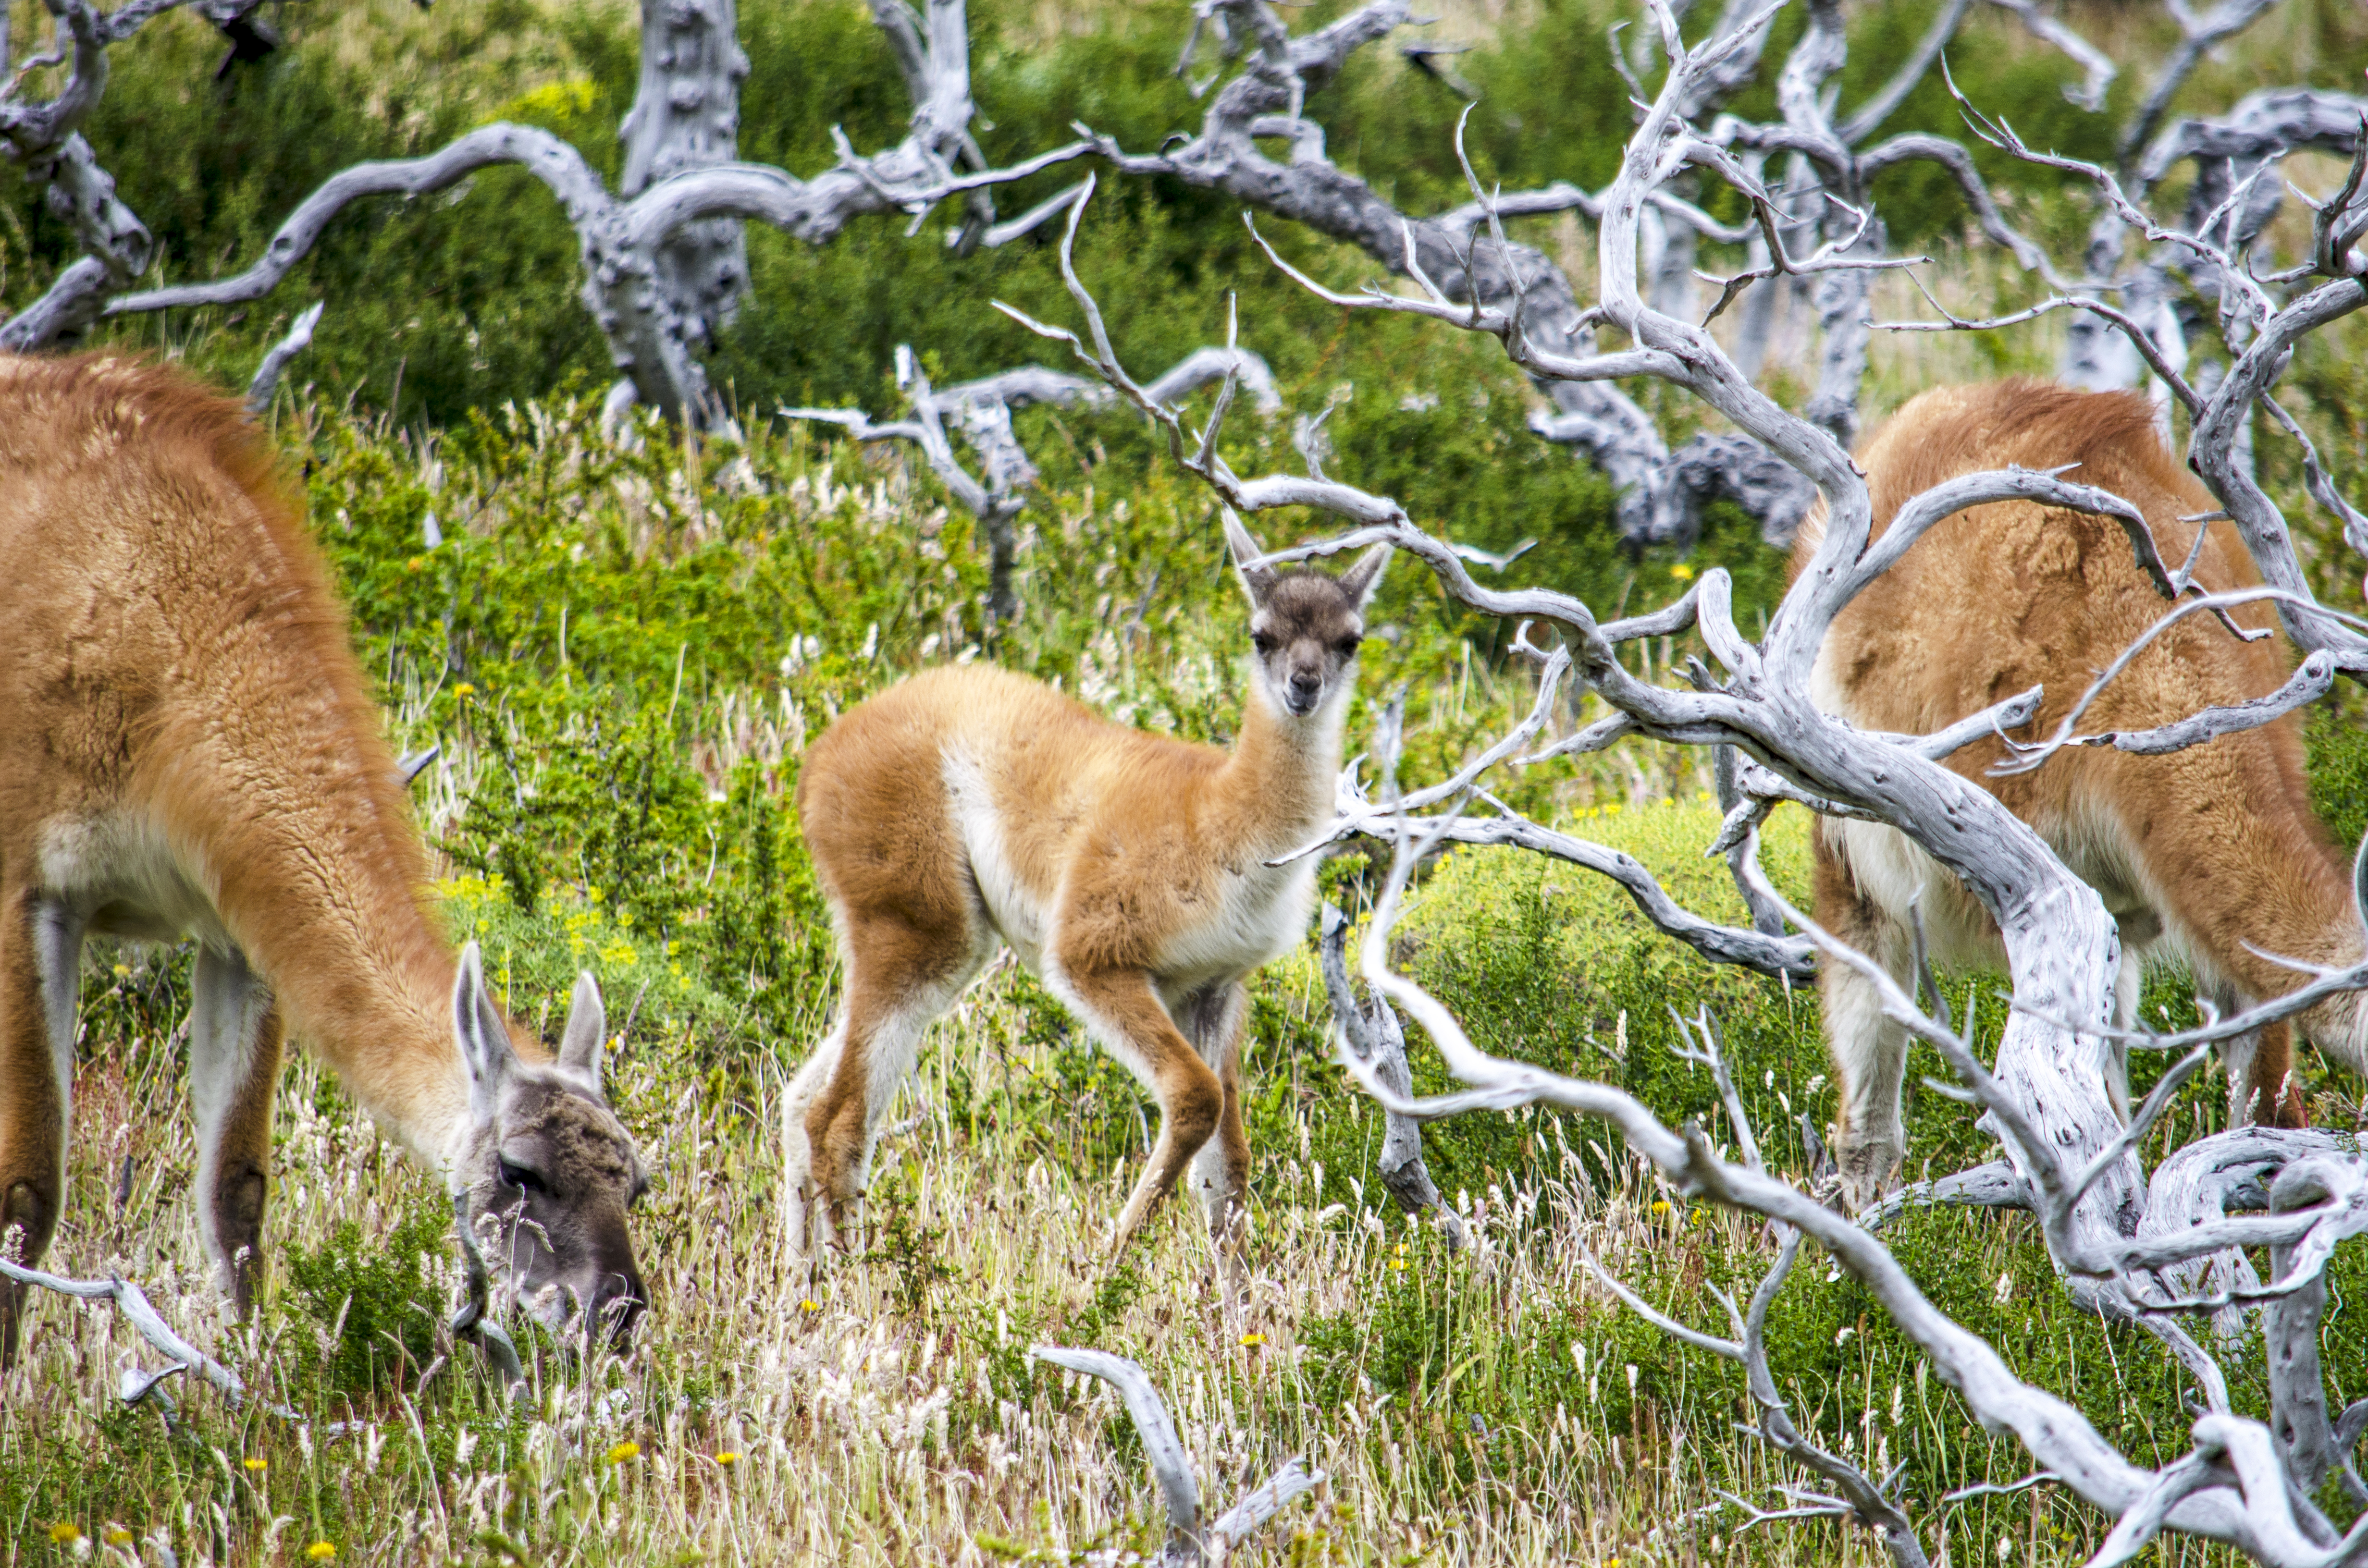
A trip to Patagonia is not complete without a visit to Torres Del Paine National Park on the Chilean side. This entire day’s journey costs about $250 per person (including pickup and drop off from the hotel). Luckily for us, my wife is also a Chase Sapphire Reserve credit card holder, and we were able to apply her $300 travel credit for 2018 to this excursion. This brought the excursion down to a reasonable $100 per person. The tour bus picked us up at 7am, and off we were. The drive from El Calafate to the Chilean border was about two hours. Once there, you must get off the bus twice before crossing into Chile to be checked by Argentinean authorities and again when you’re in Chile. Once there, you get your passport stamped by Chilean border patrol and declare anything that must be declared (don’t be that person). Our tour group had about 30 people, and crossing into Chile took about 45 minutes. Once we were cleared, the journey to Torres Del Paine took about 90 minutes. We were fortunate to have a mostly clear day when we arrived. If you have a clear day, you can see the famous towers. We stopped at the first four viewpoints for pictures before stopping at another point for lunch. They provide lunch, but unfortunately, they don’t offer vegetarian options. This was the biggest issue with this tour operator, and I conveyed to them that it was unacceptable, given the exorbitant cost of the tour itself. Luckily, we bought plenty of granola bars and Gatorade, which was sufficient. After lunch, we stopped at a few more viewpoints for spectacular photo opportunities. Anywhere you stop in the park, there will be an opportunity for a fantastic picture. The last stop was a 90-minute hike (very easy and straightforward) that gave us panoramic views of the surrounding landscape. We also saw guanacos, a species related to the camel and llama. I took a video of the hike, which you can view below.
The towers of Torres Del Paine were visible on this day.
Day Seven: Flight Back to Buenos Aires and New York City.
This was the conclusion of our memorable trip to Patagonia. Our flight back to Buenos Aires departed at 11:35 am and arrived at around 2:10 pm. To get back to Buenos Aires, we flew Aerolinas Argentinas as we did when we arrived. For the flight to New York City, we redeemed American Airlines miles for seats on American Airlines. The redemption was 57.5k miles per person, and although it wasn’t a great redemption value, it was better than United, Delta, and other options we had. We grabbed steak at Al Rawshe, near the smaller airport where we had landed. Argentina’s number one exports are beef and steak, which they do well. And trust me, the steak at Al Rawshe was phenomenal. We then took an Uber to their larger airport and headed back home. Another tip when flying out of El Calafate: Sit on the right side of the plane just as you would when you fly into El Calafate. You get incredible views of the turquoise-blue Lago Argentina upon takeoff and ascent. You can view the video below.
Should I take my kids to Patagonia?
If your kids are interested in the outdoors and can hike moderately challenging trails, I recommend bringing them to Patagonia. You could also carve out a trip for toddlers, but I would not recommend certain activities or excursions for children under eight. Being on a bus from El Calafate to Torres Del Paine National Park in Chile for nearly the entire day would probably make most toddlers impatient. If you want to bring toddlers to Torres Del Paine, you will be better served staying on the Chilean side of Patagonia in the town of Puerto Natales. From there, it is about a two-hour drive to Torres Del Paine, and you don’t have to deal with passport control.
Where can I see Penguins in Patagonia?
If you’re staying in southern Patagonia or near the town of Ushuaia
While we didn’t get to visit areas of Patagonia that have penguin colonies, there are a couple of places that you can visit to see them. If you’re staying in southern Patagonia or near the town of Ushuaia, Isla Martillo is one of the top spots for an up-close encounter with penguins. Situated in the Beagle Channel, this island is easily accessible from Ushuaia, Argentina. Travelers heading to Antarctica should take advantage of the opportunity to visit this thriving colony at the southern tip of Patagonia.
Home to thousands of Gentoo and Magellanic penguins, Martillo offers a chance to observe these unique birds in their natural habitat—nesting on rocky ridges, waddling along the shore, and diving into the water in search of anchovies and sardines. If you’re lucky enough, you might even spot an Emperor penguin that has wandered up from Antarctica.
If you’re staying in Punta Arenas, Chile, or Chilean Patagonia
Twenty kilometers off the coast of Punta Arenas, in the Strait of Magellan, lies Isla Magdalena—home to Chile’s largest penguin colony and one of Patagonia’s most significant Magellanic penguin rookeries. This island hosts over 120,000 tuxedoed residents who migrate from Brazil, Uruguay, and Peru each summer to lay their eggs and raise their chicks. They are very inquisitive, people-friendly, and will approach humans in a laid-back manner. As a friendly reminder, do not touch the penguins or any wildlife during your stay in Patagonia.
When is the best time to visit Patagonia?
December through February are the peak summer months in Patagonia and the southern hemisphere. The average high in El Calafate is in the mid-60s Fahrenheit (18 degrees Celsius), and it can go as high as the mid-70s. Temperatures during the night can dip into the 30s.
What should I bring to Patagonia?
A robust pair of hiking boots (Merrell, Keen, Columbia, etc.), waterproof windbreaker, and a thicker jacket that can insulate you from wind and temperatures in the ’30s but is versatile enough to wear while hiking ( think Northface, Patagonia, Arc’teryx, Columbia, Nike, Lululemon, etc.). I would also bring waterproof pants that have a built-in thermal layer. If you aren’t going to be in elevation, getting one or two hiking shorts is also advisable during the summer months. We packed plenty of granola bars so we wouldn’t have to shop for them in Patagonia, but it goes without saying that on any hike, you should carry plenty of protein bars or granola bars. Also, bring several bottles of water on the hike. It is always better to have more than not have enough. Since you will be in one of the world’s most beautiful areas, I strongly recommend bringing a nice camera.
I transferred 140k Chase Ultimate Rewards into United for a recent trip to Portugal. I booked two business class tickets to Lisbon via Frankfurt, Germany, on their Star Alliance partner, Lufthansa Airlines. Usually, I don’t redeem points for business class even though it’s a better value than redeeming for economy class. I would instead use fewer points and have enough left over for another trip rather than burn twice the amount on luxury and comfort. However, there were a couple of factors at play this time around. First, the wife was pregnant, and this was our babymoon, so her comfort was a high priority. Secondly, United had saver-level awards for business class but no saver-level awards for the economy (30k miles per ticket) on the day we wanted to depart. So my choices were 70k miles per person in business class or 70k points per person in economy (lol). This was the most no-brainer of no-brainers. Neither of us had ever experienced an international long-haul business class flight, and we now understand why business class redemptions provide much better value than economy class redemptions. Here is a screen-shot of the price we would have to pay for each ticket in business class if we were using cash:
A combined $14,400! Instead, we used 140,000 United miles plus $40 tax per ticket. We got a fantastic 10 cents per mile value on this award ticket. This was the most value we have ever extracted from a miles/point redemption. Generally, getting 2.5-3 cents per point on redemption is considered pretty good. In addition to the in-flight service, we both got access to the Polaris Lounge in Chicago and Lufthansa Business Class Lounge in Frankfurt. Our flight from Frankfurt to Lisbon was also business class; I’ll have a separate review. You can read about my Polaris Lounge experience here.
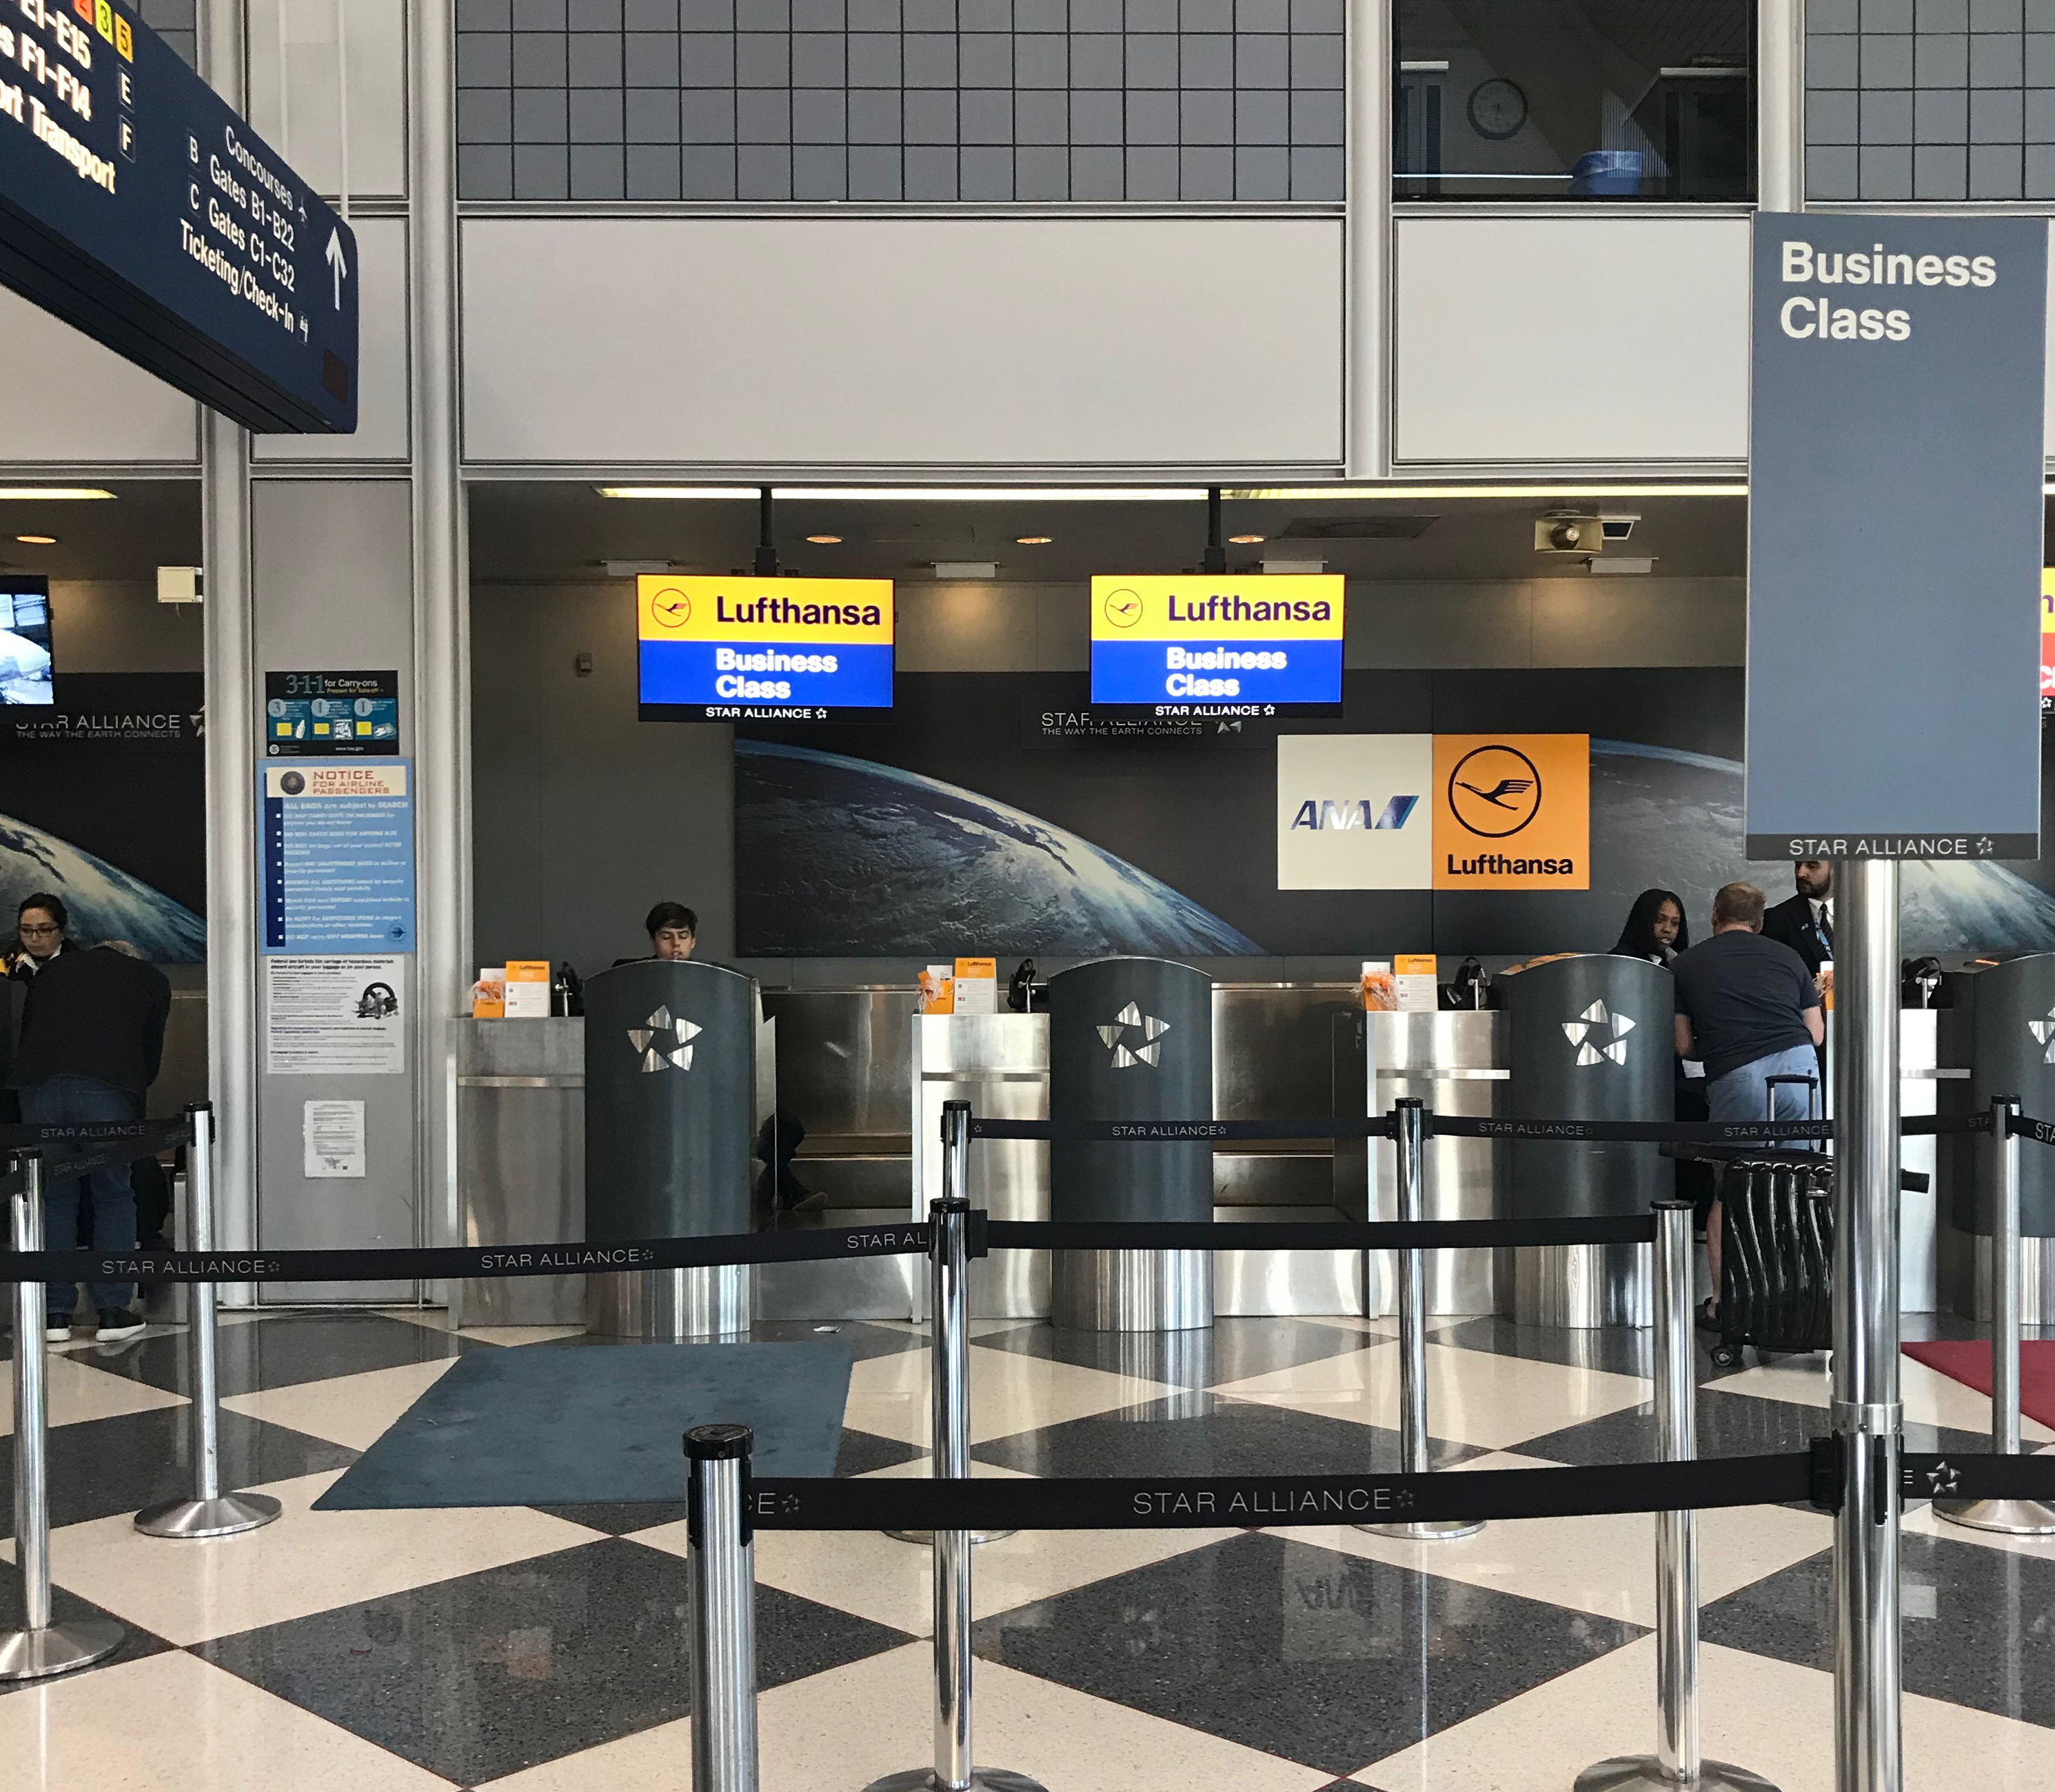
Check-in
Checking in was very straightforward. We used the designated business class check-in counter to skip the line usually seen in economy class.
There was no one in front of us, and after taking our check-in luggage and handing us our boarding pass, the Lufthansa representative informed us we had access to Polaris Lounge if we wished. That was the reason we got to the airport 5 hours before departure in the first place =)
Boarding and Seating
The Queen of the Skies, our plane for this trip to Europe
We boarded in the priority lane reserved for first-class and business-class travelers during the boarding process. For this trip, we would fly on the Boeing-747, the “Queen of the Skies” for this flight to Frankfurt. I had not flown on a 747 since 2005, and being able to fly on one in a premium cabin gave this award redemption added value. Upon entering the plane, we turned right into the business class cabin and were seated in 5A and 5C (these seats are adjacent). Lufthansa Business Class has fully lie-flat seats. Traveling overnight is a huge deal, as you can beat jet lag and not waste a day recovering. After finding our seats, our air hostess offered us welcome drinks before takeoff.
Business class seats in their upright position
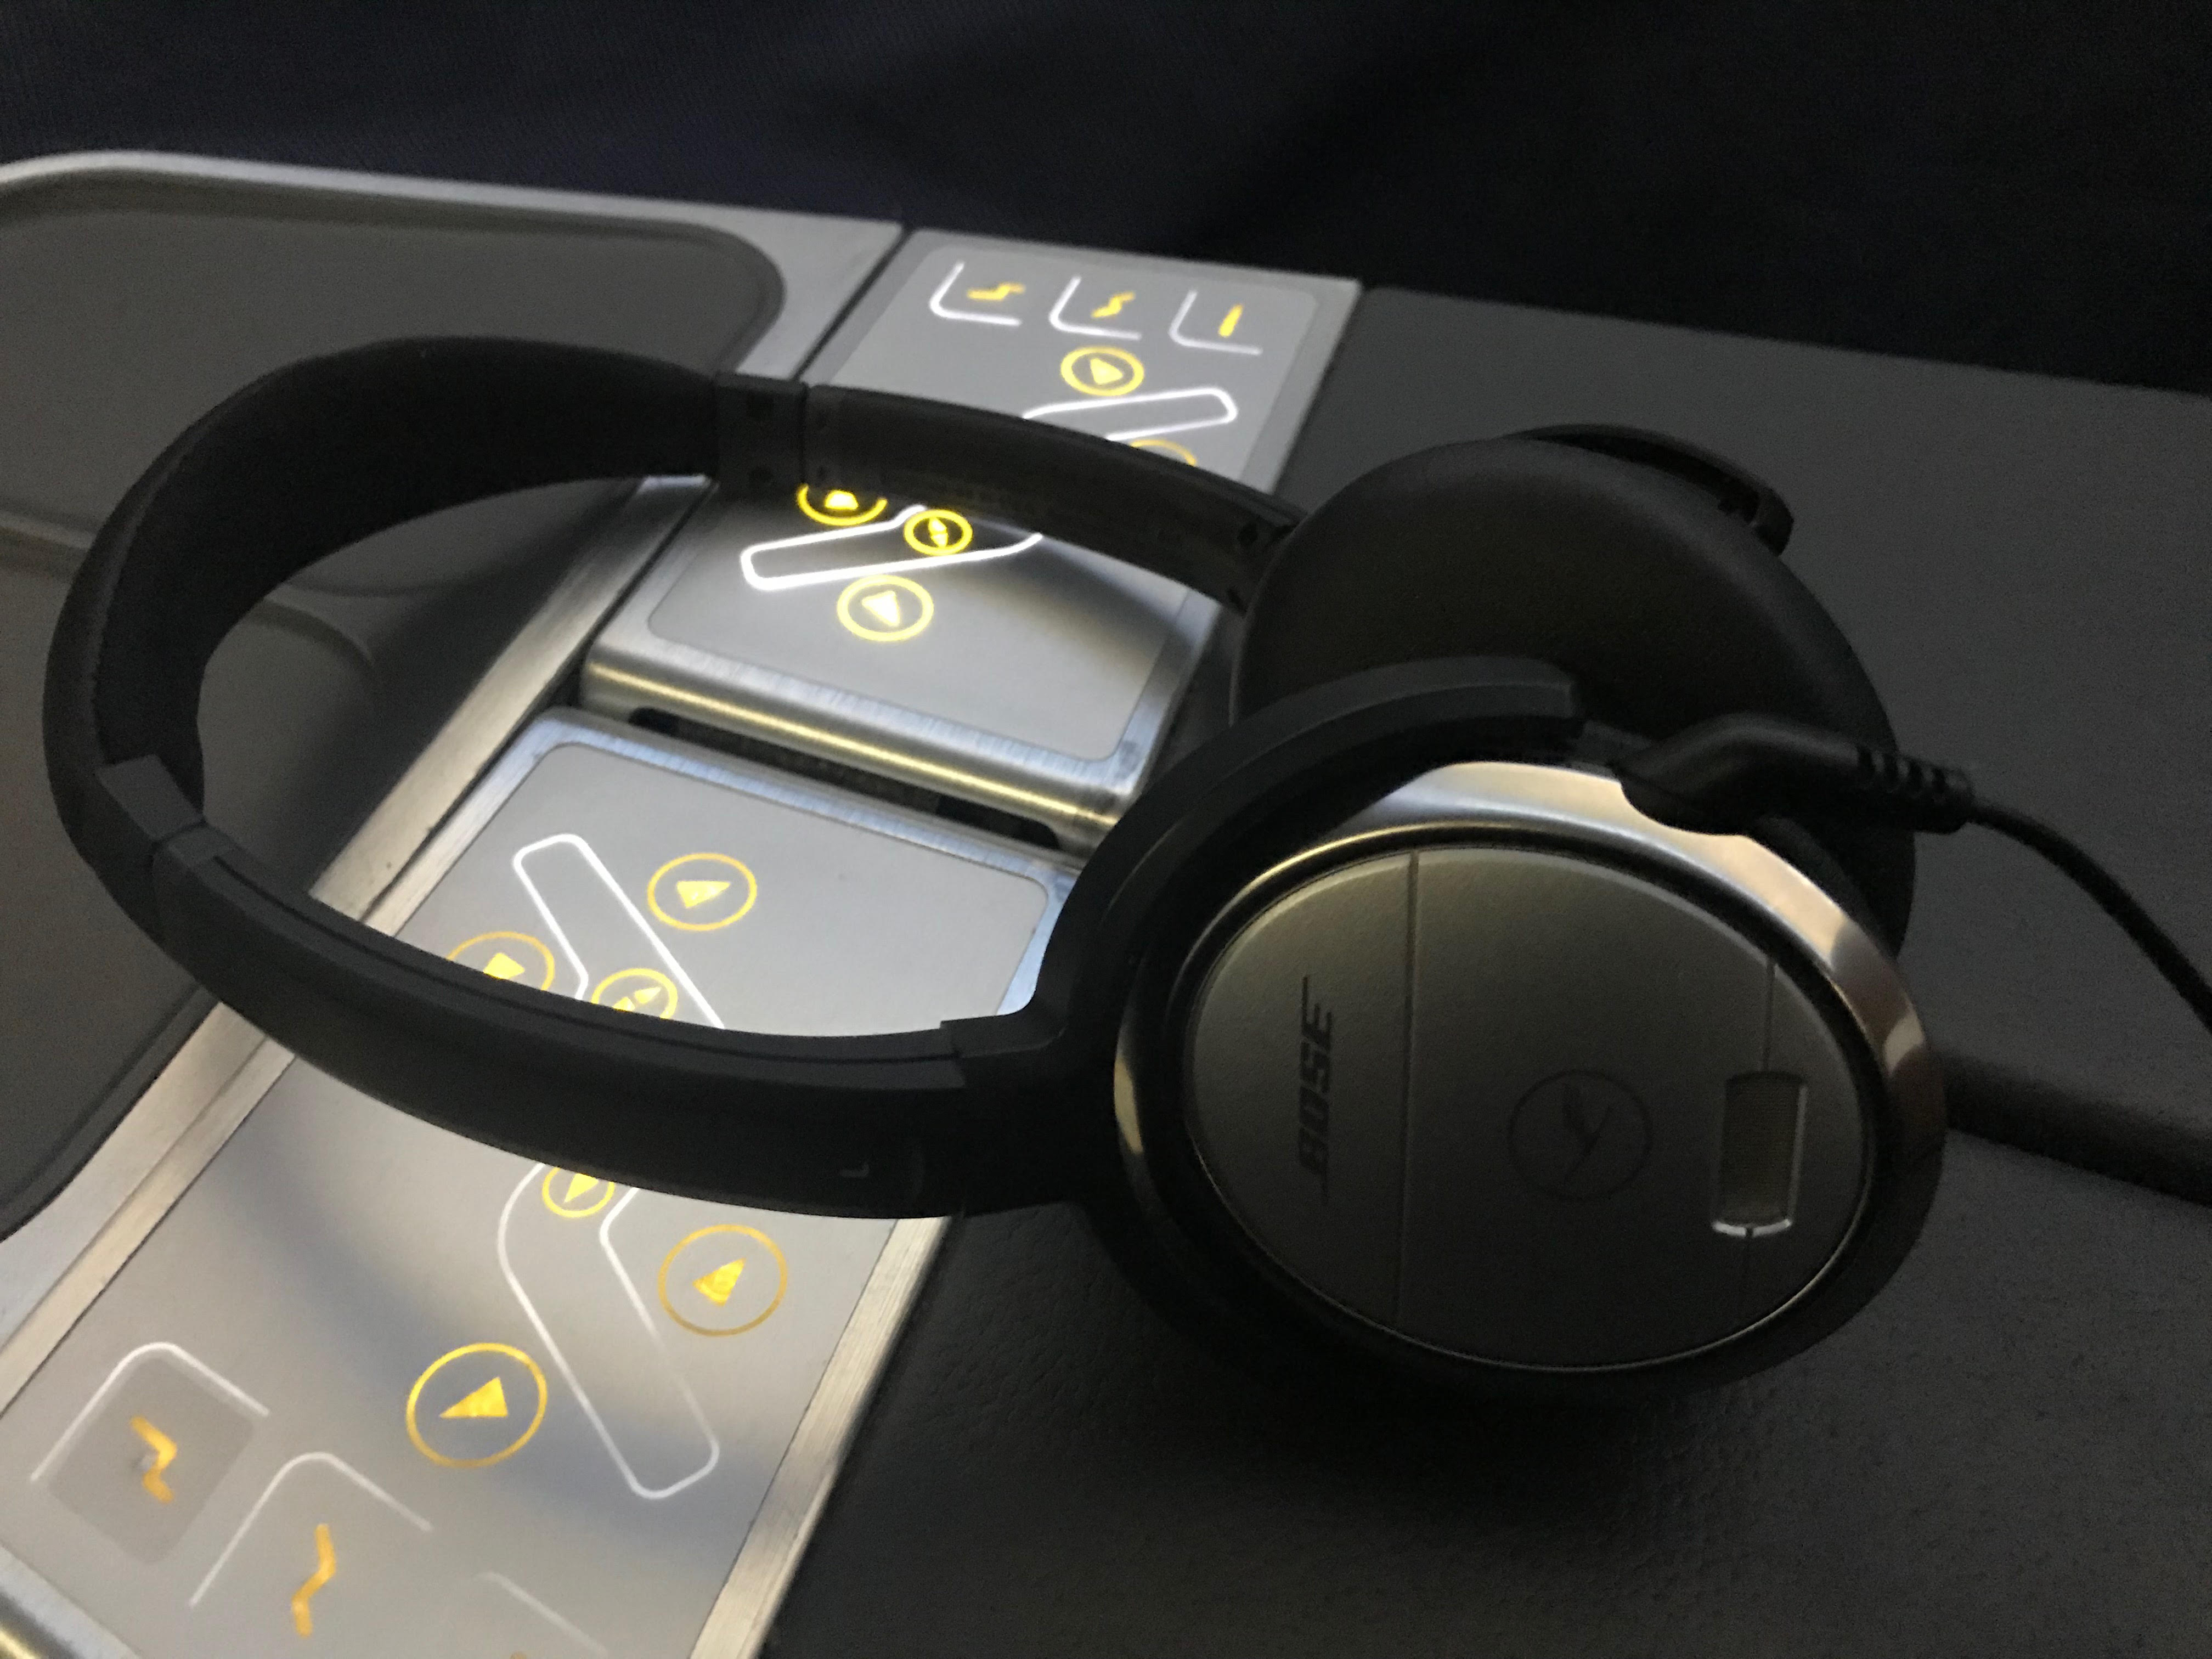
These seats have space under the footrest area and a pullout compartment to store smaller items during the flight. The amenity kit is also located here. If you want to utilize the in-flight entertainment, Lufthansa provides Bose noise-canceling headphones in the armrest compartment.
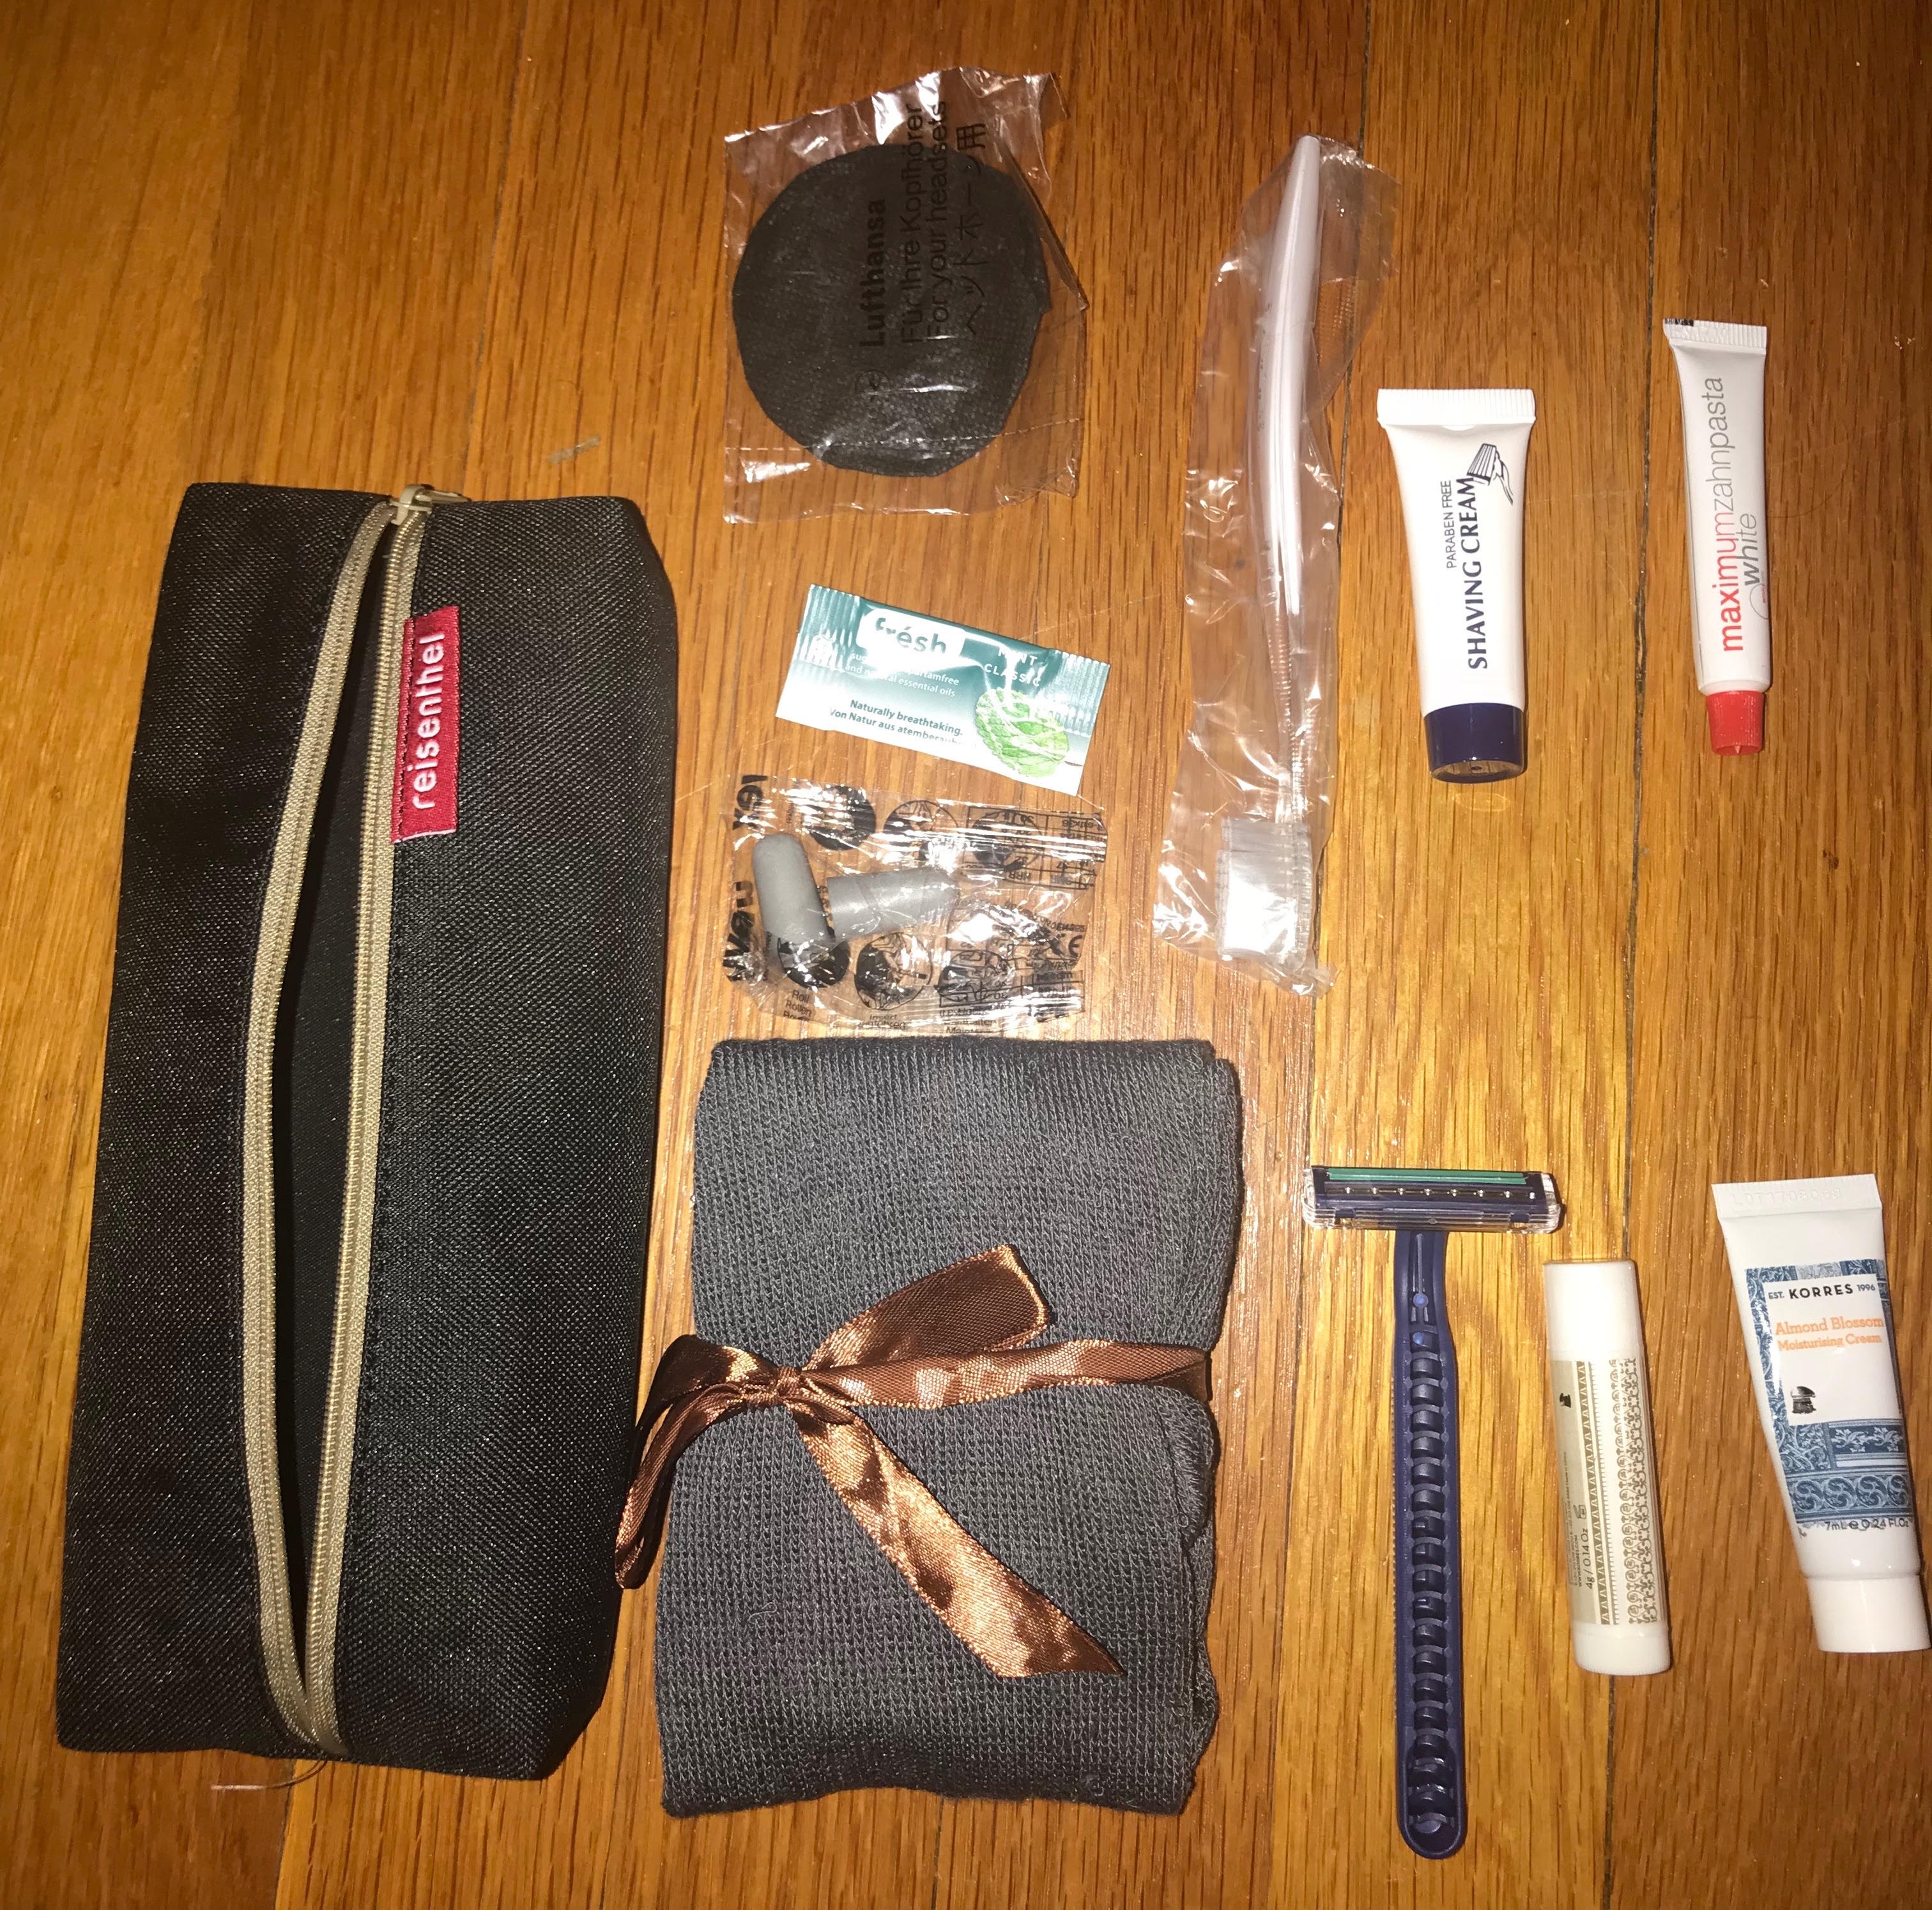
Business Class Amenity Kit
The amenity kit provided socks, eye covers, a razor/shaving cream, lip balm, moisturizing cream, mint, a toothbrush/toothpaste, ear plugs, and headphone covers for the Bose headphones they provide.
After Takeoff
We were given salted cashews as a snack and a dinner menu shortly after takeoff.
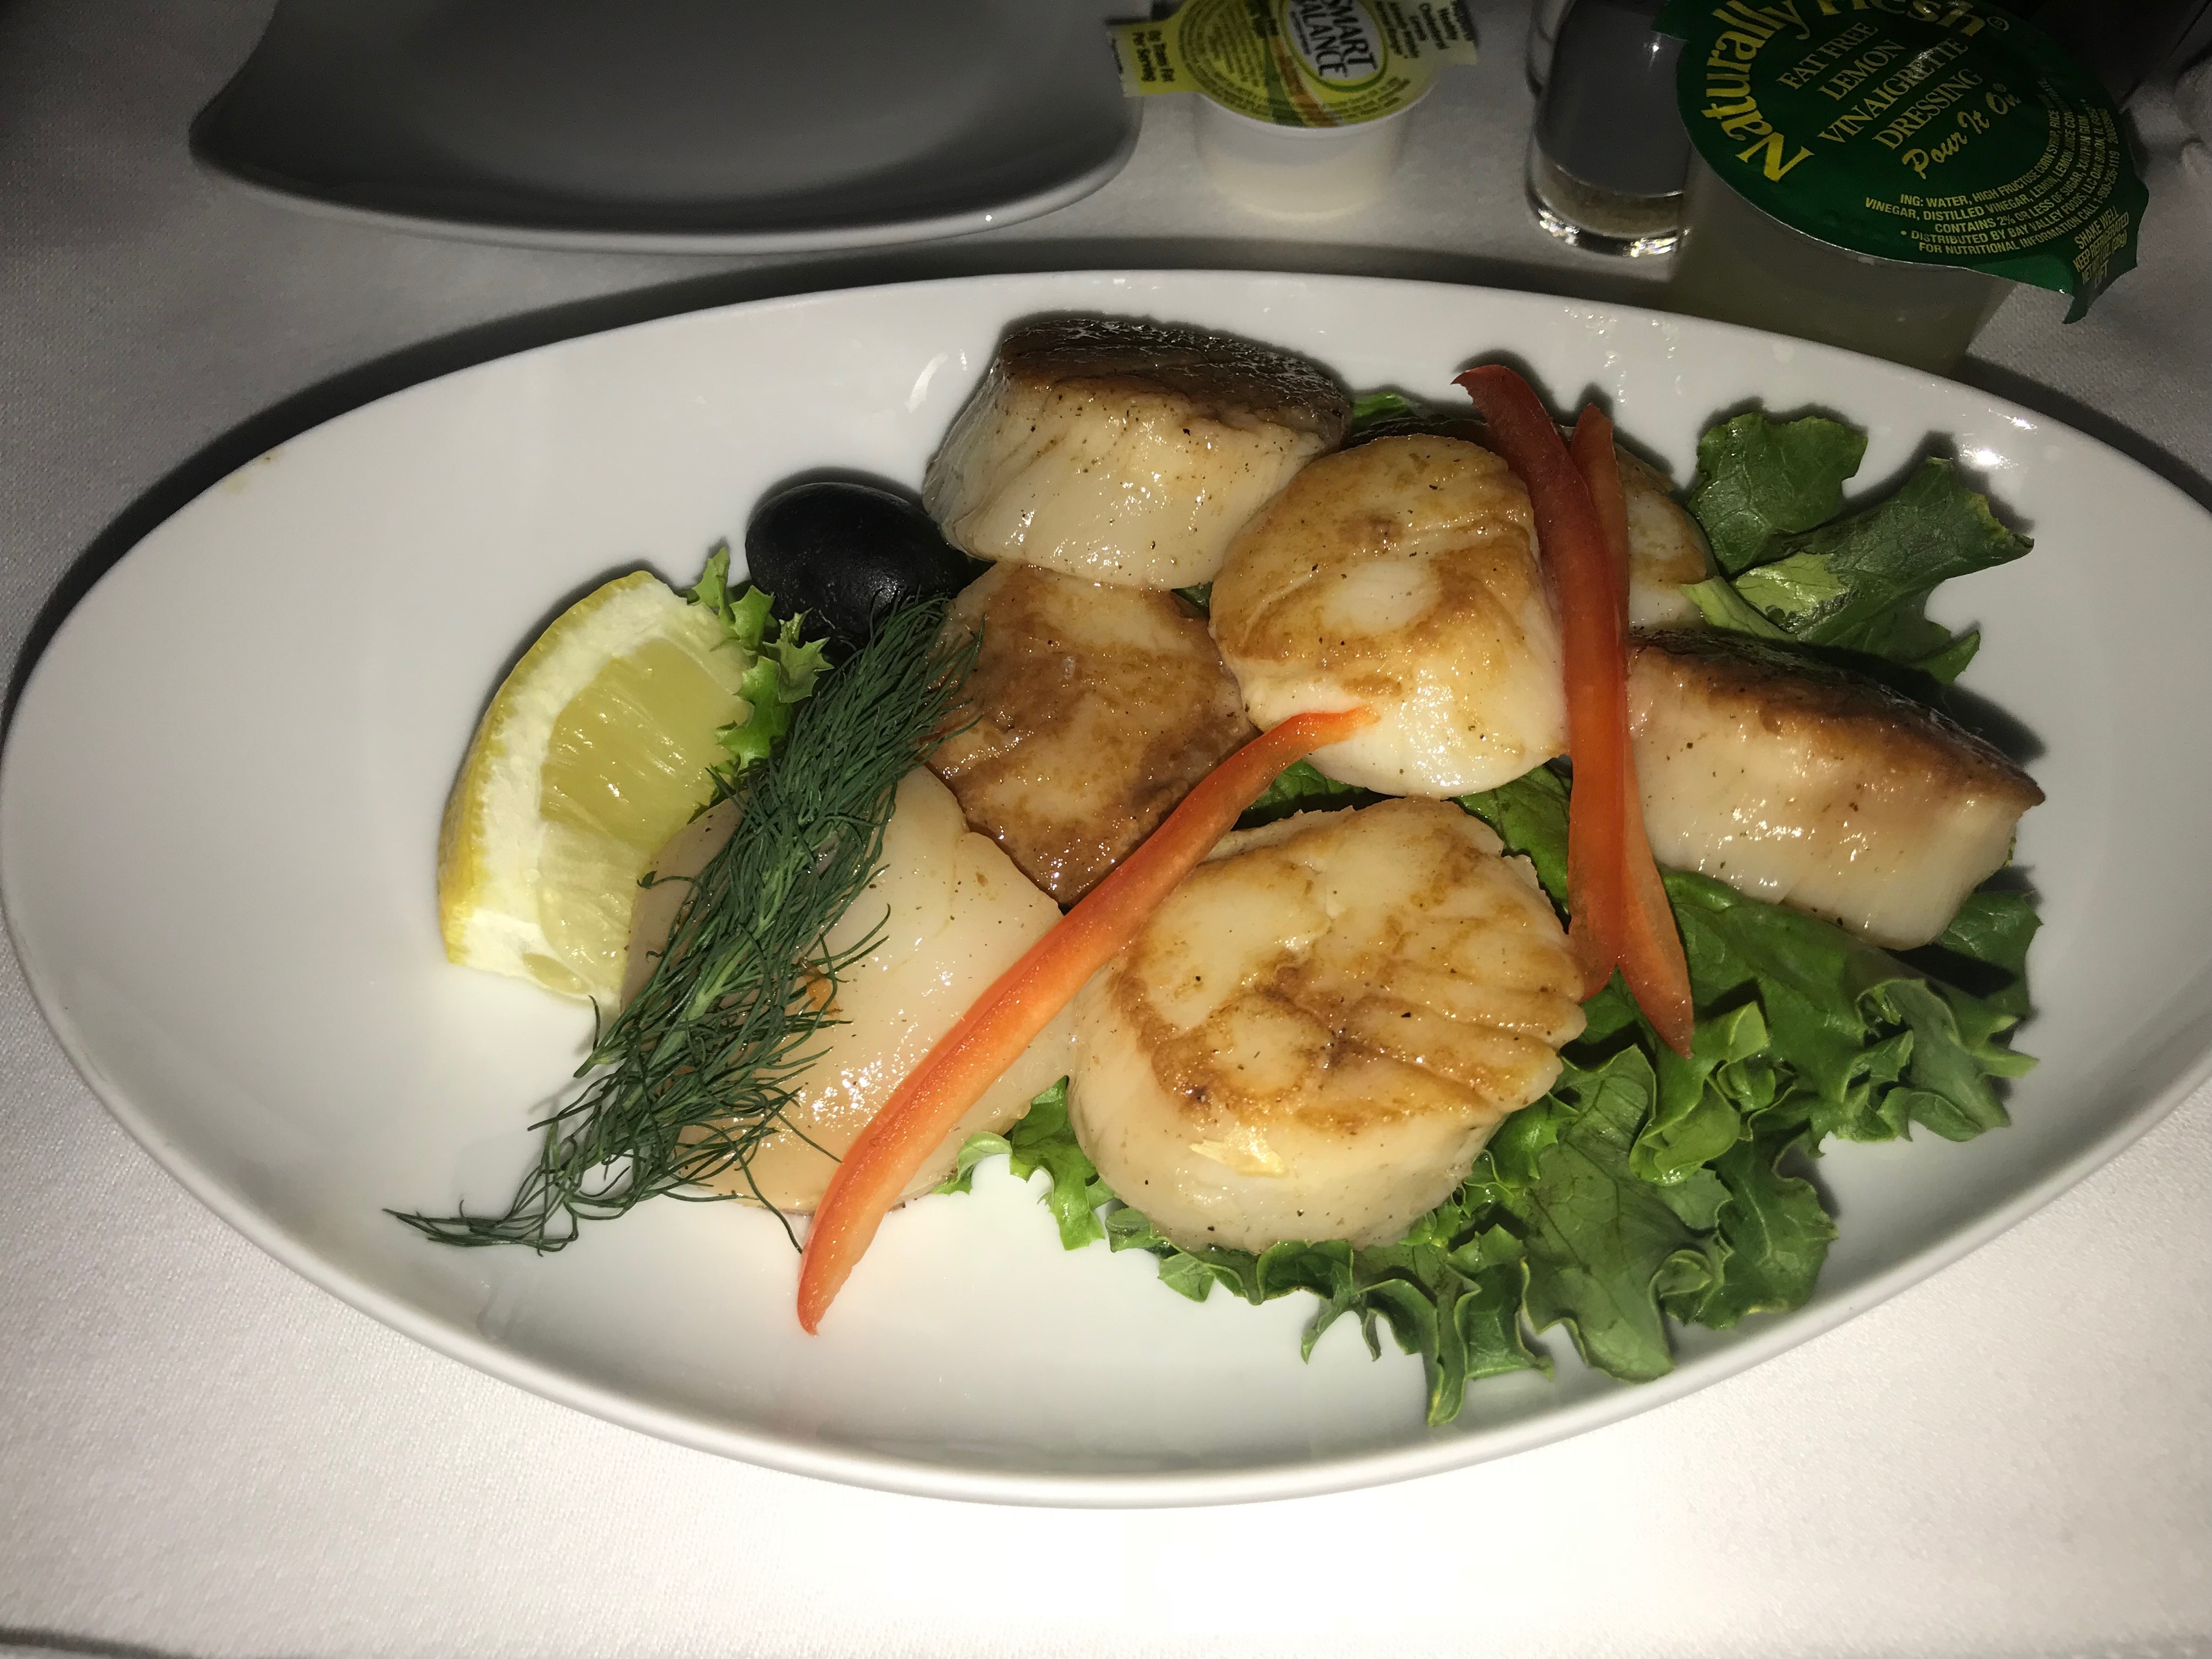
However, the menu didn’t really apply to us as Lufthansa was able to accommodate us with a halal meal that I requested during the booking process. Just for completeness, I’ll post the menu right here. We were served scallops for the appetizer for our dinner, which was delicious.
For the main course, we received a meal both of us were very familiar with:
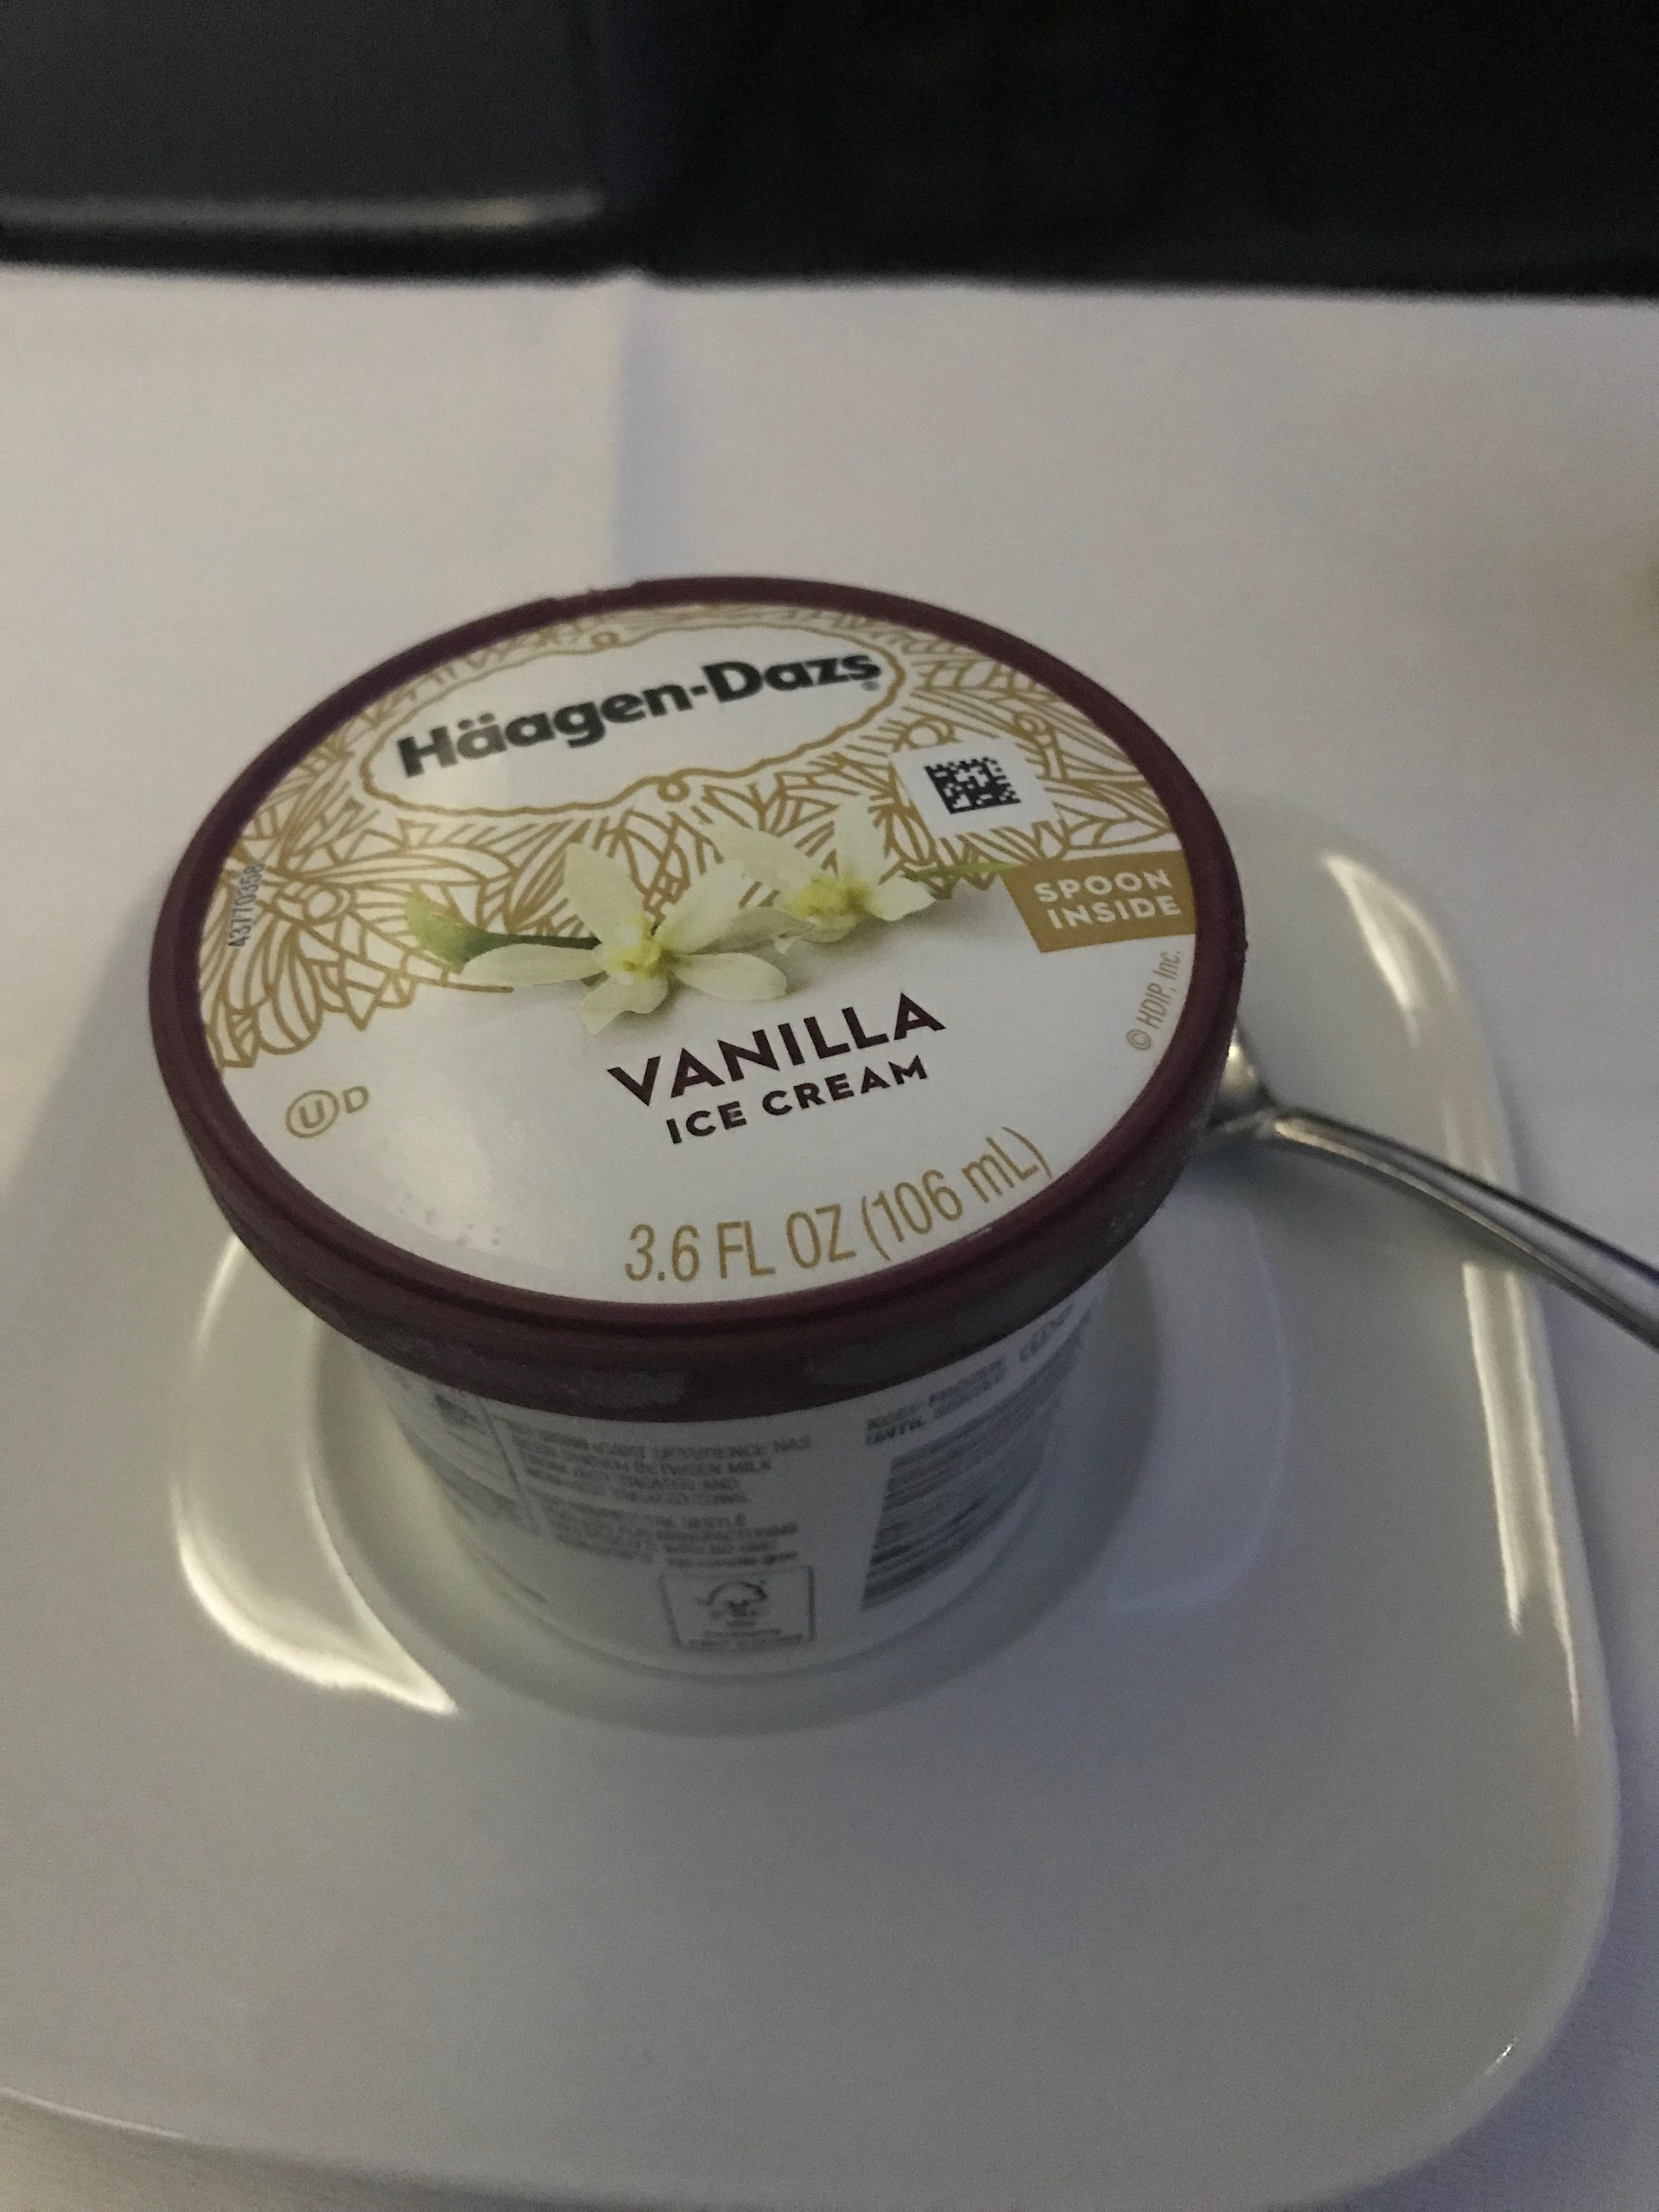
Butter chicken with jasmine rice and mixed vegetables cooked Indian-Pakistani style. This was also delicious and tasted like it was restaurant quality. It wouldn’t shock me if one of the restaurants on Devon Ave in Chicago was the supplier for halal requests. For dessert, we received a cup of Haagen Dazs vanilla ice cream. I do wish they had something different for dessert. There is nothing wrong with Haagen-Dazs, and I am a big fan of their ice cream, but I can get this from the freezer section of my local grocery store. I suppose something more unique would have been more desirable.
Post-Dinner
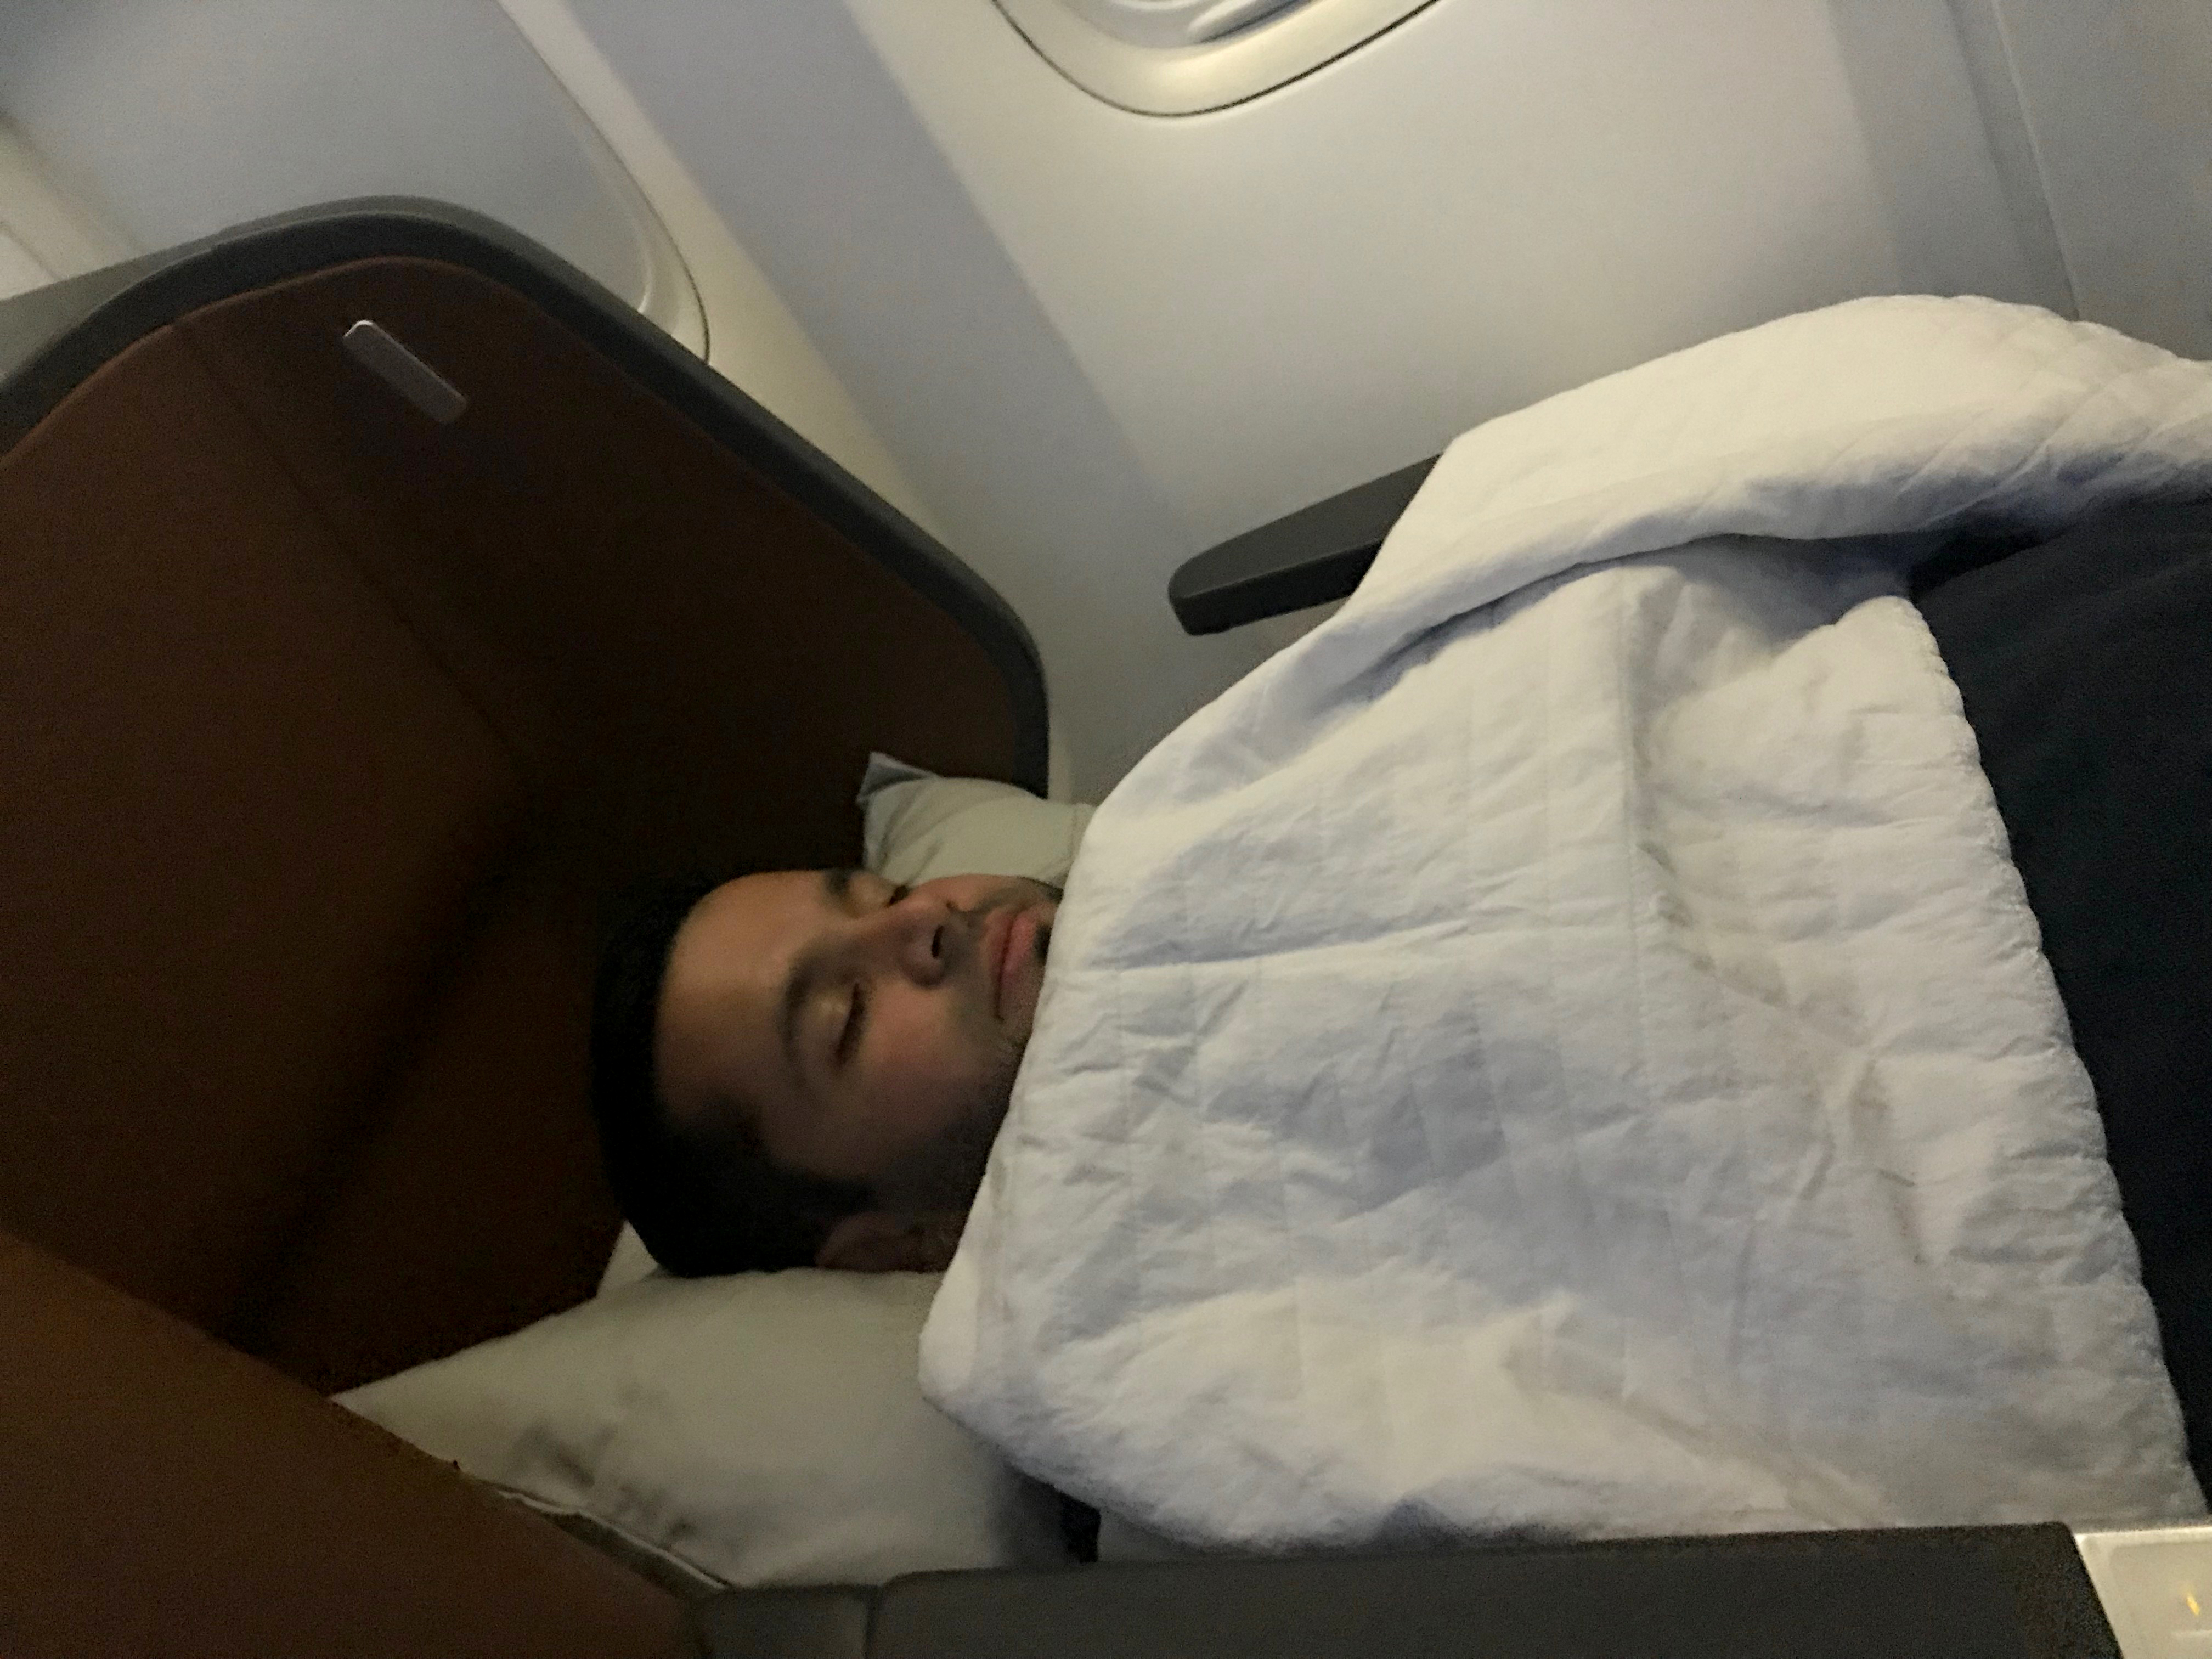
After dinner, it was time to take advantage of the lie-flat seating and get some shut-eye until breakfast.
Photo credit: Ayesha
The air hostess asked my wife and I if we wanted to be woken up for breakfast, and we both said yes. This gave us about 5.5 hours to get a good night’s sleep.
If you’re wondering, we both slept very comfortably. Lufthansa gave us lovely, lush pillows and thick blankets that were hotel-caliber. The 5.5 hours of shuteye were very refreshing, and before we knew it, it was time for breakfast.
Breakfast
We received a croissant, warm turkey slices with cucumber and lettuce, fresh fruit, and orange juice for breakfast. I have no complaints, as everything tasted great. The hostess came around a second time if we wanted another beverage or coffee. She also passed around a box of chocolates, which was a nice touch.
About an hour after breakfast concluded, the descent had begun into Frankfurt International Airport. Lufthansa did have in-flight internet, but I did not purchase it, so I have no idea how the connectivity was. This was another knock on Lufthansa since passengers in premium-class cabins should have complimentary Wi-Fi. My time would be spent eating or sleeping, and that’s precisely how it went. If I had redeemed an award ticket in the economy, I would have likely purchased in-flight wifi since I sleep very poorly when sitting upright. This was a solid business class experience for my wife and me, and the fact that she could sleep well on the plane, being 2/3 into her pregnancy, made this part of our trip highly comfortable for her. I also want to acknowledge the flight attendant who was assigned to our part of the cabin. She did an excellent job and routinely asked us if we wanted anything to drink or if we wanted any snacks. The attentiveness we got in business class was not lost on us, so thanks to Lufthansa. I’m not sure if I’ll ever extract the value I did for this award redemption, but the great thing about it is we weren’t even done. We still had access to Lufthansa Business Class Lounge during our 6-hour layover in Frankfurt and another business class flight to connect to Lisbon, Portugal. To conclude, we had a fantastic experience flying in business class on Lufthansa, and we hope to be able to do so again in the future.
On a recent trip to Chicago, which I had to book 10 days before departure, I lucked into one of Frontier Airlines’s deeply discounted flash sales. I was able to score a one-way ticket from Syracuse to Chicago (ORD) for $15.
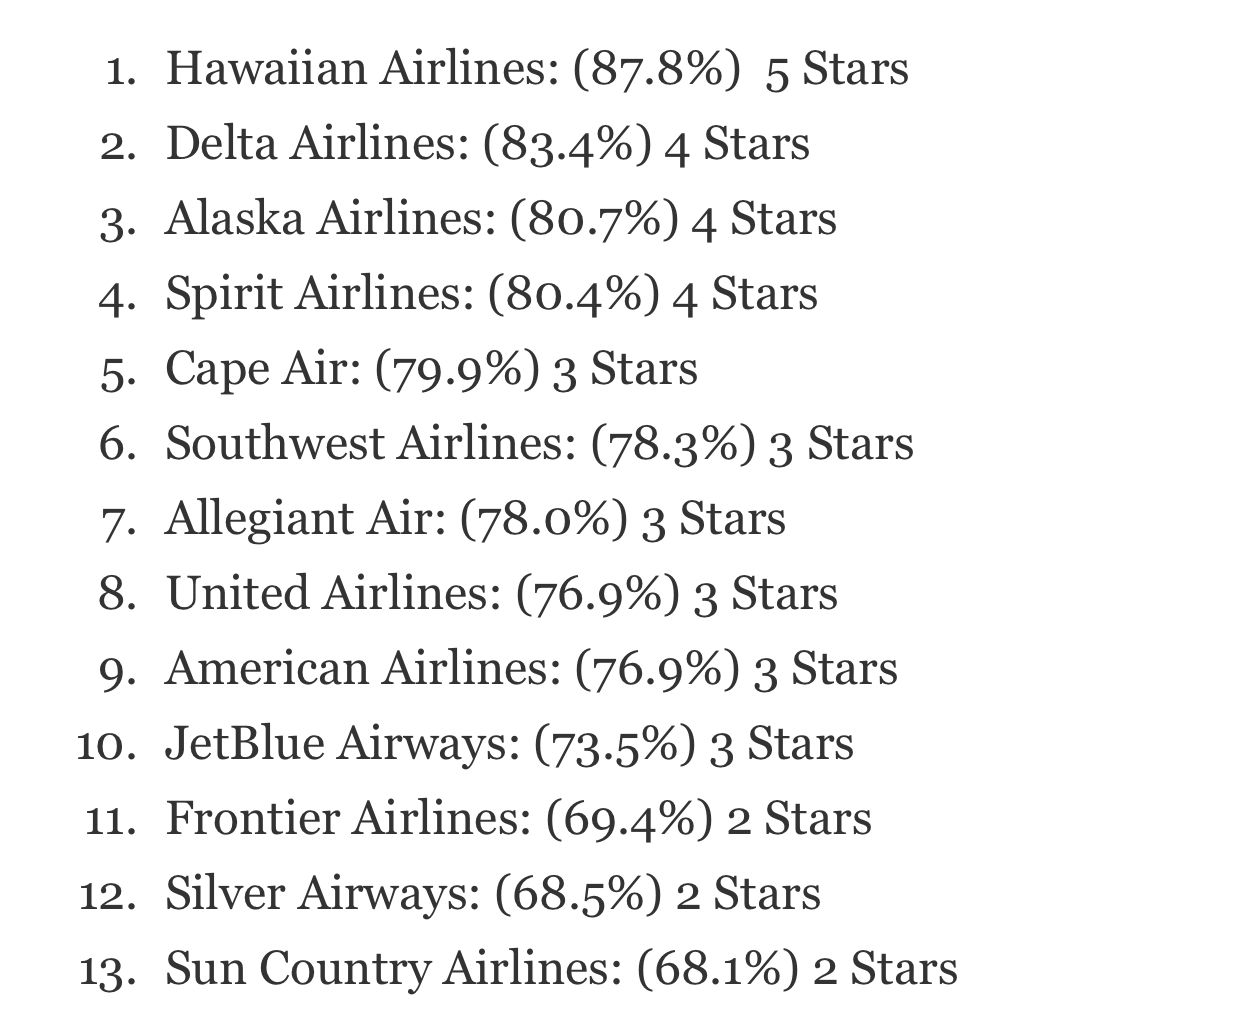
From Albany International Airport, a one-way ticket was going for nearly $400. Even when I factored in the $31 Amtrak ticket from Albany to Syracuse and the $10 Lyft ride from the train station to the airport, the savings were significant and hard to ignore. I used to be very averse to low-cost carriers such as Spirit and Frontier because of their poor on-time performance and lack of suitable contingency plans if a flight was canceled. Based on OAG’s data from June 2018 to May 2019, Spirit has improved its punctuality as it now ranks fourth among U.S. carriers in on-time performance.
Frontier, on the other hand, is still struggling with on-time performance. I had to deal with a cancellation on a Frontier flight, which I took about two weeks after this one (they handled it very well and compensated me for my ticket on American Airlines). For $15, I just had to it. That’s a ridiculously cheap price to get from point A to point B, which is almost 700 miles away. Frontier was also the last of the major remaining U.S. carriers I had yet to fly on, so this was also a great way to experience their product.
Checking In
I used Frontier’s mobile app to check in. The key with Frontier much like Spirit is knowing how their model works before flying. When you pay for your ticket, you are only entitled to the space under the seat in front of you. Carry-on bags cost $41 if you purchase them in advance and $60 if you have to pay for them at the gate. This is the part where many people who have never flown on Frontier end up getting sticker shock. My bag fit comfortably under the seat and fit above with a little nudge to push it down. Checking in a bag costs $37 if paid for during booking, $40 if paid for during check-in, and $55 if paid for at the airport. I could fit enough clothes for 3 days in the bag shown and my laptop in the laptop compartment. Something else to remember when flying on Frontier (especially when traveling with family) is that you can’t choose your seat assignment unless you pay. If you simply choose not to pay, Frontier will assign you a seat during mobile check-in. This is similar to the basic economy structure on the larger carriers and
Spirit Airlines.
Boarding
Frontier’s Airbus A320 at Syracuse Hancock International Airport. Frontier has the youngest fleet among U.S. carriers.
Frontier boards its elite members, active military members, and customers in Zone 1 (customers who have paid for their carry-on bags) first. That’s followed by Zones 2, 3, and 4. During the boarding process, the gate agents eyeball everyone’s personal items, and if they look too big to fit under the seat, they will have you put them in the bin to see if they fit (or mostly fit).
In-Flight
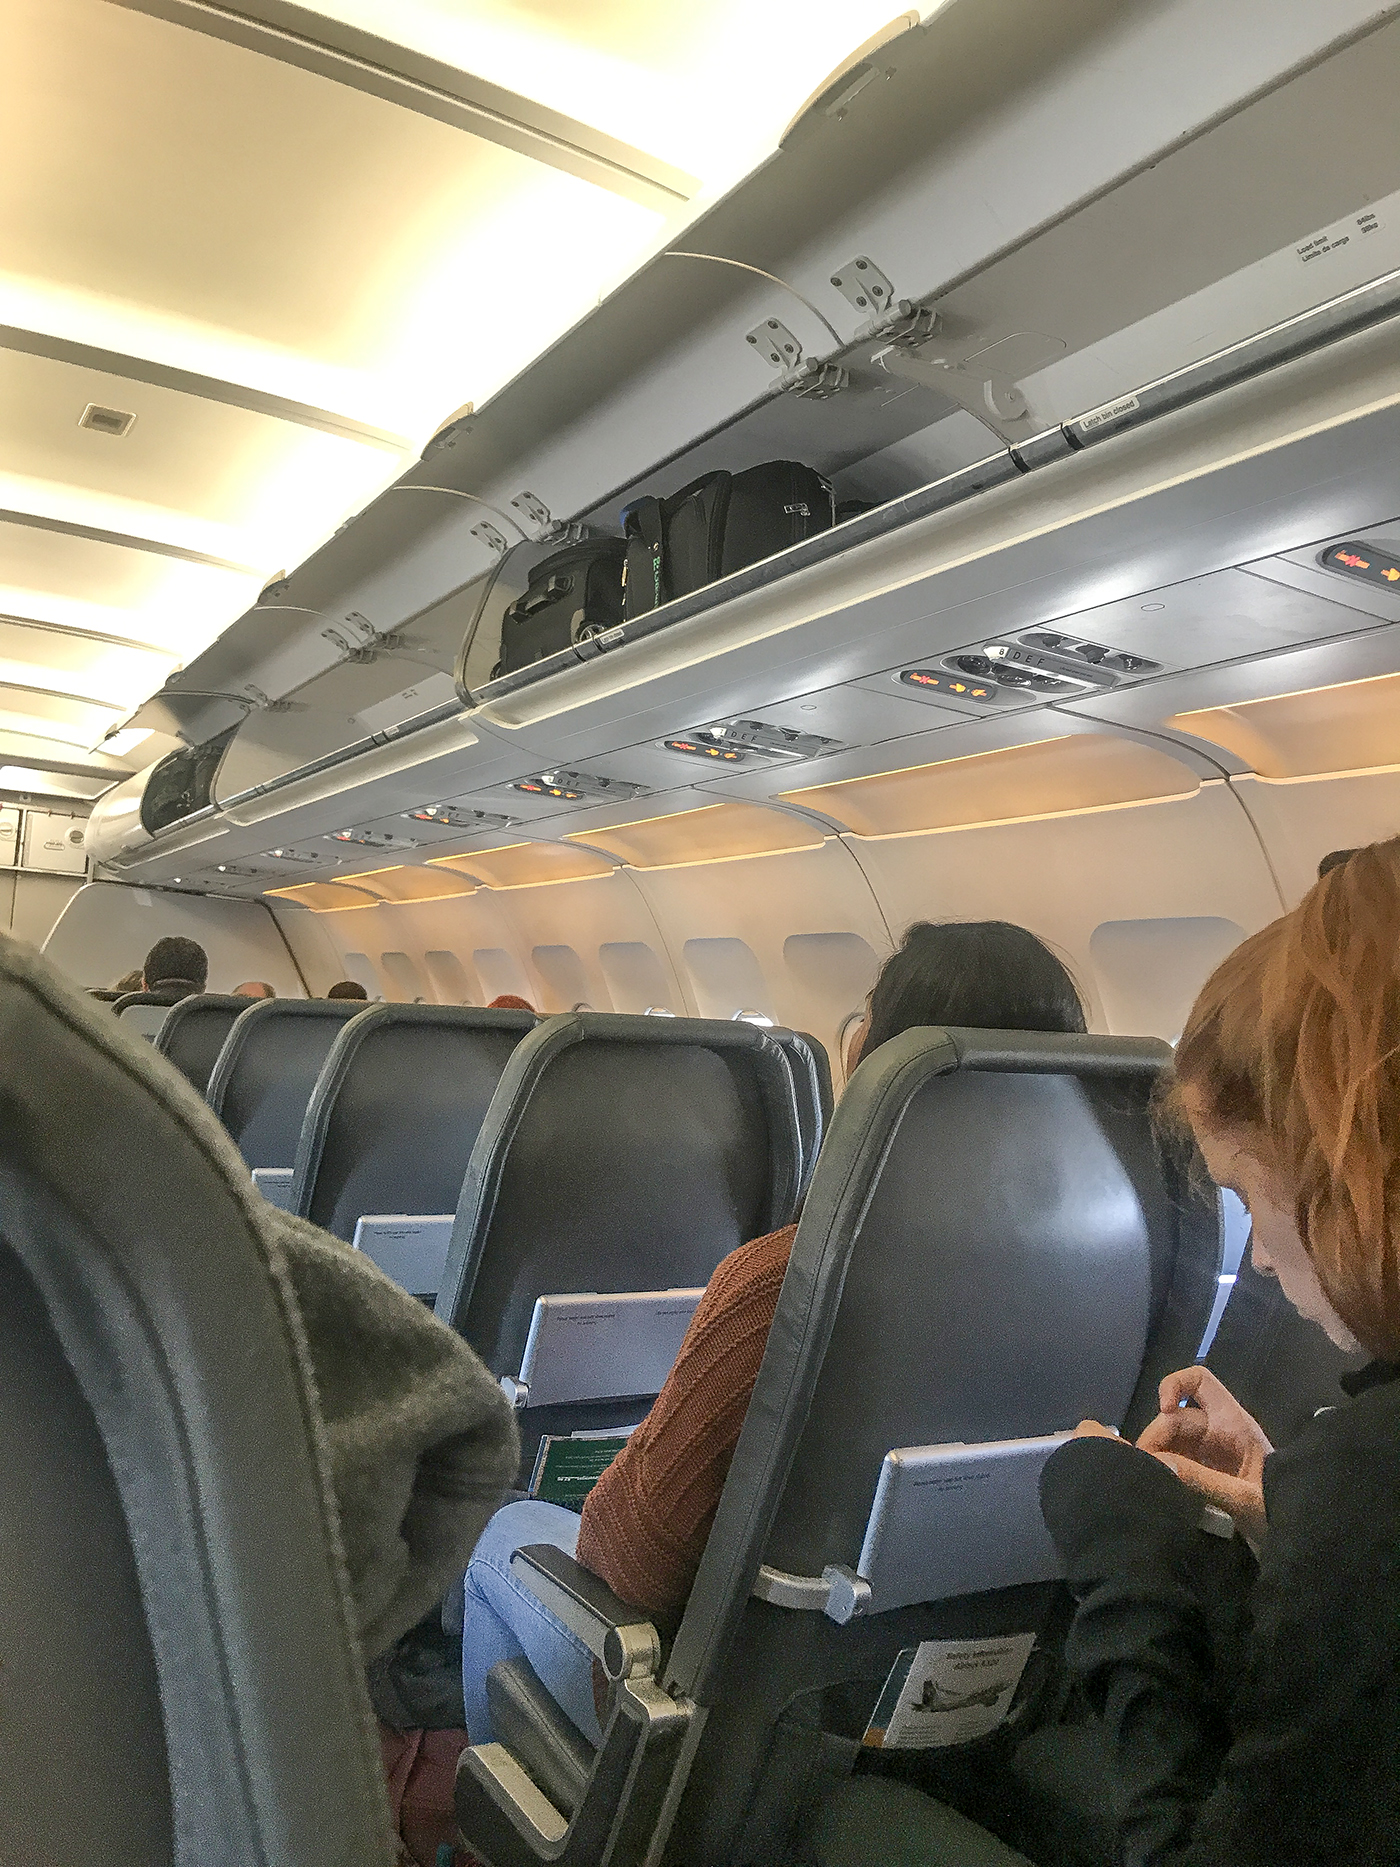
One of the beneficial aspects of having people pay for carry-on bags is that the boarding process flies by. Since people aren’t haggling for overhead bin space and attempting to stuff oversized bags, most find their seats and are seated rather quickly. The picture above illustrates this point perfectly. My flight had a lot of unused overhead bin space since most people would not pay $41 to carry a bag. I’d guess the people that did bring in a carry-on bag were Frontier Airlines Credit Card holders who have a free carry-on as a perk.
My personal item fit enough clothes for three days
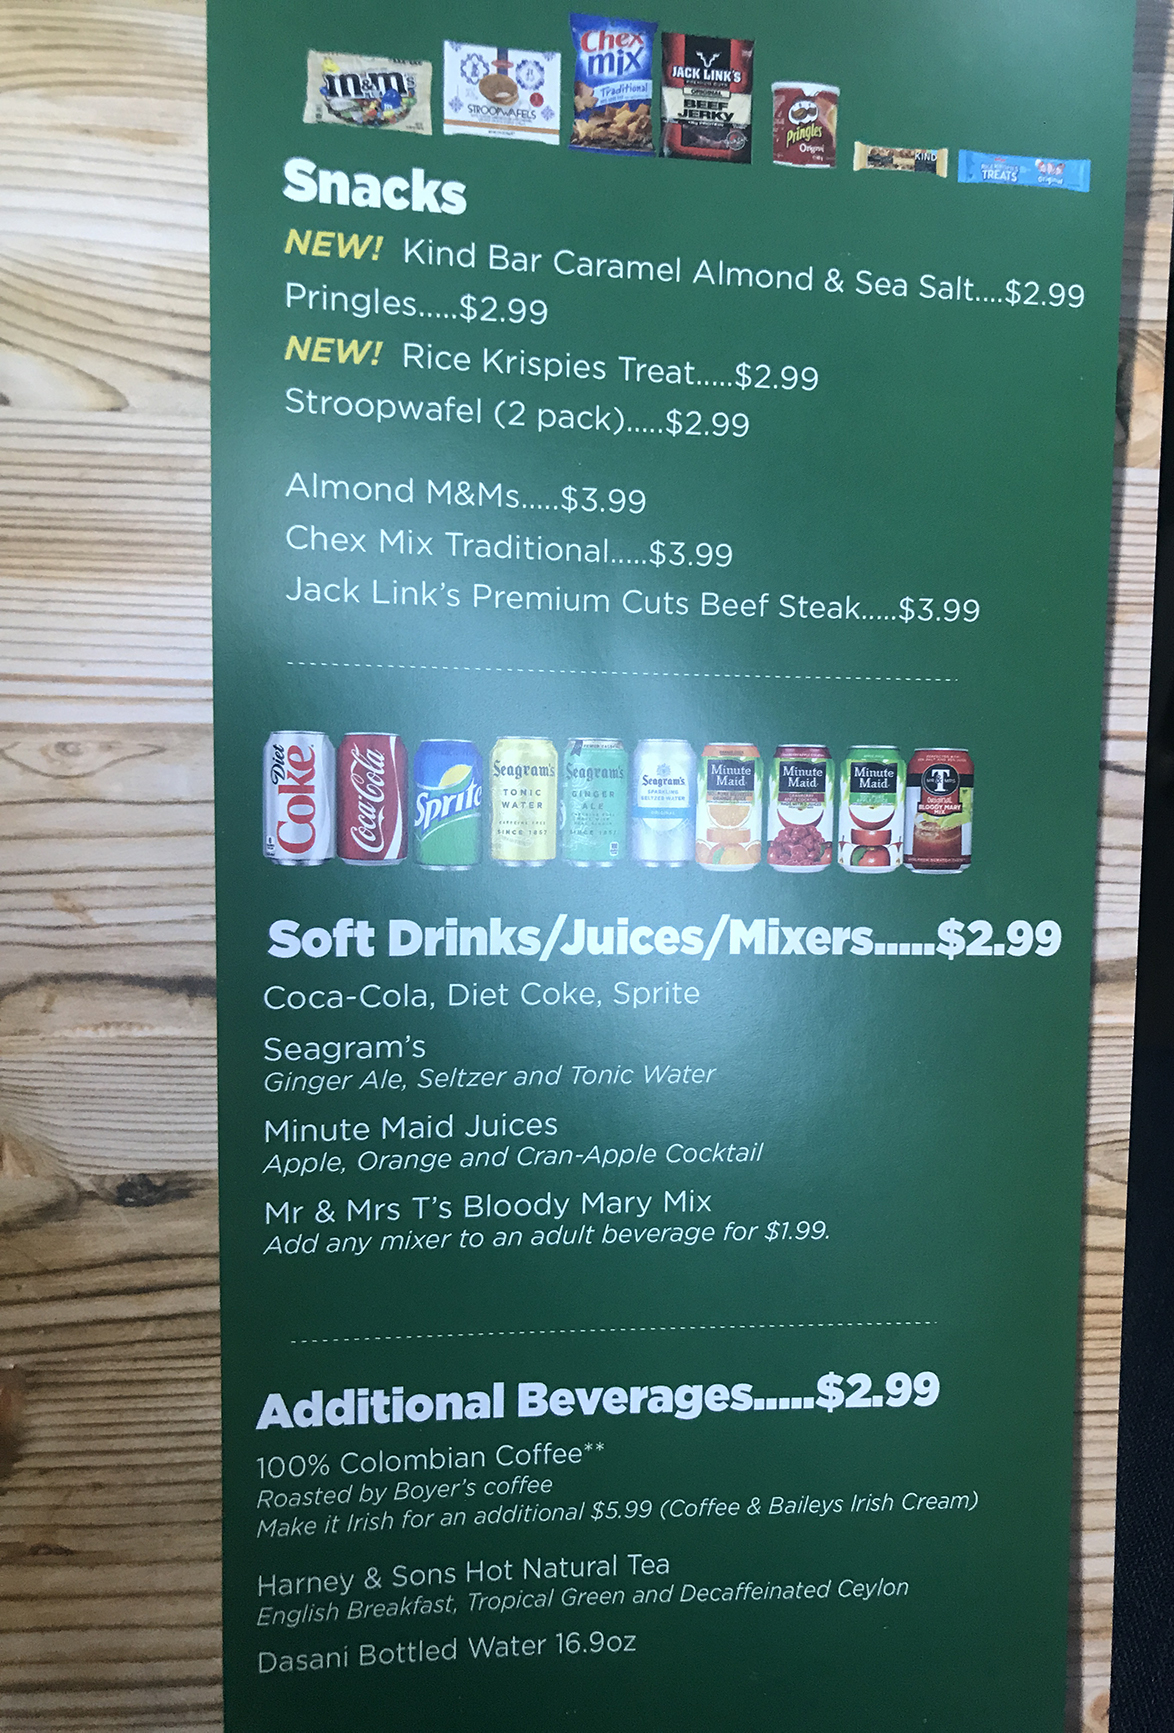
As a low-cost carrier, Frontier does not serve complimentary snacks on-board. They do serve complimentary Dasani water, which is appreciated. They do have a variety of snacks and beverages for purchase. Another thing I noticed was their tray tables being very small. It certainly won’t hold a laptop and it’s just big enough to hold a large smart phone.
Very small tray tables
There is no online WiFi or in-flight seat-back entertainment, so make sure your phones are charged, and you have downloaded a movie prior to your flight. Frontier’s business model is cramming as many seats as possible onto its Airbus airplanes. This means you won’t get a ton of leg space unless you pay extra for a “stretch seat” with additional pitch. The seats were thin, but I did not find them uncomfortable for my flight.
Frontier’s thin seats
Conclusion
My first flying on Frontier was a good experience, and I went about as expected. If you fly on Frontier, remember to sign up for their frequent flier program as there are a few benefits. First of all, Frontier awards miles based on distance flown rather than dollars spent. This means a really cheap transcontinental flight can earn you nearly 3,000 miles. A second benefit of their frequent flier program is no blackout dates. This becomes extremely valuable during peak travel times such as the Wednesday before Thanksgiving or the day before Christmas. Frontier prices these award tickets at 10k miles each way although I would assume there is probably a limited number of seats they allot for redemption. My only gripe about Frontier is their poor on-time performance and the bind it can put you in if your flight was cancelled. Since Frontier operates many routes just three or four times a week, a missed flight due to weather-related issues could mean waiting two or three days to reach your destination. If cancellation was due to their shortcomings (mechanical, lack of a pilot, etc.), they send you a link to book on a different airline and reimburse you up to $400 to get to your destination. This happened during my second time flying Frontier but I was able to book with American for a flight that departed an hour later and it didn’t end up ruining my trip. If you absolutely have to get to a place on time, say for a wedding, a job interview, etc be aware that a weather related cancellation would yield you a refund or booking on a later Frontier flight. You would have to pay your own way to make it to your destination on time.


 However, the menu didn’t really apply to us as Lufthansa was able to accommodate us with a halal meal that I requested during the booking process. Just for completeness, I’ll post the menu right here.
 We were served scallops for the appetizer for our dinner, which was delicious.