Kauai was the second island my wife and I visited during our last trip to Hawaii. We started in Maui (you can read that itinerary here) and took a one-way flight from Maui to Kaui on Hawaiian Airlines via JetBlue miles. Kauai is known as the Garden Isle for its lush tropical landscape. Based on my experience, Kauai offers more seclusion than Maui and Oahu and more lush greenery than Big Island. The islands are special in their own way, so I’d recommend experiencing all four. Here’s a rundown of what we did during our four days in Kauai.
Day One: Arrival
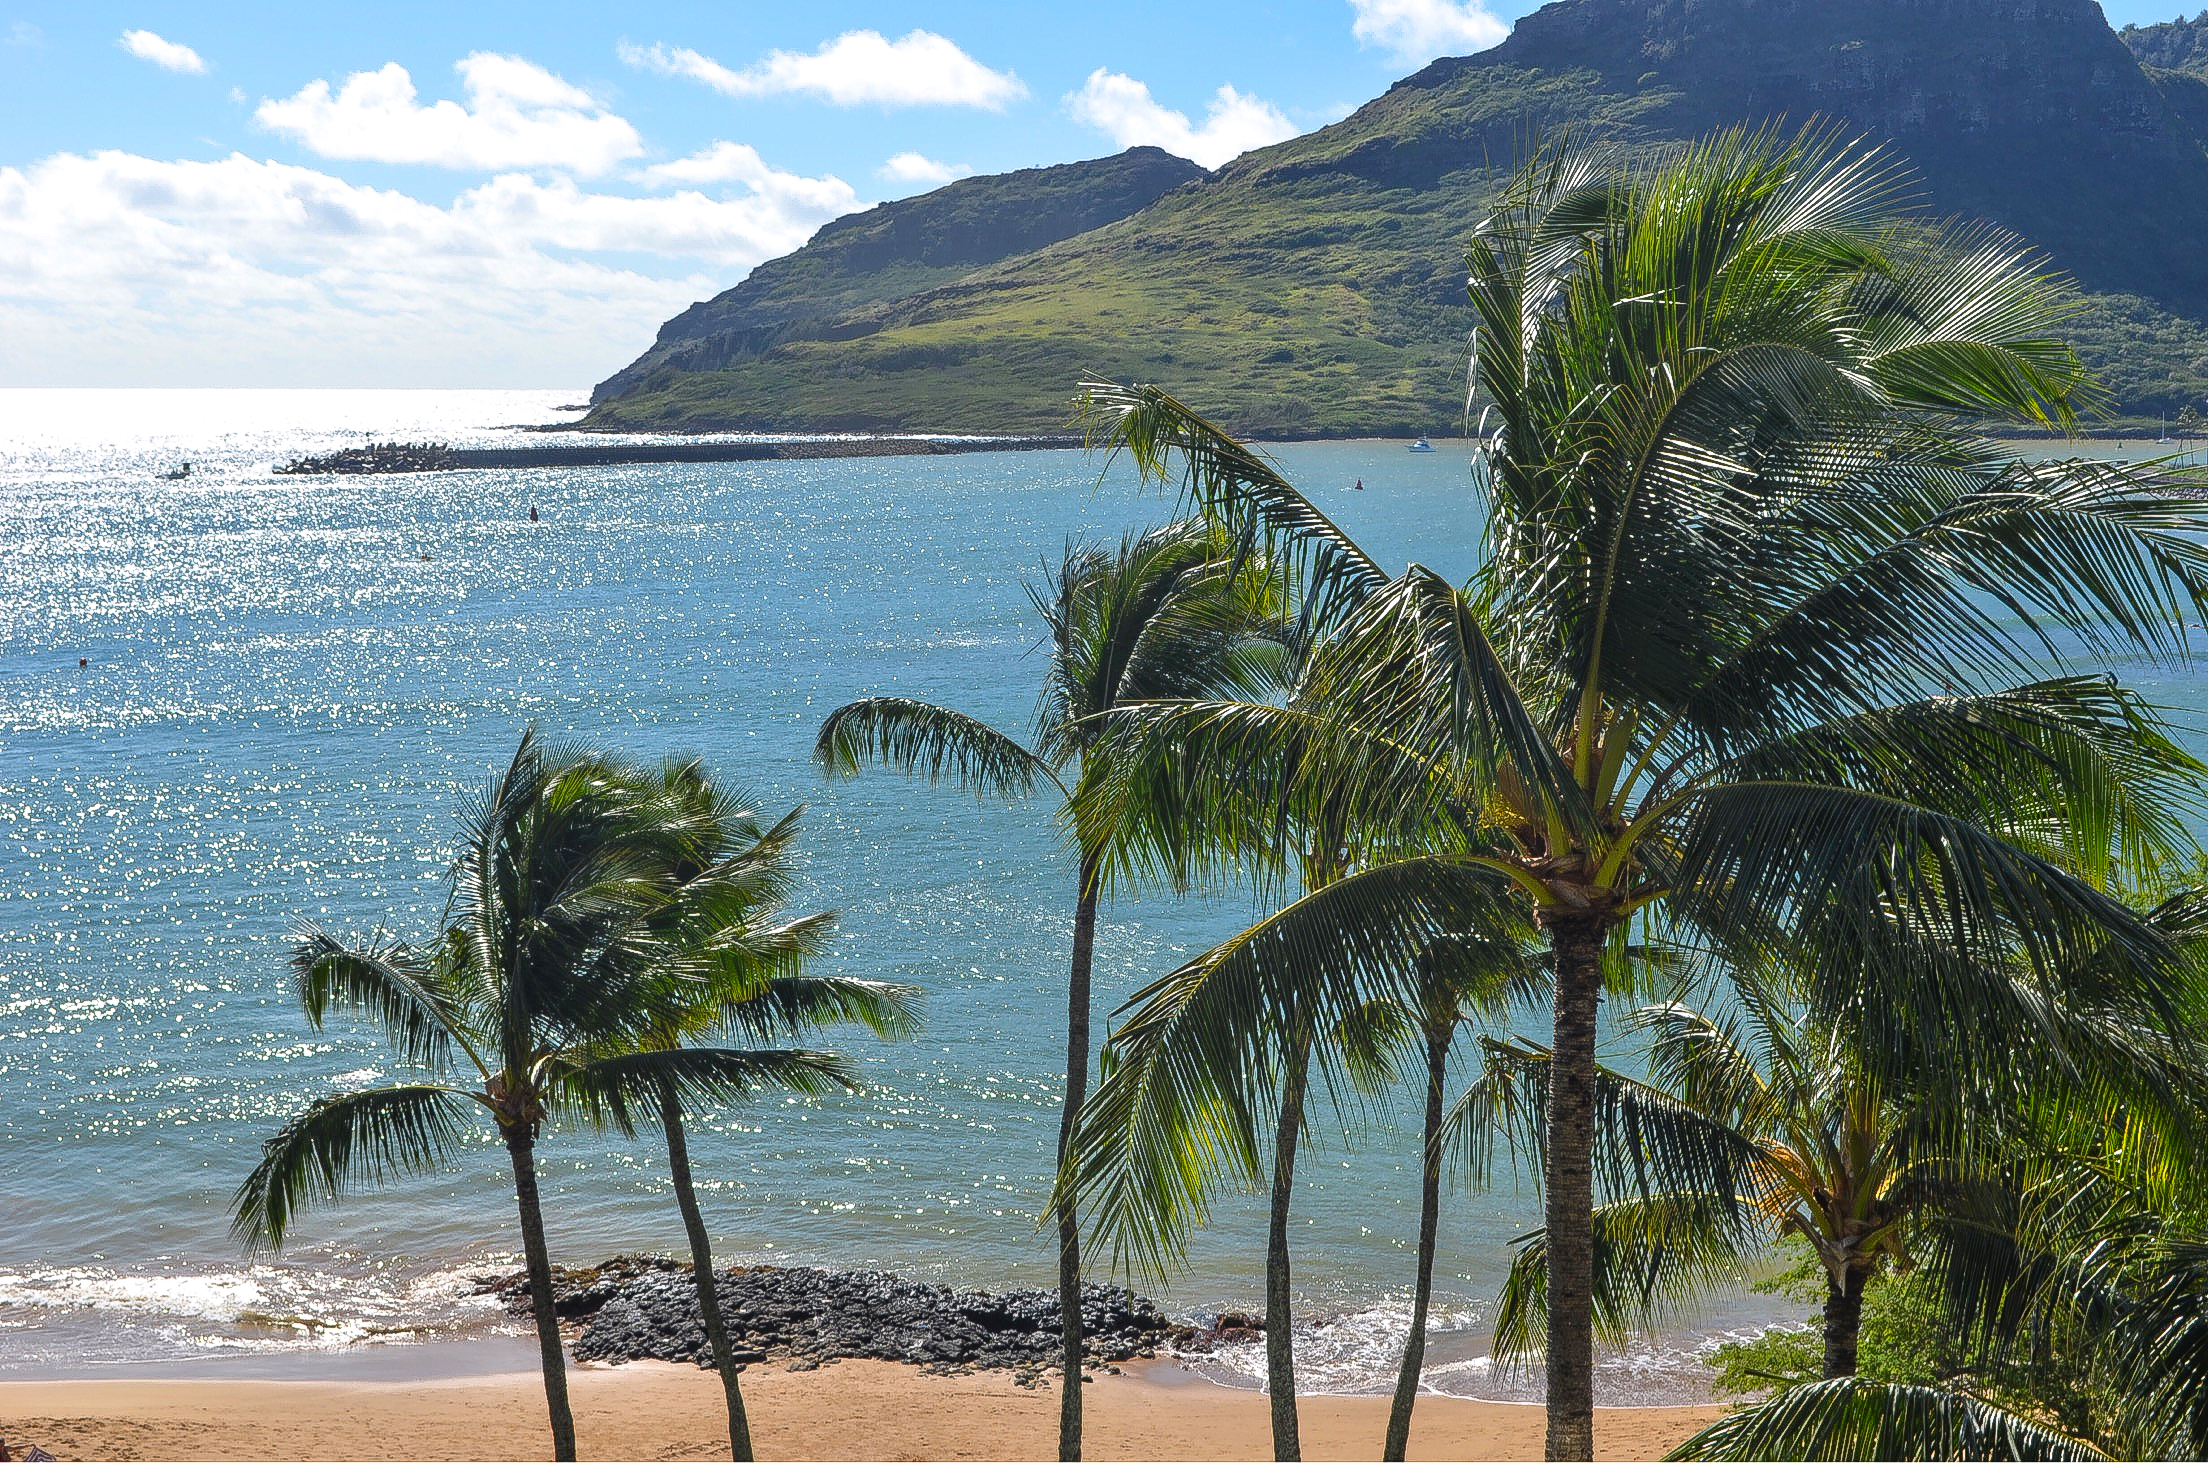
My wife and I stayed at Mariott’s Kauai Beach Club Hotel during our stay in Kauai. Great property that wasn’t expensive and located right on the beach, just 10 minutes from the airport. We rented a car in both Maui and Kauai and if you want to make the most of your time there, I’d recommend doing the same. We arrived in the late afternoon from Maui, so we spent the evening at Kalapaki Beach, right in front of our hotel, and took in the live entertainment that was offered by Marriott.
View of the beach from our balcony
Day Two: Poipu Beach
We spent almost the entire day at Poipu Beach on the second day. Of all the beaches I’ve been to in Oahu, Maui, and Kauai (I’ve been to many), this was my favorite in Hawaii. Plenty of space, clean, an abundance of marine wildlife, and a perfect place to snorkel. If you’re in Kauai, this beach is a must-see. You also get spectacular sunsets if you stick around until the late evening.
I was very fortunate to swim alongside a green sea turtle. If you snorkel in Hawaiian waters, get a GoPro or underwater camera. You’ll see some cool wildlife, and it’s worth getting on video.
Day Three: Waimea Canyon State Park
Waimea Canyon State Park is another must-see place in Kauai. From our hotel near the airport, it was about 32 miles to the entrance and took about 45 minutes. You can also take a 3.4-mile hike to the bottom of the canyon, which will take about 3 hours round-trip. The cool thing about Waimea Canyon is that the surrounding area looks like Sedona, Arizona. You’ll find red clay, orangish water, and a landscape that almost seems out of place for Hawaii.
The landscape on the periphery of Waimea Canyon
The main lookout at Waimea Canyon
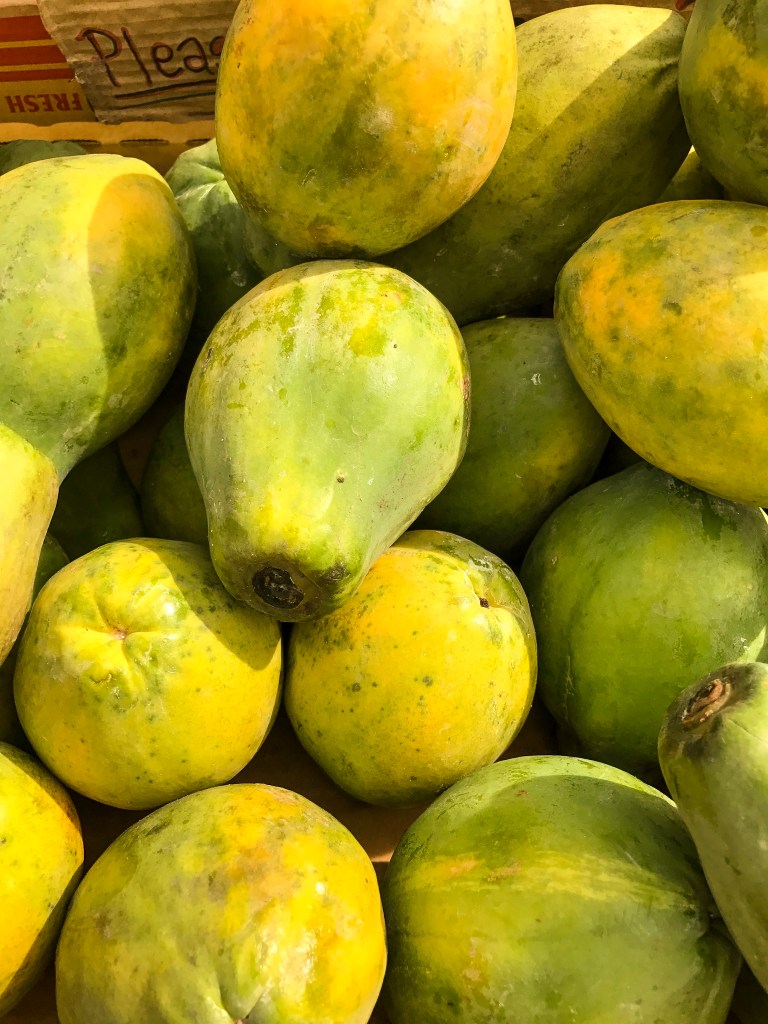
Once you’re at the main lookout point at Waimea Canyon, you’ll find local farmers selling delicious local produce such as mangos, star-fruits, and papayas. If you purchase the fruits, you’ll support locals.
Day Four: Napali Coast State Park
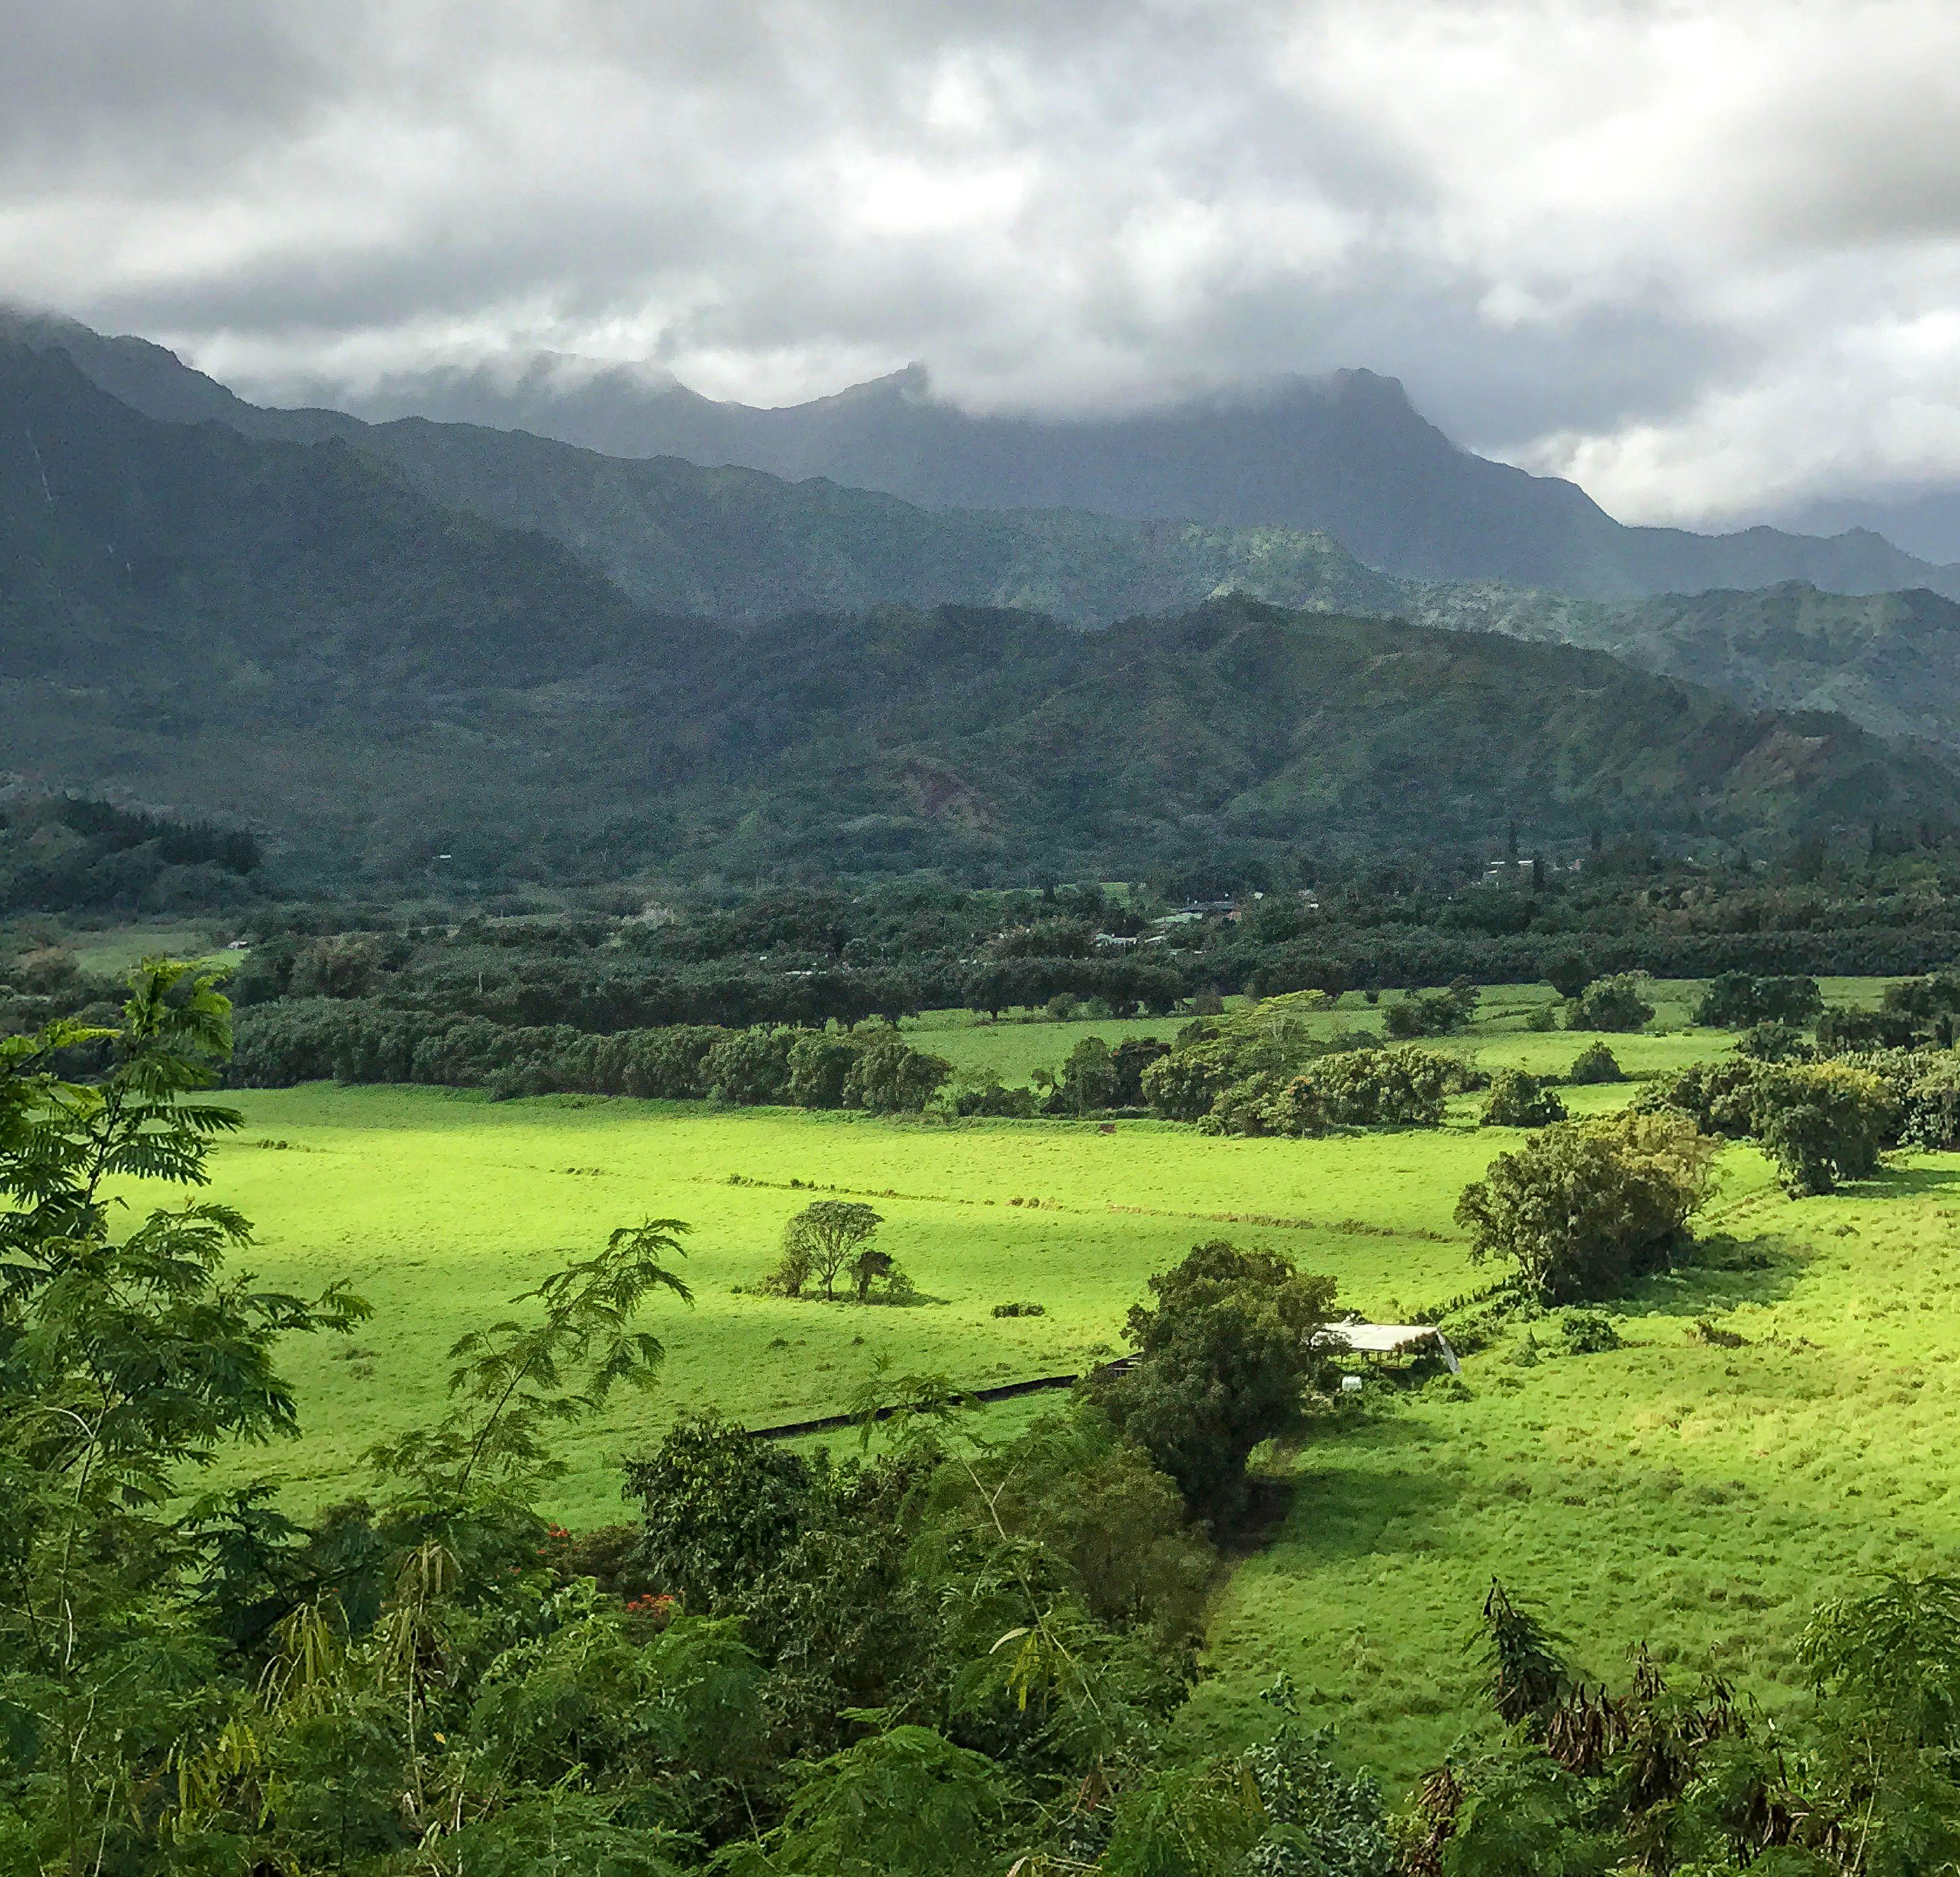
No trip to Kauai is complete without seeing Napali Coast State Park. This was one of the settings for Jurassic Park; the minute you get to the entrance, it will look familiar. My wife and I were dead set on doing the hike, and we did about 3/4 of it until park rangers told us we couldn’t go any further due to flooding from heavy rainfall the previous night. The hike is challenging, particularly the first quarter mile, where there is a lot of steep uphill climbing. Bring some solid hiking shoes, plenty of water, and a couple of granola bars if you do the hike. I saw a few people with flip-flops, and they were getting killed by mud and wet rocks. Please don’t do this hike with flip-flops or sneakers. You don’t need expensive hiking shoes; a $60 pair would do the job. I’d also bring a light raincoat since this part of Kauai gets a lot of rain, and the weather can change from hour to hour. Other options for seeing the cliffs are by boat or helicopter. I have heard the helicopter takes four people and that if you’re one of the two sitting in the rear, you’re kind of blocked off from the views compared to those sitting in the front. Just something to be aware of.
Overcast skies on our way to Napali Coast.
The weather on this part of the island changes from hour to hour. If you open any weather app on your smartphone and see rain for the entire day, take that with a grain of salt. On our drive there, we had mostly overcast skies with drizzle here and there. When we started the hike, the clouds cleared up and gave way to sunshine. Don’t be disappointed if you see overcast skies while driving there. Just wait it out, and hopefully, the sun will appear.
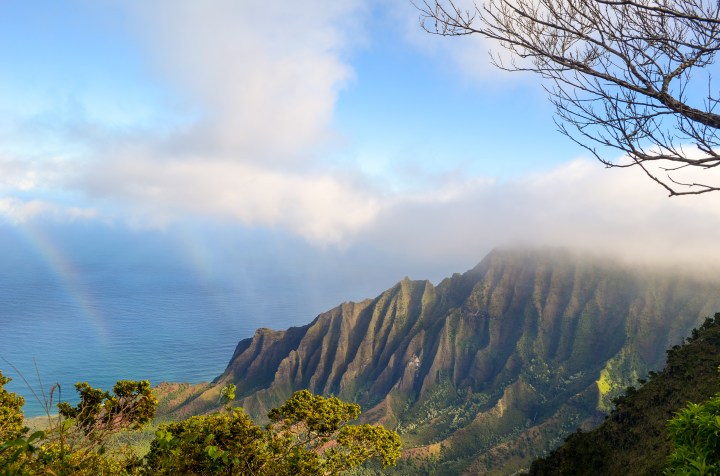
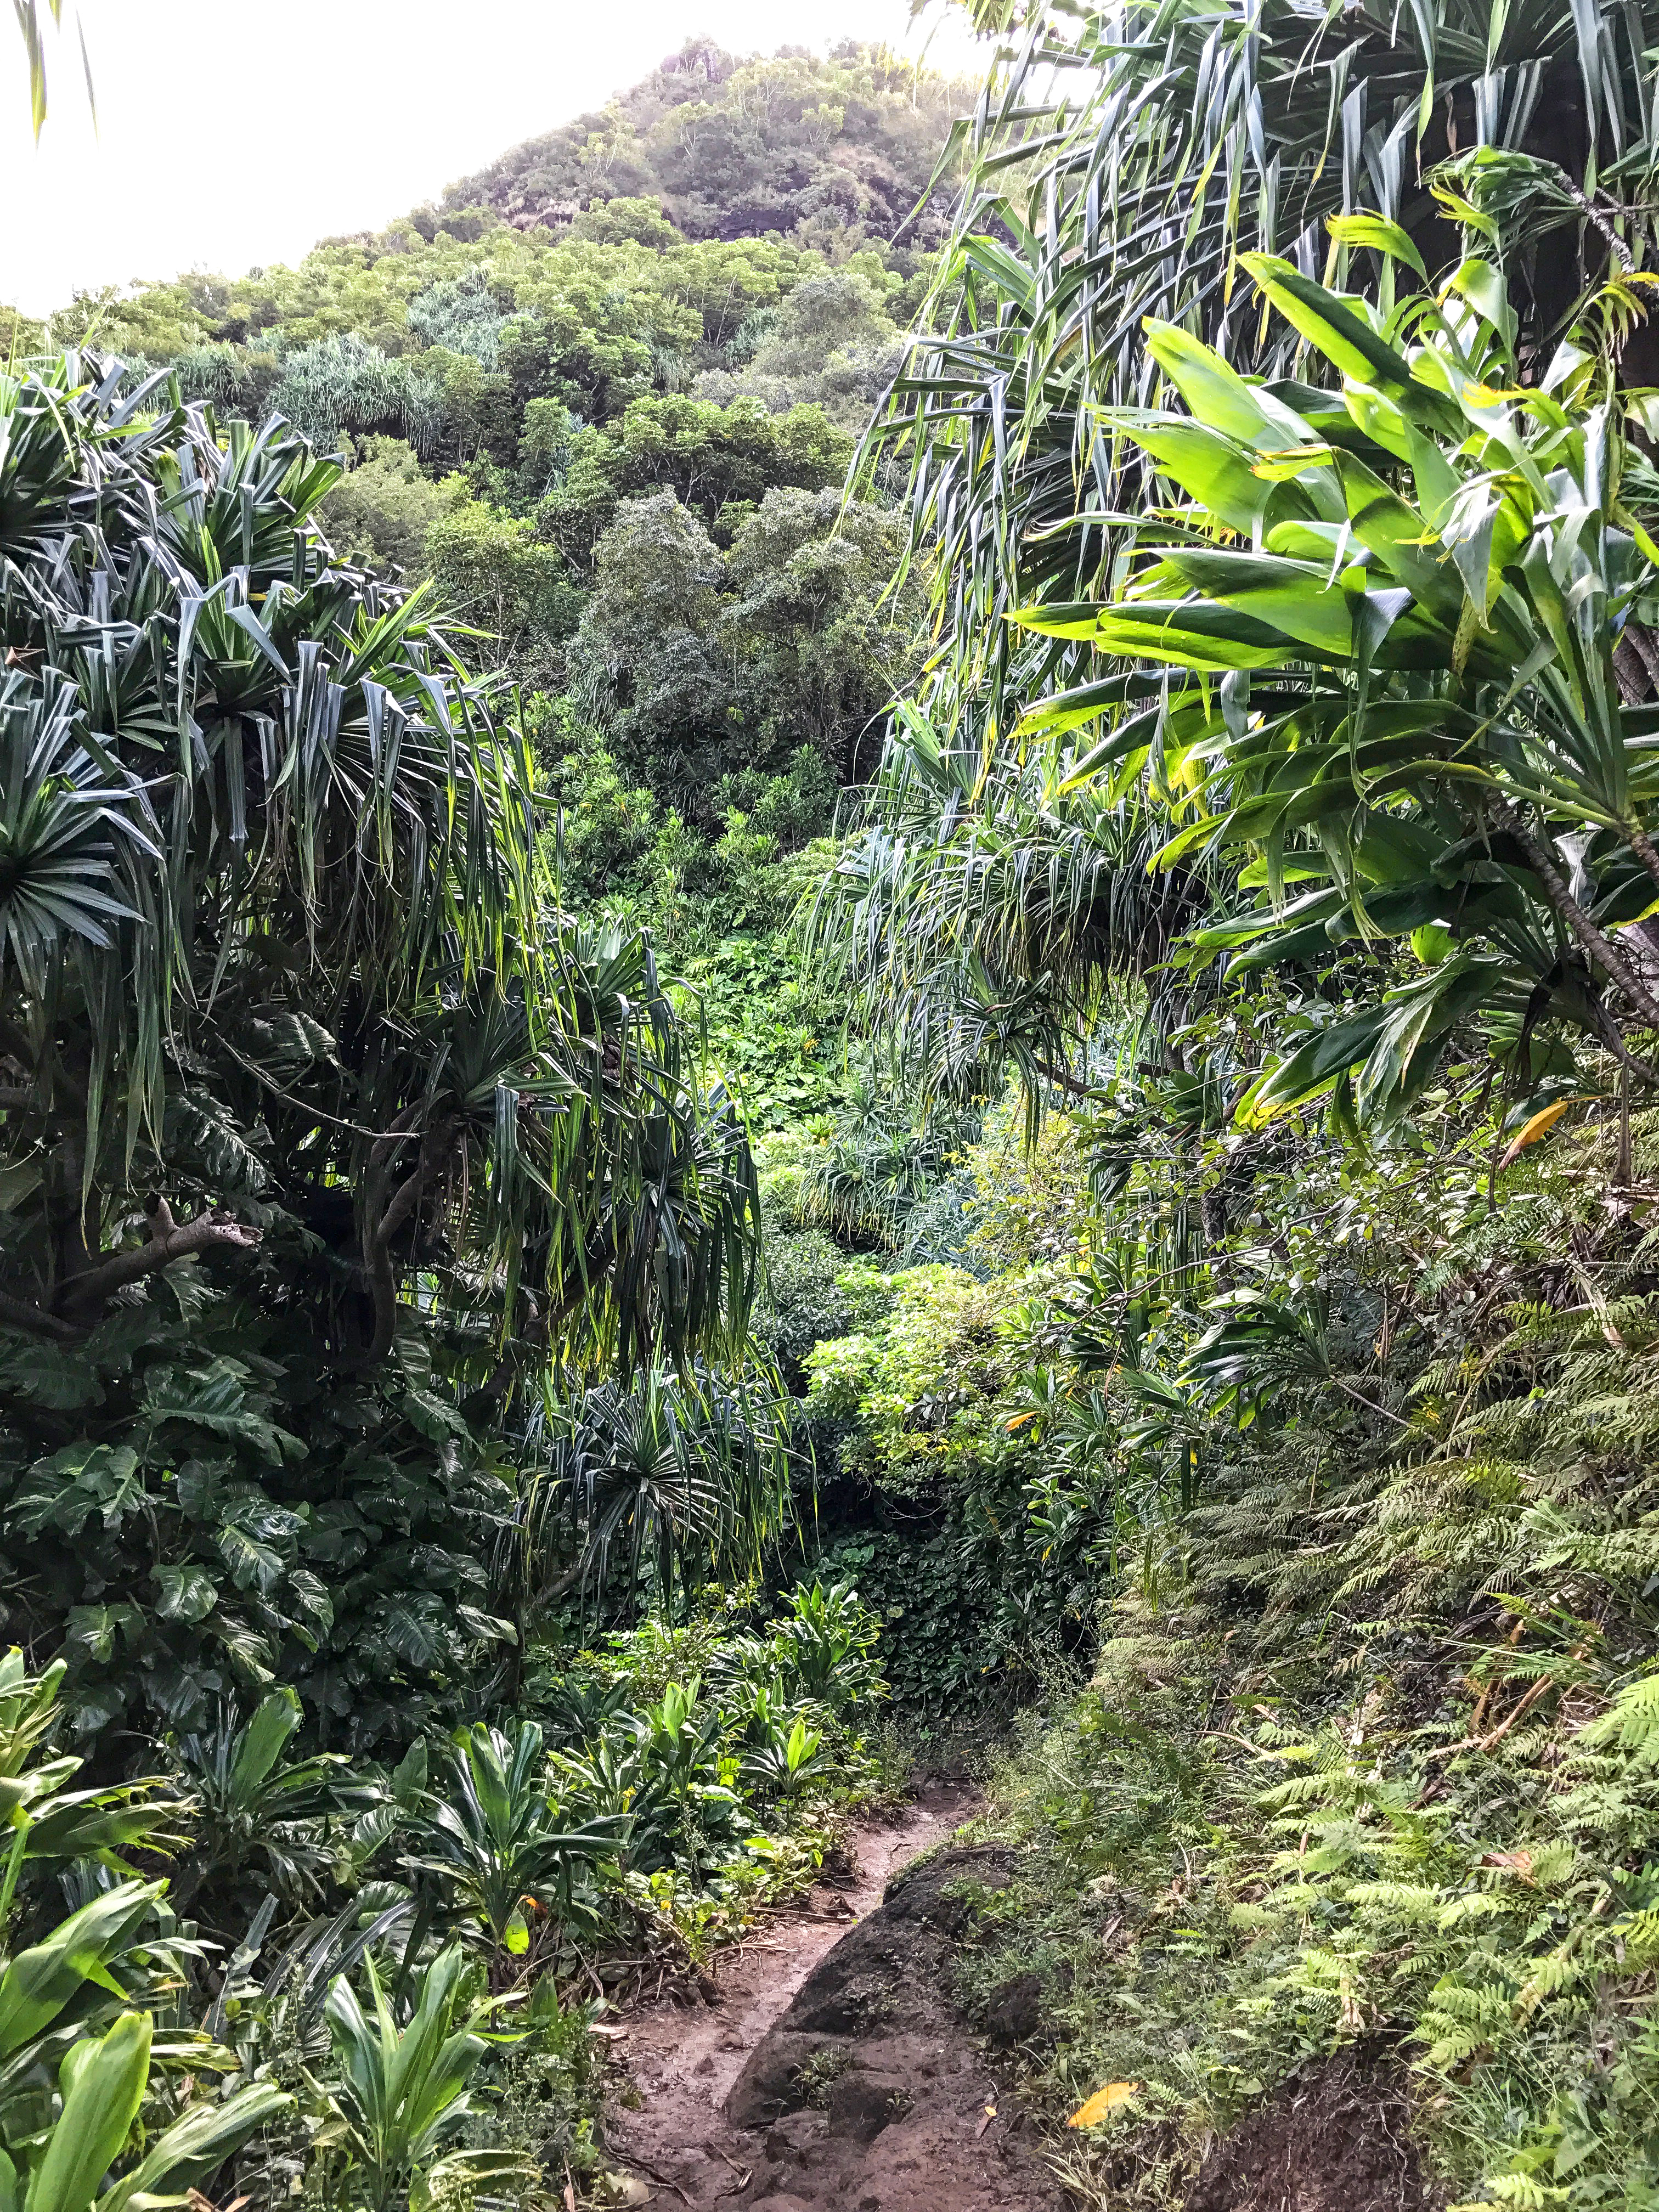
A view from the hiking trail. The skies cleared up about 40 minutes after we started hiking.The majestic cliffs and a rainbow from a distance
So this was Kauai in a nutshell. A special place and a beautiful island home to my favorite trail among the ones I have hiked in Hawaii. I wish we had an extra day here, and I know I’d be saying the same thing even if we did. If you visit Hawaii, try including Kauai in your itinerary. But only if you can do the three must-see places above. If you want to read about our most recent trip to Hawaii (Big Island), you can do that here. As always, thanks for reading.
Big Island was the fourth Hawaiian Island my wife and I visited. This trip was also our first long-distance trip with our 5-month-old son, so there was a bit of uncertainty on how he would handle being in a plane for 8+ hours. Fortunately, he was well-behaved, which gave us a ton of confidence in making future trips with him. During this trip to Hawaii, we encountered a day of heavy rain and another day when the eastern half of the island had rain, so we could not see specific points of interest. This forced us to cancel several sights we planned to visit. However, there was a positive trade-off of being “stuck” at the resort, and you will see why as you keep reading.
Day One: Arrival
We arrived at Kona International Airport on the Big Island around 3pm. We rented a car from Turo (you can read my review on Turo and our experience here), collected our luggage, and walked to the airport parking lot, where our car was already waiting for us with the keys inside. The distance to Hilton Waikoloa Village from the airport was about 20 miles and a 30-minute drive. On the way to the resort, we stopped at a lookout point to take in the scenery. If you see a lookout point anywhere, just stop your car and enjoy the views.
Vegetation growth on volcanic rock at a lookout point. The Big Island is home to multiple volcanoes, some of which are still active.
Since sunset was around 6:15 p.m., and by the time we got situated, it was already close to 5 p.m., we spent the rest of the time at the resort enjoying the sunset views.
I’ll have a separate review on the Hilton Waikoloa Village, but this was a wonderful, kid-friendly property.
Day Two: Hawaii Volcanoes National Park and Stops Along the Way
On the second day, I drove from Waikoloa to Hawaii Volcanoes National Park while making a few stops in between. I downloaded the Gypsy App specifically for the Big Island, and it guided me on where to make stops between Waikoloa and Volcanoes National Park. It costs $9.99, and you do not need to have data to work with it. The most appealing aspect of this app is that the narrator gives you historical context concerning culture and geology at various stopping points and why it might be worth stopping or skipping. The app is a knowledgeable tour guide, and I highly recommend using it for Big Island.
The Gypsy App is available for each Hawaiian Island. I highly recommend it.
Places of Interest En Route To Volcanoes National Park
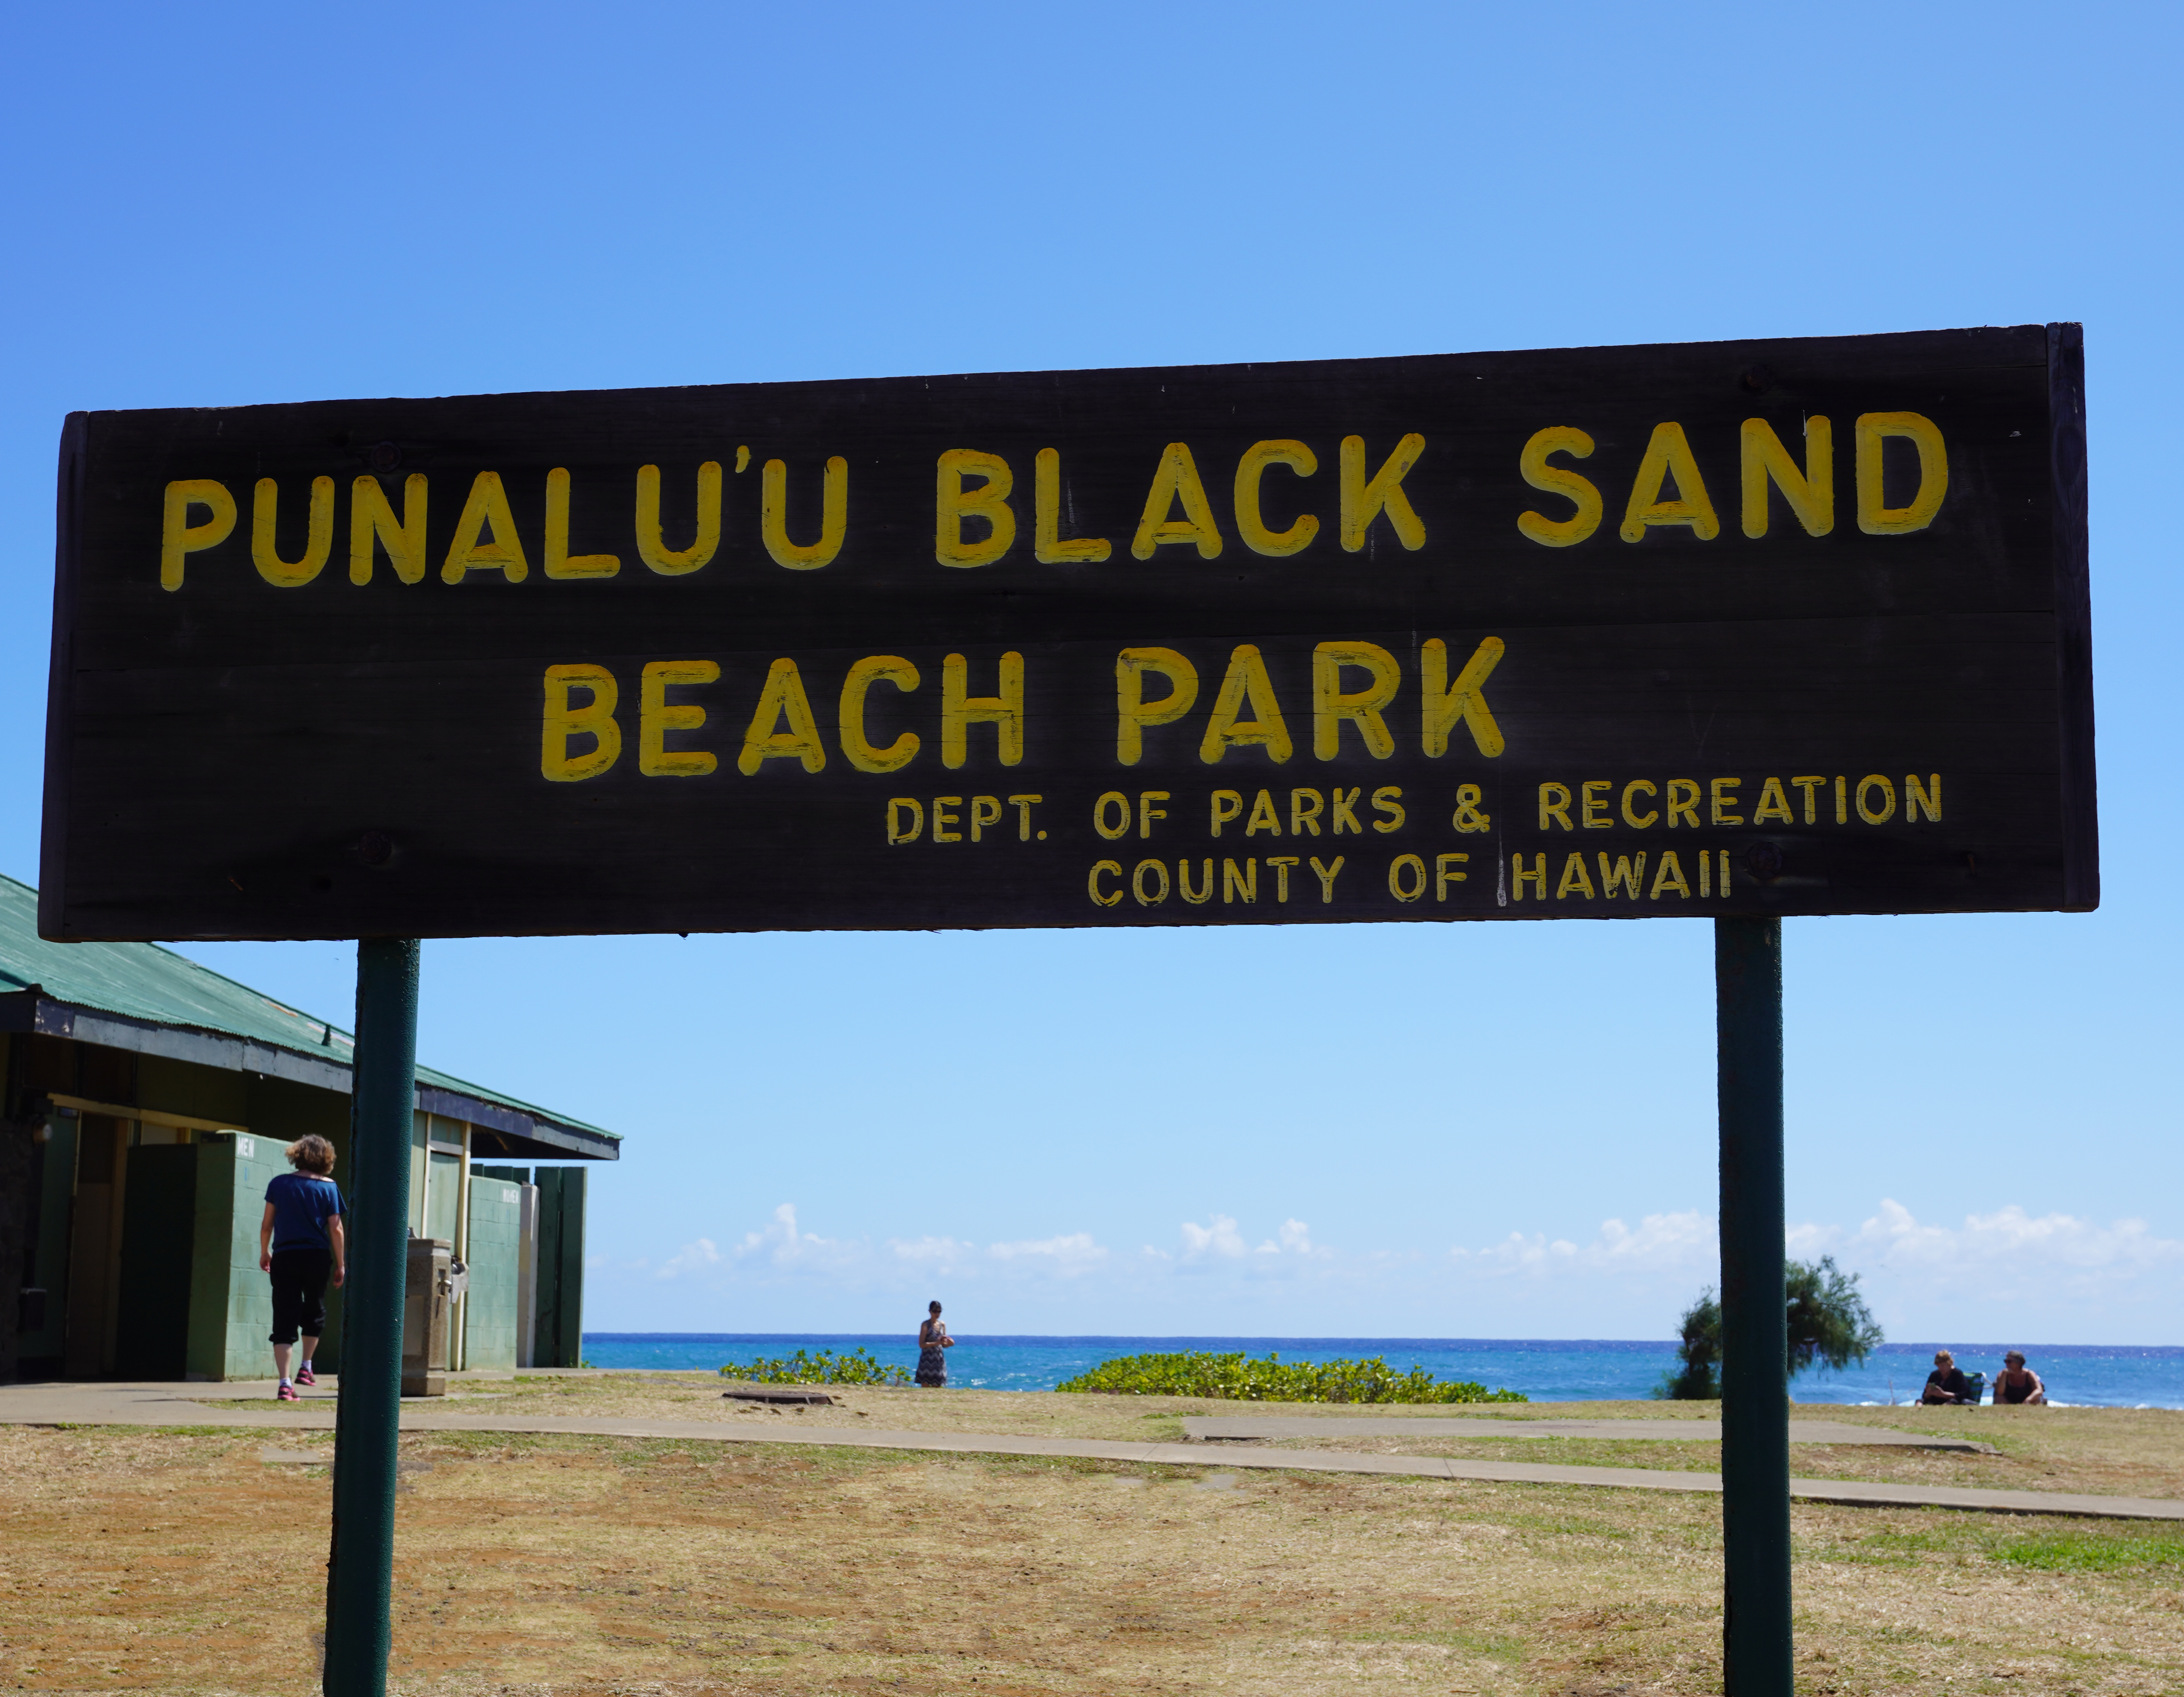
A lava field lookout point on the way to Volcanoes National Park.This viewpoint is right off the side of the road.This is one of the places you should stop by on the way to Volcanoes National Park.Punalu’u Black Sand BeachSea turtles basking in the sun at Punalu’u Black Sand Beach.
Punalu’u Black Sand Beach Park was the last place I stopped before entering Hawaii Volcanoes National Park. After this one, there are a few other points of interest, such as South Point (the southernmost point out of all the 50 states) and Papakolea Beach, a green sand beach. Getting to the beach does require over two hours of hiking, and I did not want to run out of daylight where I’d be hurrying at Volcanoes National Park. I skipped these two, but if you leave Kona before sunrise or stay in Hilo, you’ll have plenty of time to see both places.
Hawaii Volcanoes National Park
I’ve been asked if I brought my 5-month-old to this park, and the answer is no. Since the steam vents emit sulfur dioxide and hydrogen sulfide gas, I did not want to expose my son to potential lung irritants. If you’re pregnant, have heart problems, asthma, or COPD, it’s probably best to avoid the steam vents at Hawaii Volcanoes National Park.
One of the many steam vents that are found in the park.The Kilauea Caldera. You can either park at the visitors center and take a half-mile hike to get here or park on the road and walk a few hundred feet. I chose to do the hike so I could see most of the steam vents along the path.
Some parts of the park were still closed due to the eruptions from 2018, and the lava tubes were also not accessible during this time. As you continue your drive through the park, I highly recommend taking Chain of Craters Road down to the coast. It’s about 20 miles from the caldera, and the drive is among the best in any of the 50 states. Pictures don’t do it justice, so I took a short video to give you a better idea.
You will also find plenty of fantastic photo opportunities and other points of interest.
One of the scenic viewpoints on Chain of Craters Road.Pu’u Loa Petroglyphs Field
You will find a sign for the Pu’u Loa Petroglyphs Field closer to the shore. This area is considered sacred to the people of Hawaii, and you will find many symbols and images carved into the hardened lava. It’s a 1.4-mile round-trip hike, and I highly recommend it. Further down the road, you will see cliffs made from lava. This is the newest land on the Big Island, and it’s made when lava hits the water and solidifies into rock.
Chain of Craters Road on the way back also has stunning views.
Day Three: Pololu Valley and Stops Along the Way
On this day, there was rain in the forecast after 2 p.m., so I made it a point to get this hike done as early as possible. The mornings also have cooler temperatures, making a much more comfortable hike. Pololu Valley is about a 45-minute drive from Waikoloa and about 1 hour and 15 minutes from Kona. You can just park your car on the road and enjoy the views from the lookout, but if you want to get the splendid views of the valley, you should go on a hike. The hike down isn’t challenging, but it can be slippery due to the frequent rainfall in the area. Returning up the hike is moderately difficult, and you will need plenty of water and some granola bars.
Pololu Lookout. You can still enjoy these views even if you decide not to hike.Pololu Valley from the parking areaThe Black Sand Beach once you hike your way to the bottom.
This is the view you hike down for.
Waimea Valley is nearby and also offers spectacular views. However, hiking there requires entering private property, which would be considered trespassing. You can also drive down there but need an AWD or 4WD vehicle with some clearance.
Day Four: Whale Watching From Hilton Waikoloa Village (due to rain)
On this day, the plan was to go to Akaka Falls. If you are on the Big Island, visit Akaka Falls because it is beautiful from the many pictures and videos I have seen. Unfortunately, a lot of rain moved in and spanned the entire island. But there was a silver lining. As I’ve mentioned before, winter is humpback whale season in Hawaii. Mothers and calves are near the coasts of every Hawaiian island, and this is when mothers teach their young how to be whales. Since our resort was right on the shore, I took my camera and started filming when someone pointed out the whales in the distance. Then they started coming closer and closer.
Out of nowhere, the mother whale breached the water, and I was lucky enough to have my camera recording. I’m sorry for the grainy quality.
Two humpback whales right off the shore of Hilton Waikoloa Village
Whales were seen four out of the five days we stayed at Hilton Waikoloa Village, and it really made it fun and exciting for the kids who were also whale watching.
Day Five: Snorkeling in the Hilton Waikoloa Village Lagoon and visit to Kona
Day five was supposed to visit either Akaka Falls or the green sand beach. Both places had rain in the forecast, while our side of the island was bright and sunny. I used this time to go snorkeling.
This property does not have an oceanfront beach due to the powerful waves and riptide currents common along the Big Island. However, it has a sand lagoon that functions as a beach, which is excellent for swimming and snorkeling. I saw plenty of colorful fish and several sea turtles, one of which I could follow for almost two minutes.
Kona
The owner of the vehicle we rented from Turo recommended Umekes Fishmarket Bar and Grill in Kona for dinner. We ordered Tempura-Battered Fish and chips and Cajun-Style Ahi Fish Tacos, both of which were perfect.
This concluded our trip to the Big Island in Hawaii. A popular question I get asked is, among the four islands I have visited, which is my favorite? I really can’t say I have one. Each island has its own unique charm and offers something different for everyone. The Big Island has a volcanic landscape that’s so vast it can’t be seen anywhere else in Hawaii. It also has stunning valleys, excellent beaches, and a green sand beach that can’t be found on any other Hawaiian island. Since it is not as heavily trafficked by tourists, you get a better flavor of Hawaiian culture throughout the island. Big Island is also known for its coffee and macadamia nuts. If you have the time, you should visit a coffee or a macadamia nut farm. But just like the other Hawaiian islands my wife and I have been fortunate to see, the locals are wonderful. They are some of the nicest and friendliest people in the world. The physical beauty of the islands is undoubtedly attractive and makes for great pictures, but the Hawaiian people and their hospitality keep us coming back. We look forward to coming back. As always, thanks for reading.
During the second week of July, my wife, 9-month-old son, and I took a trip to Grand Cayman Island. Rather than do a separate hotel review, I will combine everything into one post since there are a few relevant details that many of you may benefit from. We chose Grand Cayman Island for a few reasons. First of all, it’s about a 3.5-hour flight from Chicago, and that’s approximately the maximum time my son will be confined to an airline cabin before he really starts getting restless. When he was five months old, we took him on an 8-hour flight to Hawaii, and he was perfectly fine. Once he hit the 7-month mark, even a 2-hour flight wasn’t easy. So, with those considerations in mind, Europe, Asia, and Hawaii were out of the question. The second reason we chose Grand Cayman is that its beaches have been spared from the seaweed problem (sargassum) that has plagued destinations such as Cancun, Dominican Republic, Barbados, and Florida. Most of these destinations do their best to remove it every morning, but despite their efforts, it’s still noticeable. The third reason we chose Grand Cayman is that it is infant/toddler/kid-friendly.
Booking
For this trip, I found saver-level award tickets (tickets that require the least number of miles for a given route) on American Airlines for 30k miles per person round trip. Since my son is a lap infant, his ticket was free. The cash price for a round-trip flight from Chicago to Grand Cayman was $455 per person. Redeeming 60k miles for $910 worth of airfare was a decent redemption.
Owen Roberts International Airport does not have jet bridges, so you must walk down the stairs and onto the tarmac before entering the terminal. The minute you land, you’re greeted by a musical band playing local music. It’s a perfect way to get the vacation vibes going.
Sunshine Suites Resort
We stayed in a boutique hotel called Sunshine Suites Resort. It’s a 3.5-star hotel that is clean, comfortable, and very reasonably priced (usually between $140-$180/night). I saw its 4.5-star rating on Trip Advisor, with over 2,000 reviews, which was good enough for me. If you need luxury accommodations with an ocean view, this hotel is not for you. The main reason I booked this hotel is we got to use all the amenities of the 5-star Westin Hotel, which is a 5-minute walk down the street. Their pool, beach, beach towels, lounge chairs, gym, and access to its restaurants and bars are all included in the mandatory $35/day resort fee. The nightly price of the Westin was 3x the price of the Sunshine Suites. Since we would be out at the beach for most of the day anyway, we needed a comfortable place to sleep, shower, and get dressed. Sunshine Suites provided all that and more, including complimentary breakfast. You can click on the video below to get an idea of the rooms and the property. FYI, if you don’t want to walk to the Westin, you can go to the front desk at Sunshine Suites and request a driver to drop you off in their golf cart. It works the same way if you want to return from the Westin. Just let the front desk at the Westin know in that case.
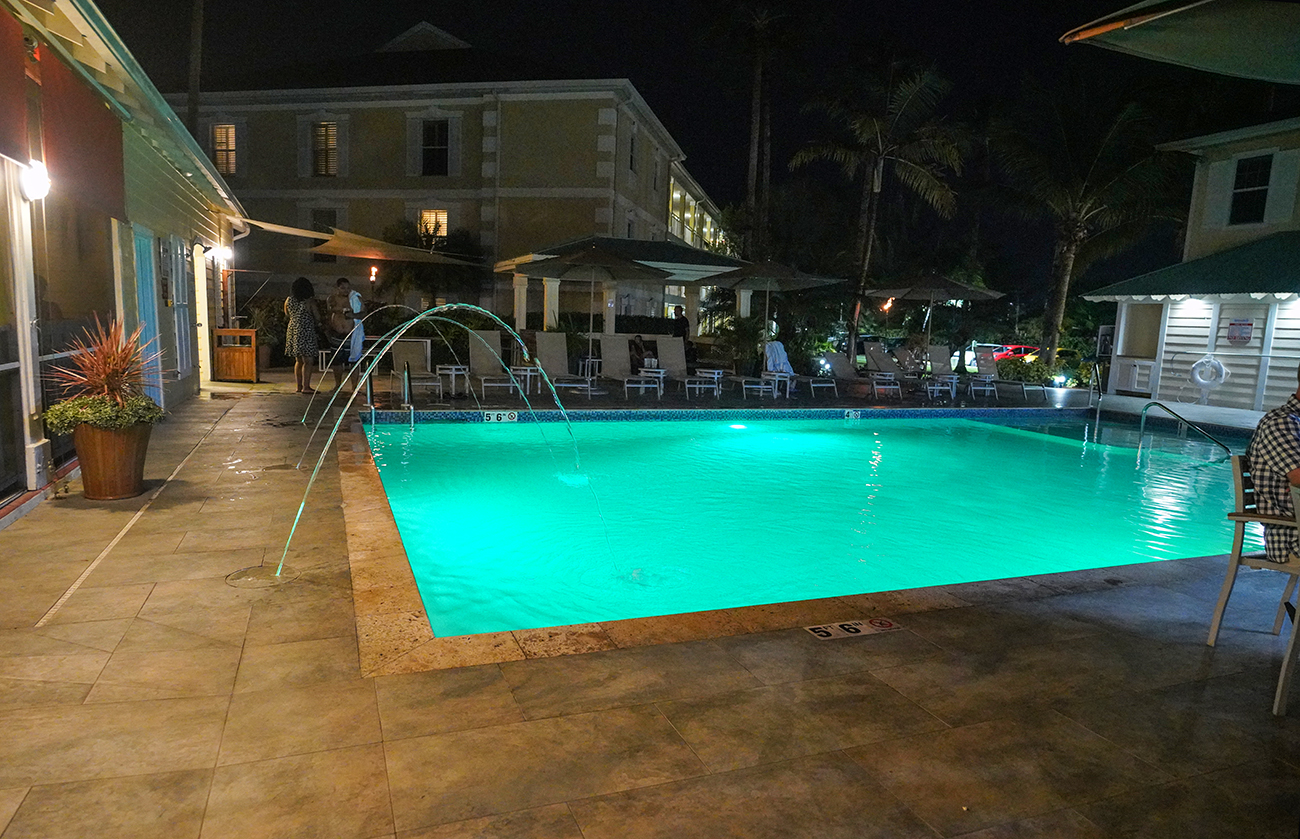
Sunshine Suites at night
The pool at Sunshine Suites at night
The breakfast offerings were decent. There was a nice variety of pastries, pancakes, cereal, parfait, boiled eggs, toast, oatmeal, bananas, muffins, coffee, tea, orange juice, and apple juice. Sunshine Suites also had a restaurant called Sunshine Grill, which served lunch and dinner. This is not complimentary and does not come as part of an “all-inclusive” package. The fish tacos they served were delicious. I would have fish tacos if I could return and have one meal in Grand Cayman.
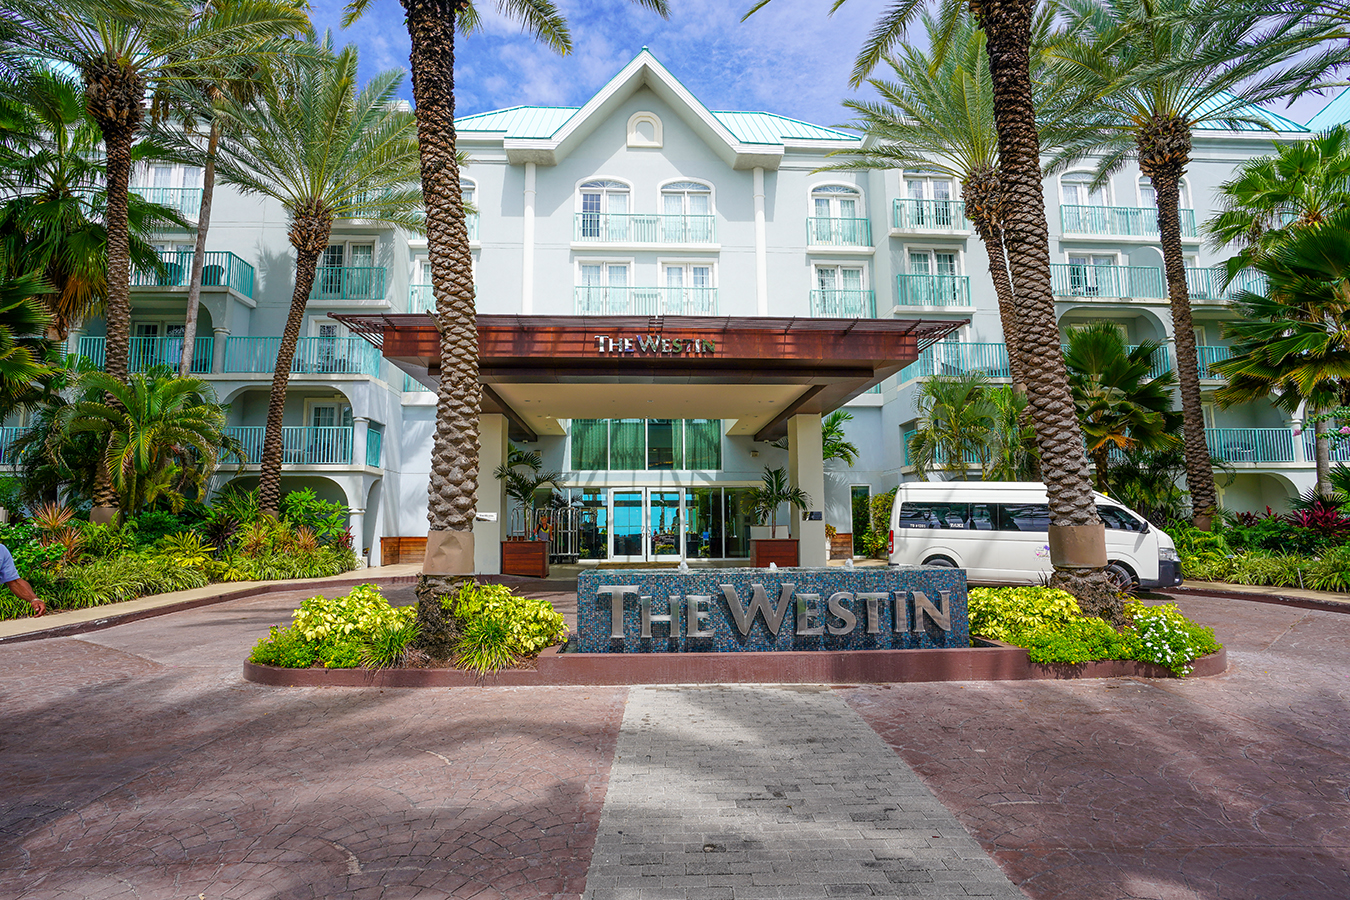
The Westin Hotel
Since we had access to all the amenities of the Westin, we would have breakfast and make our way there for most of the day.
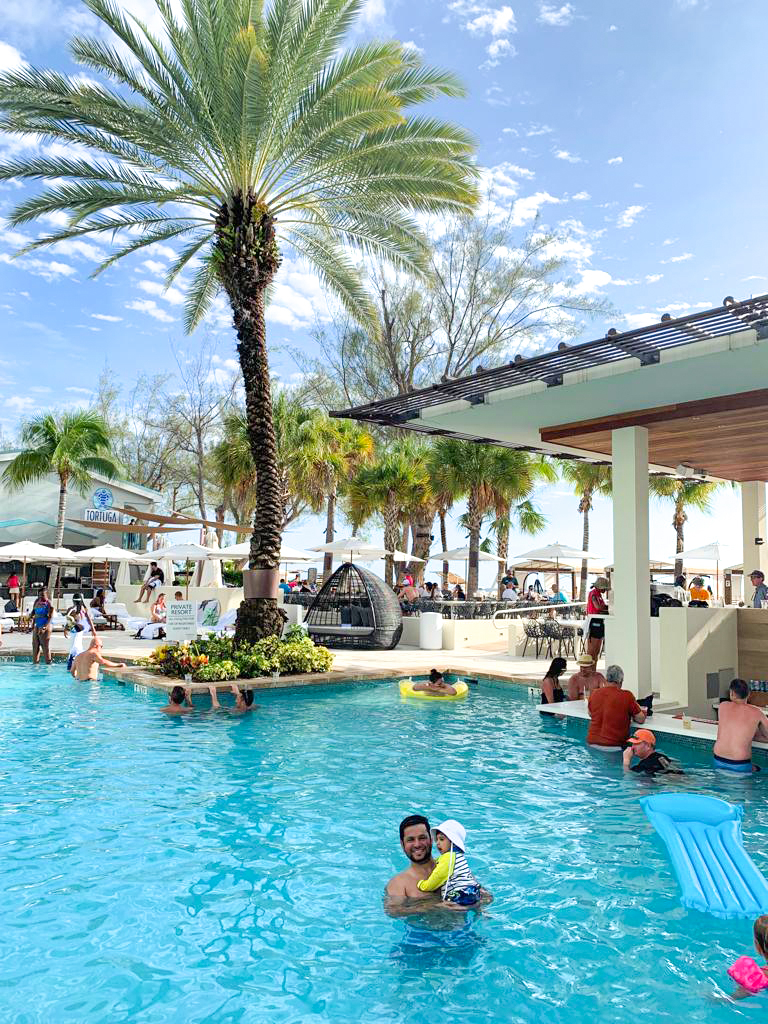
If you don’t want to walk here from Sunshine Suites, go to the front desk and request to be dropped off via a golf cart. This was a very convenient way to move around with our son.The pool and swim-up bar at the WestinThe Westin LobbyView of The Westin from the beach areaThe pool has a pedestrian bridge that crosses over to the beach. You can swim underneath to get to either side.
First pool experience for Zayn
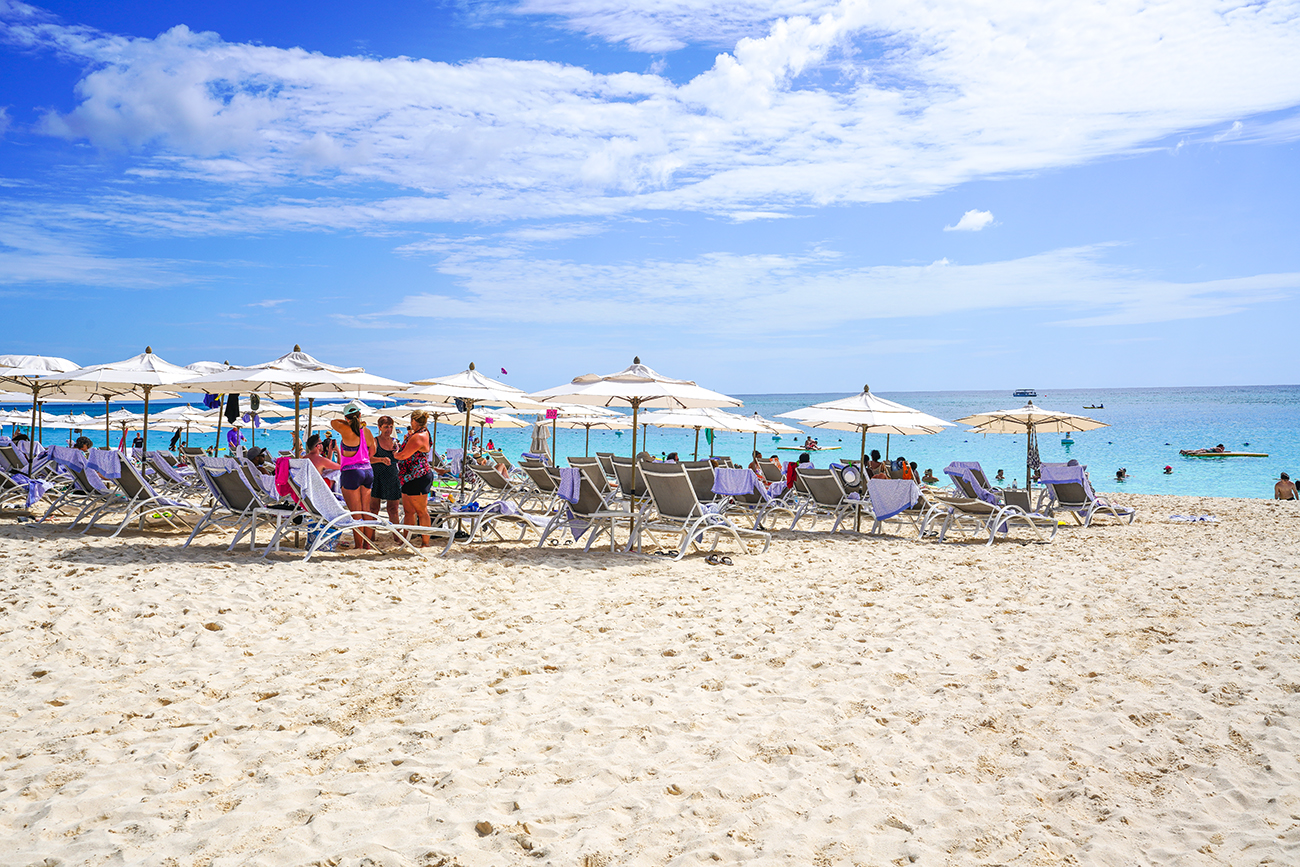
Seven Mile Beach
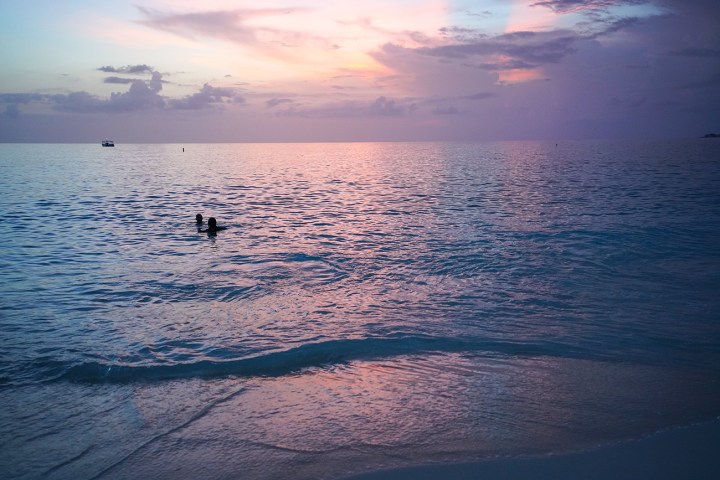
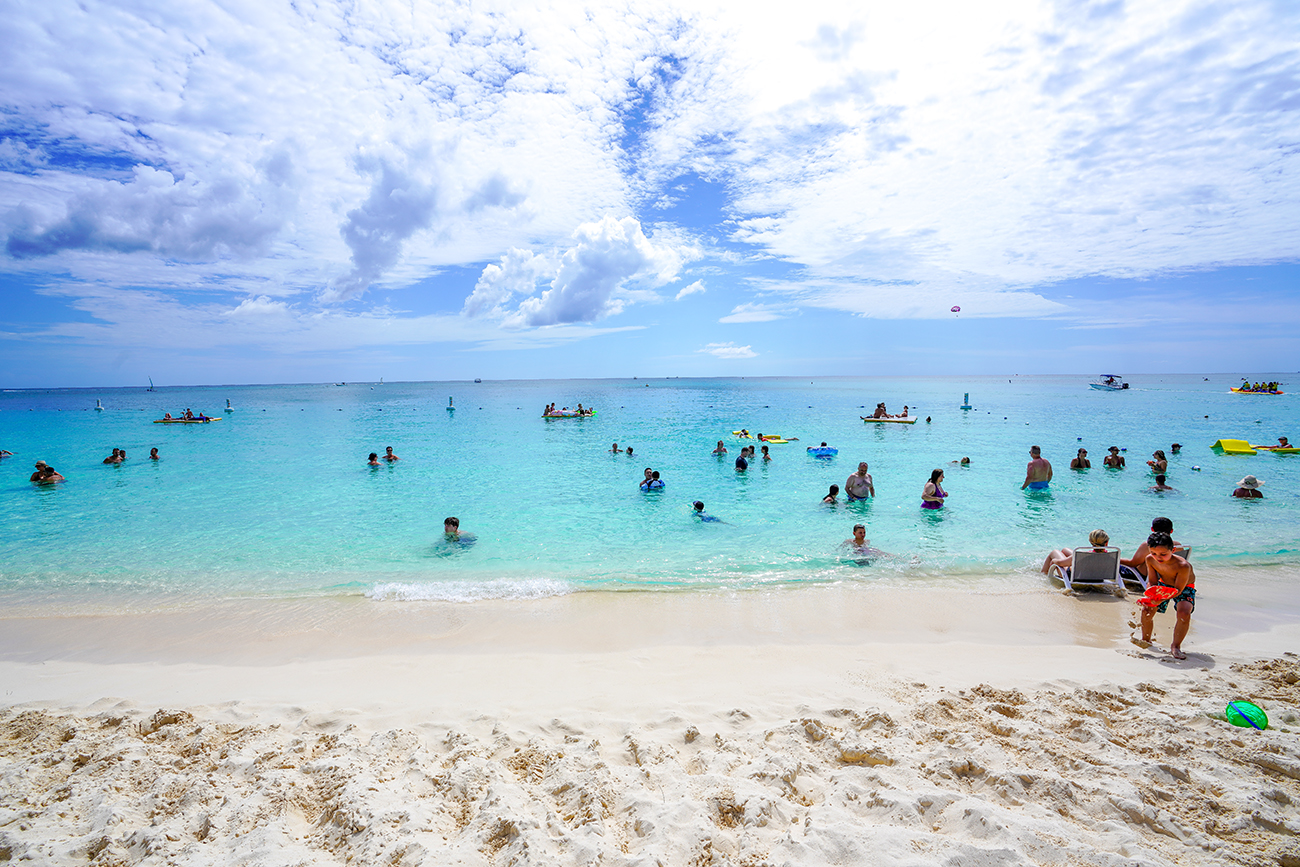
Once you cross over the pool to the beach area, you will be greeted by Westin employees who direct you to lounge chairs and open the umbrellas if you choose to have them open. Towels are available to the right of the pool and must be checked out with your last name and room number of the property you’re staying at. Seven Mile Beach is simply amazing. I would rank it right behind the Maldives for water clarity among all the beaches I have visited. There is no seaweed or litter; it’s perfectly maintained, and the waves are calm for water activities.
The lounge chairs get occupied pretty quickly. The earlier you claim one in the morning the better.
Seven Mile Beach’s water clarity makes it perfect for snorkeling, so bring an underwater camera and snorkeling gear. You can also rent the gear from the hotel. Seven Mile Beach faces west, and if the horizon is clear, you will be treated to some spectacular sunsets. Even if the horizon isn’t 100% clear, the sun reflecting off the clouds will make for a beautiful and colorful sky.
If you’re reading this, a point of interest that might be worth visiting is Stingray City. It wasn’t age-appropriate for a 9-month-old, but if you have kids who are a bit older or you want to experience swimming with stingrays, it’s only a 10-minute drive away. Keep in mind that when driving in the Cayman Islands, you drive on the left side of the road as it is a British territory.
Some of you have asked if the food, water, and snacks are expensive, and for the most part, they are costly. If you purchase from the hotel or even convenience stores right next to the hotel, it will cost you three to four times what you are used to paying for bottled water. I asked a local where I could purchase a case of water, and he directed me to a large wholesale club called ‘Cost U Less,’ which was just a 7-minute walk away. If you’re familiar with BJ’s Wholesale Club on the East Coast, this was their sister store. It even had the Wellsley Farms brand, the store label for BJ’s. You don’t need a membership, and while the prices aren’t U.S. wholesale club prices, they are far cheaper than any other place you will find on the island. If you’re staying at an Airbnb and decide to cook rather than eat out, this is a perfect place to shop for your ingredients since they also carry fresh produce, seafood, and meat.
Concluding Thoughts
We had a great time at Grand Cayman Island, and the service and hospitality at the Sunshine Suites and Westin were top-notch. I’ve never seen two hotels so well coordinated when transporting passengers between the two properties and accommodating each other’s guests at their respective restaurants. If there is one other essential tip you take from this, BRING MOSQUITO REPELLANT and bathe yourself in it. They are relentless, and if any parts of your body don’t have the repellant touching it, they will find it, guaranteed. As always, thanks for reading.
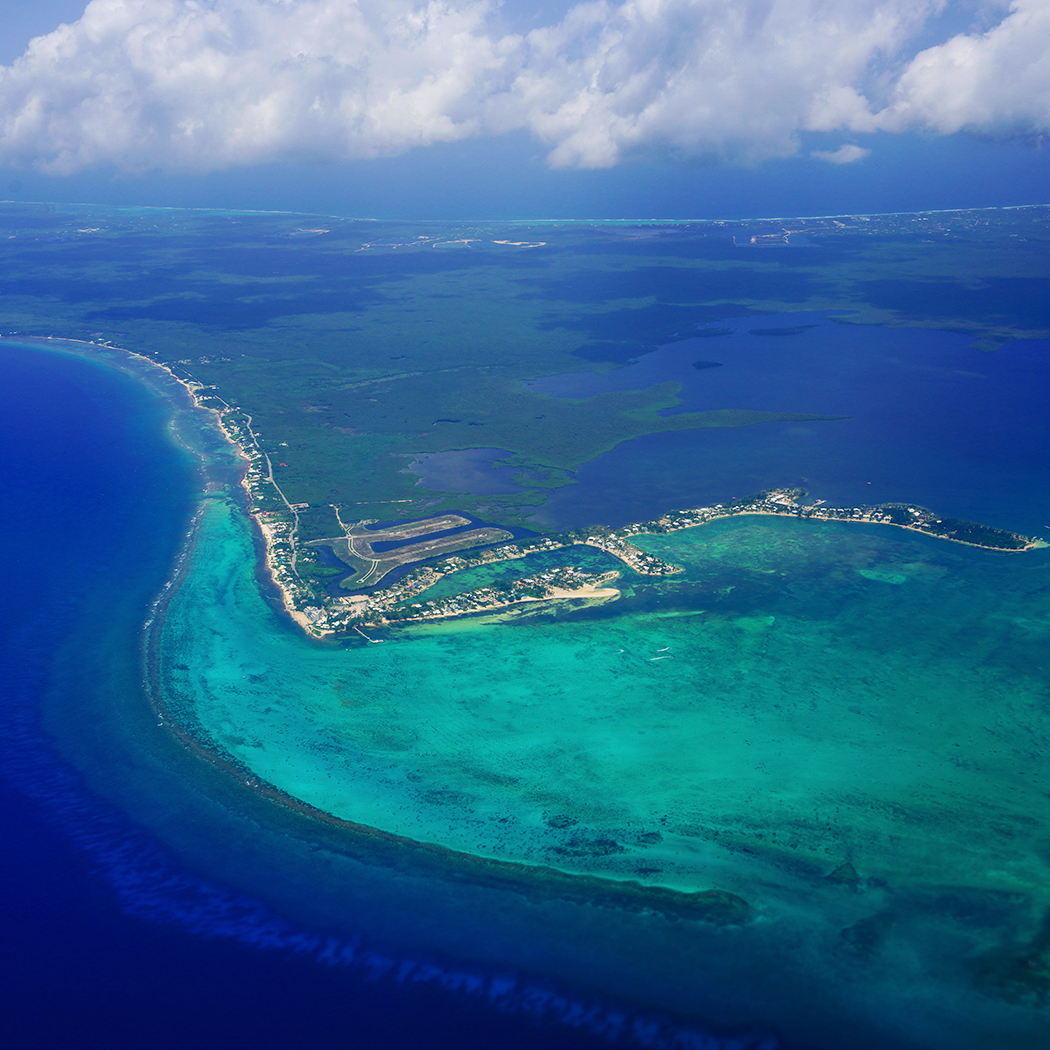
Rum Point, Grand Cayman Island, as seen from the ascent on American Airlines.


 I’ve been asked if I brought my 5-month-old to this park, and the answer is no. Since the steam vents emit sulfur dioxide and hydrogen sulfide gas, I did not want to expose my son to potential lung irritants. If you’re pregnant, have heart problems, asthma, or COPD, it’s probably best to avoid the steam vents at Hawaii Volcanoes National Park.