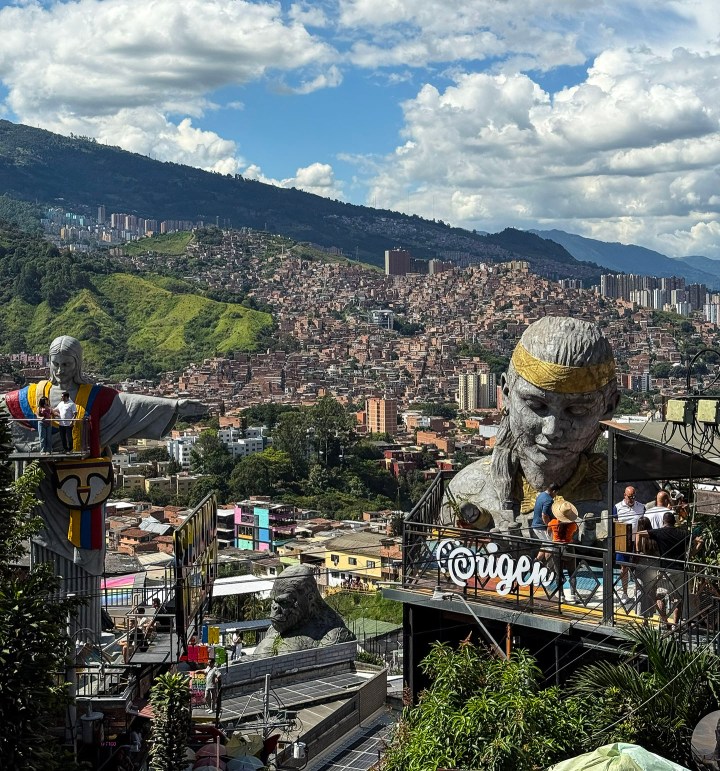
ITINERARY: 6 DAYS IN ALASKA TRAVELING WITH TODDLERS

ITINERARY: 6 DAYS IN ALASKA TRAVELING WITH TODDLERS

During the summer of 2021, my wife and I decided to take the kids (ages 34 months and 17 months when we traveled) on an adventurous trip to Alaska. Many of you know our affinity for wildlife, nature, and the natural beauty that’s found in every corner of our planet. With restrictions or logistical challenges for international travel still in place during this time, we decided that visiting a destination such as Alaska was the best option to experience a pristine environment without the worry of testing positive for COVID19 and quarantining on the way there or back. For work purposes, I simply could not afford to be in a place beyond my allotted vacation time. Having been there in 2015, I fell in love with Alaska and have longed to come back. Fast forward to 2021 and there was my opportunity to visit again. Rather than opt for the 6.5-hour non-stop flight from Chicago to Anchorage, we decided to stop in Seattle for 2 nights (a fantastic city in and of itself) and explore a little before continuing on. The kids tend to hit a wall on flights over 5 hours (the non-stop flight back was rough) and the 3-hour flight from Seattle to Anchorage was perfect to keep them fresh on our arrival to Anchorage.

Background of Denali National Park

When you visit Denali National Park most years, there is about a 2 to 3 week stretch from the beginning of May until about May 20th where anyone can drive their car on Denali Park Road, 30 miles into the park (Teklanika River rest area.) Once the summer season officially kicks off and tour buses and camp buses start using the roads on May 20th, only those selected via lottery (this occurs in April) are allowed to drive to Teklanika while others have to stop at Savage River rest area (mile 15) and turn around. When the summer season ends in late September, the lottery restriction is lifted, and anyone can drive to Teklanika until snow closes the park roads. If you want to go beyond Teklanika all the way to the Denali Road terminus at mile 92 (Kantishna), you have to take a tour bus. This is about a 12-hour round trip. With two young toddlers in-tow, this was not an option for us and it’s something I don’t recommend for parents with kids under the age of 5.

When the lottery occurred in April, I was not one of the lucky ones who was selected via the lottery process. The only option was to go the website and check every day if someone cancelled their reserved time slot during the days that we were going to be there. If someone relinquishes their slot, that slot becomes open, and it’s first come first serve. From April 28th to Jul 13th, I checked every single day, multiple times a day, but I had no luck. I would see time slots opening up, but they would never be during the time frame that we were going to be in Denali. It wasn’t until after we landed in Alaska, and we were on the way to Denali that my wife saw a time slot open for the following day. I immediately pulled into a parking lot, paid the $25 and claimed that spot. It literally went down to the wire. Keep in mind that the first 15 miles of Denali Park Road is paved and it’s all gravel road thereafter. Having an SUV makes the drive to Teklanika a bit easier. Important to Note: Lottery for 2022 has been cancelled and buses will only run until mile 43 due to the ongoing Pretty Rocks landslide at about mile 45. Read more about it here

Day 1: Arrival to Anchorage and drive to Denali National Park

Final Descent into Anchorage, Alaska

After arriving in Anchorage at around 1pm, we headed to the rental car counter inside the terminal where we surprisingly didn’t encounter any lines. If you are traveling to Alaska, remember to bring your car insurance card with you. This may not be the case with every car rental agency, but Budget demanded to see it. Even though premium credit cards such as Chase Sapphire Reserve and AMEX Platinum (among many others) offer primary rental coverage, there’s a possibility that the agent you deal with does not know this. Once we got our car, we grabbed a quick bite at a local restaurant before making the 4-hour drive north to Denali National Park. Even though we didn’t reach the park entrance until 7pm, the midnight sunset gave us plenty of time to drive 15 miles into the park. After viewing a bit of wildlife, we headed back to the hotel and rest up for the following day. Here is my rule for driving in Alaska and one which I’d recommend to everyone — if you are passing by a gas station and your gas tank is half full or less, pull over and top it off. Cell signal is spotty in many areas and almost non-existent once you drive a few miles into in the National Parks. You don’t want to end up in a situation where you have to choose between staying warm (or cool) and conserving gas in case of a flat tire or worse, collision with wildlife.

The hotel we selected for our stay in the Denali area was McKinley Chalet Resort. We loved this accommodation with its rustic rooms, beautiful views, and dining right on the premises. The dining will be a bit more expensive on resort grounds compared to other places in town, but you are paying for the convenience. Their cafe isn’t a Starbucks, but they do serve Starbucks products the way a Barnes & Noble Cafe does. Most of the restaurants and eateries around Denali NP close at 9 pm while a convenience store in town is open all night.

McKinley Chalet Resort

McKinley Chalet Resort

Day 2: Denali National Park

Our second day in Alaska was the day we had the coveted pass to drive to Teklanika River (mile 30) in Denali NP. We were fortunate enough to see a female moose with two calves on the trail near the park entrance. Having two kids that are animal enthusiasts made this encounter even better.

A mother moose (cow) keeping a watchful eye over her calves.

Remember to keep a distance of at least 50 yards. This picture was taken with a 200mm lens, but we were about 65-70 yards away

The highlight of Zayn’s Denali visit. He bottled up his excitement and respected the wildlife. Great job kiddo!

This was mostly an overcast day, but we were lucky to avoid precipitation. If you’re coming with young kids and want to do a trail, remember to bring plenty of water, granola bars, a waterproof jacket, and hiking boots. If you’re here during the summer, bring mosquito repellant! They are large and aggressive in Alaska, and I learned that the hard way. We hiked a toddler-friendly trail called the Savage River Loop Trail. This moderately trafficked trail is about 1.7 miles that’s mostly flat with no steep incline or decline. You can also choose to do a portion of it and just turn back. Any part of the park is fair game to see bears but especially areas near water sources. This particular area of the park was also near a wolf den during our visit and although we didn’t see any wolves, we were told to keep an eye out for the pack. Remember to bring bear spray and make enough noise on the trails so wildlife in the area can hear your presence. If you do see wildlife, give it plenty of space, especially bears, moose, and wolves. Always carry bear spray and know how to use it!

Day 3: Denali National Park and Anchorage

On our last day in Denali National Park, we got an early start to the day and drove until Savage River before turning back and making the 4-hour drive to Anchorage. The sun was finally out but there was not much wildlife to see on this day other than a lone moose. The clear day gave us views of the beautiful vistas of Denali Nationakl Park. Mt. McKinley was mostly covered with clouds as it usually is for 70% of the year. The drive to Anchorage included some stops to enjoy the beautiful scenery that’s prevalent all over Alaska. Anchorage was our stop for a night before continuing south towards Seward.

Day 4: Chugach National Forest and Byron Glacier Trail

After spending the night in Anchorage, we headed south towards the coastal town of Seward. On our drive there, we made sure to stop by Chugach National Forest and hike the Byron Glacier Trail. I highly recommend this trail for everyone, but in particular, those who are traveling with kids. I would make this trail a priority if you are traveling to Alaska over the next few years due to the fact that Byron Glacier is receding quickly like most other glaciers. To hike from the trailhead to the glacier is only 0.8 miles and the trail itself is mostly flat with slight incline and decline at various points. There have been reports of bears in the area but if you go between 8 am and 6 pm during the summer, the trail is heavily trafficked. When you get to the glacier, you are free to climb it but be very careful. Even with my hiking boots, I had to maneuver slowly to avoid slipping. If you don’t have ice spikes, take your time since all the foot traffic on the glacier compacts the snow enough that you’re basically walking on ice. Although it is very tempting to go under the ice cave and see the deep blue hue, I’d strongly advise against that as people have been killed by the ice shelf collapsing on them while being under the cave. The temperatures do exceed 70 degrees during the summer so ice shelves can certainly melt and shift around.

The kids loved this hike! Walking on ice without needing a winter coat was a unique experience .

Ice caves of Byron Glacier

When you’re on your way to Seward, be sure to top off your gas tank at Girdwood as there are no gas stations between Girdwood and Seward. Once we concluded our hike on the Byron Glacier Trail, it was time to make the 80-mile drive further south towards Seward. During our time in Seward, we stayed at an AirBnB and you can click the link here to view it for yourself. Our host Angela went above and beyond to make sure we were taken care of and if you find yourself in Seward, I do recommend booking your stay here. Accommodations in Seward get booked out months in advance so if you’re visiting during the summer, start booking by no later than mid-April.

Day 5: Seward and Kenai Fjords National Park Boat Tour

This was a day that I circled on the calendar and was really looking forward to during our time in Alaska. It was going to be the first-time visiting Kenai Fjords National Park for my wife and kids. You can access Kenai Fjords National Park by car if you want to get up close to Exit Glacier but the best way to view wildlife and multiple glaciers is by a boat tour. We booked the 11:30 am Kenai Fjords National Park boat tour with Major Marine as our tour operator. You need to get the harbor area and check-in 30 minutes before embarking. Parking isn’t the easiest to find in that area so I would factor in 15-20 minutes just for that. The narrated tour is 6 hours long (they will push it a bit longer if it’s a beautiful day with calm waters) and it also includes complimentary lunch, coffee, tea, and snacks for purchase. It was the first boat tour for my kids, and we were fortunate enough to have picture perfect weather. I was impressed with this same tour when I booked it in 2015 and since that time, the experience has only gotten better, with Major Marine taking delivery of two new modernized and spacious vessels. Whether you are coming to Alaska with kids or without kids, mark this down as a tour which needs to be on your list. You can opt for the longer 7.5-hour cruise but for us, 6 hours was perfect. We saw killer whales, Dall’s porpoise, puffins, seals, sea lions, and the highlight of our trip to Alaska, a humpback whale that breached the water about 150 yards away!

Seward Boat Harbor

Resurrection Bay

Transient orca

Sea Lions, Sea Gulls, and Cormorants at Resurrection Bay, Alaska

Adult Humpback Whale

Adult Humpback fully breaching. I was not prepared for this capture, hence the blurriness. The highlight of our tour.

A pod of Dall’s porpoise that followed our vessel for several minutes.

Holgate Glacier on the left, a transient orca on the right

We were fortunate to have a perfect day for wildlife viewing and to enjoy the beautiful glaciers and mountains. If you decide to do this tour or any boat tour for that matter, remember to dress warm and also bring earmuffs if you plan to be on the deck and in the elements for an extended period of time. Temperatures on the water are about 20 degrees cooler than land and the wind can make it feel really cold. If you decide to stay inside the heated cabin, you will still be able to view just about everything. Remember to tip the tour personnel on your way out.

After completing this tour, we planned on having an early dinner at a well-known place in Seward called Salmon Bake. They do not take reservations over the phone, or any website/app and you have to put your name on a list and stick around. The wait can be long to get a table so be prepared — we had to wait 45 minutes, but it was well worth it. I got the coconut crusted prawns and….wait for it……salmon! (Alaskan sockeye). Both were fantastic and as fresh as you will ever have. Try to have at least one meal here if you’re in Seward.

To conclude the evening, we drove a few minutes down the road to the car accessible part of Kenai Fjords National Park. This is where you can do the one-mile hike right up to Exit Glacier. And with that, a memorable and fun-filled fifth day in Alaska was in the books.

Day 6: Seward and Alaska Wildlife Conservation Center

Day 6 was our final day in Alaska. Since our flight from Anchorage to Chicago wasn’t until 11pm, we had most of the day for recreation. We spent the morning at Seward Waterfront Park to allow the kids to play before we had to get in the car to head north towards Anchorage. The views are beautiful here and it’s also a place where you can view sea lions, otters, native birds, and occasionally, whales.

Seward Waterfront Park

On our way to Anchorage, we stopped at the Alaska Wildlife Conservation Center. This is another place which I strongly recommend for everyone but especially those traveling with kids. You can view just about any type of large land mammal that is native to Alaska behind the safety of a fence. This includes the Wood Bison, a species that was hunted to near extinction about 70 years ago and cannot be seen in Denali. The animals here have plenty of space to roam and their environment closely resembles their natural habitat. Budget at least 2 hours to comfortably see all the animals. After a memorable and fun-filled 6 days in Alaska, it was off to Anchorage to take our redeye flight back to Chicago (more on this below). What we did in 6 days is just a tip of the iceberg of what can be done while visiting Alaska. At the end, we wished we had more time and were able to visit other parts but perhaps that will be a trip for the future.

Trip Breakdown

Since this trip required us to utilize multiple airlines and hotels in addition to AirBnB, we used a combination of Chase Ultimate Rewards Points, American Airlines miles, Delta miles, Choice Privilege Points, and cash to book our itinerary. To get to Anchorage from Seattle on Delta was just 7k miles per person. If you have AMEX Platinum, Gold, or Green — either the personal or business verion of the three — you can transfer points straight into Delta’s frequent flyer program 1:1. The Chase redemption for American Airlines on the way back to Chicago allowed us to get 1.5 points per cent and book a $400 one-way ticket for 26.4k Chase Points. Since my wife has gold status with American, this allowed us to move up to main cabin extra and check bags at no charge. Since Chase treats Ultimate Rewards points redemptions for airlines like cash purchases, we also accrued American Advantage miles for this trip. Using Chase Ultimate Rewards points to book at the McKinley Chalet Resort got us the best value in Denali since large chains such as Hilton, Marriott, IHG, Hyatt, etc do not operate there. Back when I first got in the points and miles hobby about 13 years ago (the golden era of this hobby before several airline/hotel devaluations), I used to loathe Choice Hotels and didn’t care for their portfolio of hotel brands or their rewards program. Since that time, my view on Choice Hotels has evolved as they have really expanded the footprint on their upscale properties (Cambria and Ascend Collection) and have also invested in updating their mid-tier properties (Comfort Inn, Comfort Suites, Sleep Inn, Quality Inn and Clarion). Their mid-tier properties are perfect for a one or two night stay to break up a road trip. When you’re traveling with kids, having complimentary breakfast on premises can be a huge time and money saver. The Comfort Inn Downtown – Ship Creek in Anchorage cost us 10k Choice Privilege points for a one-night redemption when cash prices were over $220. Perhaps in the near future, I’ll dedicate an entire post for Choice Hotels.

Lessons We Learned While Doing This Trip with Toddlers

Since this trip involved a lot of driving — about 850 miles in 6 days— the biggest challenge was trying to keep the kids entertained and prevent them from getting restless. We would make a stop every hour or so and let them walk outside and be active. We also downloaded kids shows and movies onto the iPad prior to arriving in Alaska knowing that cell service can be very spotty. Any time we spotted wildlife, glaciers, snow-capped mountains, or anything that was interesting, we would point it out and give them some tidbits on what they’re looking at. Later on, if we saw it again, we would quiz them and test their recollection. These trips have incredible educational value and treating them like a field trip is always our goal.

One lesson we learned with our kids is that redeye flights are very difficult for them— as it is for most kids—and something we will try to avoid moving forward. I certainly don’t blame them as it’s hard to get into a comfortable sleeping position in an economy seat during a time which they’re used to sleeping comfortably. Our flight left Anchorage at 9 pm and landed in Chicago at 6 am. Most of the non-stop flights from Anchorage to the Midwest and East Coast will be redeye, but there are a few flights that depart before 10 am and get to their destination in the evening. These flights will cost more but are worth booking if it allows your kids to be comfortable and no tears are shed.

If you plan on following our itinerary with kids, bring an iPad, plenty of snacks, water or juice, a baby carrier if traveling with an infant, hiking boots for toddlers (and yourself), raincoats, warm clothing, and a stroller if you plan on walking around Anchorage or Seward. Denali National Park does not have any trails that I would feel comfortable pushing a stroller on, but I suppose if you have a rugged stroller with larger wheels and shocks, you may come out of it okay. Do not forget to bring mosquito repellant for kids. We chose the Babyganics Deet-free repellant for both of our kids and it held up very well. As always, thanks for reading. If you have any questions, feel free to drop them in the comments or shoot me an email and I’ll try to respond as soon as I can.

Itinerary: Road Trip from Chicago to Badlands, Glacier, Yellowstone, and Grand Teton

Itinerary: Road Trip from Chicago to Badlands, Glacier, Yellowstone, and Grand Teton

Leisure travel was far different in 2020 compared to the previous three plus decades of my life due to the global pandemic caused by COVID-19. It was important to do your due diligence in just about every aspect of trip planning. It was also important to assess whether the risk-benefit analysis favored flying or driving, and depending on your personal health or those around you at home, if traveling for leisure was something that should have been done at all. With all these considerations in mind, my family (wife, toddler son, and infant son) took a road-trip out to 4 different national parks. Initially we had booked a round-trip flight on American Airlines since both legs of the trip had a half-empty plane. However, as we got closer to departure, the Chicago to Bozeman, Montana flight started getting more and more crowded. Two days before our flight, I received a courtesy message from American Airlines that the flight was expected to be full. They gave me two options: A) I could get my miles refunded without any cost to reinstate them or B) I could book another flight for the same day which routed me through Dallas. Getting off the plane in a state that was a hotbed for COVID at the time? No thank you. We took option A and decided to do a one-way car rental and then fly back from Jackson Hole, Wyoming. This was also going to be a test-run to see how our 22 month old and 4 month old (at the time) would handle a lengthy drive. Driving also allowed us to add Badlands National Park and Mt. Rushmore in South Dakota to our itinerary since we weren’t going to drive 1,500 miles from Chicago to Glacier National Park in Montana in one shot. The benefit of driving also allowed us to do some research and plan our stops away from COVID-19 hotbeds. It required meticulous planning and multiple calls to various hotels to see what precautions they were taking for COVID-19. The least they can do is ensure all staff and guests were wearing masks in common areas of the property while sanitizing every area of a room that would be prone to physical contact. One hotel also informed me that rooms would be blocked off for 24 hours once a guest checked out. Gathering that type of information gave us some peace of mind.

Day 1: Chicago to Mitchell, South Dakota

So it began. We left Chicago at 10am with the GPS showing us an ETA of 8:03 pm at Mitchell, South Dakota. Factor in diaper change stops, gas stops, and venturing out of the car for a scenic viewpoint or two, we knew 10-10:30 pm was the more realistic time frame. We chose this town since it wasn’t too close to Badlands National Park (204 miles) where overcrowding could be an issue, but close enough where we can drive over and get there in under 3 hours. We took I-90 West and made our first stop to explore the Minnesota side of the Mississippi River at Great River Bluffs State Park. We did a relatively short hike here with the kids and got panoramic views of the Mississippi River. The hike itself wasn’t difficult and it was a perfect way to stretch out after being in the car for nearly 5 hours.

View of the Mississippi River from Great River Bluffs State Park

After spending about an hour here, we continued on our journey further west to South Dakota where we’d spend the night. We stayed the night at AmericInn (Wyndham brand) and they did a great job of keeping things clean. Since this was a stopover hotel rather than a destination hotel, I won’t be doing a detailed review but it was sufficient for our purposes.

Day 2: Badlands National Park and Mt. Rushmore

On our second day of the trip, we had Badlands National Park on our agenda as the first stop followed by Mt. Rushmore. We made it a point to get up early and get to Badlands National Park as early as possible. It took about 2 hours and 45 minutes and as soon as we got through the gates, I felt like our decision to drive was validated. The scenery and rock formations over here are unreal and there is also some wildlife. We saw bison, big horn sheep, and pronghorn. There are several trails you can hike at Badlands but due to our time constraints, sweltering heat, and an infant and toddler in-tow, we decided to focus mostly on lookout points and drive through the park.


Big Horn Sheep
Rock formation at Badlands
Bighorn sheep aka Rams

After spending about 6 hours at Badlands, we headed 75 minutes west to Mt. Rushmore. It’s not as big as I thought but the precision and detail that was necessary to carve out four U.S. Presidents is pretty incredible. In hindsight if I had to choose between spending more time at Badlands and visiting Mt. Rushmore, I’d have chose Badlands. If its a bucket list item that you want to cross off, by all means go ahead and visit it.

Washington, Jefferson, Teddy Roosevelt, and Lincoln

We finished Mt. Rushmore at around 7:15 pm and now it was time to make the 366 mile drive to Billings, Montana where we would spend the night. Along the way, we made a stop at Black Hills National Forest to take in the views. This was a very underrated place that deserved more than the 35-40 minutes we spent here. Absolutely beautiful and I should have done my homework before visiting. But hey, you can learn from my mistake.

Black Hills National Forest, South Dakota

We didn’t reach Billings, Montana until nearly 1am. Fortunately both kids were asleep nearly the entire way and the 80 MPH speed limit in South Dakota and Montana didn’t hurt.

Day 3: Bozeman, MT and White Fish, MT (Glacier National Park Area)

Our goal on day 3 was to get to Whitefish, Montana with a stop in Bozeman. Whitefish was going to be our home base to explore Glacier National Park. If you recall earlier, we had our flight booked to Bozeman, MT from Chicago and that is the location where we originally booked our rental car. We found a really good car rental deal through Budget and even though it was non-refundable, we went ahead and made the booking since prices were increasing by the day. Since we cancelled our flight, I came to the realization that Bozeman was going to have to be incorporated into our trip one away or another. With that in mind, we booked our one-way rental from Chicago to Bozeman and I just aligned the drop-off and pickup times so that we could drop off the car we rented from Chicago and pick up the SUV we originally booked in Bozeman. It took 2 hours to get there from Billings and then another 5 hours to drive up north to Whitefish which would serve as our gateway to Glacier National Park. The entire drive was scenic and beautiful and long drives don’t seem long and burdensome when you’re surrounded by beauty. We stayed at the Pine Lodge on Whitefish River and that is a hotel I will be doing a review on.

Quintessential Montana on the drive to Glacier National Park.

Day 4: Glacier National Park

This was our day to explore as much of Glacier National Park as we could. We entered Glacier National Park from the west entrance and immediately got on Going-to-the-Sun Road. This road connects the eastern and western sides of the park and offers stunning views at just about every turnout. There are many trails worth hiking at Glacier National Park but I strongly suggest going in groups of 4 or more due to the presence of bears. If you’re traveling with an infant or toddler or need wheelchair access, Trail of the Cedar’s is the one you want to do. It is an ADA accessible loop trail and there is no climbing, steep declines. or hard scrambles. This is a very popular trail for families with younger children so I strongly recommend getting there early as the parking area near the trailhead can get packed after 9am.

Trail of the Cedar’s

Continue driving on Going-to-the-Sun Road and have your camera ready for several pullouts that offer some of the best scenery in North America.

Going-to-the-Sun Road will eventually lead you to Logan Pass, the continental divide of the country. This where the watershed that drains into the Atlantic Ocean is separated from the watershed that drains into the Pacific Ocean.

There is a visitor’s center here and the parking lot tends to attract several bighorn sheep. It may be tempting but do not feed them if you encounter them. They will follow you and are capable of doing damage.

Juvenile mountain goats near Logan Pass

The sunsets at Glacier National Park are gorgeous. If you want the best spot for viewing, there is a stretch of Going-to-the-Sun Road about a quarter mile from Logan Pass that will give you the best vantage point. There are also car pullouts in that area.

Day 5: Drive to Gardiner, Montana-Yellowstone National Park

We slept in on day 5 and took our time making the 6 hour drive about 400 miles south to Gardiner, Montana. This was the segment where our toddler was most restless due to the long drive and spotty cell phone data coverage along the way. My wife did a great job keeping him entertained and he did a great job not throwing a tantrum. Ridgeline Hotel was going to be our homebase for the next 2 days and is situated near the north entrance of the park. Ridgeline is part of the Ascend Collection of hotels under the Choice Hotels network. We called it an early night and prepared for a longer day tomorrow.

Day 6: Yellowstone National Park

If you enter from the North Entrance of Yellowstone, Mammoth Hot Springs will among the first sights. I highly recommend getting there early as parking can fill up quickly and parking along the road is illegal (many tourists ignore this warning). There are some stairs to climb but there is a wooden walking path and ramp that will take you right to the springs.

Mammoth Hot Springs

Once you’re done here, you can either head south towards Grand Prismatic, Old Faithful, and other geothermal hot springs or you can head east towards Lamar Valley. If you want to view wildlife including wolves, bears, bison, Lamar Valley is where you want to be. We saw wolves from a distance, several bears, pronghorn deer, elk, coyote, red fox, and other native animals. I do want to point out that if you do get out of your car to take a picture of a bear or wolf, you should maintain 100 yards of distance and 25 yards of distance from animals such as bison or elk. The pictures below were taken using a 200 mm zoom lens with more than 100 yards of distance between me and the bear and more than 50 yards between me and the bison. Bison may seem docile and gentle but if you get near them, they may charge you and can potentially kill you.

Bison in Lamar Valley, Yellow Stone National Park

With the exception of wolves, we were able to sight all of the aforementioned animals from the comfort and safety of our car. This is ideal if you’re traveling with younger children and would rather not bring them along for a hike. I did allow my 2 year old son to walk on a trail with me and I made sure it wasn’t near the tree line or thick shrubs that can be used as a hiding spot for a mountain lion or bear.

It’s important to note that seeing certain animals such as bears and wolves in Yellowstone does require patience. It’s not as simple as you driving there and the animals just show up. The longer you stay in Lamar Valley, the higher your chances. The more days you spend in Yellowstone, the higher the likelihood that you will sight most if not all the animals. There is a 20 mile stretch of Lamar Valley which we drove back and forth several times. It took about 2 hours before we saw our first bear. Bison and elk are plentiful and those are the two you can count on seeing with minimum to no effort. We spent the entire day here and were rewarded for it. Remember to bring plenty of food and water if you plan on doing the same. Also remember to bring binoculars.

Herd of Elk at Yellowstone National Park

Day 7: Yellowstone and Grand Teton National Park

Just as most other days, we got up early with ambitions to cover two parks in one day. We started our day very early in the morning (can’t thank the kids enough for cooperating) and drove south to view the geysers. Old Faithful is the one that everyone wants to see and the parking situation can be impossible if you don’t get there early enough. The same can be said for Grand Prismatic, a hot spring that is the largest in the U.S. and third largest in the world. Grand Prismatic is part of the Midway Geyser Basin which also home to Excelsior Geyser, Turquoise Pool, and Opal Pool.

Excelsior Geyser
Grand Prismatic Hot Spring

Grand Prismatic is the size of three football fields so if you want to get a panoramic view or a picture that would fit its entirety, a little hiking is required. If you look straight ahead in the picture above, you will spot people (they’re very tiny in the picture) who have made the hike congregated in an area that allows them to get a birds eye view from elevation. Doing this hike with small children on a sweltering day was not an option for us but if that’s not a concern for you, do the hike. Once we finished the Midwest Geyser Basin, it was off to Grand Teton National Park in Wyoming.

The southern entrance of Yellowstone and northern entrance of Grand Teton are only 31 miles apart. While Yellowstone covers over 3,500 square miles, Grand Teton is much smaller at about 484 square miles. Grand Teton National Park has stunning mountain views and also plenty of wildlife. We got here around 4pm which gave us time drive around Jackson Lake, Jenny Lake, and Leigh Lake and take in the various viewpoints the park has to offer.

Jackson Lake, Grand Teton National Park
Little guy taking in the views

We didn’t have much luck spotting wildlife other than bison on this day. We did enjoy the beautiful sunset and then called it a day. For this portion of our trip, we stayed in Jackson Hole, Wyoming at Hampton Inn. The summer time pricing of $400/night was exorbitant and I ended up using 131k Hilton points to book two nights. This was an average redemption rate but the property itself was very nice and the décor really fit its Wyoming location. It was easily one of the best Hampton Inn properties we had ever stayed at. We had one more full day left in Grand Teton National Park before it was time to fly home.

Day 8: Grand Teton National Park

On the final day of our trip, we woke up early and started driving around the park early in the morning. When we got to a particular area of Snake River, we were told by park rangers that three grizzlies had killed an elk overnight and consumed some of the carcass about 600 yards off the road. They said it was possible, even likely that the grizzlies would return later to finish off the carcass. With that in mind we drove around other parts of the park with a plan to return to that area a couple of hours before sunset when the grizzlies were likely to return. From our vantage point, we were able to spot the elk carcass and park rangers did not allow anyone to get within 500 yards of the downed elk. So we took in the beauty of other parts of the park but full of anticipation for what may ensue later in the day.

Grand Teton National Park
Pronghorn at Grand Teton National Park

At about 6pm, we made the drive back to the area of Snake River where the elk carcass situated. By this time, several other groups had gotten word by park rangers about the potential of a grizzly sighting and the shoulder of the road was packed with cars. After about 30 minutes of waiting, we saw a grizzly running through the meadow and heading straight for the elk carcass. It consumed whatever it could for about 10 minutes before heading back to the trees.

To observe nature in action was the absolute perfect way to cap off our trip. Over 2,500 miles driven, countless hours in the car, and cooperation by both kiddos made this trip possible. A very special thanks to my wife who initially thought I was crazy for proposing this trip but eventually bought in. She did a great job keeping our 22 month old occupied while making sure our 4 month old was always fed. Without her kid/baby management skills, this trip would have been difficult. We’re always asked how we made this trip with an infant and toddler and if it’s possible for other couples with young kids in-tow to do something similar. Our 4 month old spent most of his time sleeping so he was pretty easy to deal with. To keep our 22 month old busy, we had several educational videos and interactive games uploaded to our phones. We also bought some puzzles, etch-a-sketch, and other toys that would keep him busy. The most important part of the trip was keeping our 22 month old (Now 32 month old) engaged and educating him along the way. If we saw a specific type of animal or landscape, we’d identify it for him and then ask him to identify it for us if we saw it later. This added to his vocabulary and gave him experiences he can not only look back on but also look forward to. We’re not huge fans of giving a ton of screen time but trips like this are an exception. These types of trips may seem daunting but you’re capable of more than you think. It does take a complete buy-in from both parents but once you have that, make a game plan and execute it the best you can.

Day 9: Departure from Jackson Hole Airport to Chicago

One of the unique things about Jackson Hole Airport in Wyoming is that it is the only airport in the U.S. located inside a national park, in this case Grand Teton. This makes for some spectacular views upon takeoff and landing. Even plane spotting with the backdrop of the mountains is very cool. Thank you for reading and if you have any questions, please leave a comment.

Travel Itinerary: 3 Days in Cape Cod

Travel Itinerary: 3 Days in Cape Cod

Cape Cod is one of those timeless destinations that still has the charm of decades past. Most of the hotels on the Cape are independently owned mom & pop operations and you won’t find many chain hotels. If you ask locals on where to find the best lobster roll and seafood on the Cape, each person will likely give you a different answer as loyalties run deep. Whether you’re staying in Sandwich (the first town on the Cape), Provincetown (the last town on the Cape), or any other town in between, a beautiful beach and amazing seafood are right around the corner. Here is our itinerary for our stay in Cape Cod:

Day 1: West Dennis Beach and Nauset Light Beach

WDBeachMap

West Dennis Beach was the first place we decided to stop once we crossed into Cape Cod. Since the beach faces Nantucket Sound, the water temperature here is much warmer than the beaches that face Cape Cod Bay to the north or the Atlantic Ocean to the east.

WestDennisBeach

If you come between 9am and 4pm, parking costs $25 for the day and $75 for the week. Since we showed up at 4:30, the parking lot attendant waved us in and we didn’t have to pay. The sand is very clean and the beach doesn’t get terribly crowded. Unlike many other beaches in Cape Cod, I did not see any seals or shark warnings here. I’d still be very vigilant as prior summers have seen shark activity around this beach.  The only flaw with West Dennis Beach versus the others I had visited on Cape Cod was the seaweed. It is definitely noticeable (see video below) and it could diminish your experience if you’re getting tangled in it while going for a swim.

Once we were done with West Dennis Beach, we headed to the town of Orleans to check into Skaket Beach Motel. I’ll have a separate review of this motel but it was a comfortable stay and located approximately half-way through Cape Cod. This made it convenient to visit nearby sites such as Cape Cod National Seashore and the various beaches along its coastline. Since we still had plenty of daylight left,  we decided to go to Nauset Light Beach which is a part of Cape Cod National Seashore and run by the National Park Service. There are also 5 other beaches on the Cape that are part of Cape Cod National Seashore.

nausetlightmap
Location of Nauset Light Beach, Cape Cod

If you park in the lot before 4pm, it’s $20 to park but free thereafter. This is one of the most popular beaches along the National Seashore and the parking lot gets full rather quickly in the morning. Right across the parking lot and a short walk away is the famous Nauset Lighthouse, the logo on the bag of Cape Cod Potato Chips.

NausetLightHouse
Nauset Lighthouse

NausetLightHouse2

NausetBeach
Nauset Light Beach

NausetBeach3

Nauset Beach was clean, well maintained, and really spacious if you wanted to spread out. From the shore, we were able to see three humpback whales a few hundred yards away and plenty of seals close to shore. This beach had seen seal predation by a Great White Shark 2 days before we arrived and another predation which occurred about 30 minutes after we had left when we came the second time. Lifeguards were not allowing swimmers to go in water beyond waist-deep. If you do decide to swim here and you see seals, you should probably get out of the water as the threat of being bitten or killed by a shark increases.

SharkWarning

For dinner, we went to Arnold’s Lobster and Clam Bar. I got their fried cod sandwich called the “Fishwich” and my wife got the Fried Native Chatham Fish and Chips. Both were excellent and the great reviews we saw on Yelp were very accurate. Their onion rings were so good and they are very generous with the portions.

ArnoldsFishChips

ArnoldsLobster

This place is very popular for dinner and we had to wait about 15 minutes in line that went out the door to place an order. They have indoor and outdoor seating, an ice-cream shop adjacent to the restaurant, and mini-golf right behind the restaurant. They have a big gravel parking lot and parking is pretty easy to find.

Day 2: Provincetown

On our second day in Cape Cod, we made the 30-minute drive north to Provincetown, one of the most vibrant and eclectic towns in all of the U.S. It has great food, great beaches, unique art galleries, and many interesting shops. The people are very friendly and the vibe all around just makes you feel like you’re welcomed.

ProvincetownTownhall
Provincetown City Hall

PtownShop
One of the many shops you will find in Provincetown

Provincetown is home to 3 lighthouses and all of them require somewhat of a hike to get to. Due to its location on the Cape, Provincetown has two beaches (Herring Cove Beach and Racepoint Beach) which face west and offer magnificent sunsets. Both of these beaches are part of Cape Cod National Seashore and the same parking rates apply. If you have a parking ticket for any of the 6 beaches that are part of the National Seashore, you can go to any of the other beaches and park within the same day. This is a nice way to beach hop if you get an early start to the day.

First thing I wanted to do was cross over the breakwater to get as close as possible to Wood End Lighthouse. Full disclosure, I was inadequately prepared and I hope you learn from my mistake. I had slippers on rather than shoes and this made walking on the jagged breakwater rocks more difficult than it should have been. I also underestimated the effort required to walk on sand for long stretches once crossing over. The breakwater is over a mile long and the best time to start trekking over is early afternoon in low tide. If you don’t make it back before high tide, you could get stranded.

PtownJetty

The breakwater jetty is much longer than it seems at first glance. At high tide, these rocks get submerged underwater.

Once you cross over to the other side, poison ivy is everywhere (another reason to wear shoes) and I certainly stepped on it a couple of times and felt the effects of it later. Since I didn’t carry water or a granola bar, I decided not to take a chance and continue much further towards the lighthouse.

PtownJetty2
Low tide makes the sand bar a haven for birds

WoodLightHouse2
Wood End Light House 

CormorantProvincetown
Cormorant spotted on the breakwater

This hike is definitely not toddler-friendly so my wife and 11-month old son explored the town while I hiked the breakwater. If you are driving into town, there is metered parking nearby and meter regulations are strictly enforced. I saw two cars with the dreaded orange envelope stuck on their windshields.  I used the Park Boston app (it works for parking in Provincetown) to pay for the meter.

Right near the entrance to the breakwater is an interesting little park with benches called Pilgrims’ First Landing Park. This was the spot where the Pilgrims first arrived in America. This spot really evoked memories of 4th-grade social studies.

IMG_8289

For dinner, we went to a very popular seafood restaurant in Provincetown called Lobster Pot. LobsterPotOutside

LobsterTank

I got the Lobster Rueben Sandwich and it was just as good as it looks. Had I stayed the night in Provincetown, I would have came back the following day to have the same thing again. It was that good.

LobsterRueben

After dinner, we made the short drive to Herring Cove Beach hoping to catch the sunset on what was mostly an overcast day.  To put it mildly, we were not disappointed.

HerringCoveBeach
Taken about 15 minutes before sunset

HerringCoveBeachSunset
There was just enough cloud clearing for us to get a glimpse of the sun as it was setting

HerringCoveSunset
The gorgeous sky about 10 minutes after sunset

Seeing the sunset from Herring Cove Beach is one of the must-do things when visiting Cape Cod. I have never seen a sunset so beautiful within the contiguous 48 states. This was the absolute perfect way to end the day in Provincetown. If you go in the summer, bring a lot of mosquito repellant. They are savage around sunset time.

Day 3: Salt Pond, Marconi Beach, and Chatham

On our final day in Cape Cod, we started off by having brunch at a place called Hole In One in the town of Orleans. I had a Benedict called ‘The Green Monster” while my wife opted for the veggie omelet.

HoleinOneBenedict
The Green Monster Benedict- Fried green tomatoes and avocado on a bed of fresh spinach. Topped with two poached eggs, hollandaise sauce and a pesto drizzle served with crispy home fries. If you’re in the Lower Cape Cod area, I’d recommend giving this place a try. It is a very popular place and we had to wait 35 minutes to get a table.

Salt Pond

We headed over to the Salt Pond Visitor Center which is run by the National Park Service. Since we had a baby in tow in a stroller, we decided to do the 1.3 mile Nauset Marsh Trail, a loop trail which starts and ends at the Salt Pond Visitor Center. If you’re planning to do this trail with a stroller, there are a few things to keep in mind. First off, if your stroller does not have shock-absorbing springs, your child will have a very unpleasant time. The trail does get muddy at various points and if you have a stroller with small wheels, it might be a better idea to go with a baby carrier instead. There are a few points along the trail that have steps and you will be required to physically lift the stroller. It’s a very easy trail without a stroller but with it, it becomes a little more arduous. It can be done though and it was well worth it.  Parking at the Visitor Center was free.

SaltPondTrail

SaltPontMarsh

The trail itself offers beautiful views of the Salt Pond and is excellent for bird watching.

Marconi Beach

One of the 6 beaches that’s part of Cape Cod National Seashore, we came here because the parking lot at Nauset Light Beach was completely filled and cars were being turned away. This beach was just as good as that one and not as crowded. The water here was a chilly 60 degrees but it didn’t stop people from taking a dip. There were shark warnings at this beach as well and I didn’t see many people swim beyond waist-deep water. The beach was very clean and well maintained. The sand was nice and soft and my son had a blast playing in it.  You are allowed to bring dogs to the beach as long as you keep them leashed. 

MarconiBeach

After we were done with Marconi Beach,  we decided to go to Chatham to see the beautiful Chatham Lighthouse. On the way, we made a stop in Orleans to see the Jonathan Young Mill. This was originally constructed in 1720 and has been restored through the donations and labor of volunteers.

WindmillCapeCod

JonathanMill

Chatham

Chatham was our final stop in Cape Cod before we were on our way back home. We wanted to catch a glimpse of the Chatham Lighthouse and all its splendor. This lighthouse was actually constructed as a pair. The second lighthouse was moved to Eastham and is now the Nauset Beach Lighthouse (pictured under Day 1).  The house next to Chatham Lighthouse is an active Coast Guard station and living quarters for on-duty personnel.

ChathamLightHouse

This marked the conclusion of our trip. By no means was this a comprehensive list of places to see in Cape Cod. There is so much more to see and many activities you can do.  You would certainly need several more days to experience everything. The whale watching experience in nearby Plymouth is an activity we did a few years back and it allowed us to see humpback whales up close. If you’re into cycling, the Cape Cod Rail Trail is a paved bikeway that runs about 25 miles from South Dennis to Wellfleet. There are many points of interests along the way. There are other beaches which I have not listed that are also worth seeing. Cape Cod is very kid-friendly and family-friendly and a perfect destination to make a family trip. As always, thanks for reading.

Trip Review: Grand Cayman Island

Trip Review: Grand Cayman Island

During the second week of July, my wife, 9-month-old son, and I took a trip to Grand Cayman Island. Rather than do a separate hotel review, I’m going to combine everything into one post since there are a few relevant details which many of you may benefit from. We chose Grand Cayman Island for a few reasons. First of all, it’s about a 3.5-hour flight from Chicago and that’s approximately the maximum time for my son to be confined to an airline cabin before he really starts getting restless. When he was 5 months old and we took him on an 8-hour flight to Hawaii and he was perfectly fine. Once he hit the 7-month mark, even a 2-hour flight wasn’t easy. So with those considerations in mind, Europe, Asia, and Hawaii were out of the question. The second reason we chose Grand Cayman is that their beaches have been spared from the seaweed problem (sargassum) that has plagued destinations such as Cancun, Dominican Republic, Barbados, and even Florida. Most of these destinations are doing their best to remove it every morning but despite their efforts, it’s still noticeable. The third reason we chose Grand Cayman is that it is infant/toddler/kid-friendly.

Booking

For this trip, I was able to find saver level award tickets (tickets which require the least number of miles for a given route) on American Airlines for 30k miles per person round trip. Since my son is a lap infant, his ticket was free. The cash price for a round-trip flight from Chicago to Grand Cayman was $455 per person. Redeeming 60k miles for $910 worth of airfare was a decent redemption.

Owen Roberts International Airport does not have jet bridges so you have to walk down the stairs and onto the tarmac before getting into the airport terminal. The minute you land, you’re greeted by a musical band playing local music. It’s a perfect way to get the vacation vibes going.

   Sunshine Suites Resort

We stayed in a boutique hotel called Sunshine Suites Resort. It’s a 3.5-star hotel that is clean, comfortable, and very reasonably priced (usually between $140-$180/night). I saw its 4.5-star rating on Trip Advisor with over 2,000 reviews and that was good enough for me. Now, if you need luxury accommodations with an ocean view, this hotel is not for you. The main reason why I booked this hotel is we got to use all the amenities of the 5 star Westin Hotel which is a 5-minute walk down the street. Their pool, beach, beach towels, lounge chairs, gym, and access to its restaurants and bars are all included as part of the mandatory $35/day resort fee. The nightly price of the Westin was 3x the price of the Sunshine Suites. Since we were going to be out at the beach for a majority of the day anyway, all we needed was a comfortable place to sleep, shower, and get dressed and Sunshine Suites provided all that and more including complimentary breakfast. You can click on the video below to get an idea of the rooms and the property. FYI, if you don’t want to make the walk to the Westin, you can go to the front desk at Sunshine Suites and request a driver to drop you off in their golf cart. It works the same way if you want to come back from the Westin. Just let the front desk at the Westin know in that case.


SunshineSuitesNight
Sunshine Suites at night

SunshinePool
The pool at Sunshine Suites at night

The breakfast offerings were decent. A nice variety of pastries, pancakes, cereal, parfait, boiled eggs, toast, oatmeal, bananas, muffins, coffee, tea, orange juice, and apple juice. Sunshine Suites also had a restaurant on premises called Sunshine Grill which served lunch and dinner. This is not complimentary and does not come as part of an “all-inclusive” package. The fish tacos they served were delicious. If I can go back and have one meal in Grand Cayman, the fish tacos would be it.

Tacos


The Westin Hotel

Since we had access to all the amenities of the Westin, we would have breakfast and make our way there for the majority of the day.

SStoWestin

WestinEntrance
If you don’t want to walk here from Sunshine Suites, go to the front desk of Sunshine Suites and request to be dropped off via golf cart. This was a very convenient way to move around with our son.

WestinGCpool
The pool and swim-up bar at the Westin

WestinLobby
The Westin Lobby

WestinBack
View of The Westin from the beach area

WestinPools
The pool has a pedestrian bridge that crosses over to the beach. You can swim underneath to get to either side.

ZaynMePool
First pool experience for Zayn 

Seven Mile Beach

Once you cross over the pool to the beach area, you will be greeted by Westin employees who will direct you to lounge chairs and open up the umbrellas if you choose to have them open. Towels are available to the right of the pool and they must be checked out with your last name and room number of the property you’re staying at. Seven Mile Beach is simply amazing. Among all the beaches I have visited in my life,  I would rank it right behind the Maldives for water clarity.  There is no seaweed, no litter, it’s perfectly maintained, and waves are calm for water activities.


Sevenmilebeach (2)
The lounge chairs get occupied pretty quickly. The earlier you claim one in the morning the better.

sevenmilebeach3


7milebeach

ZaynBeach3

The water clarity makes it perfect for snorkeling at Seven Mile Beach so be sure to bring an underwater camera and snorkeling gear. You can also rent the gear from the hotel. Seven Mile Beach faces west and if the horizon is clear, you will be treated to some spectacular sunsets.  Even if the horizon isn’t 100% clear, the sun reflecting off the clouds will make a for a beautiful and colorful sky. SunsetGrandCayman

CaymanSunset

A point of interest which might be worth visiting if you’re reading this is Stingray City. It wasn’t age-appropriate for a 9-month-old but if you have kids a bit older or you yourself want to experience swimming with stingrays, it’s only a 10-minute drive away.  Keep in mind that when driving in the Cayman Islands, you drive on the left side of the road as it is a British territory.

Some of you have asked if the food, water, and snacks are expensive and for the most part, they certainly are expensive. If you purchase from the hotel or even convenience stores right next to the hotel, it will cost you 3 to 4 times would you are used to paying for bottled water. I asked a local where I can just buy a case of water and he directed me to a large wholesale club called ‘Cost U Less’ which was just a 7-minute walk away. If you’re familiar with BJ’s Wholesale Club on the East Coast, this was basically their sister store. It even had the Wellsley Farms brand which is the store label for BJ’s. You don’t need a membership and while the prices aren’t U.S. wholesale club cheap, it’s far cheaper than any other place you will find on the island. If you’re staying at an Airbnb and decide to cook rather than eat out, this is a perfect place to shop for your ingredients since they also carry fresh produce, seafood, and meat.

CostUless


Concluding Thoughts

We had a great time at Grand Cayman Island and the service and hospitality at both the Sunshine Suites and Westin were top notch. I’ve never seen two hotels so well coordinated when it came to transporting passengers between the two properties and accommodating each other’s guests at their respective restaurants. If there is one other important tip you take from this, BRING MOSQUITO REPELLANT and bathe yourself in it. They are relentless and if there any parts of your body that doesn’t have the repellant touching it, they will find it, guaranteed.  As always, thanks for reading.

TakeOffGC
Rum Point, Grand Cayman Island as seen from the ascent on American Airlines.


Travel Itinerary: 5 Days in Big Island Hawaii

Travel Itinerary: 5 Days in Big Island Hawaii

Big Island was the fourth Hawaiian Island my wife and I visited. This trip was also our first long distance trip with our 5-month-old son so there was a bit of uncertainty on how he would handle being in a plane for 8+ hours. Fortunately, he was very well behaved and this gave us a ton of confidence in doing future trips with him. During this trip to Hawaii, we did encounter a day of heavy rain and another day where the eastern half of the island had rain so we could not see certain points of interest. This forced us to cancel a couple of sights we had planned to see. However, there was a positive trade-off of being “stuck” on the resort and you will see why as you keep reading.

Day 1: Arrival

We arrived at Kona International Airport on the Big Island at around 3pm. Since we rented a car from Turo (you can read my review on Turo and our experience here), it was a matter of collecting our luggage and walking to the airport parking lot where our car was already waiting for us with the keys inside. The distance to Hilton Waikoloa Village from the airport was about 20 miles and a 30-minute drive. On the way to the resort, we stopped at a lookout point to take in the scenery. If you see a lookout point anywhere, just stop your car and enjoy the views.

DSC00014
Vegetation growth on volcanic rock at a lookout point.  The Big Island is home to multiple volcanoes, some which are still very active.

Since sunset was around 6:15 pm and by the time we got situated it was already close to 5 pm, we spent the rest of the time on the resort to enjoy the sunset views.

ResortSunsetResortSunset2resortsunset3

I’ll have a separate review on the Hilton Waikoloa Village but this was a wonderful property that was very kid-friendly.

 Day 2: Hawaii Volcanoes National Park and Stops Along the Way

On the second day, I drove from Waikoloa to Hawaii Volcanoes National Park while making a few stops in between. I downloaded the Gypsy App specific for Big Island and it guided me on where to make stops in between Waikoloa and Volcanoes National Park. It costs $9.99 and you do not need to have data for it to work. The most appealing aspect of this app is that the narrator gives you historical context with regards to culture and geology at various stopping points and why it might be worth stopping or skipping. The app serves as a very knowledgeable tour guide and I highly recommend using it for Big Island.


GypsyRoad
The Gypsy App is available for each Hawaiian Island. I highly recommend it.

Places of Interest En Route To Volcanoes National Park

LavaFieldBigIsland
A lava field lookout point on the way to Volcanoes National Park.

Lookoutpoint2
This viewpoint is right off the side of the road.

PunaluuSign
This is one of the places you should definitely stop by on the way to Volcanoes National Park.

blacksandbeachsouthend
Punalu’u Black Sand Beach

SeaTurtlesPunaluuBeach
Sea turtles basking in the sun at Punalu’u Black Sand Beach.

Punalu’u Black Sand Beach Park was the last place I stopped prior to entering Hawaii Volcanoes National Park. There are a few other points of interest after this one such as South Point (southernmost point out of all the 50 states) and Papakolea Beach which is a green sand beach. Getting to the beach does require over 2 hours of hiking and I did not want to run out of daylight where I’d be hurrying at Volcanoes National Park. I skipped these two but if you find yourself leaving prior to sunrise from Kona or if you’re staying in Hilo, you’d have plenty of time to see both of these places.

Hawaii Volcanoes National Park

VNPEntrance

VNPSign I’ve been asked if I bought my 5-month-old to this park and the answer is no. Since the steam vents emit sulfur dioxide and hydrogen sulfide gas, I did not want to expose my son to potential lung irritants. If you’re pregnant, have heart problems, asthma, or COPD, it’s probably best to avoid the steam vents at Hawaii Volcanoes National Park.

SteamVent
One of the many steam vents that are found in the park.

Caldera2
The Kilauea Caldera. You can either park at the visitors center and take a half mile hike to get here or you can just park on the road and walk a few hundred feet. I chose to do the hike so I would get to see most of the steam vents along the path.

There were some parts of the park that were still closed due to the eruptions from 2018. The lava tubes were also not accessible during this time. As you continue your drive through the park, I highly recommend taking Chain of Craters Road all the way down to to the coast. It’s about 20 miles from the caldera and drive is one of the best you will find in any of the 50 states. Pictures really don’t do it justice so I took a short video so you get a better idea.

You will also find plenty of amazing photo opportunities and other points of interest.

VolcanoesNPViews
One of the scenic viewpoints on Chain of Craters Road.

PetroglyphsPath
Pu’u Loa Petroglyphs Field

Closer to the shore, you will find a sign for the Pu’u Loa Petroglyphs Field.  This area is considered sacred to the people of Hawaii and you will find many symbols and images that were carved into the hardened lava. It’s 1.4-mile round-trip hike and I highly recommend it. Further down the road, you will see cliffs that are made from lava. This is the newest land on the Big Island and it’s made when lava hits the water and solidifies into rock.

VolcanoesNPLavaCliffs

RoadViewChainofCraters
Chain of Craters Road on the way back also has stunning views.

Day 3: Pololu Valley and Stops Along the Way

On this day, there was rain in the forecast after 2 pm so I made it a point to get this hike done as early as possible. The mornings also have cooler temperatures so it makes for a much more comfortable hike as it is. Pololu Valley is about a 45-minute drive from Waikoloa and about 1 hour and 15 minutes from Kona. You can just park your car on the road and enjoy the views from the look-out but if you really want to get the splendid views of the valley, you should do the hike. The hike down isn’t difficult but it can be slippery at times due to the frequent rainfall in the area. The hike going back up is moderately challenging and you will certainly need plenty of water and some granola bars.

PoluluLookoutParking
Pololu Lookout. If you decide not to do the hike, you still can’t go wrong with these views.

PololuLookout2
Pololu Valley from the parking area

Blackrockbeach
The Black Sand Beach once you hike your way to the bottom.

PoluluLookOut
This is the view you hike down for.


Waimea Valley is nearby and also offers spectacular views. However, hiking there does require that you go on private property and that would be considered trespassing. You can also drive down there but you would definitely need an AWD or 4WD vehicle with some clearance.

Day 4: Whale Watching From Hilton Waikoloa Village (due to rain)

On this day, the plan was to go to Akaka Falls. If you are in Big Island, please make an attempt to visit Akaka Falls because it is beautiful from the many pictures and videos I have seen. Unfortunately, a lot of rain moved in and it basically spanned the entire island. But there was a silver lining.  As I’ve mentioned before, winter is humpback whale season in Hawaii. Mothers and calves are near the coasts of every Hawaiian island and this is the time when mothers teach their young on how to be whales. Since our resort was right on the shore, I took my camera and started filming the minute someone pointed out the whales in the distance. Then they started coming closer and closer.

Out of nowhere, the mother whale breached the water and I was lucky enough to have my camera recording. I do want to apologize for the grainy quality.

TwoWhales
Two humpback whales right off the shore of Hilton Waikoloa Village

Whales were seen 4 out of the 5 days we stayed at Hilton Waikoloa Village and it really made it fun and exciting for the kids who were also whale watching.

Day 5: Snorkeling in the Hilton Waikoloa Village Lagoon and visit to Kona

Day 5 was supposed to be a visit to either Akaka Falls or the green sand beach for the second day during our trip both those of places had rain in the forecast while our side of the island was bright and sunny. I used this time to go snorkeling.


This property does not have an ocean front beach due to the powerful waves and riptide currents that are common along the Big Island. It does have a lagoon with sand that functions as a beach and the lagoon is excellent for swimming and snorkeling. I saw plenty of colorful fish and several sea turtles, one which I was able to follow for almost two minutes.

Kona

For dinner, we were recommended Umekes Fishmarket Bar and Grill in Kona by the owner of the vehicle we rented from Turo. We ordered the Tempura Battered Fish & Chips and Cajun Style Ahi Fish Tacos. Both of the items we ordered were perfect.

FishTacosUmekes

FishAndChips


This concluded our trip to the Big Island in Hawaii. A popular question I get asked is among the four islands I have visited, which one is my favorite? I really can’t say I have one. Each island has its own unique charm and offers something different for everyone. The Big Island has a volcanic landscape that’s so vast, it can’t be seen anywhere else in Hawaii. It also has stunning valleys, excellent beaches, and a green sand beach that can’t be found on any other Hawaiian island. Since it is not as heavily trafficked by tourists, you get a better flavor of Hawaiian culture throughout the island. Big Island is also known for its coffee and macadamia nuts. If you have the time, you should visit a coffee or a macadamia nut farm.  But just like the other Hawaiian islands my wife and I have been fortunate to visit, the locals are wonderful. They are some of the nicest and friendliest people in the world. The physical beauty of the islands is certainly attractive and makes for great pictures but it’s the Hawaiian people and their hospitality that keeps us coming back. We look forward to coming back sometime in the near future. As always, thanks for reading.

Travel Itinerary: 3 Days in Acadia National Park, Bar Harbor Maine

Travel Itinerary: 3 Days in Acadia National Park, Bar Harbor Maine

Acadia National Park had been on the bucket list for quite a while. Acadia National Park encompasses a large area of Mt. Desert Island off the coast of Maine. This beautiful setting is known for its stunning vistas, scenic hikes, views of the ocean from atop Cadillac Mountain. This is also the first place in the U.S. where you can see the sunrise between October and early March. If you’re there in the peak of summer, you can take a swim at Sand Beach when the water temperature is more tolerable. We drove from Albany, NY and it took us about 7 hours to get there. Acadia National Park is about a 4.5-hour drive from Boston and about an 8-hour drive from New York City.  If you’re not close enough to drive, you can also fly into Bangor International Airport which is about 50 miles from the town of Bar Harbor. We used Bar Harbor as our base camp and gateway into Acadia National Park.

AcadiaMap

Day 1: Cadillac Mountain

We arrived at Bar Habor in the late afternoon about 2 hours before sunset. We stayed at the Hampton Inn which is located just 5 minutes away from the park entrance and used that as our base camp for this trip. Since it was a clear day, we decided to enter the park and drive up Cadillac Mountain to catch the sunset. The cost to enter Acadia National Park is $25 per vehicle and the pass is good for 7 days. Park Rangers routinely check for the passes (it must be hung over the rear-view mirror) so please purchase them prior to entering.  DSC_0066DSC_0118

IMG-0648
The spectacular sunset from Cadillac Mountain

DSC_0104

DSC_0074
Overlooking the town of Bar Harbor from Cadillac Mountain

Incredible sunset views and plenty of photo opportunities. Cadillac Mountain has plenty of pull-outs so utilize them and take your time driving up the mountain. For dinner, we came across a tavern called Thirsty Whale. Their lobster rolls were delicious and highly recommended.

LobsterThirstyWhale
No one does lobster quite like Maine. Here’s a lobster roll from Thirsty Whale in Bar Harbor.


Day 2: Jordan Pond and Bubble Rock Trail

Our second day in Maine was overcast with a slight drizzle at times, but nothing that would keep us from further exploring Acadia National Park. On this day, we decided to hike the trail around Jordan Pond and climb up South Bubble Rock. Jordan Pond is actually a small lake and there is no swimming allowed as it is the main source of drinking water for residents in the area. You are allowed to bring a kayak or small boat and utilize it on Jordan Pond. The circular trail around Jordan Pond is 3.4 miles and isn’t difficult at all. We saw people of all ages, from 5-year-olds to senior citizens. The hike up Bubble Rock is a different story. It’s only 0.4 miles but it’s all vertical and there are areas where you have to climb. I wouldn’t recommend this trail for kids or those who aren’t fit enough to climb vertically. Please wear proper hiking shoes if you decide to do this hike or any other at Acadia. They do get precipitation often and gym shoes on slippery rocks is a recipe for disaster. Once at the top, the views are magnificent.

DSC_0147
Jordan Pond


JordanPondTrail
Part of the trail around the perimeter of Jordan Pond.

BubbleMountain2
Atop Bubble Rock. The hike to get here isn’t long but it is steep. The views at the top are amazing.

DSC_0203
We all made it.

For dinner, we stopped in town at went to a restaurant called Geddy’s. Their haddock sandwich was delicious. Seafood from Maine really is on a whole different level.

HaddockSandwich

BarHarborTown
The town of Bar Harbor, Maine. 

Day 3: Bowel Trail, Beehive Trail, Sand Beach, Cadillac Mountain

Day 3 gave us perfect weather and we took full advantage of it. First on the agenda was the top of Beehive Trail. There are actually two ways to get to the top. The first is taking the most direct route which is Beehive Trail itself and vertically climbing straight to the top. There are handlebars as you get higher and if you’re afraid of heights or you’re a novice hiker, this route isn’t for you.   The other way to get to the top of Beehive Trail is by taking the longer Bowel Trail. The hike is longer (1.4 miles) and you gain elevation gradually. This trail also offers multiple picture opportunities and allows you to loop around a small lake. If you do hike the Beehive Trail to the top, you have to hike Bowel Trail on the way back down as Beehive Trail only has one-way traffic going up. From the top of the trail, you’ll get spectacular views of the ocean, the park, and many islands around Mt. Desert Island.

DSC_0238
A view on the Bowel Trail

LightHouse
Egg Rock Light, a lighthouse built in 1875 and still active today as seen from the trail. I used a zoom lens to get this close up shot. Still looks beautiful.

AcadiaView
View from the top of Beehive Trail. Sand beach in the background


DSC_0269
View of  Sand Beach from Beehive Trail

After we were done hiking, we walked across the street to Sand Beach to get an up-close look. The water looked very enticing but given that it was still early May, the water was still too cold to go for a dip. Perhaps late June through early September would be a good time to go for a swim. The beach is very clean and the water as blue as it looks in the picture.

DSC_0277
Sand Beach at Acadia National Park

AcadiaBeach
Sand Beach

AcadaRocks
The rocky shore of Acadia National Park

Since we were going to pass Cadillac Mountain on the way back, we figured we would stop by and soak in the views from vantage points we missed the first day.

DSC_0359
Cadillac Mountain

DSC_0324
We stopped at a pull-out and walked a few hundred yards over the granite to get this view on Cadillac Mountain

For dinner, we went back to Geddy’s because of the wonderful experience we had the day before. This time we all opted for the fish and chips. And man, it did not disappoint.

GeddyFishChips
fish and chips with coleslaw and tartar sauce

This was our trip in a nutshell. I want to point out that there is a very steep and difficult trail called the Precipice Trail which is closed between March and August due to falcons nesting between that time. If you happen to go outside of this timeframe and you’re physically fit to hike the trail, check it out because I’ve heard nothing but great things about it. Whale watching season was still a few weeks away during our visit but if you’re in the area and are interested, it’s a great opportunity to potentially see humpback whales, minke whales, and finback whales. If you plan on visiting Acadia National Park, budget at least 3 days. 4 or 5 days would be optimal in case a day or two isn’t productive due to the weather. This was a memorable trip and Acadia National Park is a setting with endless beauty and plenty of things to do. We had a blast and we hope to visit again soon.


Travel Itinerary: 4 Days in Kauai

Travel Itinerary: 4 Days in Kauai

Kauai was the second island my wife and I visited during our last trip to Hawaii. We started off in Maui (you can read that itinerary here) and took a one-way flight from Maui to Kaui on Hawaiian Airlines via JetBlue miles. Kauai is known as the Garden Isle for its lush tropical landscape. Based on my experience, Kauai offers more seclusion than Maui and Oahu and more lush greenery than Big Island. All of the islands are special in their own way so I’d recommend experiencing all four.  Here’s a rundown of what we did during our four days in Kauai.

Day 1: Arrival

My wife and I stayed at Mariott’s Kauai Beach Club Hotel during our stay in Kauai. Great property that wasn’t expensive and located right on the beach just 10 minutes from the airport. We rented a car in both Maui and Kauai and if you want to make the most of your time there, I’d recommend doing the same.  We arrived in the late afternoon from Maui so we spent the evening at Kalapaki Beach, right in front of our hotel and took in the live entertainment that was offered by Marriott.

MarriottKauai.jpg
View of the beach from our balcony

Day 2: Poipu Beach

On the second day, we spent almost the entire day at Poipu Beach. Of all the beaches I’ve been to in Oahu, Maui, and Kauai (I’ve been to many), this was my favorite in Hawaii. Plenty of space, clean, an abundance of marine wildlife, and a perfect place to snorkel. If you’re in Kauai, this beach is a must see. You also get spectacular sunsets if you decide to stick around until the late evening.

Kauai


I was very fortunate to be able to swim alongside a green sea turtle. If you’re going to snorkel in Hawaiian waters, get yourself a GoPro or any underwater camera. You’ll see some really cool wildlife and it’s worth getting on video.

Day 3: Waimea Canyon State Park

Waimea Canyon State Park is another must-see place in Kauai. From our hotel near the airport, it was about 32 miles away to the entrance and took about 45 minutes. You can also take a 3.4-mile hike to the bottom of the canyon and this will take about 3 hours round-trip. The cool thing about Waimea Canyon is that the surrounding area looks like Sedona, Arizona. You’ll find red clay, orangish water, and landscape that almost seems out of place for Hawaii.

IMG-5750


IMG-5748
The landscape on the periphery of Waimea Canyon


Waimea
The main lookout at Waimea Canyon


Once you’re at the main lookout point at Waimea Canyon, you’ll find local farmers selling local produce such as mangos, star-fruits, and papayas. They are delicious and if you purchase the fruits, you’ll be supporting local.

Day 4: Napali Coast State Park aka Jurassic Park

No trip to Kauai is complete without seeing Napali Coast State Park. This was the setting for Jurassic Park and the minute you get to the entrance, it will all come back to you. My wife and I were dead set on doing the hike and we did about 3/4 of it until park rangers told us we couldn’t go any further due to flooding from heavy rainfall the previous night.  The hike is definitely challenging, particularly the first quarter mile where there is a lot of steep uphill climbing. If you do the hike, bring some solid hiking shoes, plenty of water, and a couple of granola bars. I saw a few people with flip-flops and they were getting killed from mud and wet rocks. Please don’t do this hike with flip-flops or sneakers. You don’t need expensive hiking shoes and a $60 pair would do the job.  I’d also bring a very light raincoat since this part of Kauai gets a lot of rain and the weather can change from hour to hour. Other options to see the cliffs are from a boat or helicopter. I have heard the helicopter takes four people and that if you’re one of the two sitting in the rear, you’re kind of blocked off from the views when compared to those sitting in the front. Just something to be aware of.

KauaiCliffs
Overcast skies on our way to Napali Coast.

KauaiCliffs2

The weather on this part of the island changes from hour to hour. If you open up any weather app on your smartphone and you see rain for the entire day, take that with a grain of salt. On our drive there, we had mostly overcast skies with drizzle here and there. By the time we started the hike, the clouds started clearing up and gave way to sunshine. Don’t get disappointed if you see overcast skies while you’re driving there. Just wait it out and hopefully the sun will appear.

NapaliEntrance

NapaliOne
A view from the hiking trail. The skies cleared up about 40 minutes after we started hiking. 

Napali3
Waiting for a raptor to come around the corner….jk

IMG-2151

NapaliCoast2
The majestic cliffs and a rainbow from a distance

So this was Kauai in a nutshell. A special place and a beautiful island that’s home to my favorite beach amongst the ones I have visited in Hawaii. I really wish we had an extra day here and I know I’d be saying the same thing even we did. If you happen to visit Hawaii, try to include Kauai in your itinerary as well. But only if you are certain you can do the three must-see places above. If you want to read about our most recent trip to Hawaii (Big Island), you can do that here. As always, thanks for reading.

Travel Itinerary: 3 Days in Maui

Travel Itinerary: 3 Days in Maui

Maui was the first of two islands my wife and I visited during this particular trip to Hawaii. The second island we visited was Kauai and you can read about that here.  Our last trip to Hawaii (Feb 2019) covered The Big Island and if you are interested in reading about our time there, you can do so here. Maui, also known as the Valley Isle, is the second largest island in Hawaii and with endless beauty. Our three days didn’t cover everything, but it covered most of the main attractions. We had a total of 7 days in Hawaii (the first day was more like a half day), three which we spent in Maui and four in Kauai. The question a lot of people ask is if 3 days is enough to see most of the main sights in Maui. It was enough for us for two reasons: First of all, we woke up at the crack of dawn and got an early start to our day. This is absolutely crucial. If you’re not in your car by 8 am every day, it’ll be very difficult. The second thing which was totally out of our control but worked in our favor was the weather. We had sunshine all 3 days and that’s just us gambling on great weather for 3 days and getting lucky. Ideally, you want to have one or two extra days as a buffer for rain.

How We Got There

You’ll probably notice a trend with just about every itinerary I post.  We rarely use cash to get to our destination and this trip was no different. Now keep in mind, my wife and I have schedules that for the most part, allow us to take these trips during peak travel season.  This trip to Hawaii happened to be during the last 9 days of December which is high season in Hawaii. Likewise, the number of miles that airlines require to get to Hawaii is also doubled from most cities. United usually charges 22.5k miles a person one-way to get to Maui. That redemption rate from Chicago, Newark, and D.C were 45k miles per person one-way. Fortunately for us, Denver still had the saver award redemption at 22.5k miles so we decided to spend two days there (both of us had never visited Denver), and depart to Maui from Denver International Airport.

 Arrival

Even though this was technically our first day, we arrived too late to do anything significant. Our flight to Maui arrived at 4:35pm and by the time we deplaned, got our bags, and picked up our rental car, it was close to 5:45pm. At this point, we only had about 15 minutes of daylight left. We checked into our hotel, the Napili Shores by Outrigger, ate an early dinner and decided to go sleep at 8pm.  The next day was going to be very long.

Day 1: Haleakala National Park & Papawai Scenic Lookout

  • Haleakala National Park

If you’re visiting Maui, you simply can’t leave without witnessing the sunrise at Haleakala National Park. It’s something that can’t be replicated elsewhere and it’s magical. The ideal day is when there is a layer of clouds below you that allows the sun to rise above that layer. Sometimes it can get cloudy enough where there is little to no visibility and that’s the type of day you want to avoid. Your best bet is keeping an eye on the weather. You do have to pay $25 per car at the entrance and you have to make a reservation for $1.50 if you’re going there at sunrise. The ticket for the sunrise is good for 3 days and it can be purchased up to 60 days in advance. My wife and I got there 2 hours before sunrise to assure ourselves a good parking spot.  You should aim to get there no later than an hour before sunrise or the desirable parking spots and viewing areas will fill up quickly. It’s a relatively slow 45-minute that has steep curves and hairpin turns after hairpin turns. It does require your full attention and if you’re the type that gets distracted with a cell phone easily while driving, turn it off until you’re at the top. If you run into fog, it can get a little challenging but fortunately for us, it was clear all the way through during our drive to the top.

sunriseMaui

DSC_0090
View of the sunrise at Haleakala National Park

A few important things to keep in mind. When you’re at the viewpoint, you are at an elevation of about 10,000 feet. Not only is it cold, it is very windy! You will need a warm jacket and ear covers or I promise you it won’t be pleasant. The air is obviously much thinner so If you’re sensitive to elevation or have had trouble breathing in elevation before, please reconsider. Once you’re done with the sunrise, you can stop at other viewpoints on the way down. There are fantastic picture opportunities of the surrounding craters and landscape

HaleakalaCraters
View of the craters from one of the scenic lookouts on the way down

  • Papawai Scenic Lookout

  • On our way back to Lahaina, we decided to stop at the Papawai Scenic Lookout. Locals recommended this spot as a great place to whale watch from land. During the winter months, mother humpback whales will birth their calves and teach them important behaviors in the waters right off of Maui. It took a little bit of patience but it paid off and we got a show of a lifetime. About 15 minutes after we got there, we noticed a mist of water that was sprayed about a quarter mile offshore.  And there it was, a baby humpback whale under the watchful eye of its mother practicing breaching behaviors. At first, the calf looked like it needed a bit of support just to breach halfway.

HalfBreach
This was as far as the calf could go the first few times.

After about 8 attempts of getting halfway up, it completely breached the water. I kept my camera in rapid-fire mode and I was fortunate enough to capture a memorable moment.

DSC_0230

Even if you don’t manage to see whales, the lookout provides excellent photo opportunities.

DSC_0198

DSC_0200

At night we walked around Lahaina Town and stumbled upon one of the best Ice Shave’s you will ever have. It’s called Ululani’s Hawaiian Ice Shave and they have over 50 flavors. I had the ‘Haleakala’, a mix of coconut, leche, and condensed milk. I really wish I took a picture to post here but I guarantee you’ll find whatever you’re looking for.

Day 2: Road to Hana

Along with Haleakala National Park, the Road to Hana is another excursion you simply cannot leave Maui without experiencing. It has black sand beaches, waterfalls, bamboo forests, flower gardens, breathtaking ocean views, and it was one of the highlights during our stay in Hawaii. The Road to Hana from start to finish is about 52 miles it is a journey which will take the majority of the day if you factor in the time you will stop at various stopping points. There is over 600 hairpin turns, 54 bridges (46 which are one lane), and you will have to concentrate while driving as the roads can get very narrow at certain points. My wife and I had a rental car so if there were certain stop points we liked better, we were able to spend more time. You can opt to take a tour bus but then you’re on their time. If you are driving there,  fill up your tank before you start. The last town prior to starting this journey is Paia and the gas prices over there are expensive. You’re better off filling up in Kahului. There no gas stations between Paia and Hana. If you are driving yourself, I highly recommend downloading Gypsy Guide – Road to Hana on your iPhone or Android.

IMG-9921

It cost me $5 and it was the best $5 I spent on the island.  The app will recommend which points of interests are worth stopping for, which ones don’t require a lot of time, and which should be skipped altogether.  It honestly felt like we had an actual person with us and the app even told us of approaching food shacks and cafes. The great thing about this app is that it worked even when we lost data connectivity. On the way back, the app tells you more of the cultural significance of different points in Maui. These are the places we stopped in chronological order:

1. Garden of Eden Arboretum

This is one of the only points of interests on the Road to Hana where you have to pay to get in since it is privately owned. The cost is $15 for adults, $5 for children, and infants are free. They do offer student and AAA discounts. My wife and I found it to be worth it and you can budget about 30 minutes here. They have numerous native and indigenous plants, many you might have never seen before and it also offers some great photo opportunities. The garden also has a smaller waterfall and you’ll see peacocks on the premises as well.

DSC_0330
Garden of Eden Arboretum

2. Waikamoi Ridge Trail

This was a hike which really stimulated your senses. The best thing about this trail? There are mango trees all around and it smells like heaven. They also have one my favorite trees, the rainbow eucalyptus tree which looks like the bark has been colored by a pastel. The trail can get extremely muddy so if you’re wearing flip-flops or don’t want to get your shoes destroyed, it wouldn’t be a bad idea to skip this and spend more time at Twin Falls (which we skipped).

IMG-1958
This fruit looks like pineapple but it is not.

IMG-5722

IMG-5729
Rainbow-eucalyptus tree

3. Halfway to Hana Stand

They’re known for their banana nut bread and it’s delicious. If it wasn’t worth the hype I wouldn’t tell you to stop here.  It won’t take long and you can park on the side of the road.
HalfwayHana

4. Upper Waikani Falls

There is only room for a couple of cars on the side of the road to see this trio of waterfalls but it certainly is beautiful and worth stopping if parking allows.

IMG-5726

4. Nahiku Market Place

Two words: fish tacos.  Perfect place to have lunch. The fish tacos were super fresh and delicious. I wish I had a picture but I inhaled them before I realized I’d had forgotten.

5. Wai’anapanapa State Park

This is one of the places where you absolutely have to stop. A beautiful black sand beach which also has an abundance of volcanic rock, a cave that takes you to the waters, and you can also go for a swim. The waves are very strong so something to keep in mind. We spent a solid hour here and honestly we wished we could have spent more.

IMG-1915
Black sand beach and volcanic rocks

IMG-5741
There’s a story behind this cave but I won’t ruin it. Download the app above and it will tell you all about it

6. Wailua Falls

Another point of interest that you should definitely stop by. You can park on the side of the road and walk down to the base of the falls. I even saw a few people swimming near the base and they seemed quite comfortable doing so. I have no idea how deep it is so please be cautious if you decide to go in the water. It’s a beautiful waterfall and probably the largest one you’ll see on The Road to Hana.

IMG-1938

IMG-1943

7. Oheo Gulch (7 Sacred Pools)

This was our last stop on The Road to Hana. Unfortunately, due to mudslides, access to these pools was closed during our visit to Maui. We were able to see some of the falls from the trail but no one was allowed to swim at the base. Oheo Gulch is located 15 minutes past the town of Hana. Here is a very important detail to keep in mind. If you go beyond this point in your rental car and if something bad were to occur, your insurance becomes void! Even your credit card coverage would be voided.  The road beyond this point is mostly gravel and dirt and the major rental companies have this written out explicitly in the contract agreement. Many tourists will risk it because there are some beautiful sites to see even beyond Oheo Gulch. But even something as minuscule as a flight tire means you’re on your own.

Oheo
Oheo Gulch

Day 3: Napili Bay

Maui has plenty of amazing beaches that you can choose to spend your day. Or you can even go beach hopping and get a taste for almost all of them. Since our hotel was situated at Napili Bay, we decided to spend the day on the beach over here. If you’re into snorkeling and seeing marine wildlife, this was an awesome spot for that. I saw plenty of colorful fish and was lucky enough to see a few sea turtles, one which was managing to get by with a flipper missing. You can see the video below.

IMG-1763
You can see me snorkeling in the distance with the island of Moloka’i in the background.

If you happen to be in the Lahaina area, I strongly recommend stopping by Gazebo Restaurant for breakfast. Their white chocolate macadamia nut pancakes with homemade whipped cream were amazing. They are also very generous with their portions.

IMG-1697.jpg

So this was Maui for us in a nutshell. We wish we could have stayed a day longer but that meant subtracting a day from Kauai. We felt pretty satisfied with our 3 days here (excluding travel) and felt like we accomplished just about everything we wanted to accomplish. If you want to continue reading about Kauai or the Big Island, scroll to the top of this page and you will find the links. Thank you for reading.

Travel Itinerary: 7 Days in Costa Rica

Travel Itinerary: 7 Days in Costa Rica

Costa Rica is a beautiful and affordable destination and one which I get asked about quite often. It has such a diverse landscape that you can be on the beach taking in the sun one day while trekking the trails near Arenal Volcano the very next day. There is something for everyone in this beautiful country and you’re going to see wildlife, landscape, and other sites which you might have never seen before. My wife and I took a flight from Albany, NY to Liberia, Costa Rica and rented a small SUV to get around. We started on the northwest side of Costa Rica and made our way southeast. We returned the car to San Jose International Airport. It’s not really far in terms of distance but there are roads where you will have to drive slow either due to the speed limit or due to the poor conditions of the road themselves. If you are going to rent a car, I highly recommend an SUV. It doesn’t have to be huge and anything with decent ground clearance will suffice. You can see the distance between the two airports below.

CRMap.JPG

Arriving in Costa Rica

We arrived at Liberia International Airport from Newark at 1:40 pm. 17.5k United miles per person was what got us here. We headed straight for the car rental counters which were adjacent to the airport and this was probably the worst part of our trip. We pre-booked with Budget so I assumed I would just have to show my license and passport, give them my credit card, and we’d be on our way. That’s not how it went. First of all the line was long and it was slow moving. The issue at hand with just about everyone in front me? Not reading up on their car rental laws prior to arriving and then assuming that Budget was in the wrong. Here is how it works: In Costa Rica, you are BY LAW, required to purchase government issued liability insurance  (SLI). This is different than benefits from your credit card. The concern with most people was that purchasing this insurance would void the collision damage waiver (CDW) their own credit card might provide. It does not void the CDW because purchasing the SLI is law. Now it’s true that the rental agencies might try to upsell you their own insurance in addition to the SLI. That’s where they earn most of their profits. For your sake, it’s redundant and a waste of money. We spent nearly two hours in line before we finally got our SUV. And again, I strongly recommend an SUV because you will find gravel roads and roads that are poorly paved in Costa Rica.

Days 1 & 2: Puerto Potrero

For the first two days, we stayed right on the beach at Sugar Beach Hotel.  It was a relatively inexpensive and comfortable place with a very friendly staff. One of the biggest appeals of this hotel was having their own private beach. A clean pool and complimentary breakfast were huge pluses. They also have their own restaurant but my wife and I opted for the local food scene instead. The sunset views from the beach were incredible. If you’re into surfing, boogie boarding, or water paddling, this place was perfect for that. There are plenty of hotel options on the west coast of Costa Rica and you’ll get sunset views and clean beaches from just about all of them.

Day 3: Bijagua and Tenorio Volcano National Park

We left around 9:30 and arrived at our B&B called Sueno Celeste around 11 am. This is the area near the Rio Celeste waterfall and if you happen to find yourself in this area, I would definitely recommend this B&B. Rather than one large building with multiple rooms, they have several colorful cabin type rooms in a lush green garden setting that is frequented by several unique and colorful birds. I saw birds on this property that I’ll probably never see anywhere else. You can see some of them below.

DSC_0616
The lush grounds of the Sueno Celeste B&B. All the birds that were seen below frequent the property so always have your camera ready

DSC_0707
Toucan

DSC_0729.JPG

DSC_0763

DSC_0769

We arrived at Sueno Celeste, dropped off our luggage, and drove to the entrance of Tenorio Volcano National Park. There is only one road to get there and not only is it gravel, there are bumps, potholes, and craters everywhere. It was hard enough traversing this road with an SUV, I can’t imagine how difficult it would be with a sedan or smaller car. Once we were there, the entrance fee was $10 per person and off we were. The hike to get to the Rio Celeste Waterfall is about an hour and there is some steep uphill climbing involved. The return is about 45 minutes. Bring a couple of water bottles and some granola bars because the uphill portion can be exhausting. Since the trails get frequent rainfall, it will be very muddy and you will likely get mud over your clothes. Make sure you bring a decent pair of hiking shoes and hiking clothes that you wouldn’t lose sleep over if they got dirty. I saw a few people trying to do this hike with flip-flops and they struggled. The mud was eating their flip-flops alive. The views along the way are picture worthy and the reward at the end of the hike, the Rio Celeste Waterfall, is incredible.  Swimming in the national park is forbidden but since the Rio Celeste runs 9 miles, you’ll find locals swimming in the portions that are outside of the national park territory.

DSC_0629
The blue color of the Rio Celeste

DSC_0635
Rio Celeste Waterfall. Well worth the hike.

DSC_0680
Capuchin monkey high in the trees. These monkeys spend almost all of their time near the canopy. They won’t bother you but please don’t feed them. That’s how they lose their fear of humans.

Tenorio Volcano National Park closes at 4pm  and they don’t allow visitors after 2pm so the earlier you get there the better. After we were done with our hike, we drove the bumpy road back to Sueno Celeste. The family that owns this B&B has a rotating menu for dinner each night (for pay) that they cook themselves. That particular night, fish cakes with peanut sauce, steamed vegetables, and jasmine rice were on the menu. We never had anything like it and it was delicious. This property also had a large outdoor jacuzzi that can fit 8-10 people. Since no one was using it, we figured it would be a nice way to cap off a productive but tiresome day.  We stayed in Bijagua for just one night and the next day it was on to La Fortuna, about a 2-hour drive southeast with Arenal Volcano National Park being the main attraction.

Day 4 & 5: La Fortuna and Arenal Volcano National Park

La Fortuna is a small town near Arenal Volcano and one that is used as a base camp to get to the sights near the area.  We stayed at an inexpensive but comfortable hotel called Hotel Eco Arenal for two nights. On the day we arrived, we did a quick hike to La Fortuna waterfall. The entrance fee was $15 and the hike took about 20 minutes. This hike will take you through the lush tropical forest and will provide you with plenty of spectacular picture opportunities.

DSC_0793
La Fortuna Waterfall from a distance

DSC_0796

Once we were done with this excursion, we headed back to La Fortuna and just walked around the town. They have a beautiful park located in the town’s center and there is an abundance of restaurants, boutique shops, and souvenir shops throughout town. The following day, we did the hike at Arenal Volcano National Park. The Volcano is easily seen from La Fortuna but to hike the trails, we had to drive about 40 minutes to the entrance of the park. The park is open from 8am to 6pm and there is an entrance fee of $15 per adult. If you’re in Costa Rica, this is one of the must-see places you should add to your list. Arenal Volcano is still considered an active volcano and it last erupted in 2010. On a clear day, there will be multiple points on the trail where you will be able to take incredible pictures of the volcano and surrounding landscape.

DSC_0840

DSC_0945
Arenal Volcano. The ashy gray areas are from the last eruption in 2010.

The hike was mostly flat grounds but if you wanted to get better photo opportunities, there are trails that diverged from the main path and required some steep uphill climbing. If you’re able to do it then I highly recommend taking advantage of this opportunity. As an FYI, you don’t need a guide to do these trails but if you feel more comfortable having one, you will find guides at the entrance of the park (for a fee). Now it was time make the 3 hour drive southwest to Monteverde.

Day 6: Monteverde and Cloud Forest Biological Reserve

Even though the straight line distance isn’t far, the drive from La Fortuna to Monteverde took us 3 hours since there are no roads that cut through the center of Arenal Volcano National Park. We also had to drive around Laguna de Arenal and this added considerable time and distance. But 3 hours later we were in Monteverde and we stayed at a very cheap hotel called Hotel El Bosque. In places like Costa Rica where we were going to be out and about almost the entire day, we opted for cheap but comfortable accommodations. Although this place was cheap, it certainly wasn’t comfortable so I wouldn’t recommend it.

The main attraction in this area is the Cloud Forest Biological Reserve, a sanctuary to over 500 species of birds, 130 species of mammals, and 120 species of reptiles and amphibians. For this excursion, we opted for the guided tour ($37 per person for foreigners and $27 if you have a student ID) on the recommendation of friends who had been here before. They had tours at 7:30am, 11:30am, and 1:30 pm. Since we had a 3-hour drive from La Fortuna, we opted for the 1:30pm tour.  You can choose between a few different types of tours including a night tour if you’re feeling more adventurous. The website for booking the tour is http://www.reservamonteverde.com/guided-tours.html.

Having a guide for this tour was worth it. Our guide was able to point out reptiles and birds that were well camouflaged in the trees which we would have certainly missed without his expertise. He was able to identify the species of birds based on their chirping noise and had some powerful Nikon binoculars that he passed around to everyone in our group when an animal or bird was spotted. This walking tour took about 4 hours and the trails were mostly flat and easy to navigate.

DSC_1070
Beautiful view from the hike at Cloud Forest Biological Reserve

DSC_1026.jpg
One of the rarer birds in the forest, the resplendent quetzal

DSC_1076

This concluded our hiking/nature/adventure portion of our trip to Costa Rica. It was off to the capital city of San Jose early the next morning.

Day 7: San Jose

Our return trip home was via San Jose International Airport so we made sure we gave ourselves an entire day to experience Costa Rica’s capital city. San Jose is a vibrant city and the largest city in Costa Rica. They have plenty of museums, theatres, parks, and interesting architecture. You can experience most of this by choosing a central hotel location and walking around. We decided to stay at Hotel Aranjuez which I highly recommend. Their complimentary breakfast had a huge selection and it was a clean and comfortable accommodation.  It only cost us $67 for the night so there was a ton of value there.

DSC_1079
The National Theater of Costa Rica, which opened in 1897

DSC_1081
Central Park in San Jose, Costa Rica

The following day we returned our one-way rental to San Jose International Airport and off we were back to the U.S. We used Southwest Airlines for our trip back and we got an incredible redemption of 6,200 points per person for our flight back to Albany via Baltimore. In a span of 7 days, we were able to enjoy the beach, spectacular sunsets, multiple waterfalls, volcanoes, exotic wildlife, and a beautiful city. That’s what makes Costa Rica very special. There is something for everyone and you can customize your itinerary based on your specific interests. The people are so friendly and helpful and it’s a place I’d highly recommend. Just remember to bring mosquito repellant, a good pair of hiking shoes/clothes, and read up on the car rental laws prior to arriving.

Travel Itinerary: 7 Days in Argentina

Travel Itinerary: 7 Days in Argentina

I’ll go over our itinerary to Argentina and Chile and the miles/points that we used on different segments. I’ll go over what we did well with regards to planning while touching upon the aspects that we could have done differently. Everyone’s purpose for a trip is different, but my wife and I had one main goal in mind: To make the Patagonia region of Argentina and Chile our priority. We had 6 full days in Argentina so we had to make the most of it. So here it goes……

Getting There:

Non-stop flights to Buenos Aires, Argentina depart from NYC, Newark, Miami, Dallas, and Houston. We were traveling during the busy holiday season and we were definitely not going to use cash to book this ticket. Round trip airfare was at least $1,300 a person on American, United, and Latam Airlines. United Airlines was charging 70k miles one way from Newark or Houston for this trip. American Airlines was charging over 70k miles from JFK, Miami, and Dallas (DFW) We caught a huge break when we searched up the one way trip from Miami on British Airways. They were only charging 25k miles per person from Miami to Buenos Aires via American Airlines. Since they are One World partners with American, we were able to use British Airways Avios (BA’s mileage currency) to fly on American. Since neither my wife or I had ever visited Miami, we figured we’d use our JetBlue miles to fly from Albany to Ft. Lauderdale and escape the ensuing blizzard that was en route to Albany, NY. This allowed us to spend two days there and enjoy the city. The flight to Buenos Aires departed on the 24th from Miami during the evening.  A one-way ticket on the same flight would have cost us over $1,900 dollars per person!!! We got significant value on this redemption, possibly one of our best ever. British Airways is a transfer partner of Chase (If you hold the Chase Sapphire Reserve or Preferred) and American Express (Platinum and Gold) so it’s one of the easier mileage currencies to accrue.

Capture
The damage had we booked using cash. Insane.

Day 1: Buenos Aires

Our flight landed at 6:45 am and this was really going to be our only full day in Buenos Aires. I tried to sleep as much as I could have, but anyone who travels economy class knows, you can’t really sleep well when you’re sitting for that long. My wife and I were both tired and our hotel, Dazzler Polo (part of the Wyndham portfolio of hotels) was all the way on the other side of town. We just hoped that even if the hotel didn’t let us check in early, they would at least hold our bags until the 2 pm check-in time. Once we got our luggage we hailed an Uber (more on this later) and took the nearly 1 hour ride to the other side of town. By the time we got to the hotel, it was 9 am. I walked to the front desk and told the lady we just arrived from Miami and kindly asked her if there was any possible way she would let us check in early. She quickly checked her computer and said there was a room available and that she would give it to us. This was a HUGE deal.  It allowed us to take a much-needed 2-3 hour nap and still have the entire day ahead of us to explore the city. Since it was summer in South America, sunset was not until 8:10 pm.  So a huge shout out to the lady at Dazzler Polo for really helping us salvage that day. The hotel itself was awesome and I booked it using a hotels.com gift card that I redeemed using Ibotta (you can read about that app here).

Dazzler3
Front Entrance to the Dazzler Polo Hotel

DazzlerPolo
Hotel Room

The free breakfast was far better than what you would get at American hotels.

This hotel was located in the northwest part of Buenos Aires in the neighborhood of Palermo. To visit some of the main sites near the city center, we got on their subway and got off at the last stop (Catedral). Their subway system is really easy to use and if you do need help, the employees will gladly assist you.

SubwayBA

Once we got off the subway at the Catedral station, everything we wanted to see was a short walk away. Plaza de Mayo is a beautiful central plaza that has a pink building called Casa Rosada, the statue of San Martin, and the Catedral Metropolitana. Many picture opportunities will present themselves here. If you walk a bit further into the hip and trendy Puerto Madera neighborhood, you’ll find the Puente De La Mujer or Women’s Bridge. This neighborhood also has many restaurants and brunch spots and is very lively at night. We happened to be there during Christmas so most of the places were closed.

The best way to explore any city is by walking. Could you get around between some of these sites with a taxi or Uber? Sure you can. And speaking of Uber, I preferred using it for longer distances in Buenos Aires. The regular taxi was also an option but with Uber, you’re locked into a fare and you know approximately how much you’re going to be paying before you step into the car. With a taxi, there’s always that chance that we might be taken advantage of as foreigners. The app worked seamlessly and a one hour ride from one side of the town to the other cost about $25 American dollars. The taxi company quoted me double that price. But most of the time we walked, and walked, and walked and saw much of the sites we wanted to see.  We loved Buenos Aires and now it was time to get back to the hotel and prepare for the flight to El Calafate the following day.

Day 2: Buenos Aires to El Calafate

I booked this flight using Chase Ultimate Rewards points on Aerolineas Argentinas. El Calafate is the gateway city to the Patagonia region of Argentina. Had I used cash, the flight would have cost $450 round trip per person. Again, I was set on not paying cash for any airfare. As a Chase Sapphire Reserve credit card holder, I was able to get 1.5 cents per point booking flights. This cost us 30k points per person for this roundtrip from Buenos Aires to El Calafate. This trip was taken from Buenos Aires’ other airport, Jorge Newbery International Airport which is located on the north end of Buenos Aires, about 1.5 miles from the Dazzler Polo. It’s much smaller than their main airport and I chose it because of the cheaper fares to El Calafate. The total flight time was about 2 hours 45 minutes. Once we got there, we booked a round trip transfer with a company called VES. It’s a smaller bus that took us to our hotel and also dropped us off at the airport when we’re flying out of El Calafate. The total for two people was 480 pesos or about $26 USD.  This was far more cost effective than taking a taxi and Uber did not offer service here. Here’s a tip: Request a window seat and sit on the right side of the plane (Any seat that is F). This side will give you some spectacular photo opportunities as you’re landing into El Calafate. You can see an example below.

DSC_0482

For the duration of our stay at El Calafate, I booked a hotel named Picos Del Sur. For $56 a night, this hotel offered free breakfast, free WiFi, and was located just a quarter mile away from the city center where all the shops, restaurants, and cafe’s are located. The staff was awesome and super friendly and the premises weren’t bad either. The breakfast was okay as most of their offerings were high carb items such as sweet croissants, muffins, toast, cereal, etc. Most of this hotel stay was paid via hotels.com gift card via Ibotta (man I love that app).

Day 3:  El Calafate

For any of you that might travel to Patagonia in the future, let me give you some advice: Throw the weather forecast out the window. This is one of those places where you can try to plan around the weather and it means absolutely nothing. We saw days where torrential downpours were forecasted only to see clear skies (much to our delight). The weather here changes hourly because the Atlantic and Pacific coasts are literally just a couple hours drive away.  On this day, we decided to stay in El Calafate and spend the day exploring the town and nearby places. One gem we encountered was the Laguna Nimez Reserve. This place is a sanctuary for flamingos, owls, birds of prey, and other unusual birds I had never seen anywhere else. The entrance fee was 150 Argentinean pesos or roughly $8 USD. The entire circle around the sanctuary takes about 90 minutes to walk and it offers some amazing views of Lago Argentino as well as the mountains in the background. If you’re in El Calafate, I highly recommend it. For the second half of the day, we spent walking around the city center and checking out the town vibes. El Calafate has many nice boutique shops that worth checking out.

DSC_0526DSC_0590

DSC_0542

Day 4: Perito Moreno Glacier

On this day, we booked a tour to Perito Moreno Glacier with Hielo & Aventura. You can visit their website and see everything they have to offer right here. They picked us up from the hotel at 7:30am and off we went on the 90 minute journey to Parque Nacional Las Glaciares.  The first stop was a scenic overlook for about 10 minutes. This spot provided a glimpse of the awe-inspiring scenery yet to come. The second stop took us to the multiple viewing decks that are right in front of the glacier. We saw a few smaller chunks of glacier calve off into the lake and even that was incredible. The third thing on the agenda was the boat ride to the southern face of the glacier so we could actually hike on it. If you’re coming to Patagonia, I highly highly highly recommend doing this activity. For you Game of Thrones fans, it literally felt like we were north of the wall. The scenery is incredible and unlike anything I have ever witnessed. The ice has a nice shade of blue and even the water in certain crevasses seems like it has a deep blue color to it. This activity costs about $180 per person and that includes pickup and drop off from your hotel. As a Chase Sapphire Reserve credit card holder, I was able to apply my $300 annual travel credit for 2018 for this excursion, effectively bringing our cost down to about $60 combined for two people.  That’s a hell of a way to use the travel credit. Something to keep in mind: There is an entrance fee to Perito Moreno that is separate from the tour cost. It’s 500 Argentinean Pesos (equivalent to about $27 USD). The park ranger will collect that fee at the entrance of the park and from what I remember, they don’t accept any other currency.  Be sure to exchange your currency before you get there. My wife and I booked the 90 minute hike for this trip rather than the 6-8 hour hike. Looking back at it, this is one the things we wish we did differently. It wasn’t  as challenging as we initially thought and if you’re physically fit and have done longer hikes before, the longer hike might be of interest to you. Just be sure to dress in layers for either one you may choose. Even though they give you snow clamps, it’s still important you have a decent pair of hiking shoes for this trek. Merrell, Keen, Columbia, etc would all suffice. They also require you to have gloves so you don’t cut yourself on the jagged ice if you fall. Sunglasses are a great idea if you’re there on a sunny day since the glare off the glacier can be blinding at times.

Perito

DSC_0726DSC_0857

The boat ride to get to the glacier is also incredible and you can view it for yourself. It does get windy and there will probably be rain at some point so it’s best to wear waterproof clothing and a raincoat.

Day 5: El Chalten

On day 5, we did a day trip to El Chalten, a town that’s about 3 hours north of El Calafate. El Chalten is known for its hiking, scenery, and Mt. Fitz Roy. Unfortunately for us, Fitz Roy was hidden by clouds for the entire day we were there. But we still didn’t pass up the opportunity to hike a few trails. Some of the trails are moderately challenging and will require a lot of steep climbing. You will get wet, muddy, messy, and if you’re not physically fit, it might be painful. But on a clear day, the reward at the end is majestic views of Fitz Roy that is postcard-worthy. The best thing about El Chalten? It’s one of the few places where you get access to the trails without paying an entrance fee. If you’re into camping, it’s a very popular spot to set up camp.

DSC_0919
A viewpoint from one of the trails at El Chalten

DSC_0900
The viewpoint at the end of the Mirador trail

Day 6: Torres Del Paine National Park, Chile

A trip to Patagonia is not complete without a visit to Torres Del Paine National Park on the Chilean side. This was an entire day’s journey and the trip cost about $250 per person (including pickup and drop off from the hotel). Luckily for us, my wife is also a Chase Sapphire Reserve credit card holder and we were able to apply her $300 travel credit for 2018 into this excursion. This brought the excursion down to a very reasonable $200 or $100 per person. The tour bus picked us up at 7am and off we were. The drive from El Calafate to the Chilean border was about 2 hours. Once there, you have to get off the bus twice, once before you cross into Chile to be checked by Argentinean authorities and then again when you’re in Chile. Once there, you get your passport stamped by Chilean border patrol and declare anything that is required to be declared (don’t be that person). Our tour group had about 30 people and the entire process to cross into Chile took about 45 minutes. Once we were cleared, the journey to Torres Del Paine took about 90 minutes. We were super fortunate to have a mostly clear day when we got there. If you have a clear day, you’ll be able to see the famous towers. We stopped at the first four viewpoints for pictures before stopping at another point for lunch. They provide lunch but unfortunately, they don’t provide a vegetarian option. This was my one issue with this tour operator and I conveyed to them that it’s not acceptable given the exorbitant cost of the tour itself.  Luckily we bought plenty of granola bars and gatorade and that was sufficient. After lunch, we stopped at a few more viewpoints for some spectacular photo opportunities.  Anywhere you stop in the park, there will be an opportunity for an amazing picture. The last stop was a 90 minute hike (very easy) that gave us panoramic views of the surrounding landscape. We also saw guanacos, a species that is related to the camel and llama.  I took a video of the hike which you can view below.

DSC_0101

DSC_0044
The towers of Torres Del Paine were visible on this day

DSC_0208DSC_0152

Day 7: Flight Back to Buenos Aires and Flight Back to New York City. 

This was the conclusion of our trip. Our flight back to Buenos Aires departed at 11:35 am and arrived at around 2:10 pm.  To get back to Buenos Aires, we flew Aerolinas Argentinas as we did when we arrived.  For the flight to New York City, we redeemed American Airlines miles for seats on American (not British Airways Avios as we did on the way here). The redemption was 57.5k miles per person and although it wasn’t a great redemption value, it was better than United, Delta, and other options we had.  We grabbed steak at a place called Al Rawshe which was not too far from their smaller airport where we had landed. Argentina’s number one export is beef and steak is something they do really well. And trust me, the steak at Al Rawshe was phenomenal. We then took an Uber to their larger airport and were headed back home. Another tip when you’re flying out of El Calafate: Sit on the right side of the plane just as you would when you fly into El Calafate. You get incredible views of the turquoise blue Lago Argentina on upon takeoff and ascent. You can view the video below.