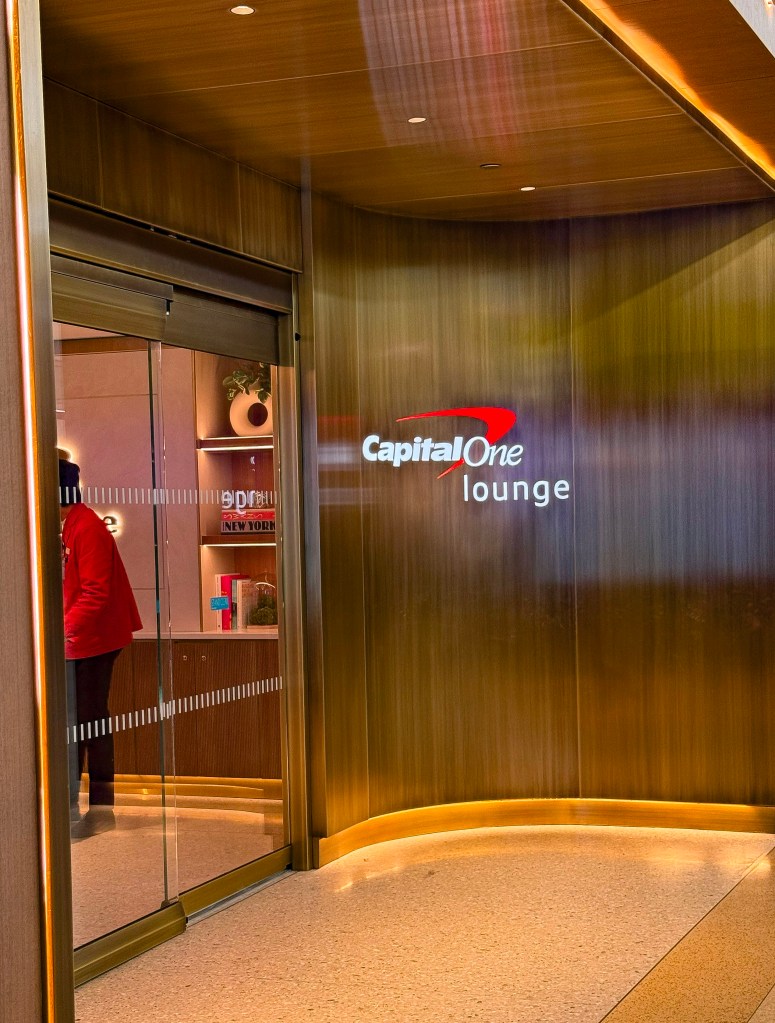
On a recent flight from New York City to London, we had the chance to check out the new Capital One Lounge at JFK International Airport. It’s located in Terminal 4 near the B gates and is open 24 hours a day—making it a great spot to relax, no matter how early or late your flight is.
Access is complimentary for Capital One Venture X personal and business cardholders. Currently, through February 1, 2026, cardholders can bring two guests for free. However, starting after that date, only primary cardholders who spend $75,000 or more in a calendar year will continue to receive complimentary access, which could limit the lounge’s appeal for many travelers and significantly reduce the card’s value proposition. If cardholders want to pay for guest access, they can do so at a discounted rate of $45 per person ($90 per person is the rate for non-cardholders).
When we visited, the lounge had only been open for a few days, so it was still working through a few minor growing pains.
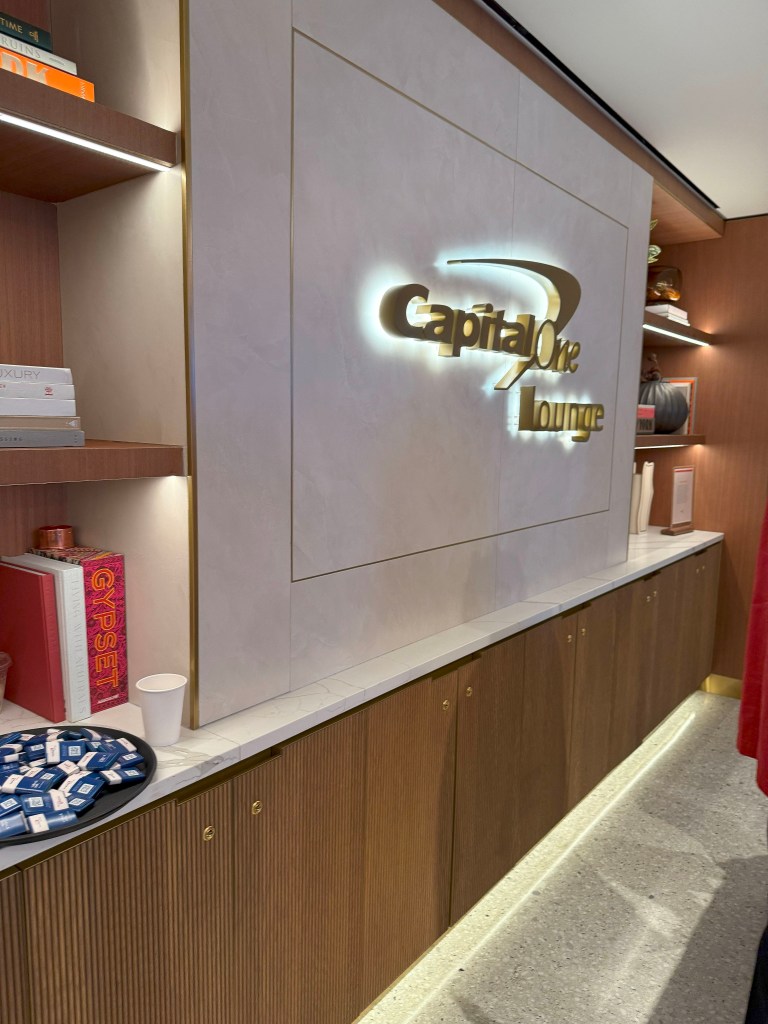
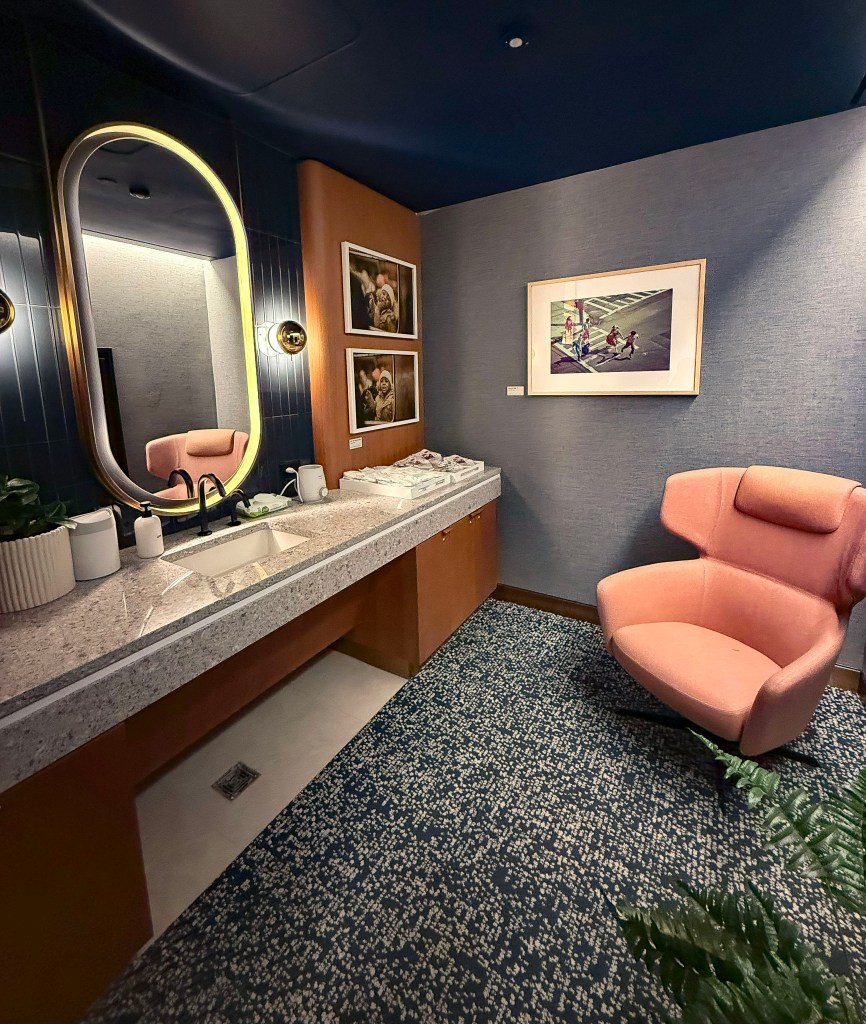
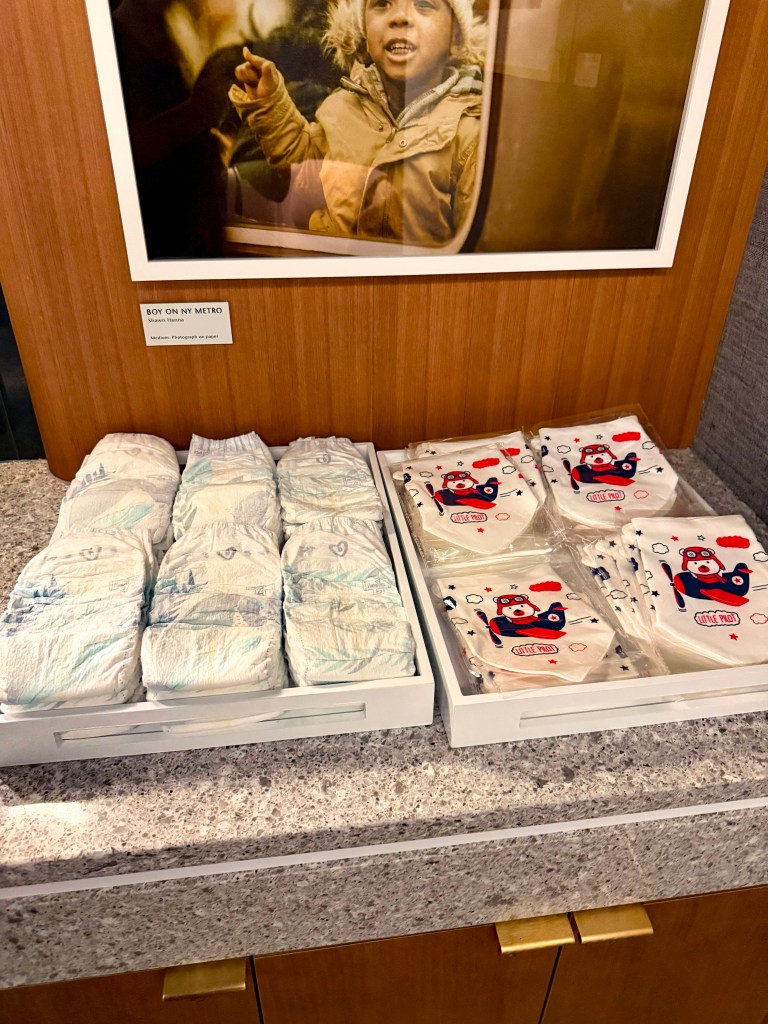
Upon arrival, we were warmly greeted by the front desk staff, who welcomed us into the lounge. They scanned our boarding passes, verified our credit cards, and gave us a quick overview of the amenities—including directions around the space and instructions for ordering from the dine-in menu. The lounge has all the usual Capital One perks—grab-and-go snacks and drinks, dine-in menu, shower suites, dedicated password-protected Wi-Fi, and a parents’ room. The parents’ room is stocked with diapers, wipes, bibs, bottle warmers, and comfortable seating for feeding your child. No other lounge network accommodates parents with young children to this extent. Capital One gets high marks here.
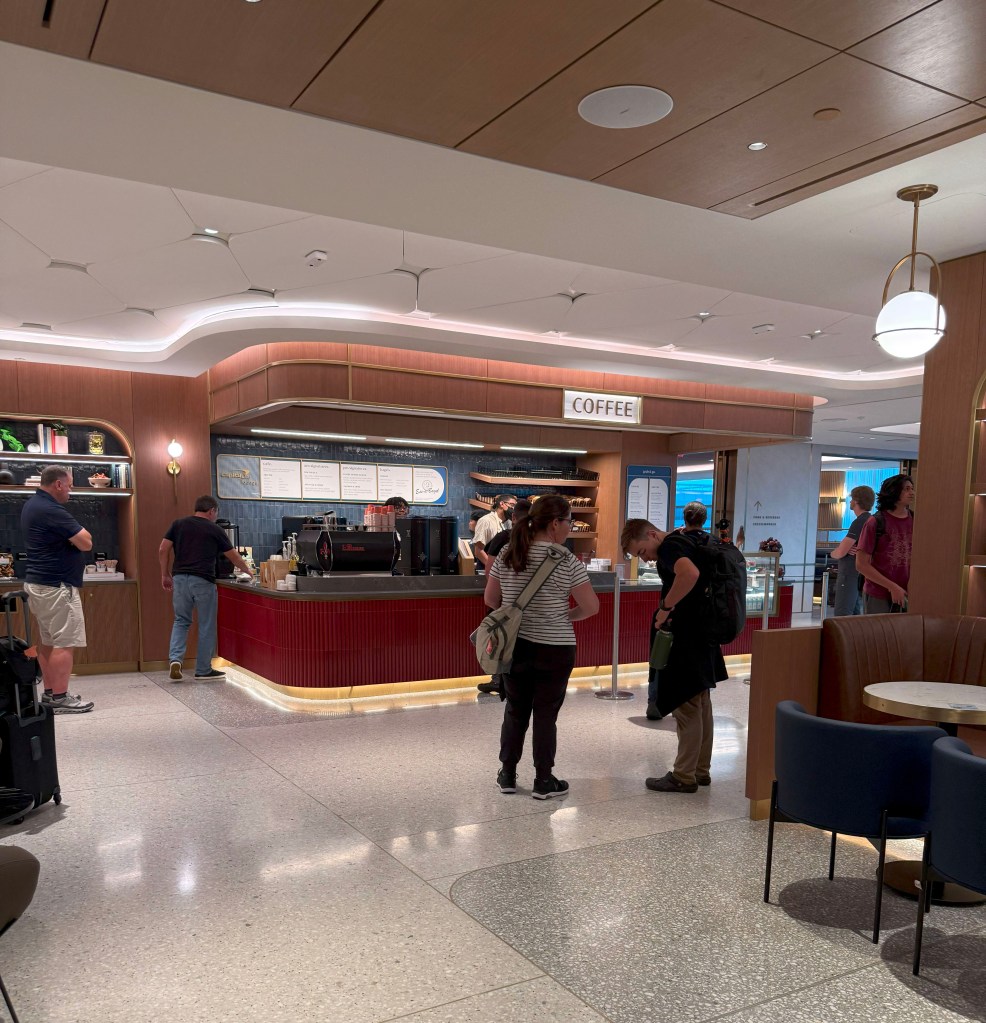
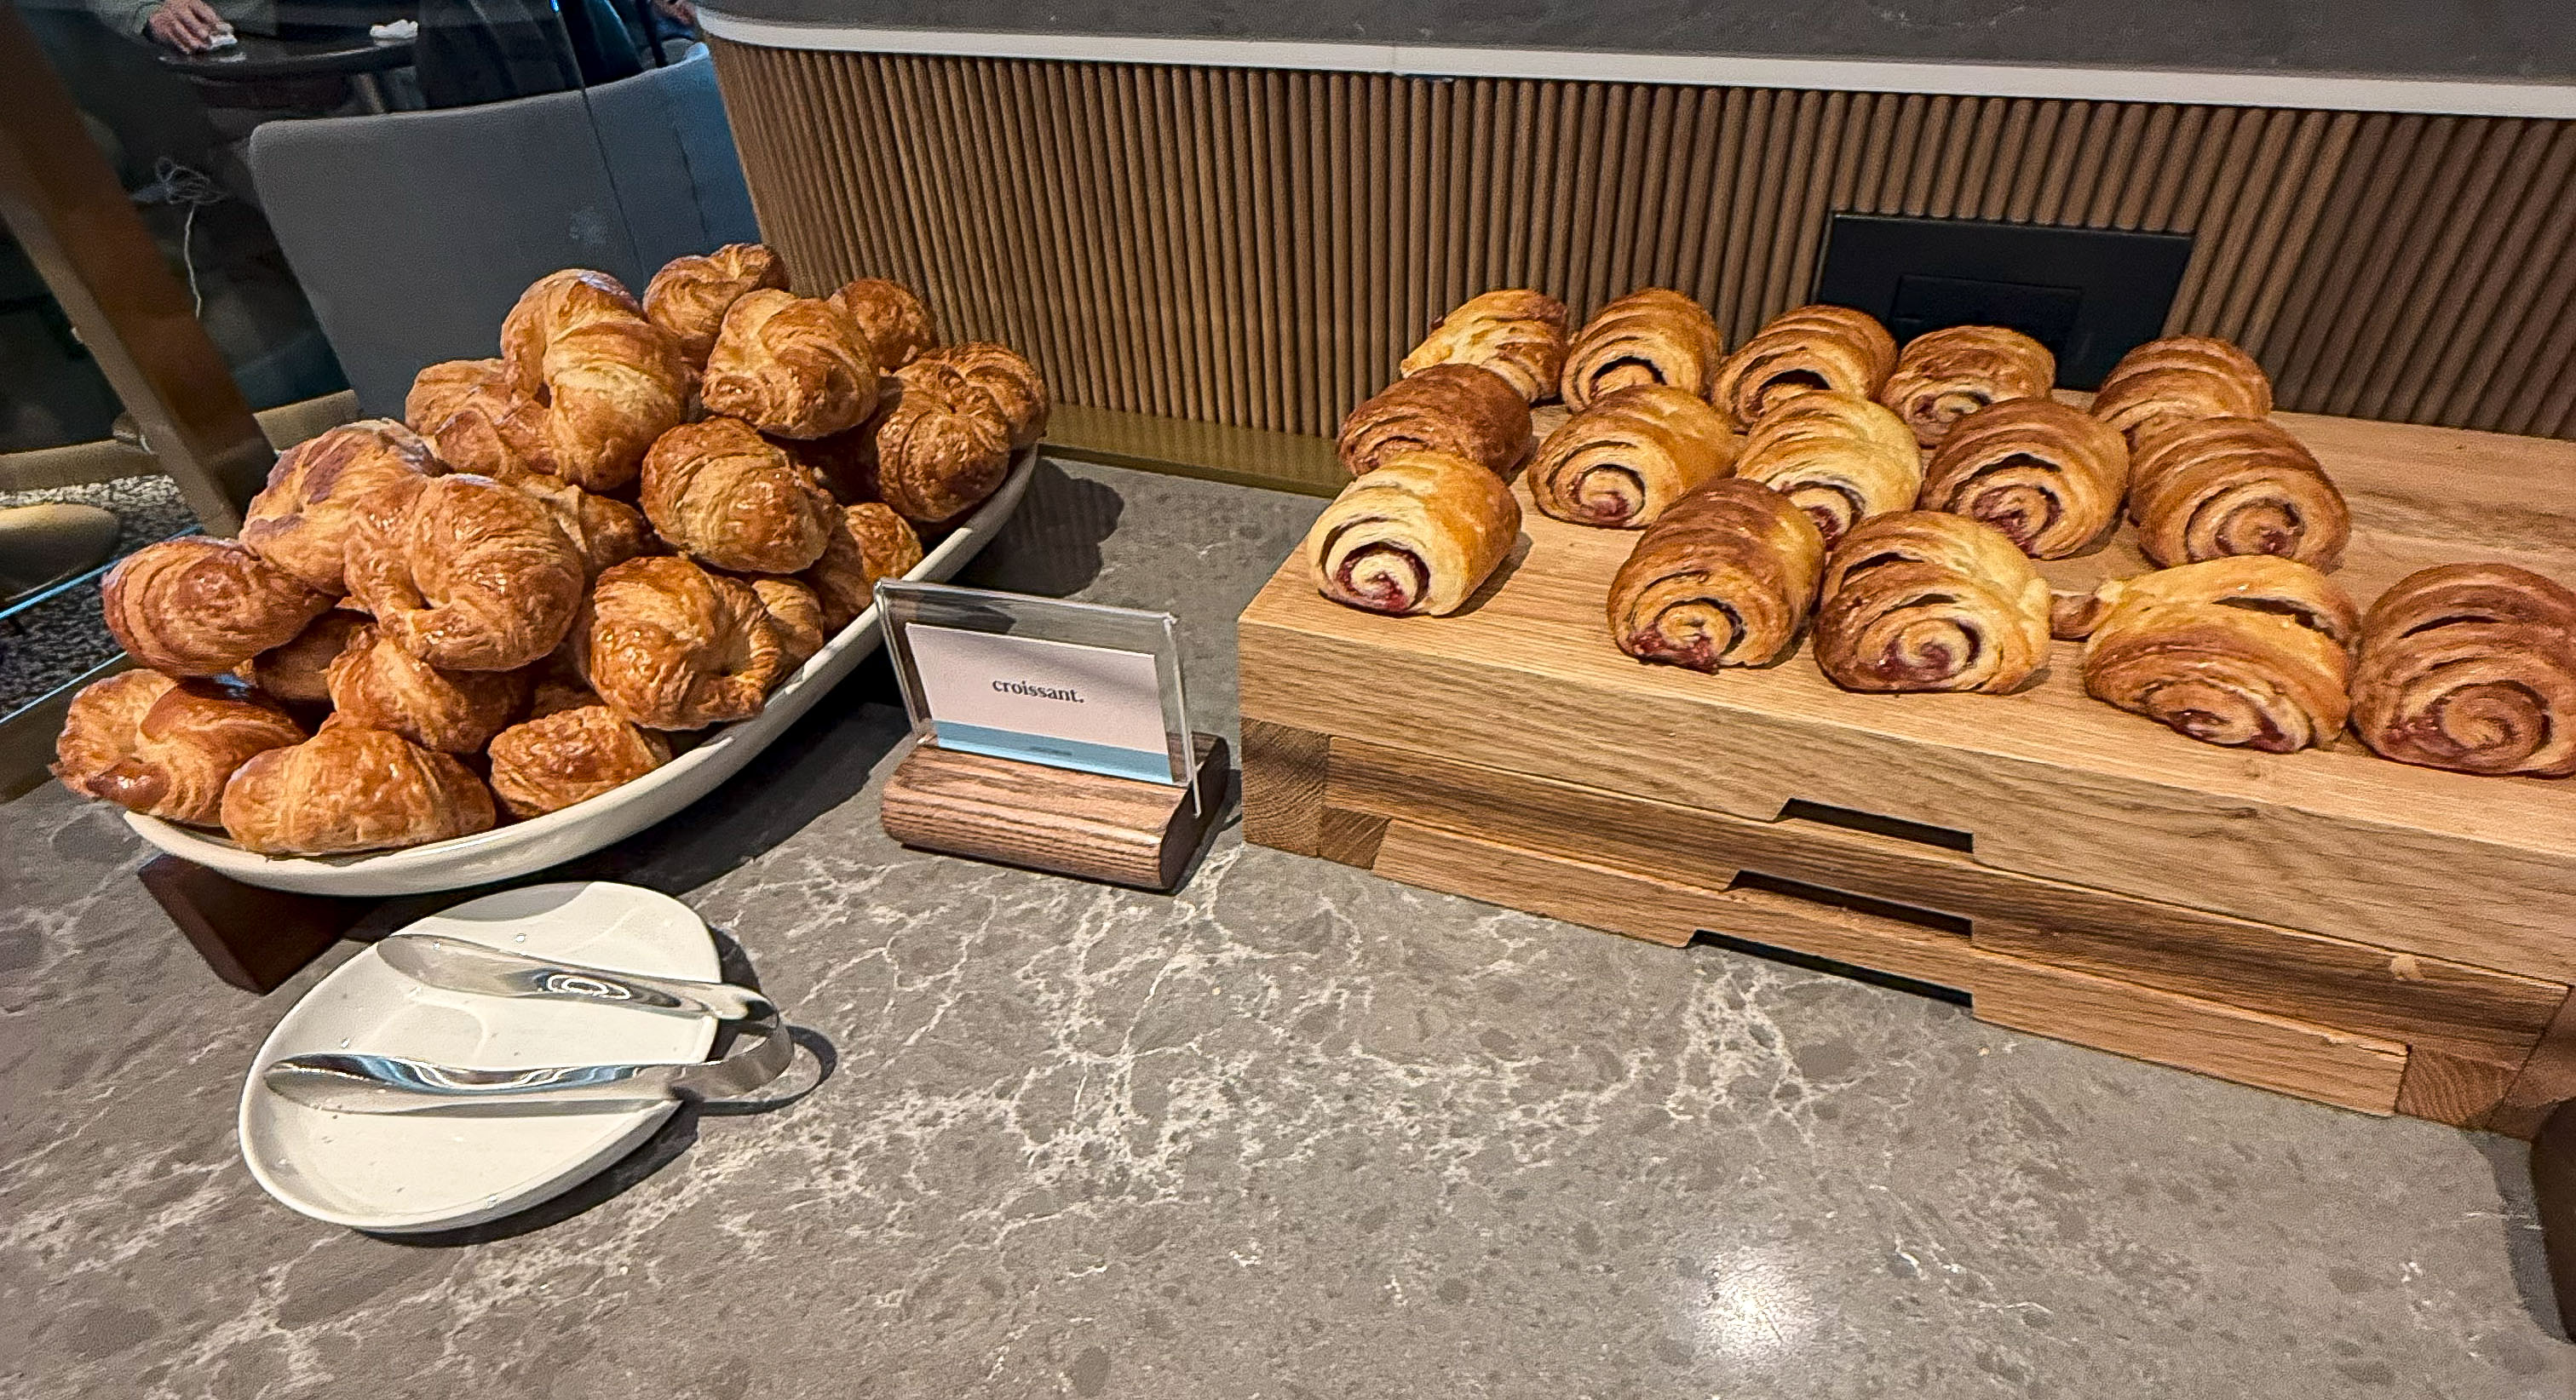
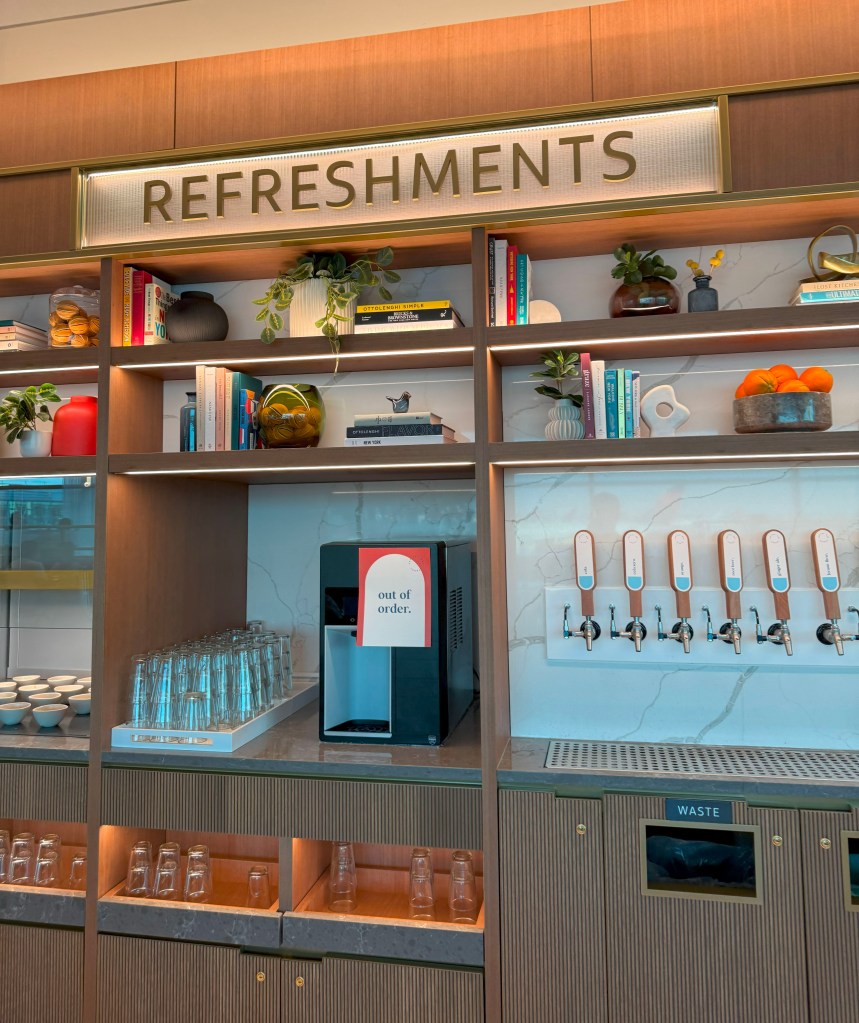
The lounge offers a bodega-style espresso bar, giving the lounge an NYC feel, with hand-rolled bagels from Ess-a-Bagel, espresso from Bean & Bean Coffee Roasters, and La Colombe cold brew.
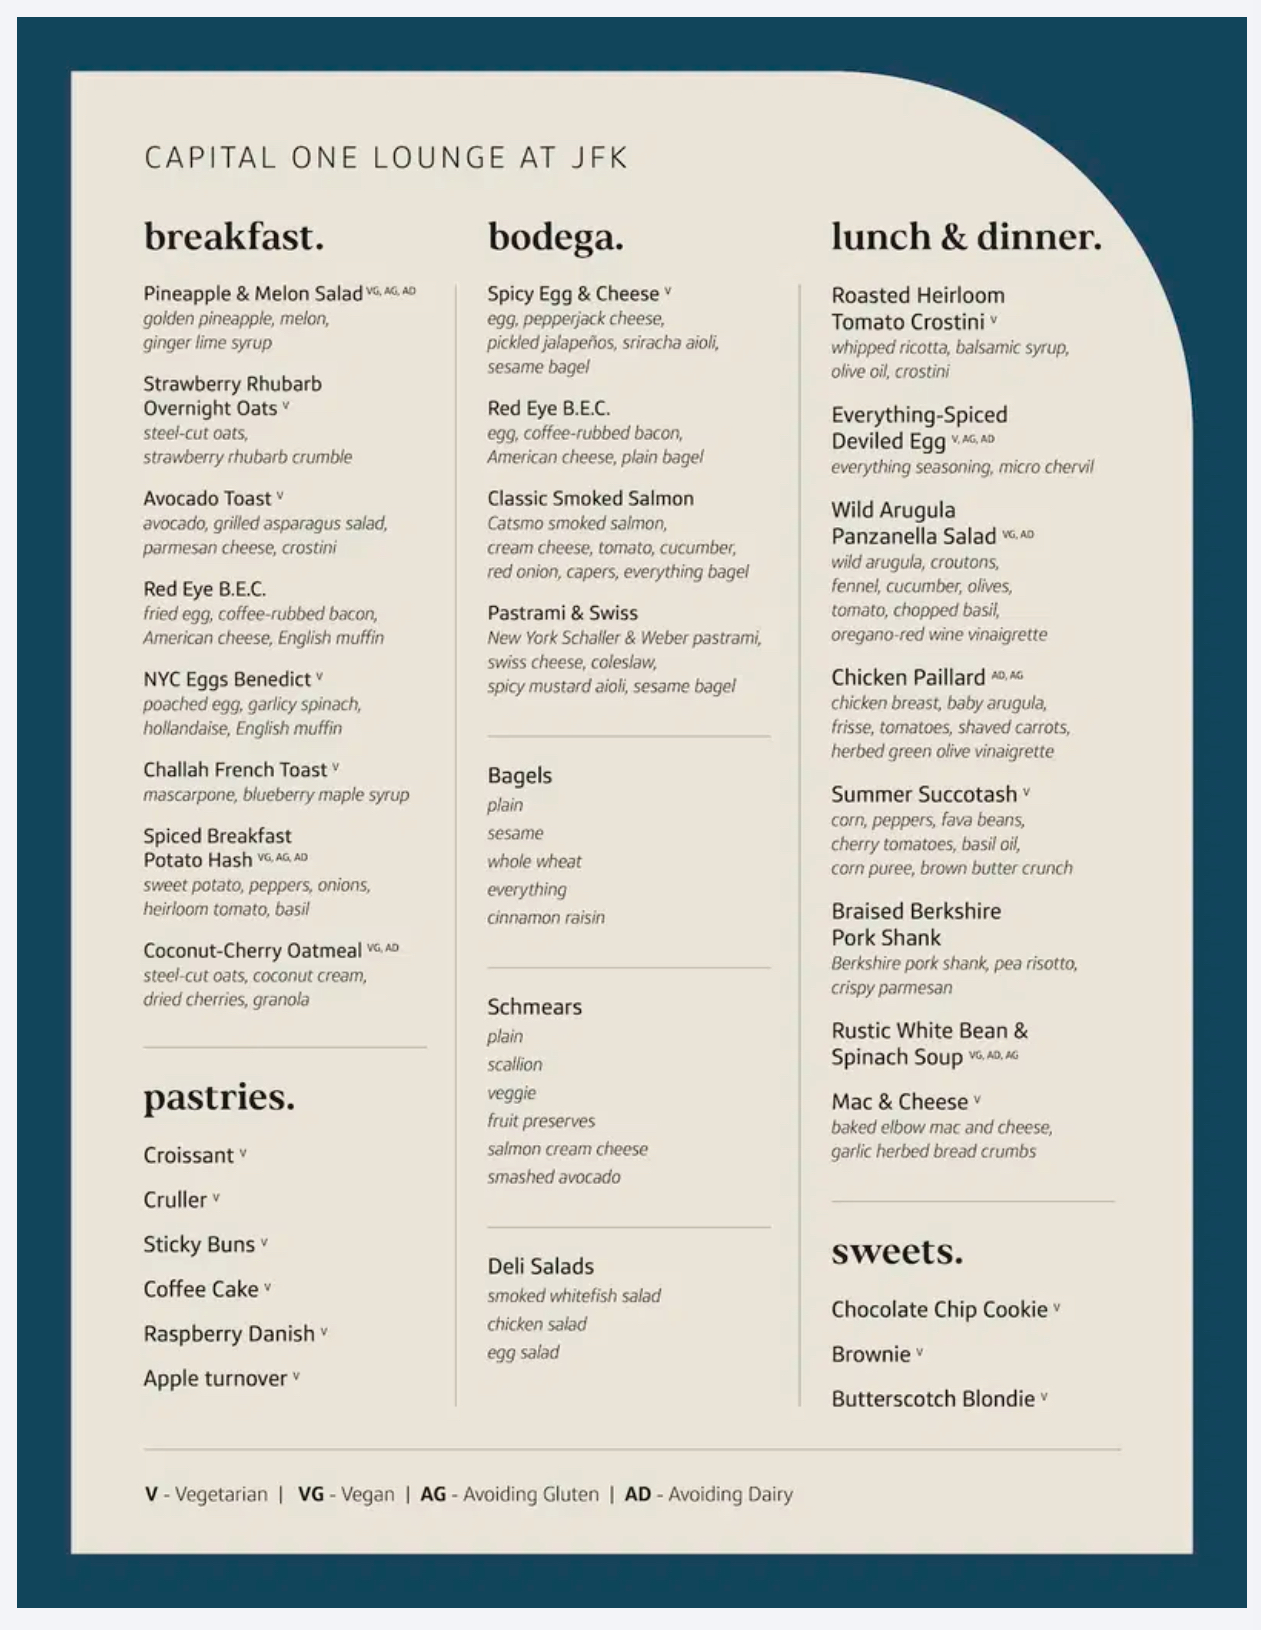
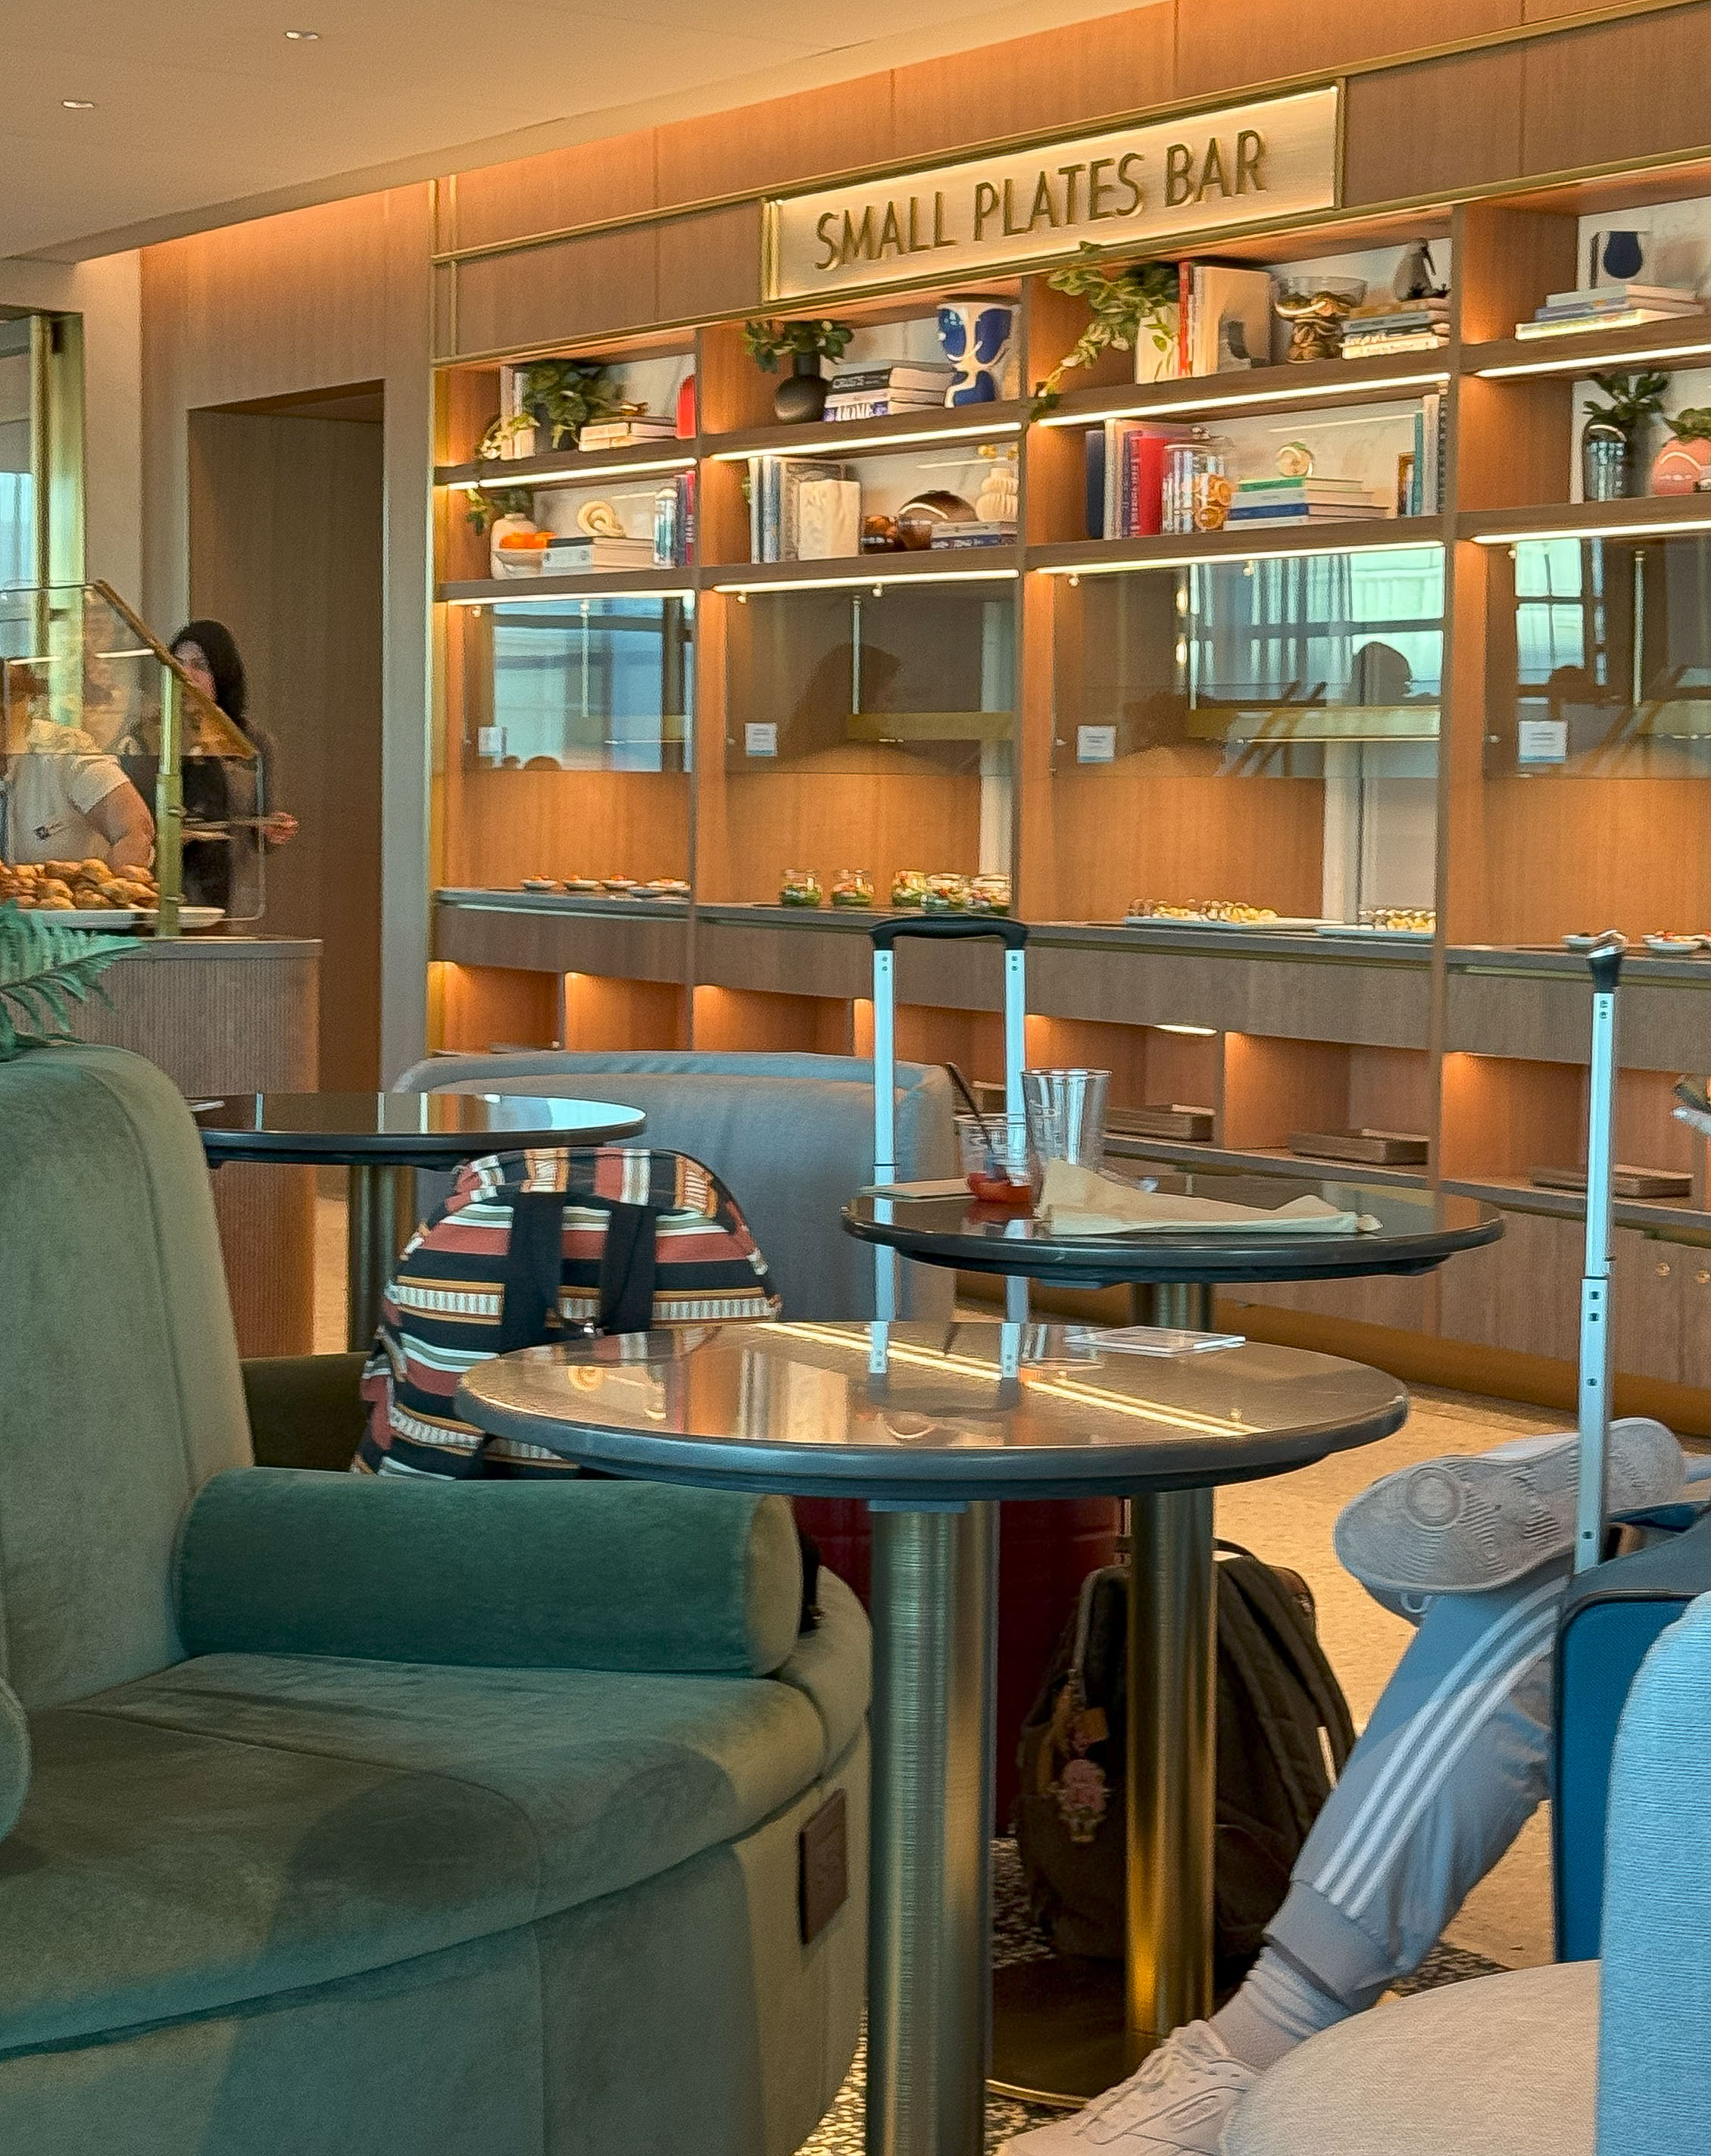
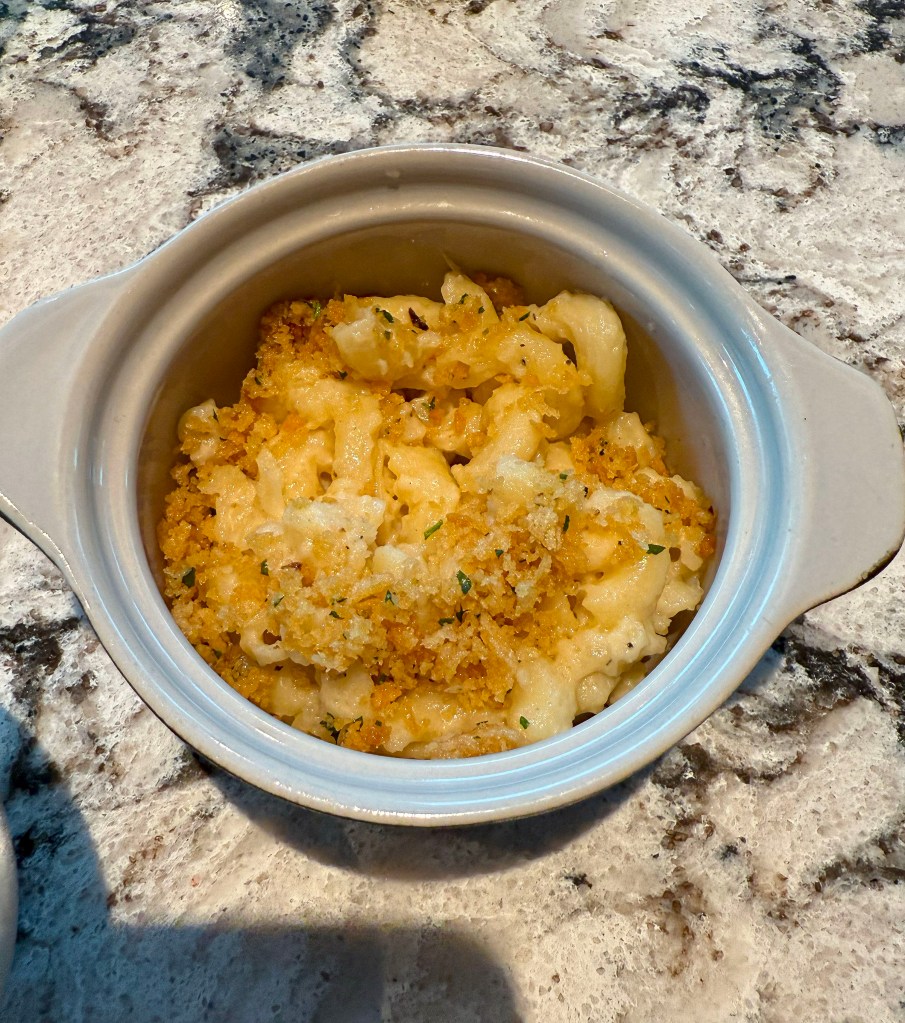
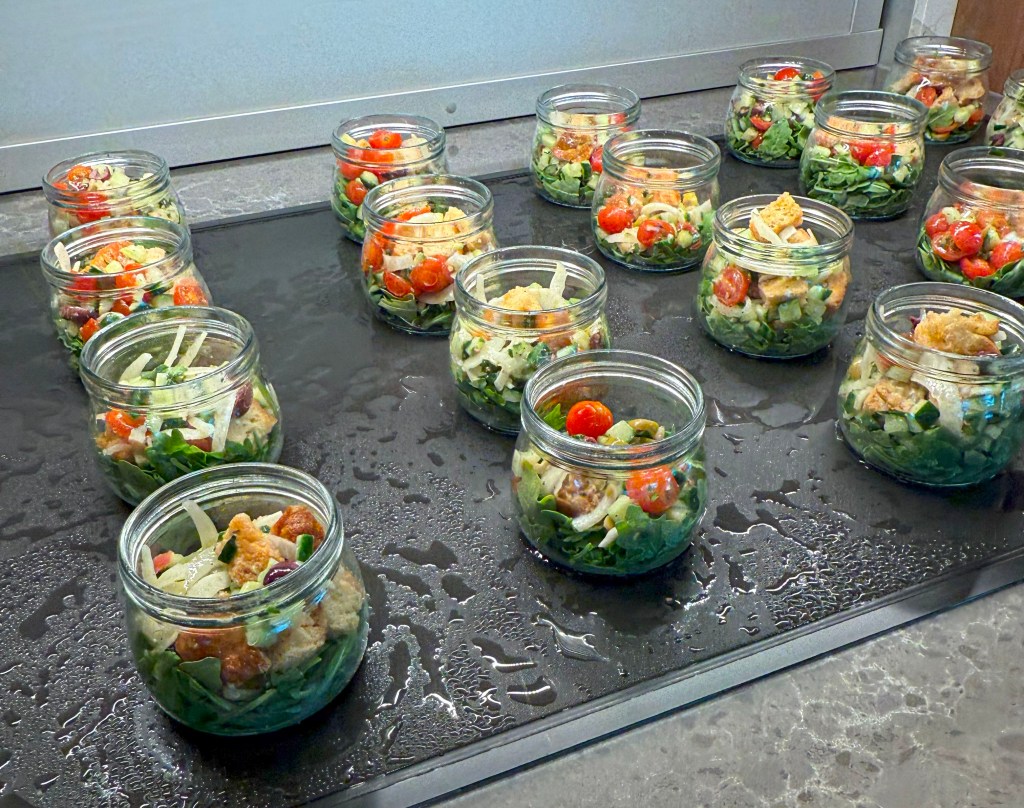
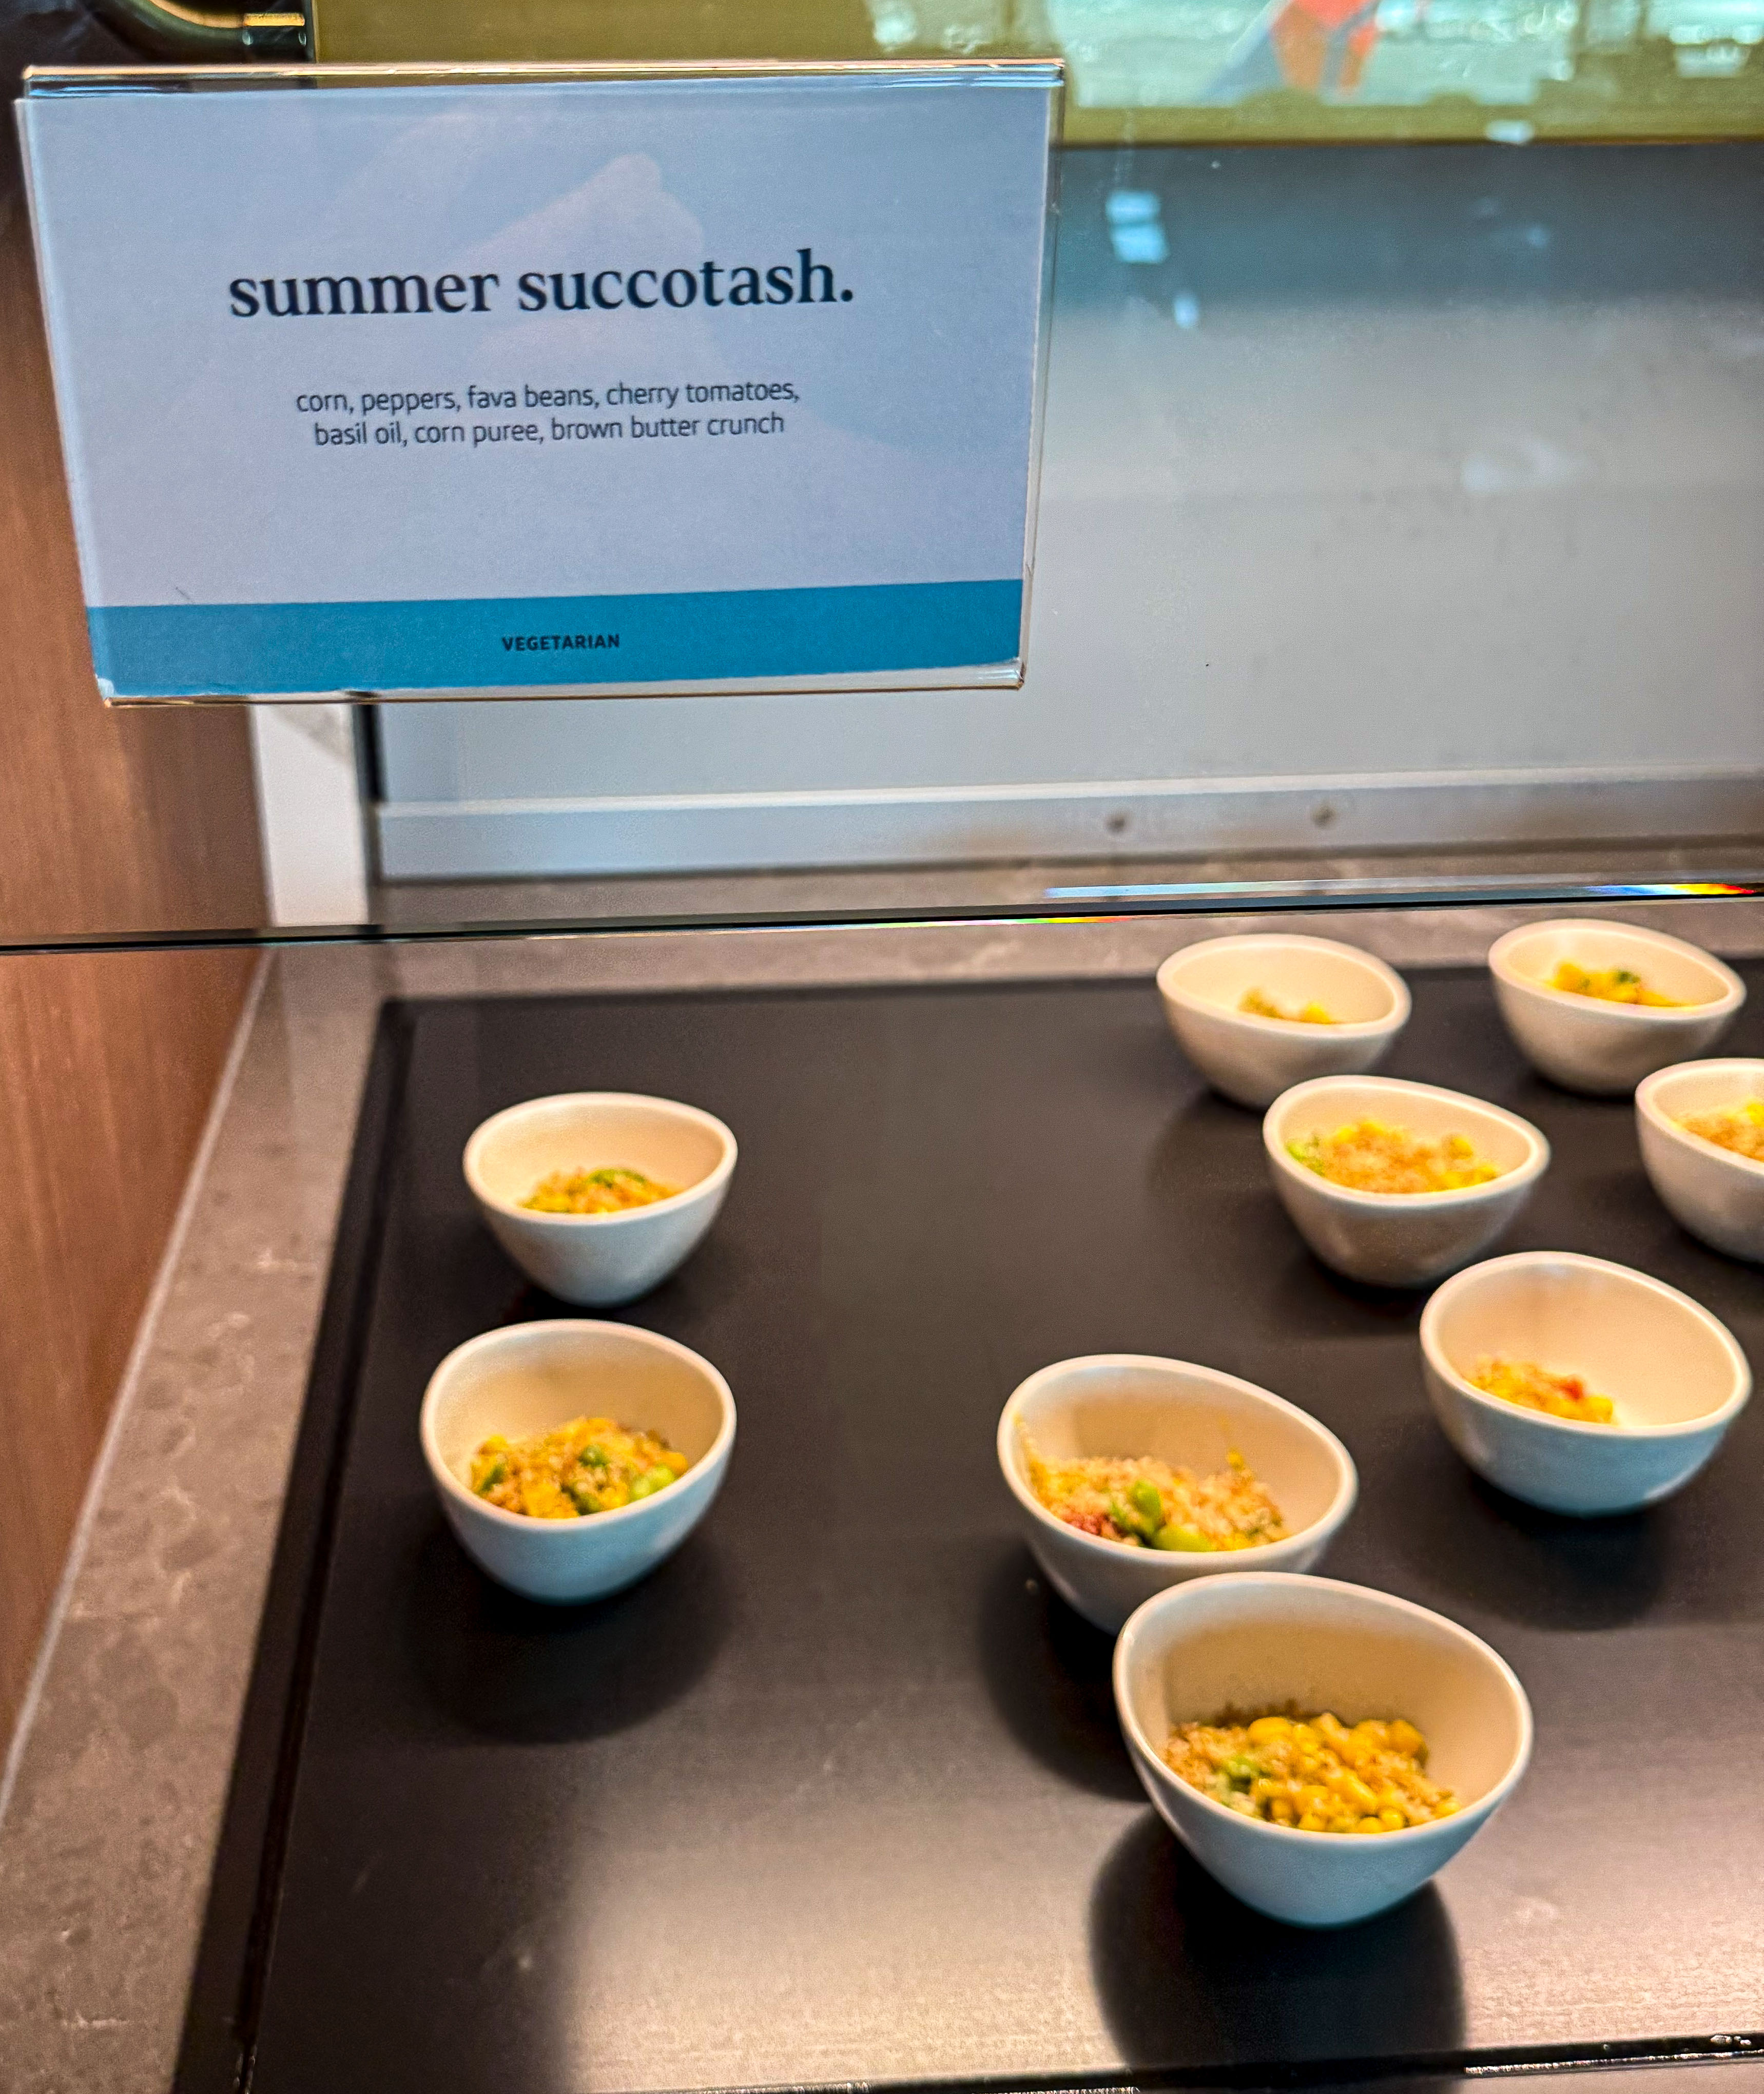
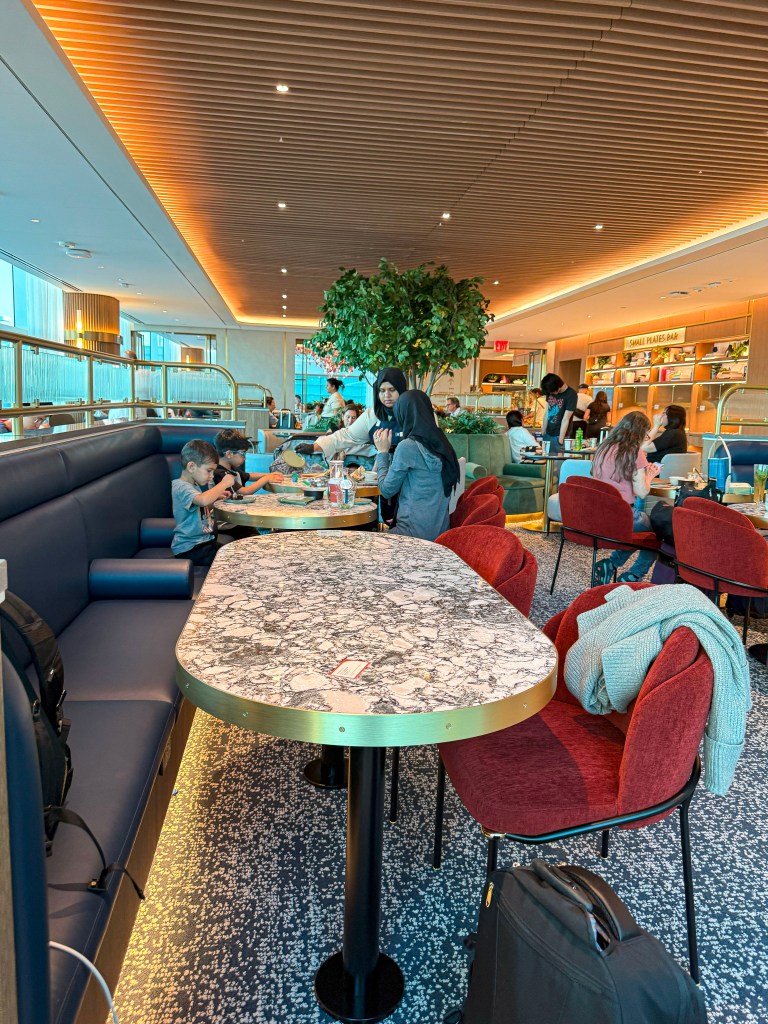
Capital One offers its dishes in small plate portions, and I had the Mac & Cheese, Roasted Heirloom Tomato Crostini, Wild Arugula Panzella Salad, and the Rustic White Bean & Spinach Soup. Everything was so flavorful and delicious, and having the small plate portions allowed me to comfortably try multiple items. They frequently replenish their items, and I never had to wait more than a few minutes if something was out.
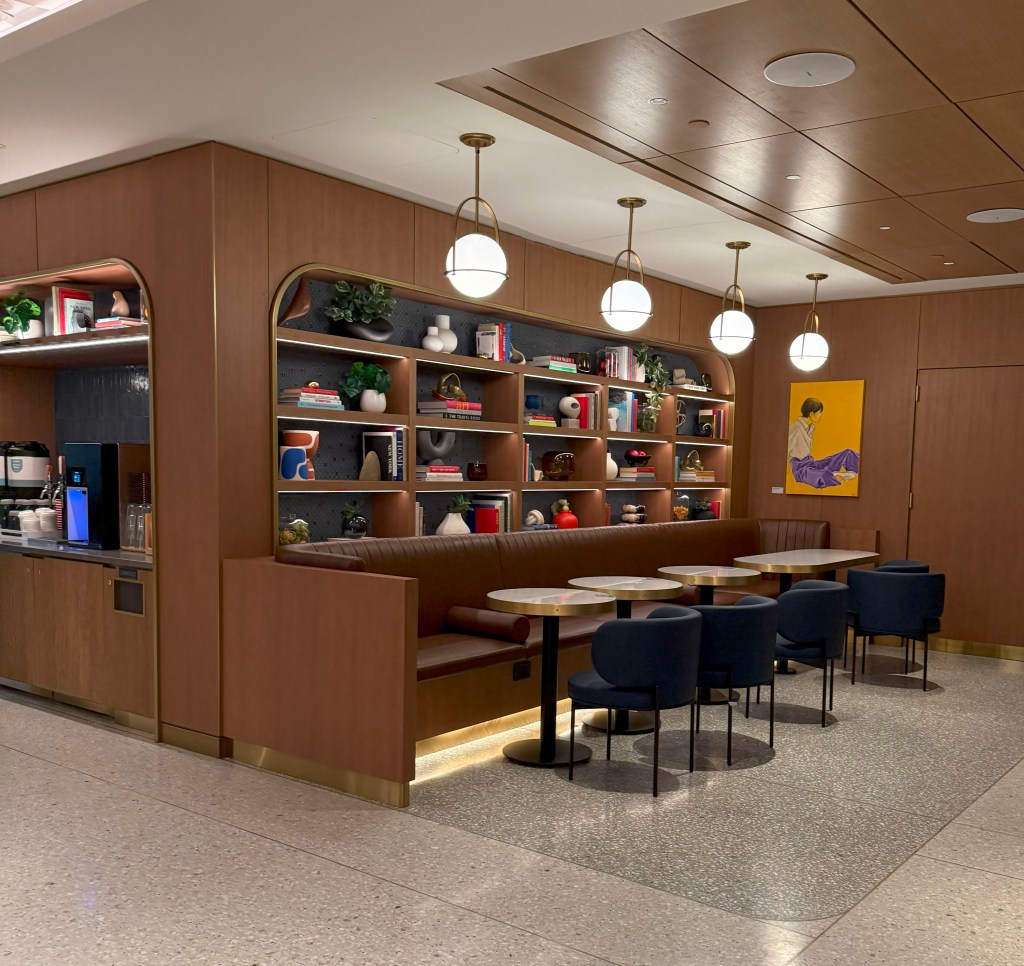
Although it wasn’t open during our visit, the lounge also features a cheesemonger station where guests can sample a variety of gourmet cheeses. There’s plenty of space to relax, and during our time there, the lounge was only about 60% full.
Cheesemonger
For families, there are two private rooms available by reservation. You simply scan a QR code to join the waitlist and receive a text when your room is ready. Unfortunately, both rooms were occupied for the duration of our stay, so we didn’t get a chance to check them out.
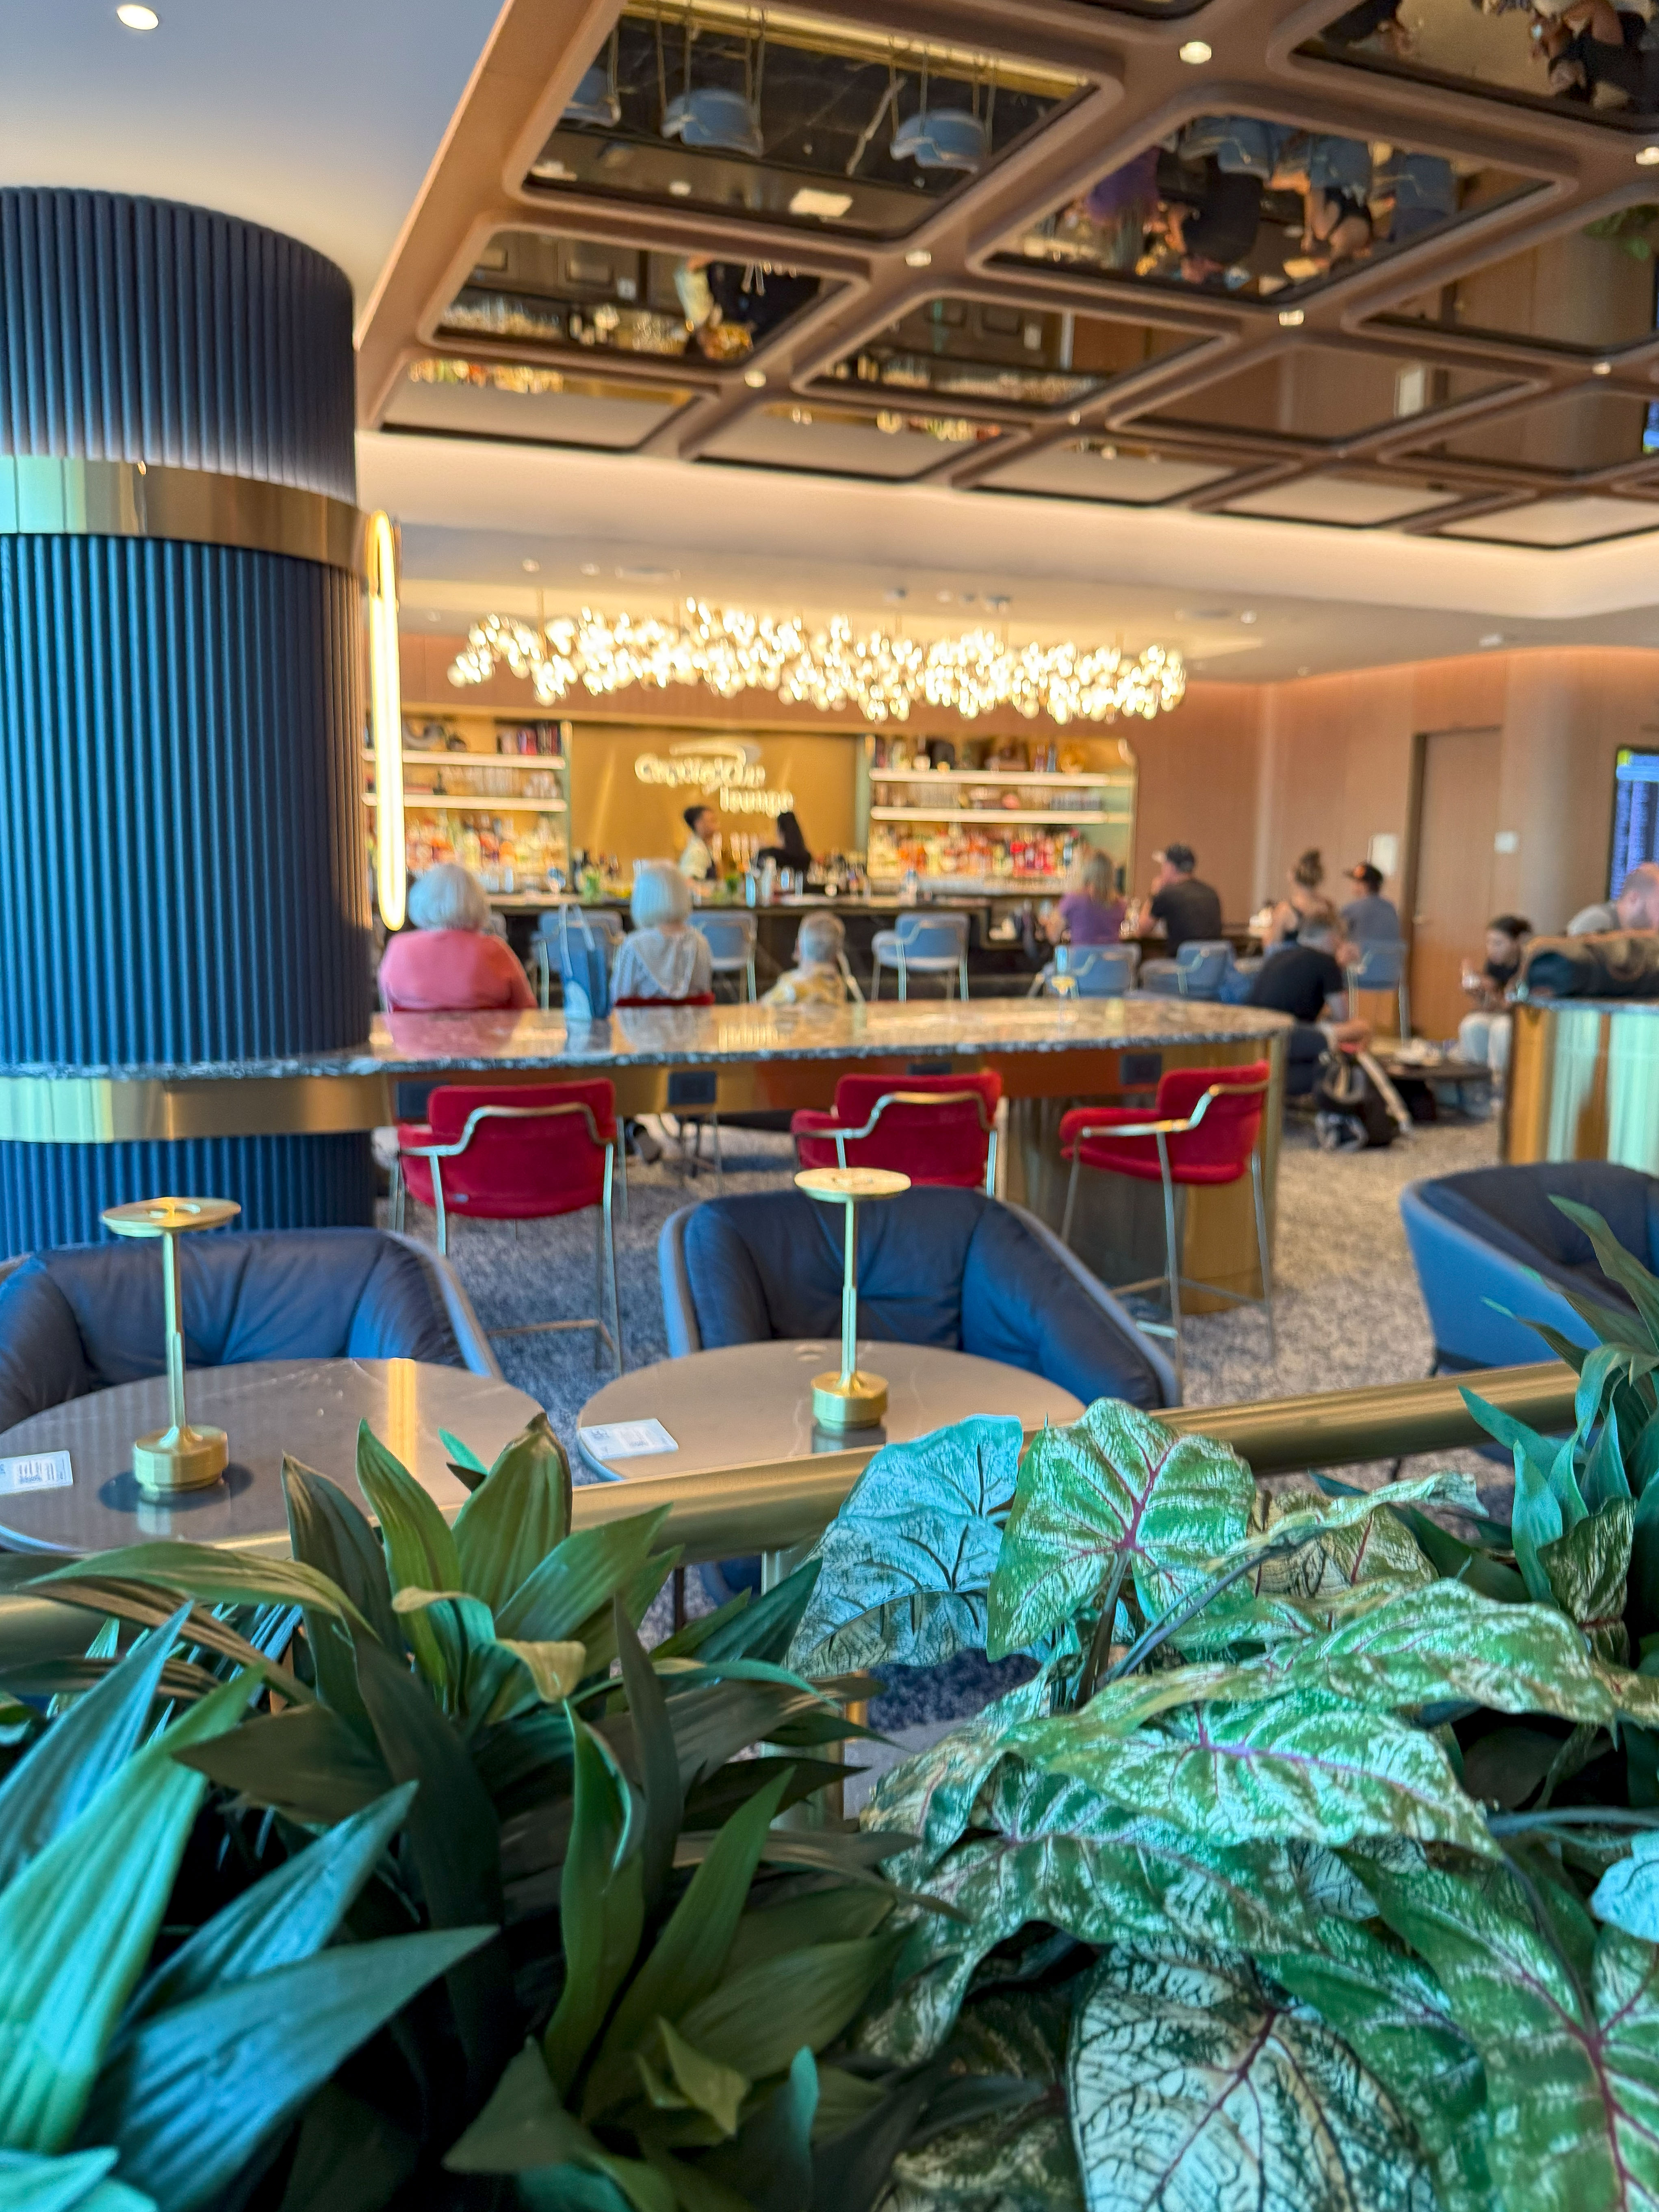
Bar Area
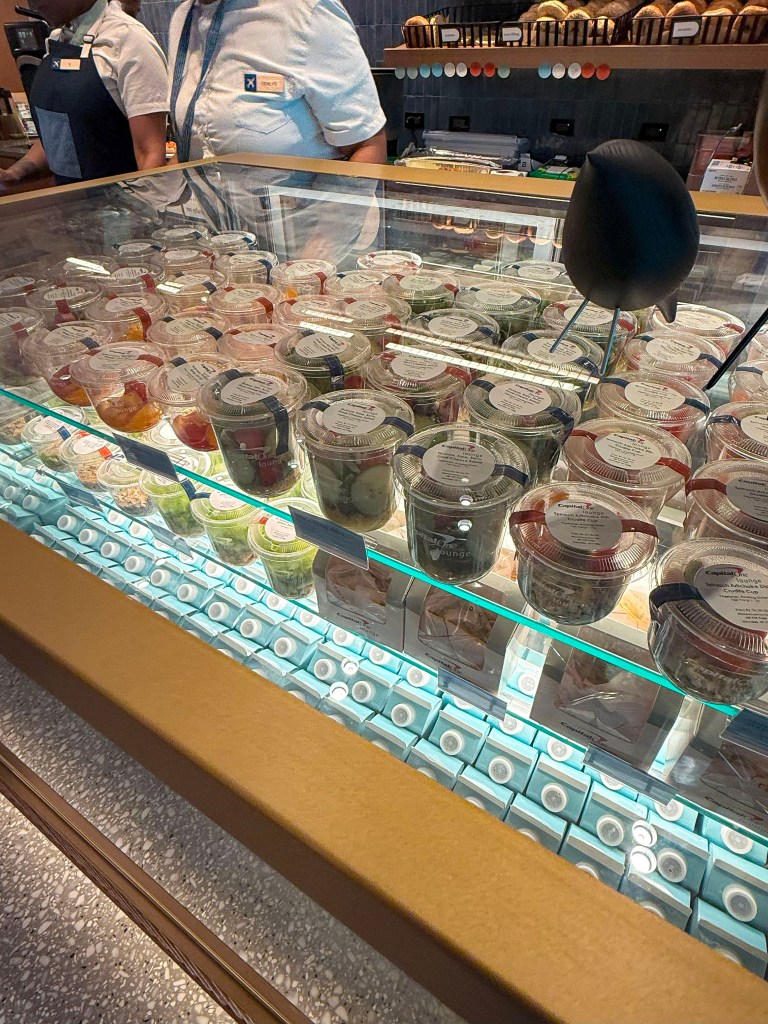
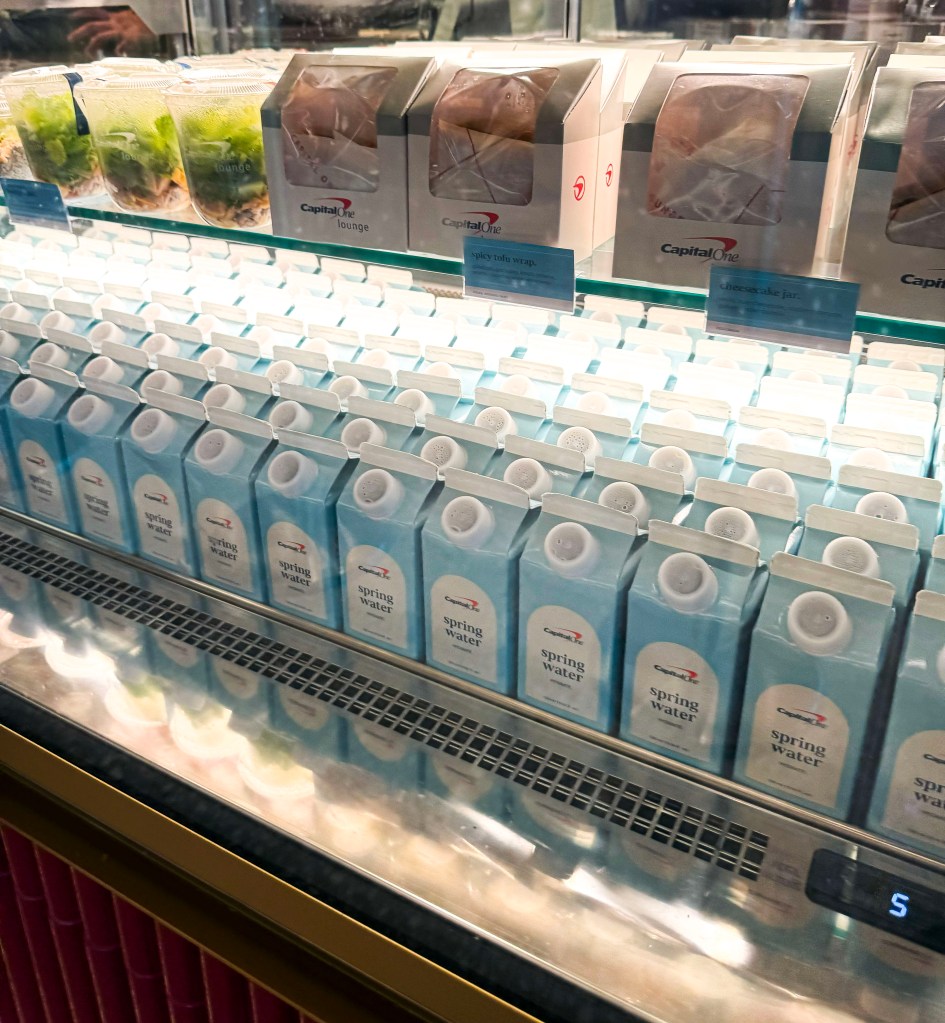
Unlike most other lounge networks, Capital One offers a convenient “grab-and-go” option, letting guests take food with them for the flight. The selection can vary, but typically includes pre-made sandwiches, yogurt parfaits, fruit cups, salads, bottled water, and more.
The lounge offers nice views of the tarmac, and if you’re an AvGeek, you will consistently spot larger widebody aircraft such as the Airbus A380 and Boeing 747. The Wifi speed wasn’t terrible, but I think Capital One can improve upon the 16.7 Mbps download speed when other lounges around the country are surpassing 100 Mbps. This lounge also has shower suites, and they can be reserved in advance.
Conclusion
Overall, this is an excellent addition to JFK, giving travelers in Terminal 4 another strong option alongside the Centurion Lounge, Chase Sapphire Lounge, and others. For those traveling with an infant, the family-friendly amenities show that Capital One has gone the extra mile to make life easier for parents of very young children. The downside is that Capital One Venture X personal and business cardholders only have until February 1, 2026, before a $75,000 annual spend requirement kicks in for complimentary guest access.
This was my second time staying at the Langham in NYC, but my first time staying at the Langham as an AMEX Platinum cardholder—a whole new experience! Don’t get me wrong, I had a great first stay; it was what I expected for a 5-star hotel; however, as an AMEX Platinum cardholder, I felt like the experience was so much better. One of the card’s benefits is a $200 credit for booking hotels that are part of Fine Hotels & Resorts or The Hotel Collection. When I checked in, the staff immediately upgraded me to an executive suite with a kitchen on the 21st floor. Along with the upgrade, I was informed that I had a $100 credit for any of the following: spa, room service, or breakfast for two at their Michelin-star restaurant, Ai Fiori. I was also informed that I could check out at 4pm, which was very convenient since our flight was at 5:30pm on Sunday.
When we went to our room, my cousin and I first noticed the view through the large windows—we could see down 5th Avenue and the beautiful Chrysler building.
View of Bank of America Tower and the Conde Naste Building (with H&M sign)
Beautiful view of the Chrysler building and looking down on Fifth Avenue
The second thing we noticed was that we had a powder room—when does that ever happen? Needless to say, we had more than enough room. We even had some of our friends and cousins come up to hang out with us in the room; six adults and a baby were hanging out comfortably. All the cafes around us were closed, so we ordered lattes from room service (using my $100 credit), and they were excellent!
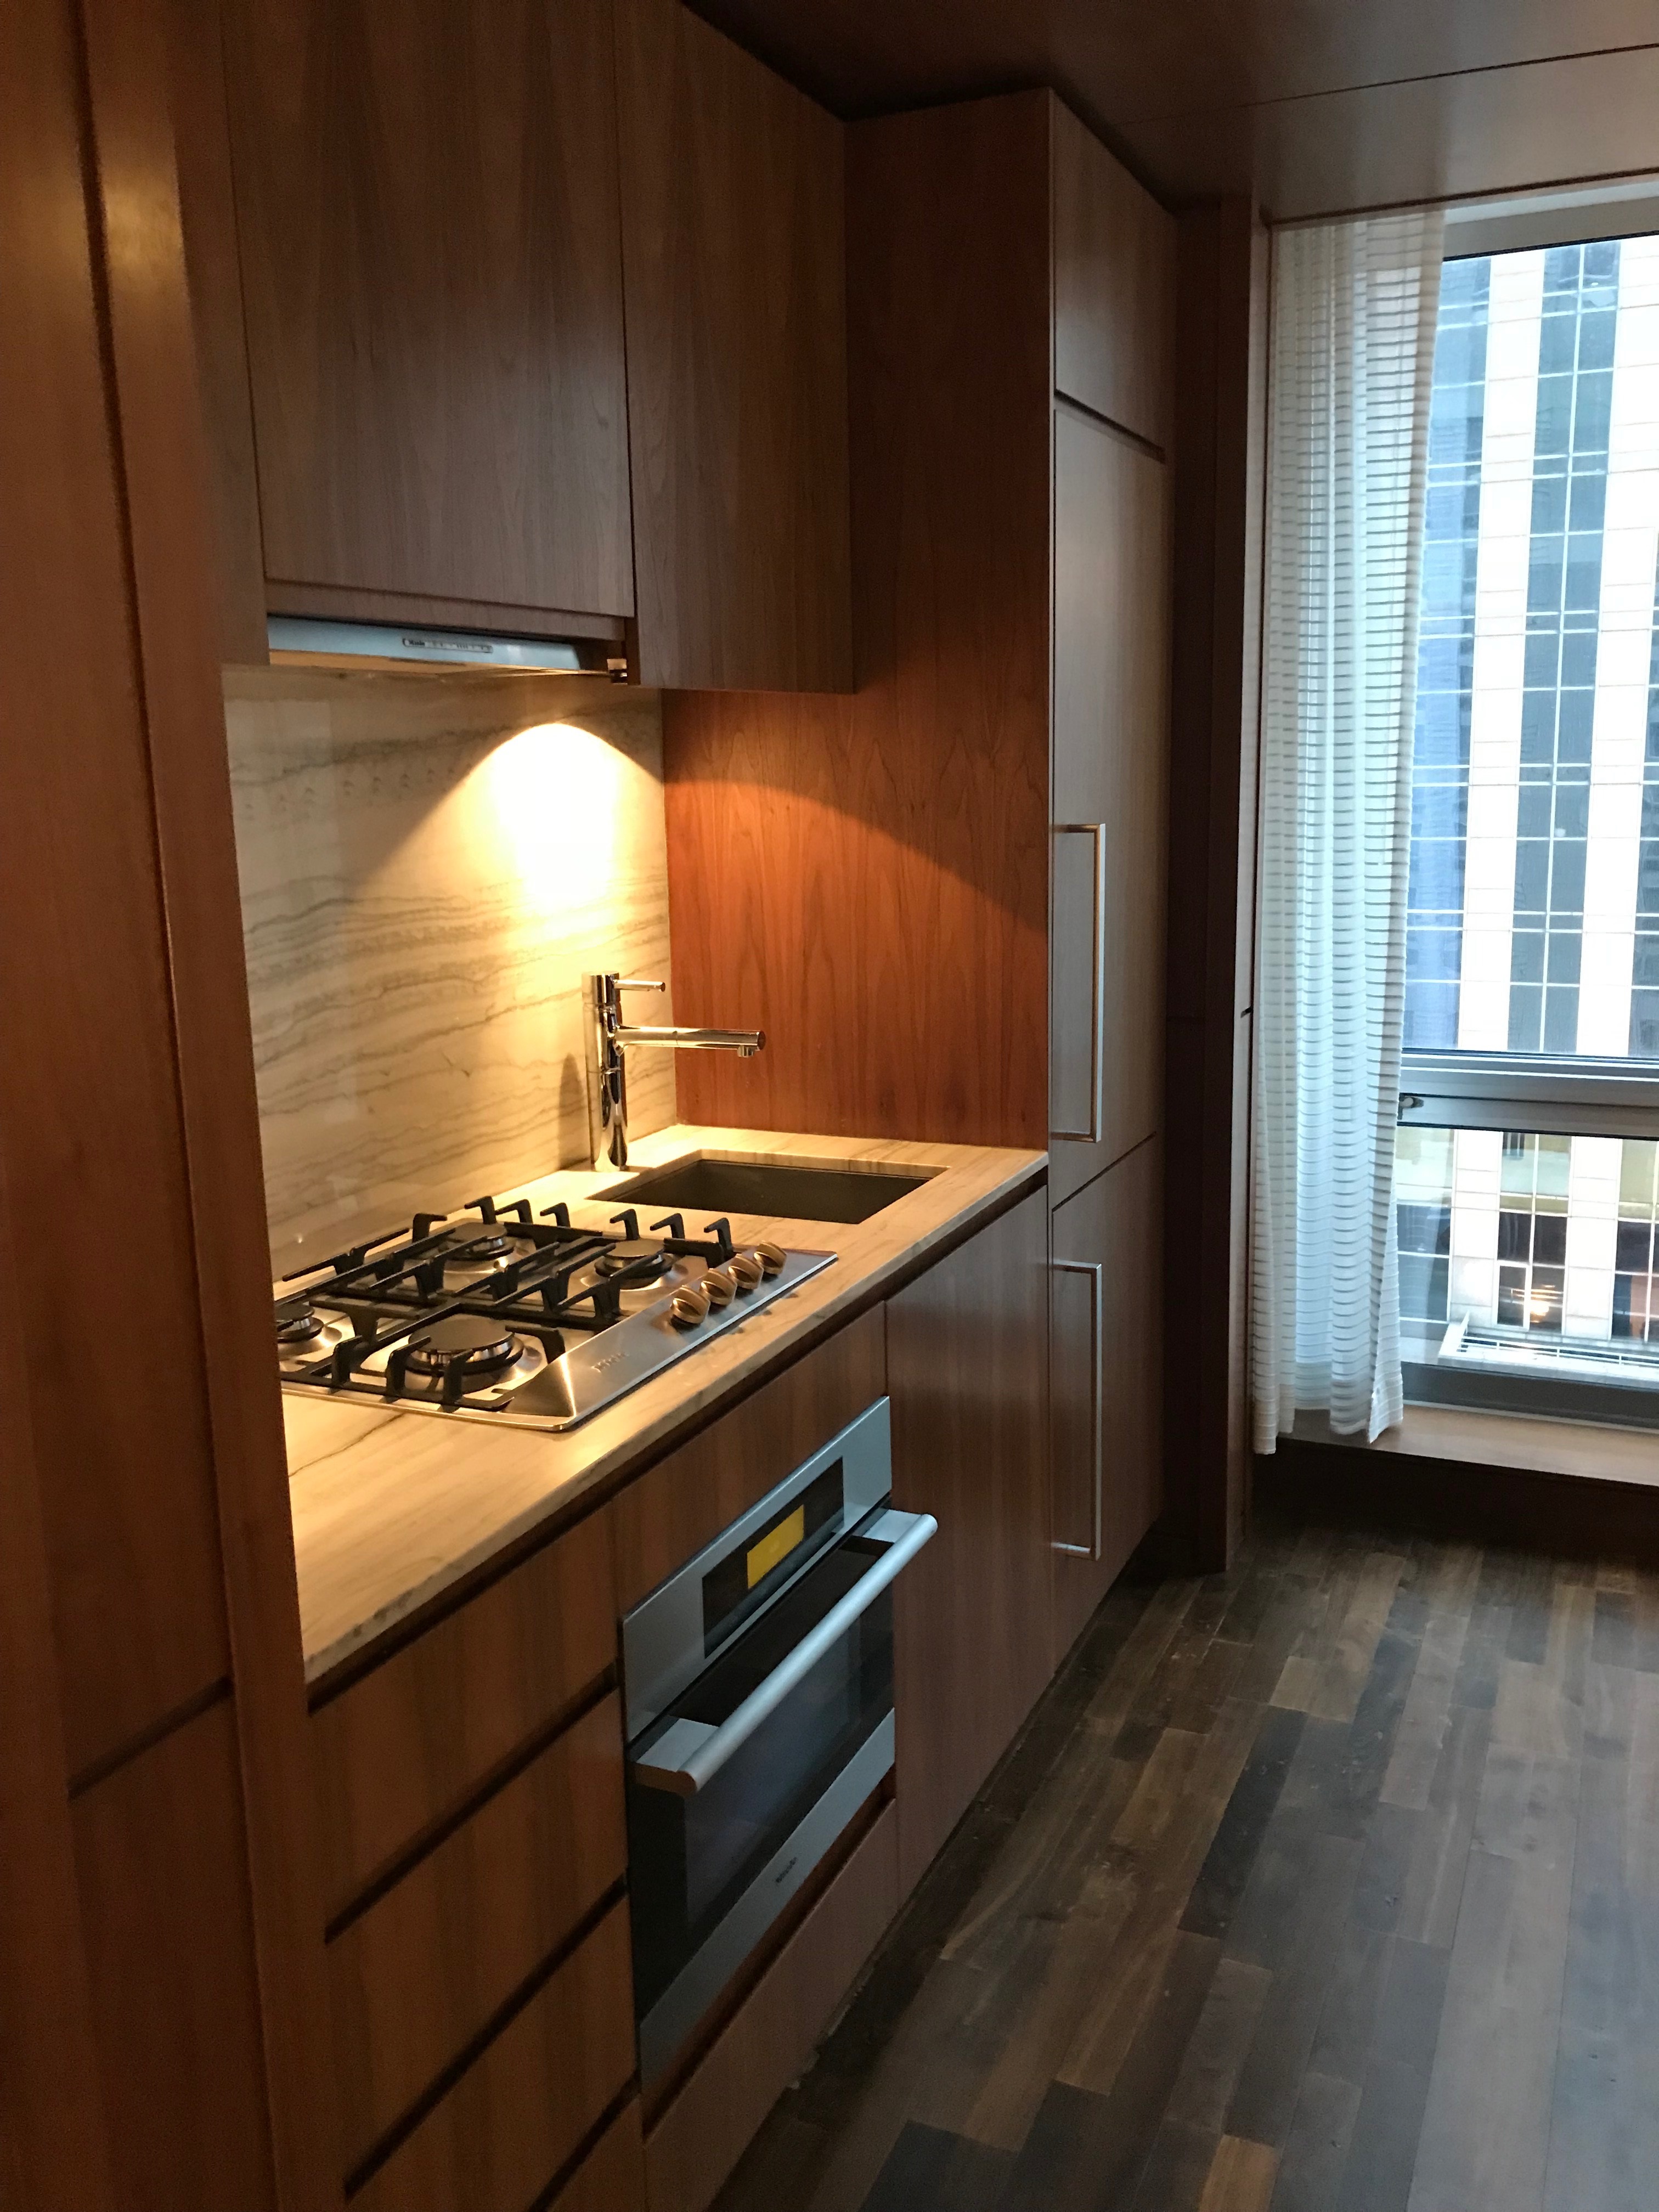
Full kitchen via AMEX Platinum upgrade
Views of Manhattan from the bathroom
Soap, shampoo, and conditioner were all Chuan, a holistic proprietary brand owned by Langham.
Another huge selling point for the Langham is its location. The hotel is centrally located in Manhattan, so we could walk to most of our destinations on Saturday. We walked to Washington Square Park, Times Square, and the Highline. The next day, we had to check out by 4pm and catch our flight at 5:30pm, so we didn’t have much time to waste. We woke up at 8am and called the doorman to arrange a ride to Central Park at 11am using the hotel car service (which is free!).
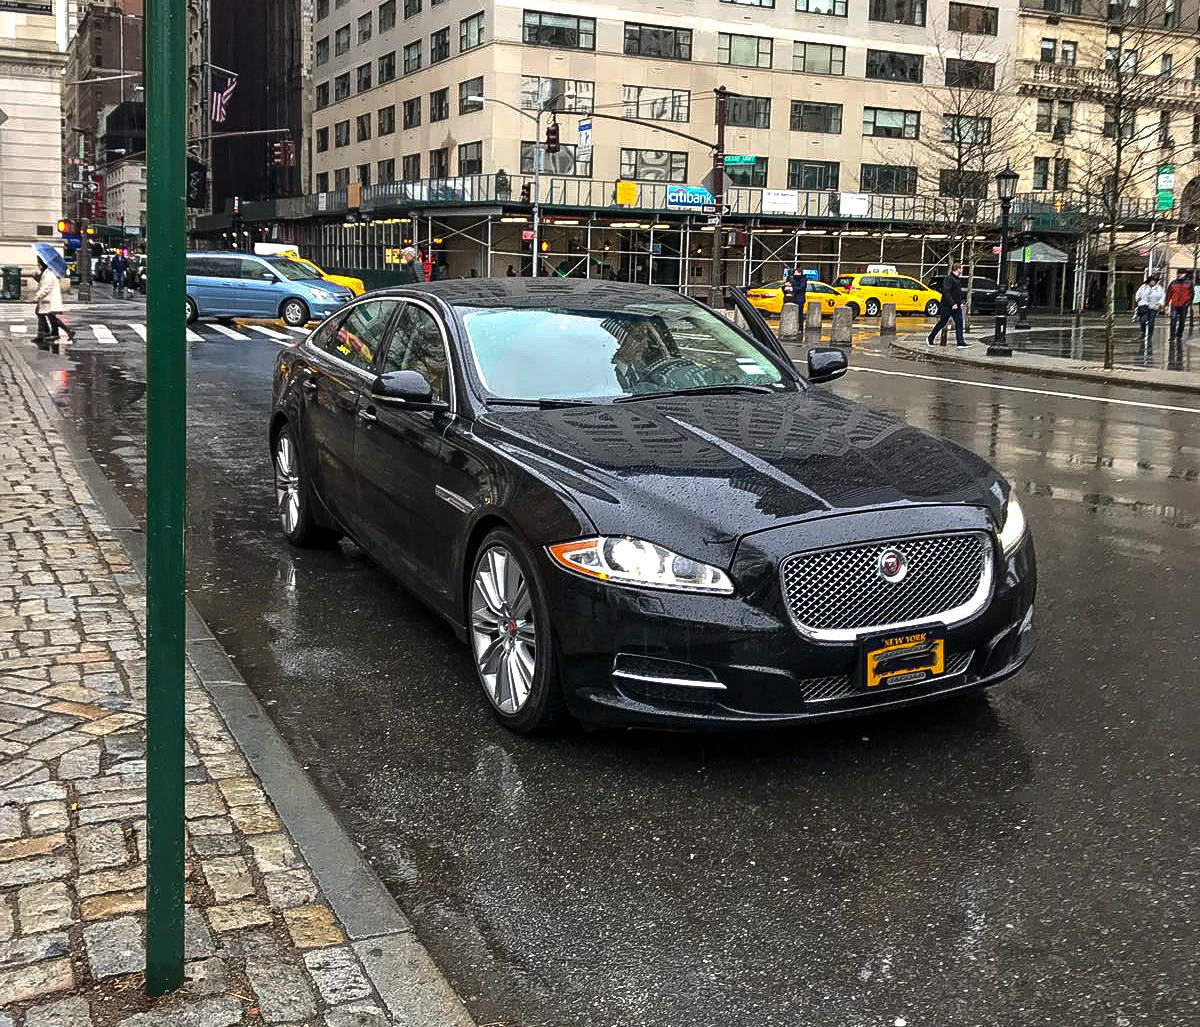
Pro Tip: The hotel has a Jaguar that will drop you off wherever you want to up until 59th Street. They start taking appointments at 8 a.m., and they are on a first-come, first-served basis.
Jaguar that’s provided for guests of The Langham
After our ride set up, we got ready and cashed in on our complimentary breakfast at Ai Fiori—which was phenomenal! My cousin and I decided to order a couple of things and share. We ordered the buttermilk pancakes, uova in Purgatorio, and the house potatoes—everything was phenomenal. You can see the picture below.
If you asked me what the stay was like after my first time, I would’ve said it was great—all the basics of a 5-star hotel. But staying here as an AMEX Platinum cardholder made this experience next-level amazing, to say the least! It is rare to have a travel experience where you don’t compromise on something, whether it be the room, service, or location. But I can genuinely say there was no compromising at the Langham NYC; everything was at the top of its game—the room, the service, the amenities, the location, and the (free) food were all a 5 out of 5.
I’ll review our itinerary to Argentina and Chile and the miles/points we used on different segments. I’ll review what we did well about planning while touching upon the aspects we could have done differently. Everyone’s purpose for a trip is different, but my wife and I had one main goal: To make the Patagonia region of Argentina and Chile our priority. We had six full days in Argentina, so our goal was to make the most of it. Here is a recap of our memorable trip to this beautiful part of the world:
Getting There:
Non-stop flights to Buenos Aires, Argentina, depart from NYC, Newark, Miami, Dallas, and Houston. We traveled during the busy holiday season and would not use cash to book this ticket. Round trip airfare was at least $1,300 a person on American, United, and Latam Airlines. United Airlines was charging 70k miles one way from Newark or Houston for this trip. American Airlines was charging over 70k miles from JFK, Miami, and Dallas (DFW). We caught a huge break when we searched for a one-way trip from Miami on British Airways. They only charged 25k miles per person from Miami to Buenos Aires via American Airlines. Since they are One World partners with American Airlines, we used British Airways Avios (BA’s mileage currency) to fly on American. Since neither my wife nor I had ever visited Miami, we figured we’d use our JetBlue miles to fly from Albany to Ft. Lauderdale and escape the ensuing blizzard that was en route to Albany, NY. This allowed us to spend two days there and enjoy the city. The flight to Buenos Aires departed on the 24th from Miami during the evening. A one-way ticket on the same flight would have cost us over $1,900 per person (!). We got significant value on this redemption, possibly one of our best ever. British Airways is a transfer partner of several credit card companies (Chase, AMEX, Capital One, Wells Fargo, Citi, Bilt, etc), so it’s one of the easier mileage currencies to accrue.
The damage had we booked using cash. Insane.
Day One: Buenos Aires
Our flight landed at 6:45 am, and this would be our only full day in Buenos Aires. I tried to sleep as much as possible, but anyone who travels economy class knows you can’t sleep well when sitting for that long. My wife and I were both tired and our hotel, Dazzler Polo (part of the Wyndham portfolio of hotels) was all the way on the other side of town. We just hoped that even if the hotel didn’t let us check in early, they would at least hold our bags until the 2 pm check-in time. Once we got our luggage, we hailed an Uber (more on this later) and took the nearly 1-hour ride to the other side of town. By the time we got to the hotel, it was 9 am. I walked to the front desk and told the lady we just arrived from Miami and kindly asked her if there was any possible way she would let us check in early. She quickly checked her computer and said a room was available and she would give it to us. This was a HUGE deal. It allowed us to take a much-needed 2-3 hour nap and still have the entire day to explore the city. Since it was summer in South America, sunset was not until 8:10 pm. So, a massive shout out to the lady at Dazzler Polo for helping us salvage that day. The hotel itself was fantastic, and I booked it using a hotels.com gift card that I redeemed using Ibotta (you can read about that app here).
Front Entrance to the Dazzler Polo Hotel
Hotel Room
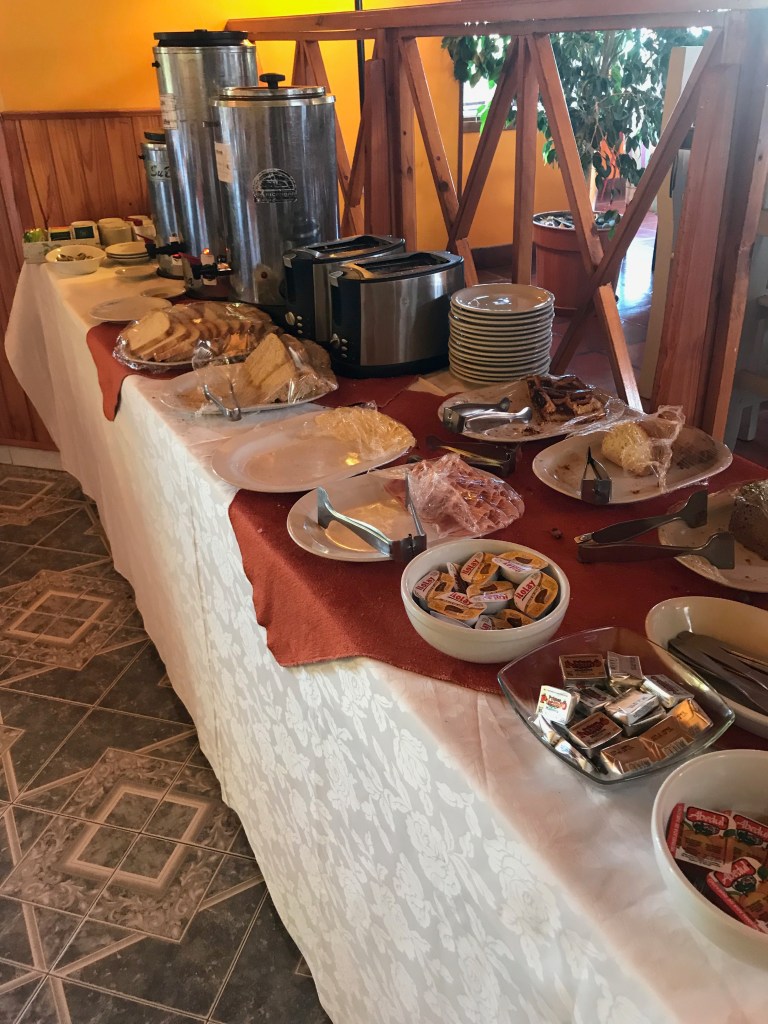
The complimentary breakfast was far better than what you would get at American hotels.
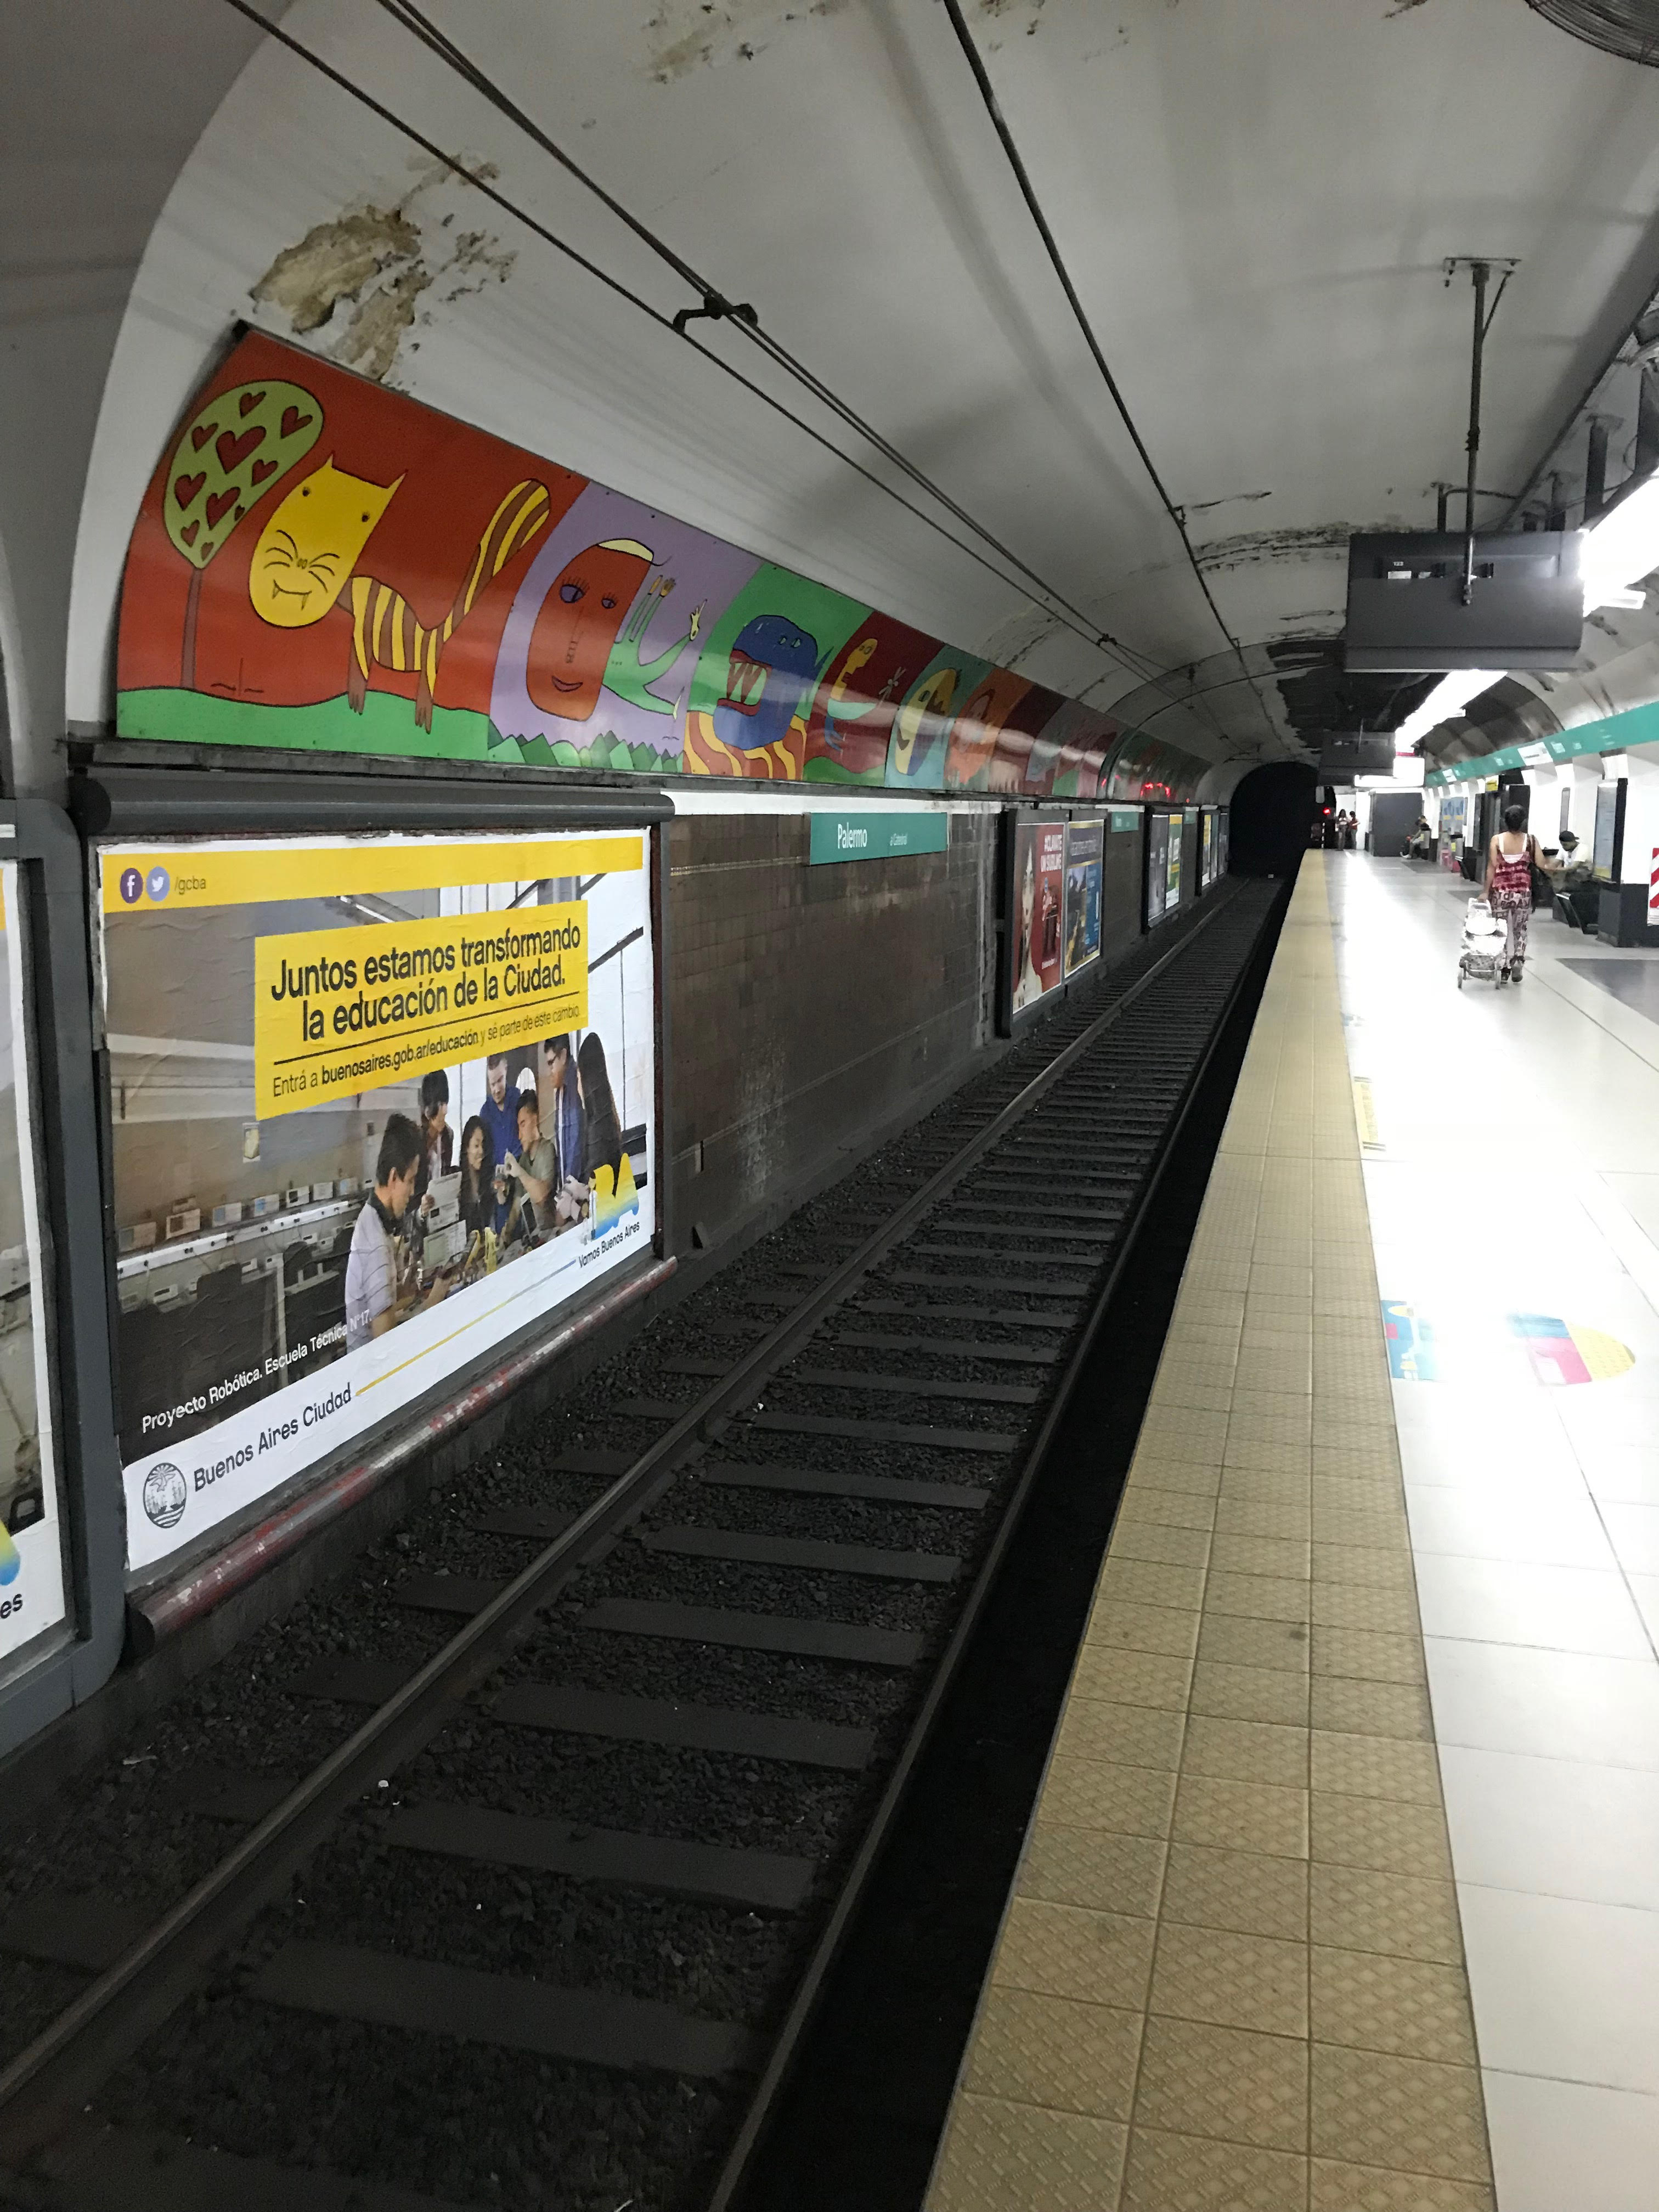
This hotel is located in the northwest part of Buenos Aires, in the neighborhood of Palermo. We took the subway and got off at the last stop (Catedral) to visit some of the main sites near the city center. The subway system is straightforward to use, and if you need help, the employees will gladly assist you.
Once we got off the subway at the Catedral station, everything we wanted to see was a short walk away. Plaza de Mayo is a beautiful central plaza with a pink building called Casa Rosada, the statue of San Martin, and the Catedral Metropolitana. Many picture opportunities will present themselves here. Walking further into the hip and trendy Puerto Madera neighborhood, you’ll find the Puente De La Mujer or Women’s Bridge. This neighborhood also has many restaurants and brunch spots and is lively at night. We happened to be there during Christmas, so most places were closed.
The best way to explore any city is by walking. Could you get around between some of these sites using a taxi or Uber? Sure you can. Speaking of Uber, I prefer using it for long distances in Buenos Aires. A taxi was also an option, but with Uber, you’re locked into a fare, and you know approximately how much you will be paying before you step into the car. With a taxi, there’s always that chance that we might be taken advantage of as foreigners. The app worked seamlessly; a one-hour ride from one side of the town to the other cost about $25 USD. The taxi company quoted me double that price. But most of the time, we walked around and saw many of the sites we wanted. We loved Buenos Aires, and now it was time to get back to the hotel and prepare for the flight to El Calafate the following day.
Day Two: Buenos Aires to El Calafate
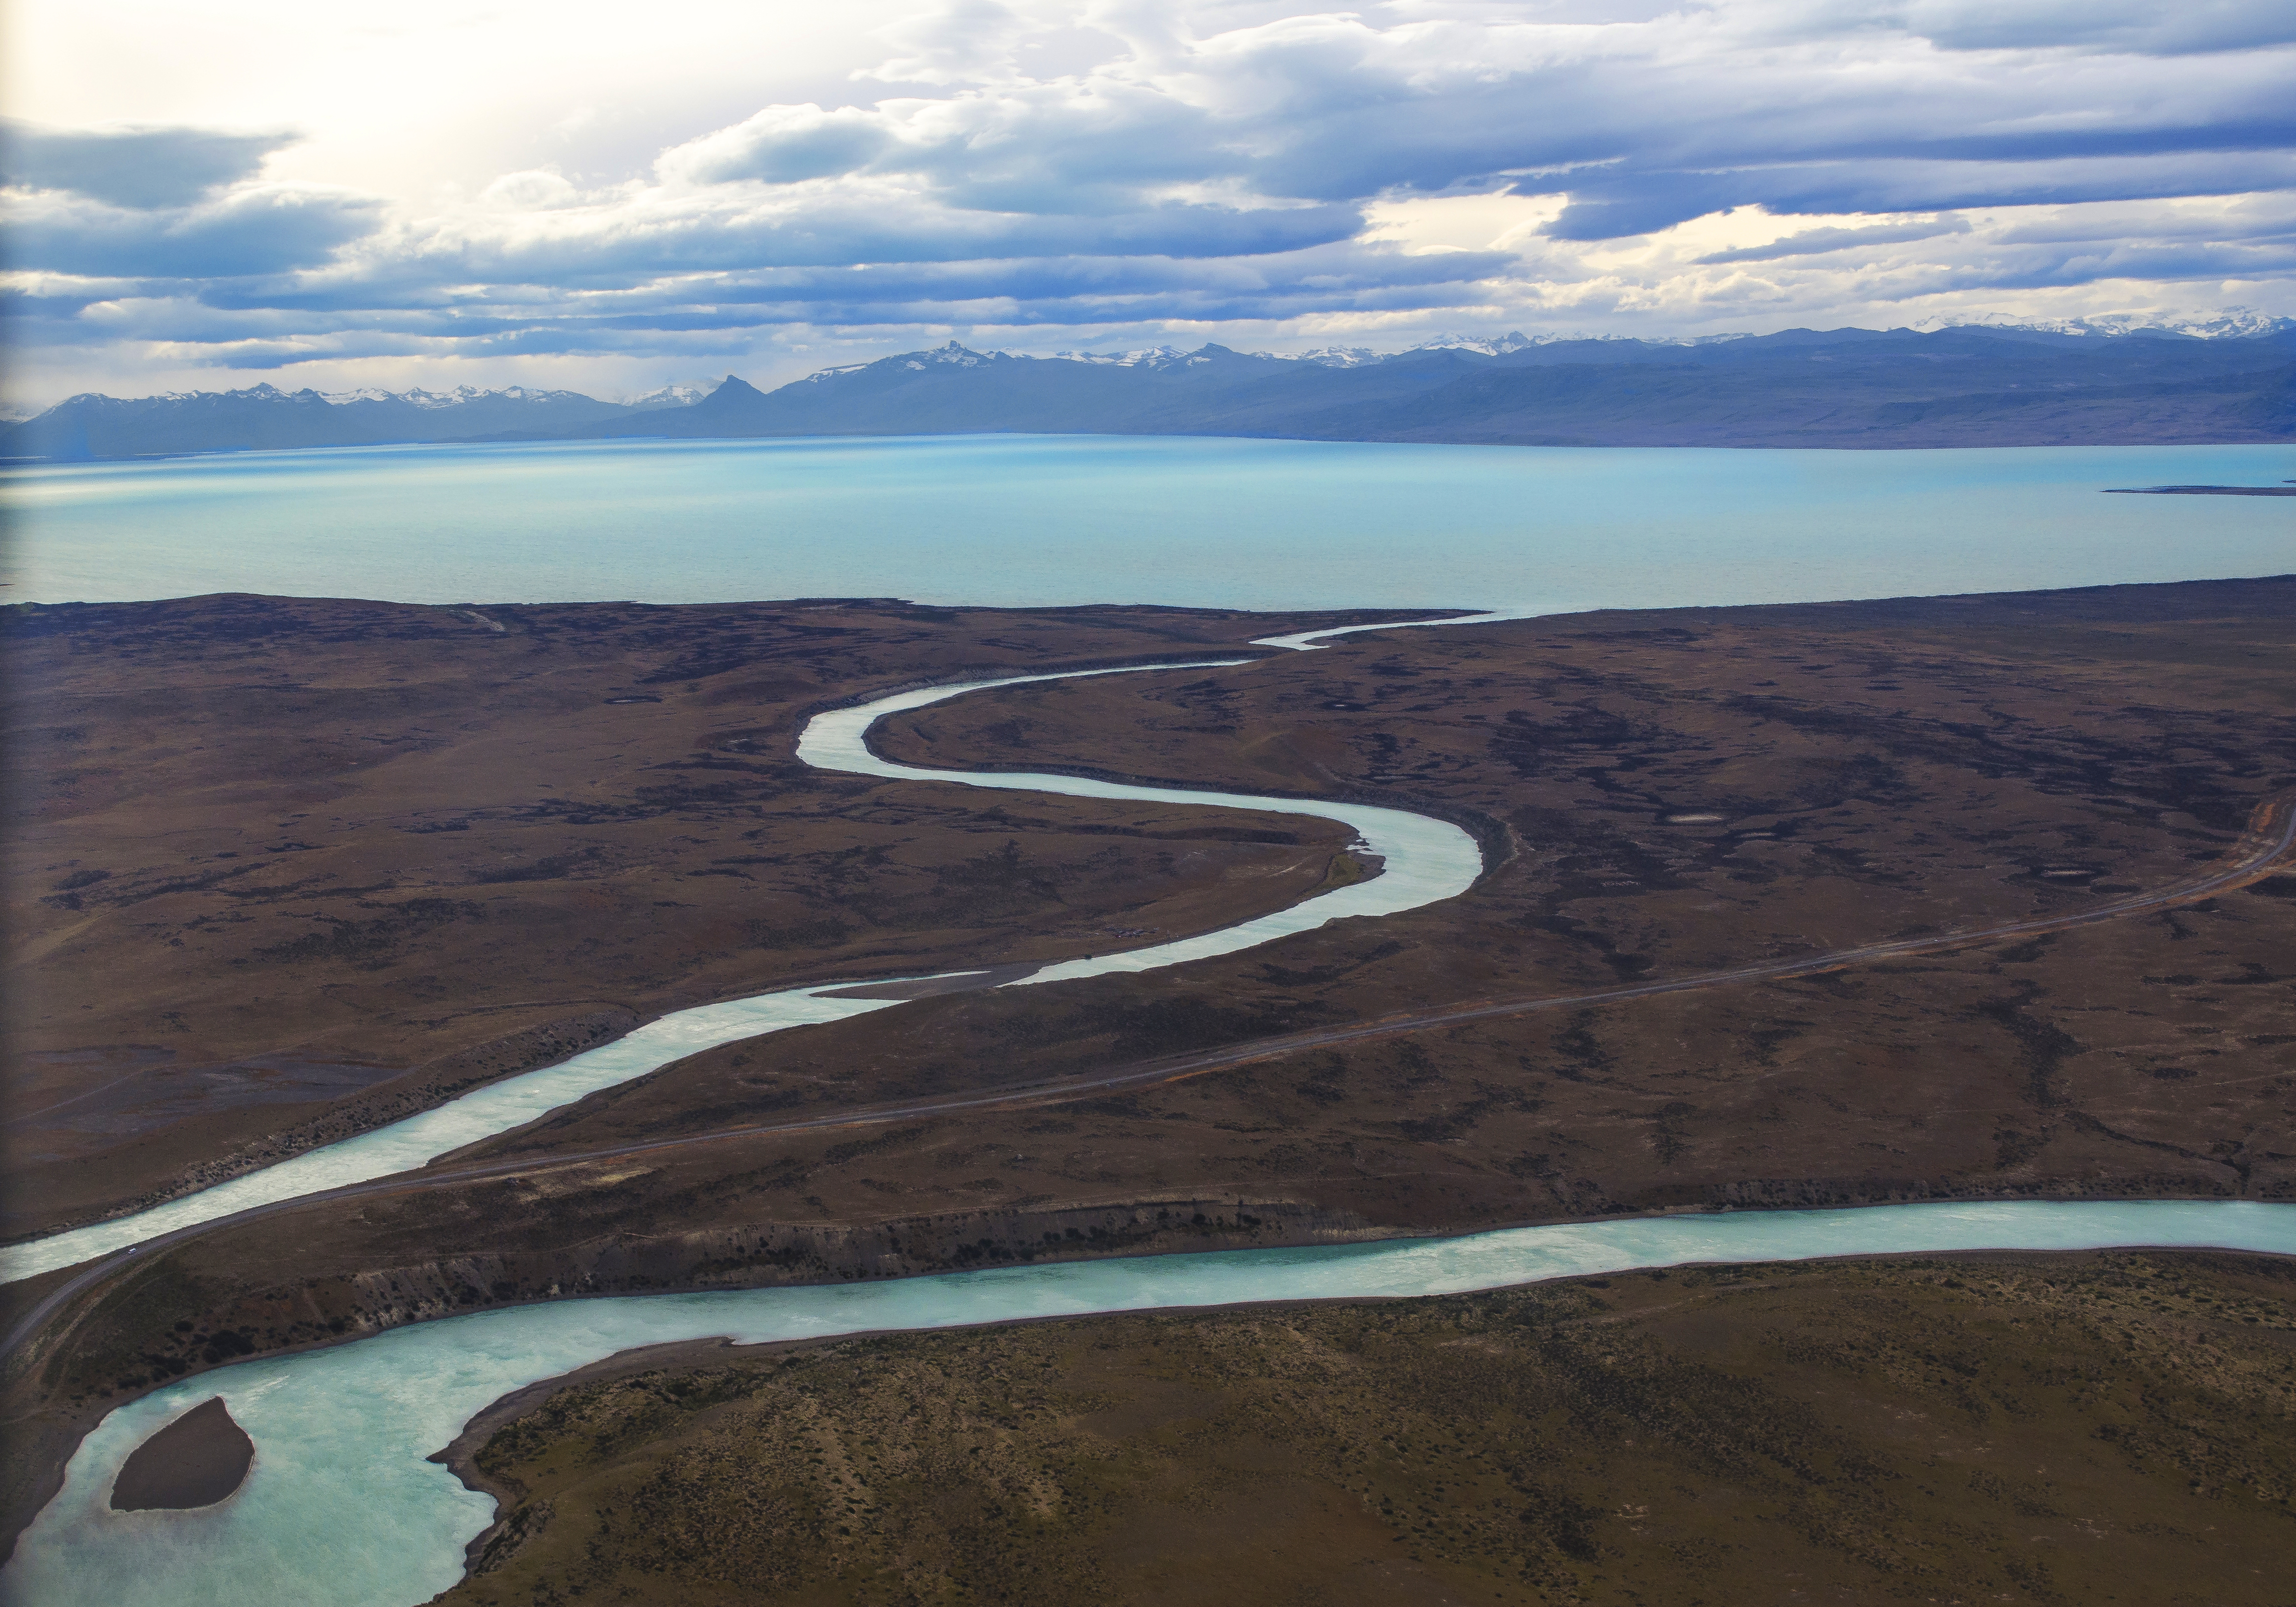
I booked this flight using Chase Ultimate Rewards points on Aerolineas Argentinas. El Calafate is the gateway city to the Patagonia region of Argentina. Had I used cash, the flight would have cost $450 round trip per person. Again, I was set on not paying cash airfare. As a Chase Sapphire Reserve credit card holder, I got 1.5 cents per point for booking flights. This cost us 30k points per person for this roundtrip from Buenos Aires to El Calafate. This trip was taken from Buenos Aires’ other airport, Jorge Newbery International Airport, located on the north end of Buenos Aires, about 1.5 miles from the Dazzler Polo. It’s much smaller than their main airport, and I chose it because of the cheaper fares to El Calafate. The total flight time was about 2 hours 45 minutes. Once we got there, we booked a round-trip transfer with VES. It’s a smaller bus that took us to our hotel and dropped us off at the airport while flying out of El Calafate. The total for two people was 480 pesos, or about USD 26. This was far more cost-effective than taking a taxi, and Uber did not offer service here. Here’s a tip: Request a window seat and sit on the plane’s right side (Any seat that is F). This will give you spectacular photo opportunities as you land in El Calafate. You can see an example below.
I booked a hotel named Picos Del Sur for our stay at El Calafate. For $56 a night, this hotel offered complimentary breakfast and free WiFi and was just a quarter mile from the city center, where all the shops, restaurants, and cafes are located. The staff was fantastic and super friendly, and the premises were adequate. The breakfast was okay, as most of their offerings were high-carb items such as sweet croissants, muffins, toast, cereal, etc. Most of these hotel stays were paid via hotels.com gift card via Ibotta (I love that app).
Day Three: El Calafate
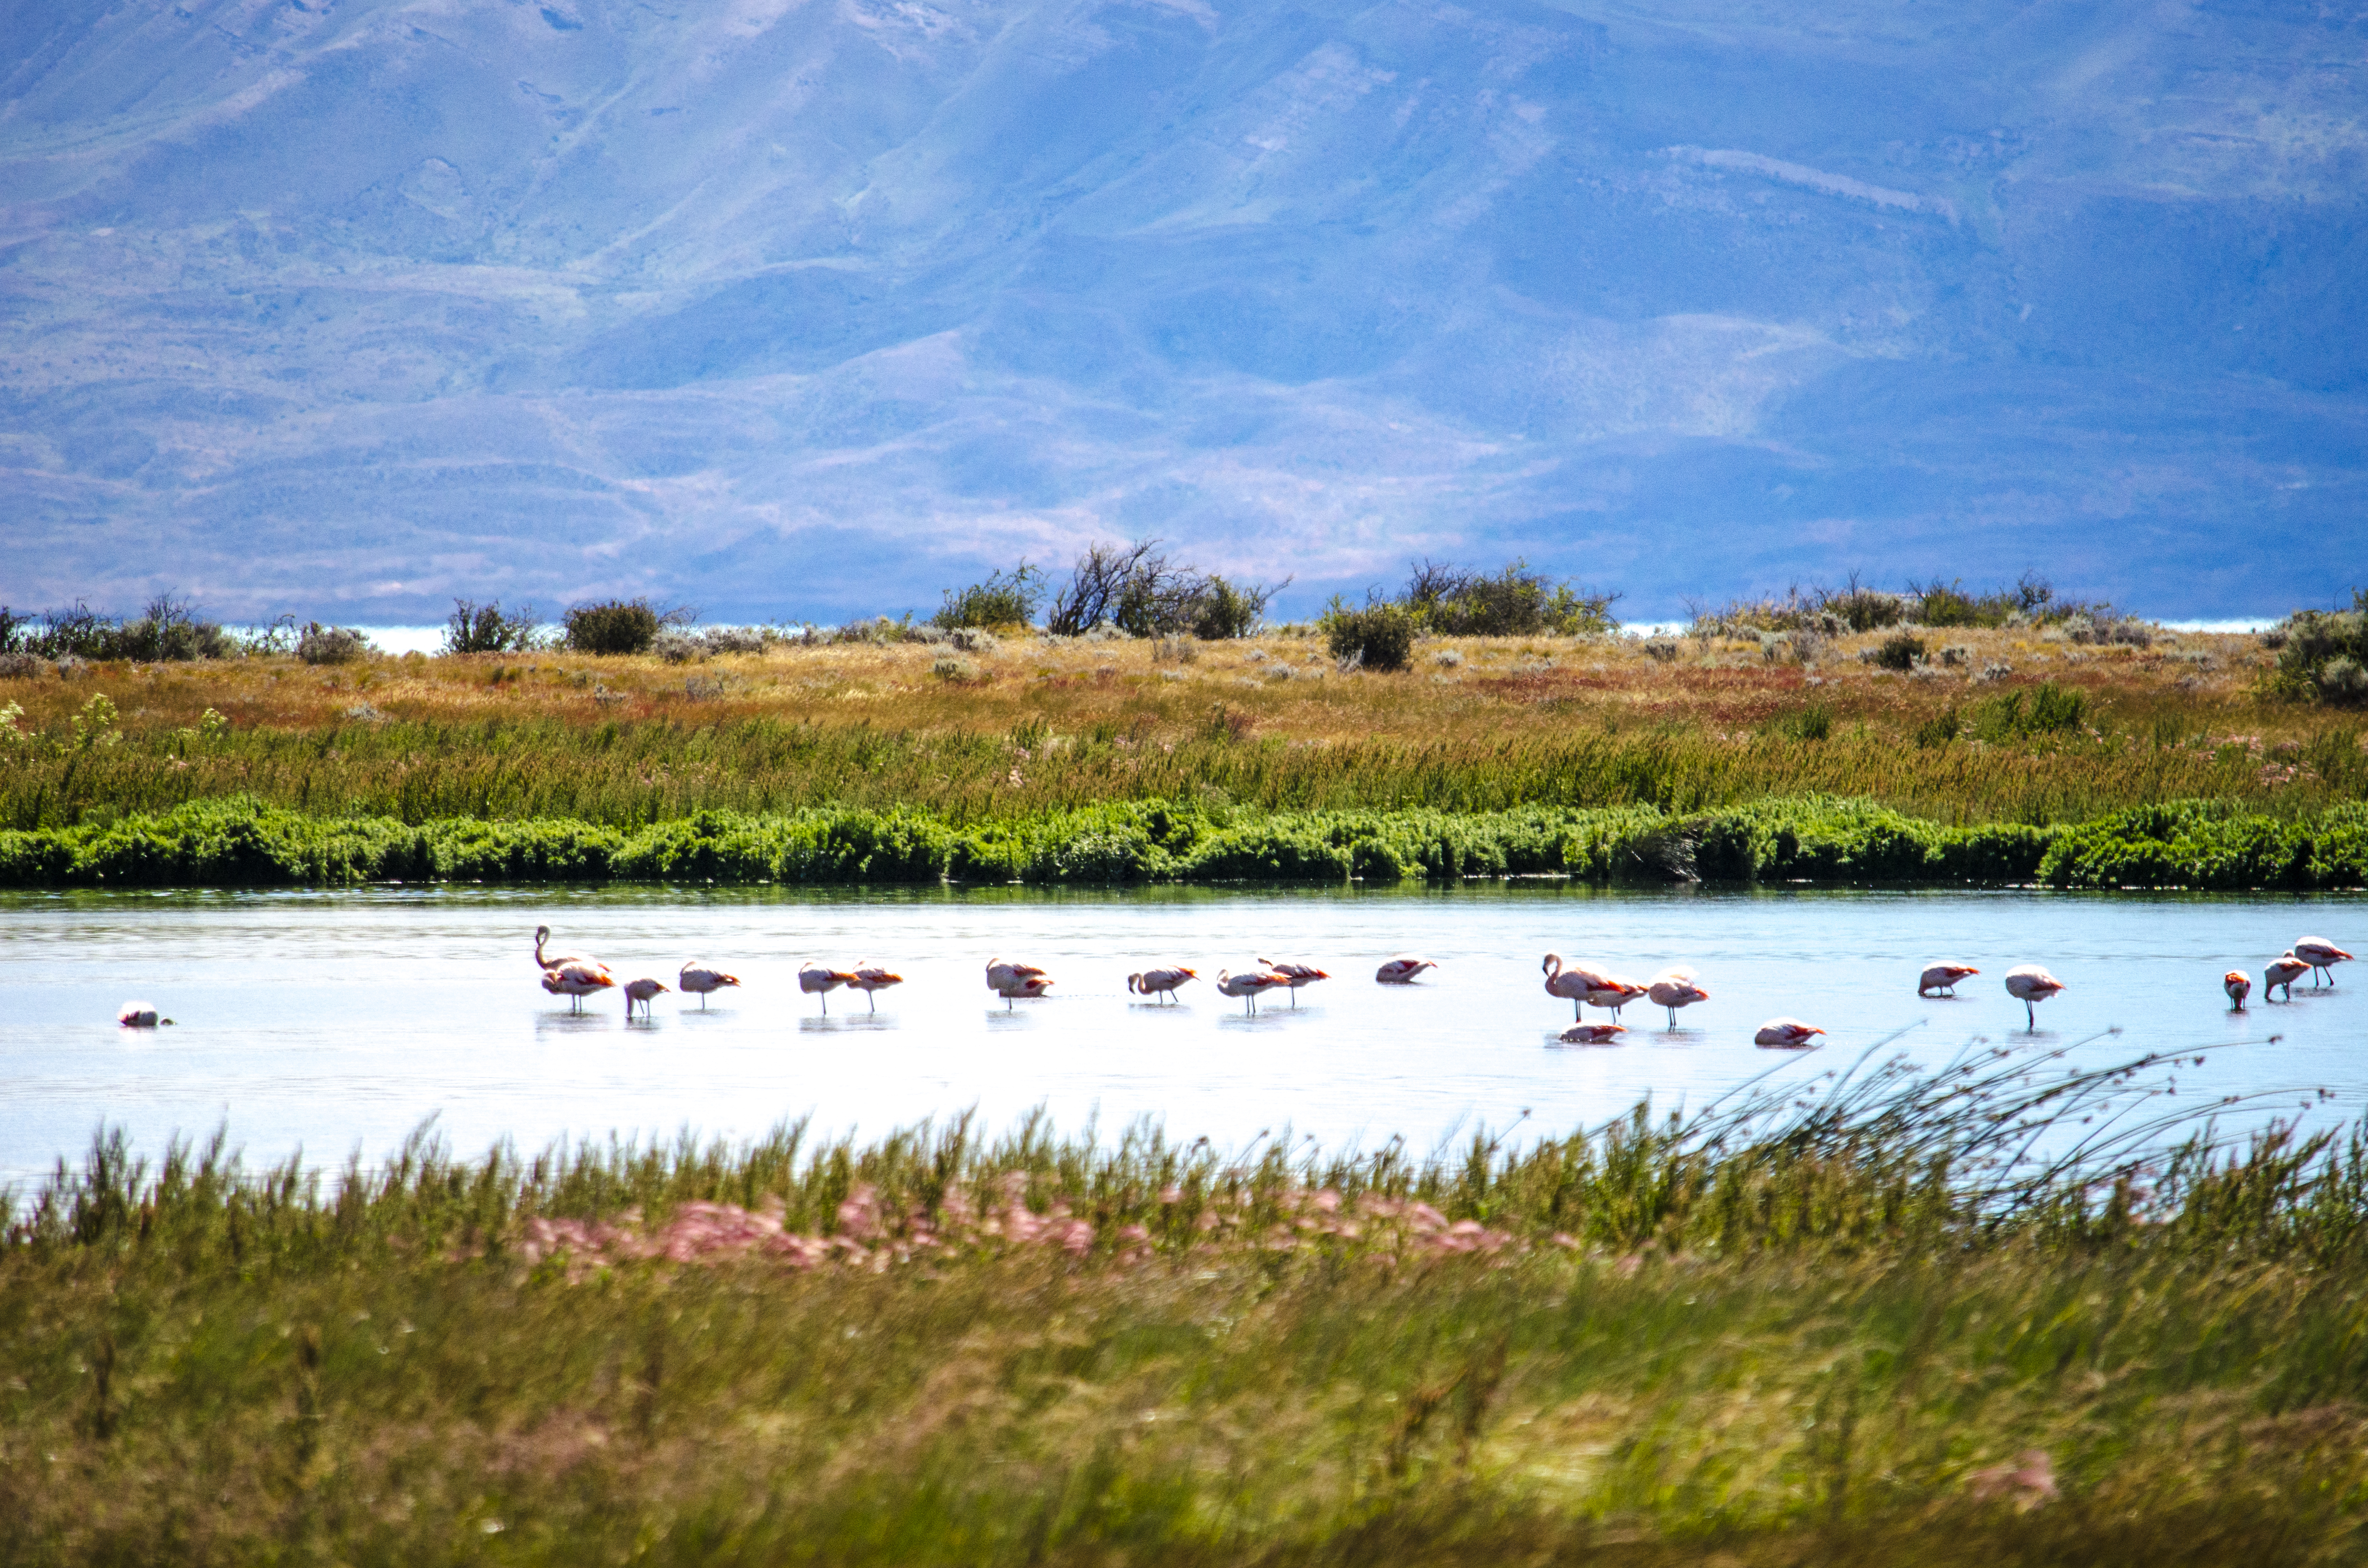
For any of you who might travel to Patagonia in the future, let me give you some advice: Throw the weather forecast out the window. This is one of those places where you can try to plan around the weather, which means absolutely nothing. We saw days where torrential downpours were forecasted only to see clear skies (much to our delight). The weather here changes hourly because the Atlantic and Pacific coasts are separated by just a few hours’ drive. On this day, we decided to stay in El Calafate and explore the town and nearby places. One gem we encountered was the Laguna Nimez Reserve. This place is a sanctuary for flamingos, owls, birds of prey, and other unusual birds I had never seen anywhere else. The entrance fee was 150 Argentinean pesos or roughly $8. The entire circle around the sanctuary takes about 90 minutes to walk and offers fantastic views of Lago Argentino and the mountains in the background. If you’re in El Calafate, I highly recommend it. For the second half of the day, we walked around the city center and checked out the town vibes. El Calafate has many lovely boutique shops that are worth checking out.
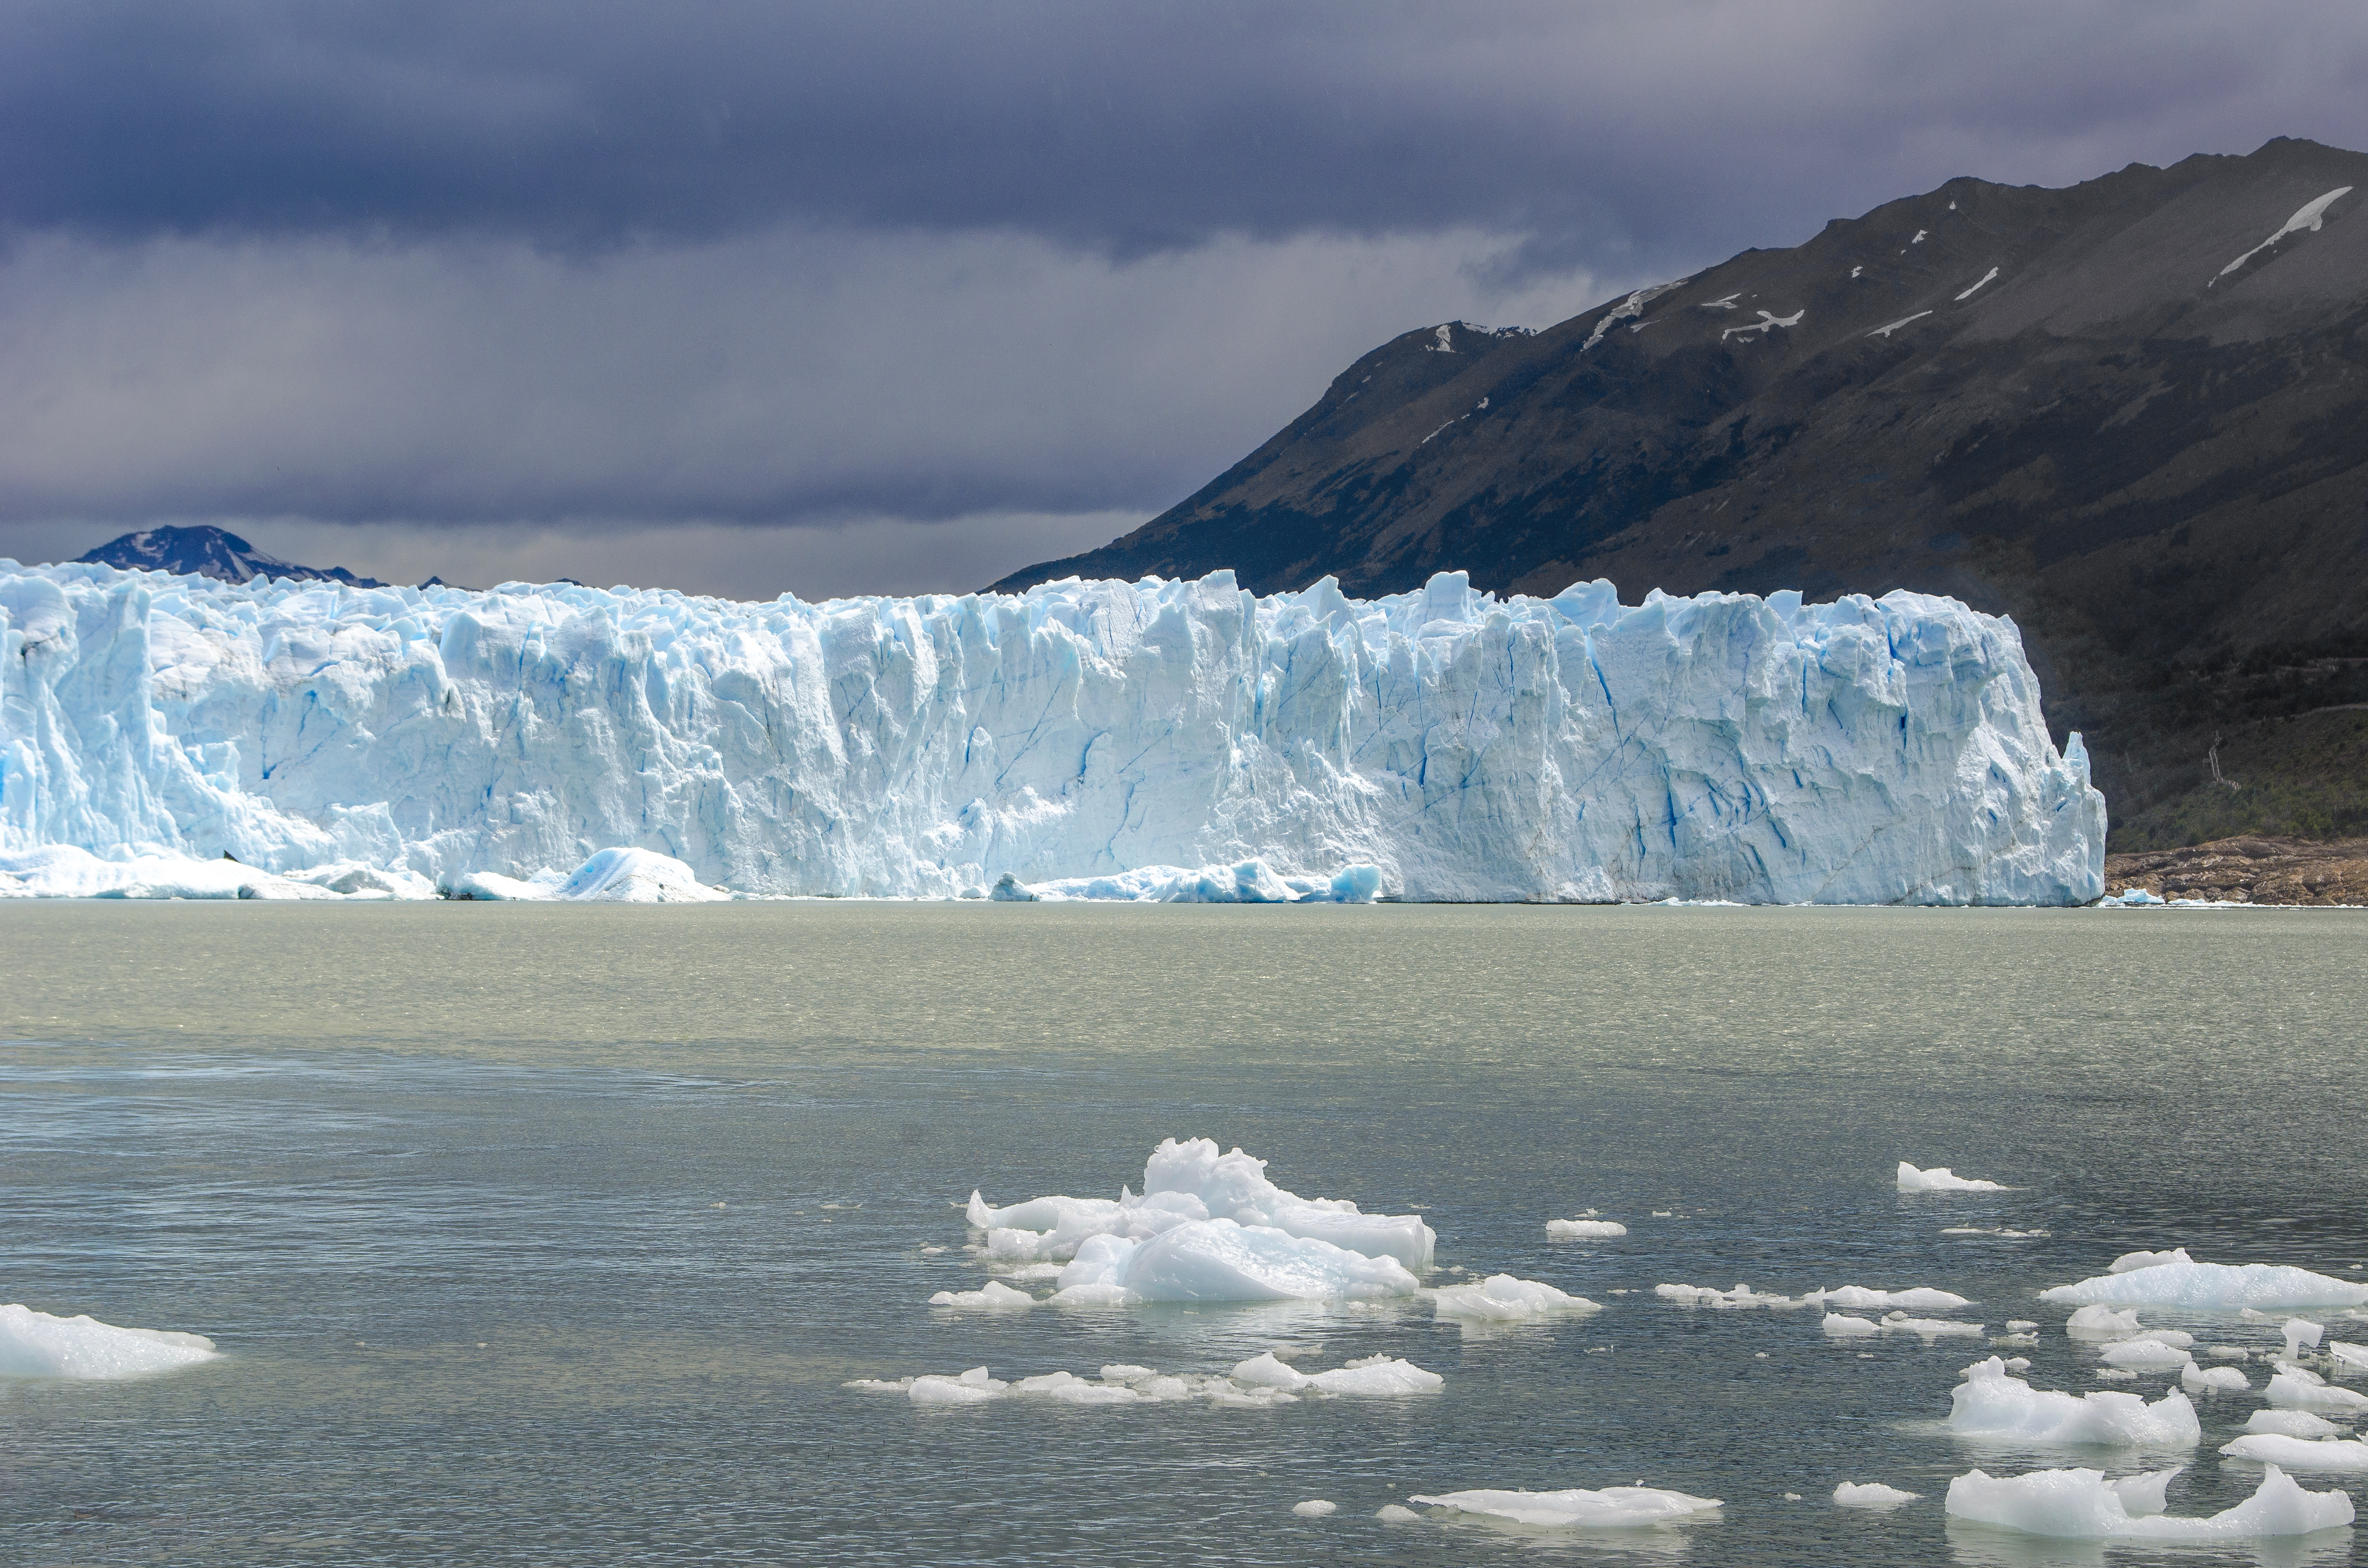
Day Four: Perito Moreno Glacier
We booked a tour to Perito Moreno Glacier on this day with Hielo & Aventura. You can visit their website and see everything they offer right here. They picked us up from the hotel at 7:30am, and we went on the 90-minute journey to Parque Nacional Las Glaciares. The first stop was a scenic overlook for about 10 minutes. This spot provided a glimpse of the awe-inspiring scenery yet to come. The second stop took us to the multiple viewing decks before the glacier. We saw a few smaller chunks of glacier calve off into the lake, which was incredible. The third thing on the agenda was the boat ride to the southern face of the glacier so we could actually hike on it. If you’re coming to Patagonia, I highly recommend doing this activity. For you Game of Thrones fans, it felt like we were north of the wall in wildling territory. The scenery is incredible and unlike anything I have ever witnessed. The ice has a lovely shade of blue, and even the water in certain crevasses seems to have a deep blue color. This activity costs about $180 per person, including pickup and drop-off from your hotel. As a Chase Sapphire Reserve credit card holder, I applied my $300 annual travel credit for 2018 for this excursion, effectively bringing our cost down to about $60 combined for two people. That’s a hell of a way to use the travel credit. Something to keep in mind: There is an entrance fee to Perito Moreno that is separate from the tour cost. It’s 500 Argentinean Pesos (equivalent to about $27 USD). The park ranger will collect that fee at the park entrance, and from what I remember, they don’t accept any other currency. Be sure to exchange your currency before you get there. My wife and I booked the 90-minute hike for this trip rather than the 6-8 hour hike. In retrospect, this is one of the things we wish we had done differently. It wasn’t as challenging as we initially thought, and if you’re physically fit and have done longer hikes before, the longer hike might be of interest to you. Just be sure to dress in layers for either one you may choose. Even though they give you snow clamps, it’s still important you have a decent pair of hiking shoes for this trek. Merrell, Keen, Columbia, etc would all suffice. They also require gloves so you don’t cut yourself on the jagged ice if you fall. Sunglasses are a great idea if you’re there on a sunny day since the glare reflecting off the glacier can sometimes be blinding.
The boat ride to the glacier is also incredible; you can view it for yourself. It does get windy, and there will probably be rain at some point, so it’s best to wear waterproof clothing and a raincoat.
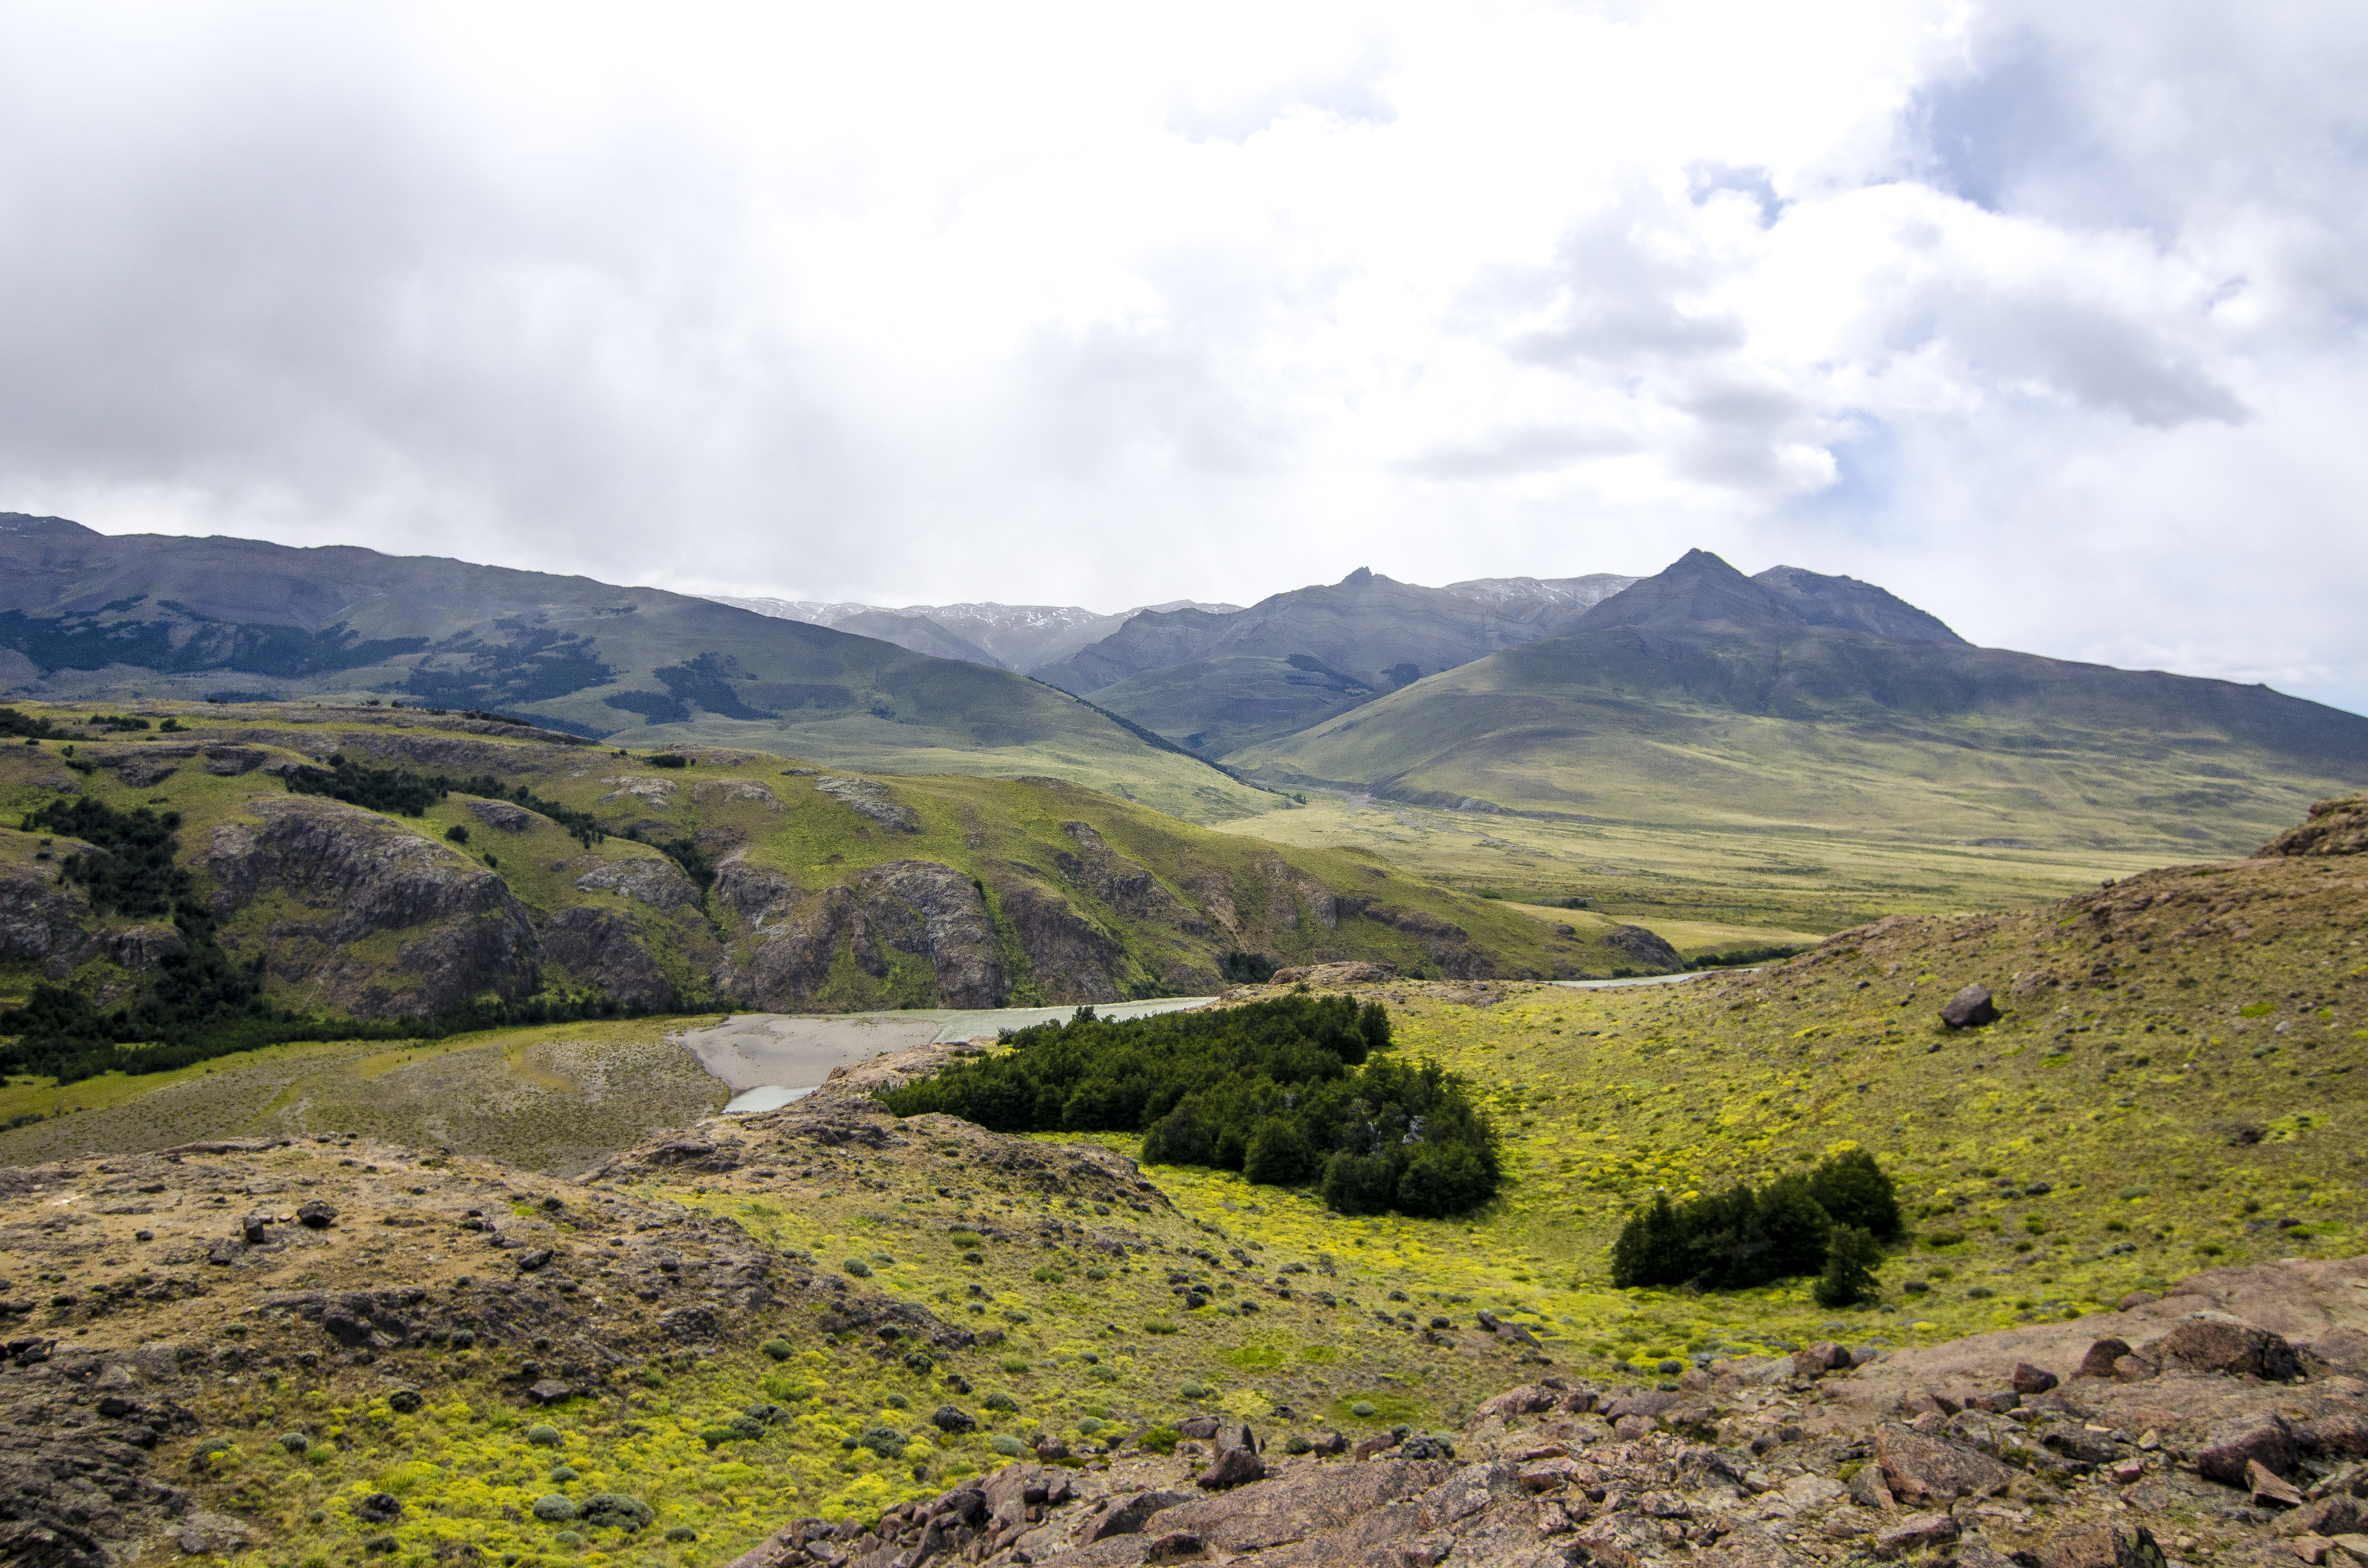
Day Five: El Chalten
On day five, we did a day trip to El Chalten, about 3 hours north of El Calafate. El Chalten is known for its hiking, scenery, and Mt. Fitz Roy. Unfortunately, Fitz Roy was hidden by clouds for the entire day we were there. But we still didn’t pass up the opportunity to hike a few trails. Some of the trails are moderately challenging and require much steep climbing. You will get wet, muddy, and messy, which might be painful if you’re not physically fit. But on a clear day, the reward at the end is majestic postcard-worthy views of Fitz Roy. The best thing about El Chalten? It’s one of the few places to access the trails without paying an entrance fee. If you’re into camping, it’s a very popular spot to set up camp.
A viewpoint from one of the trails at El ChaltenThe viewpoint at the end of the Mirador trail
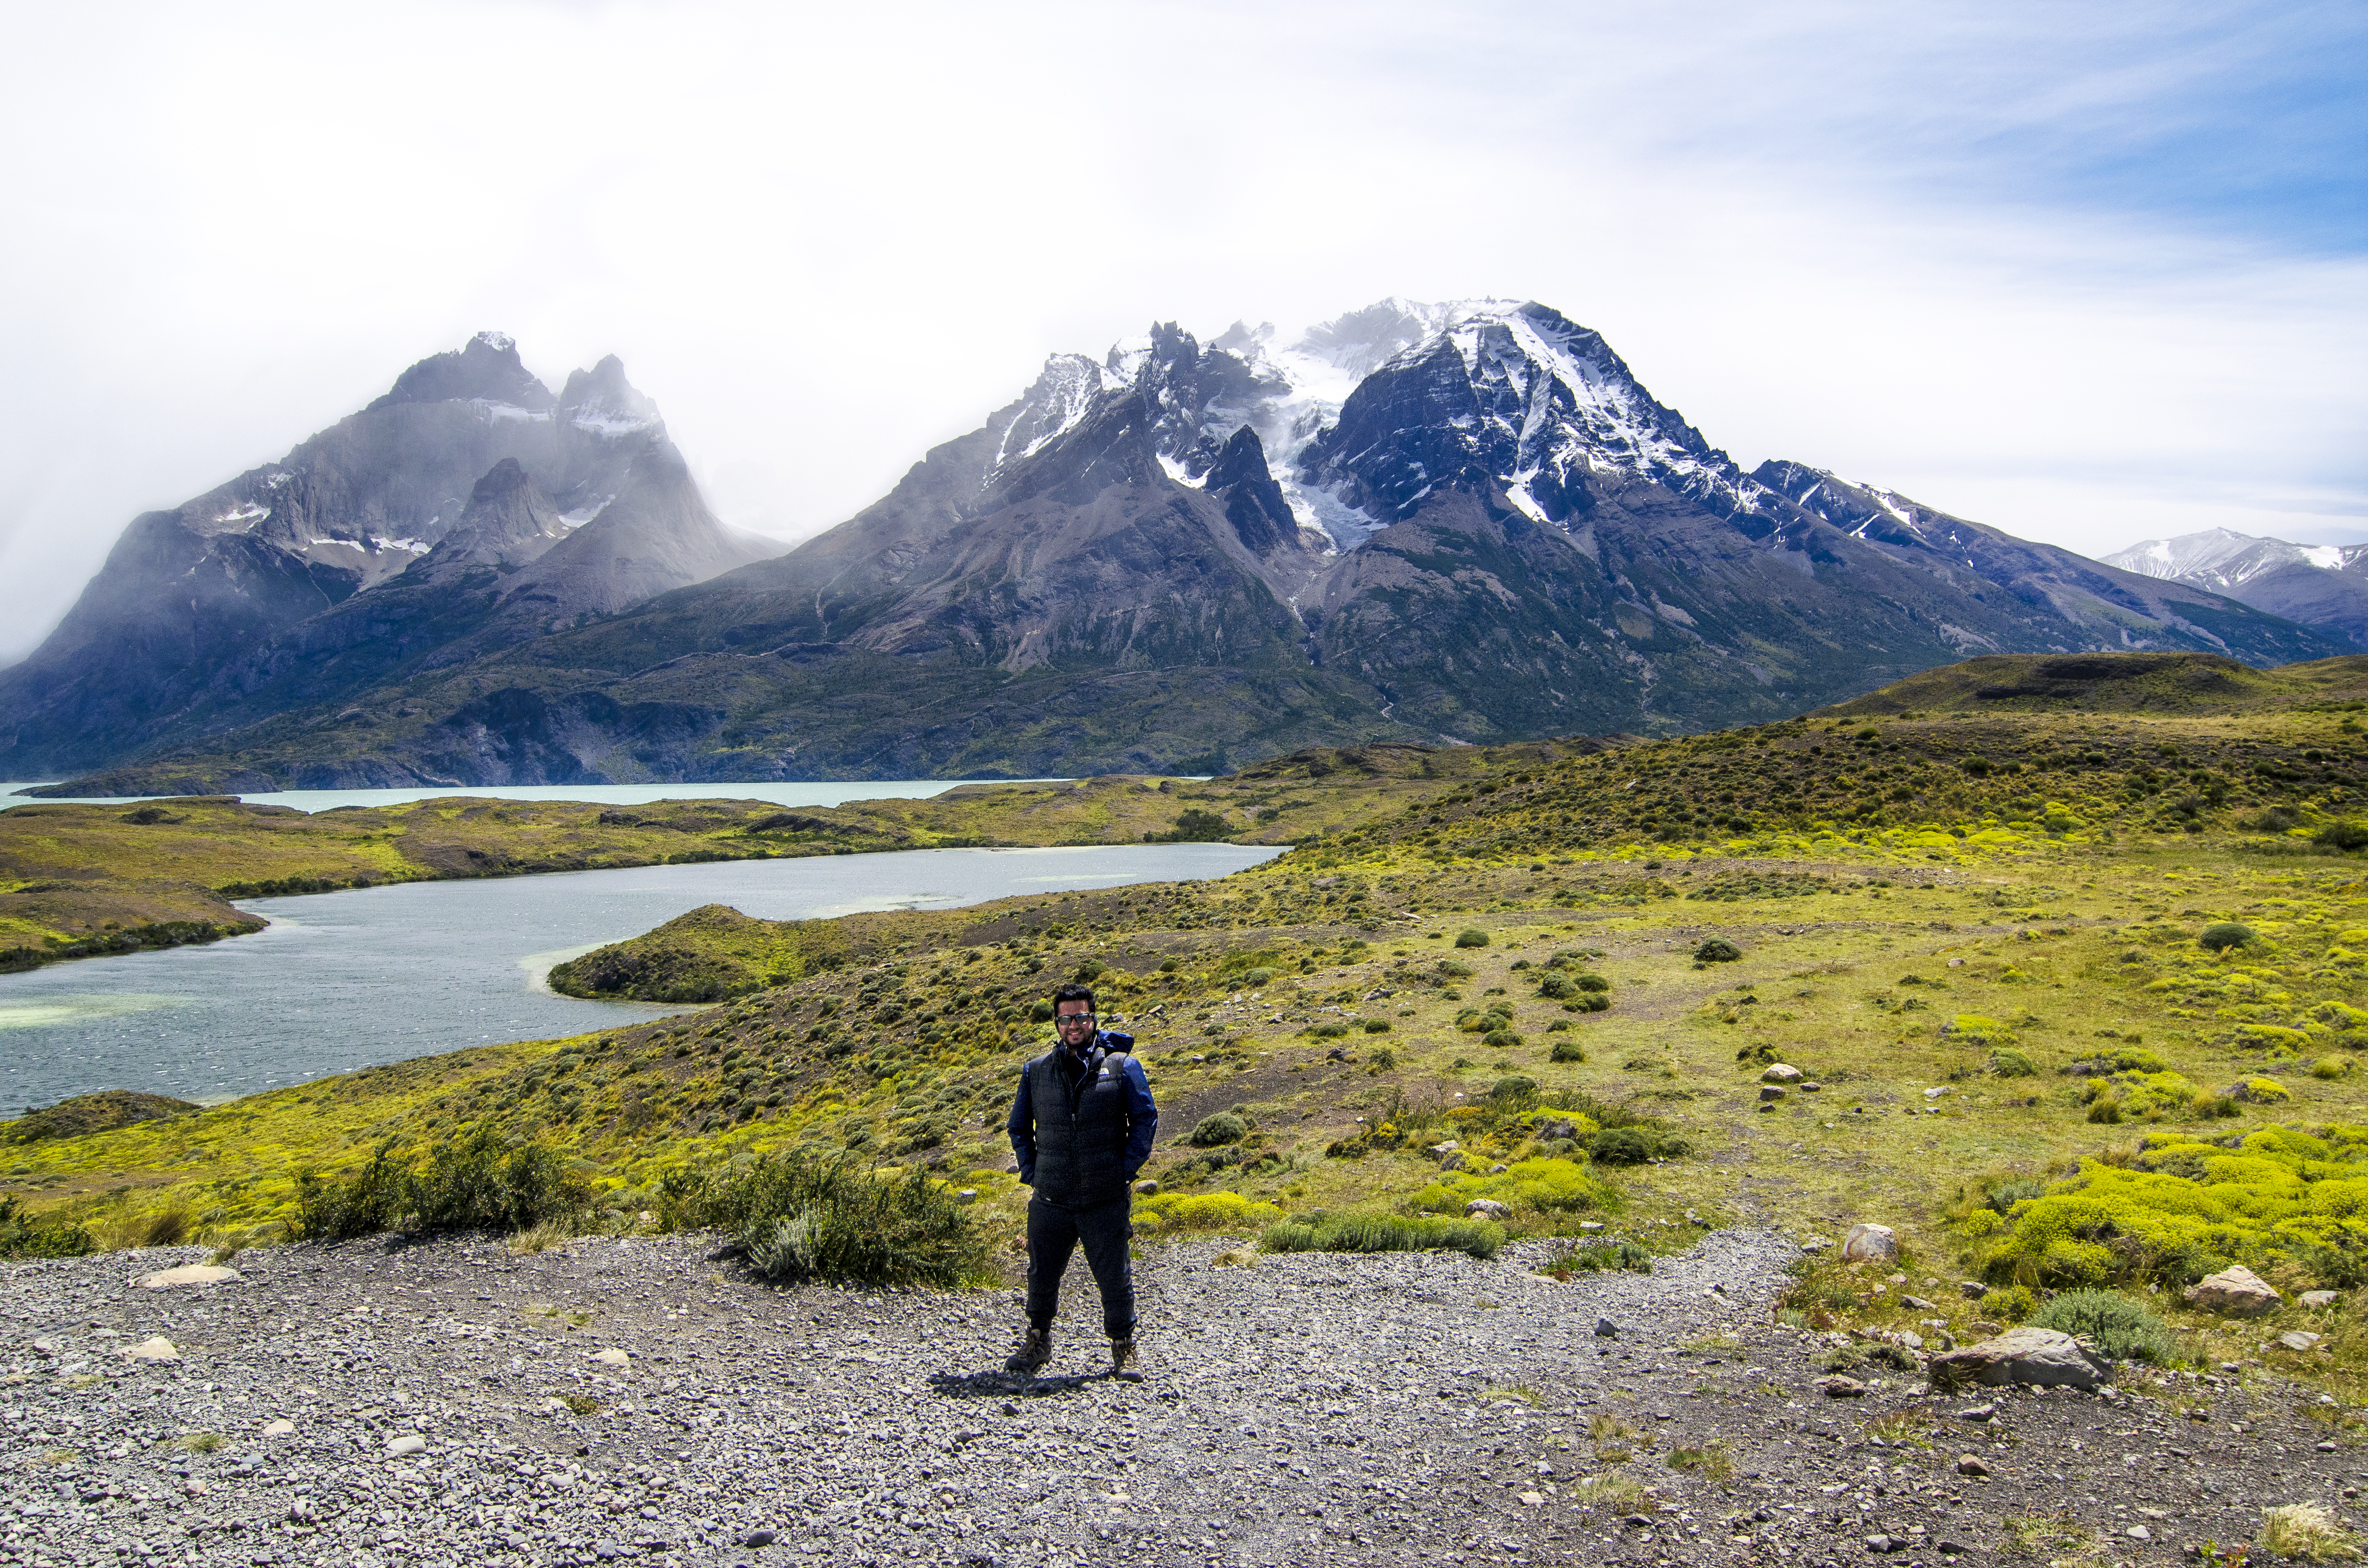
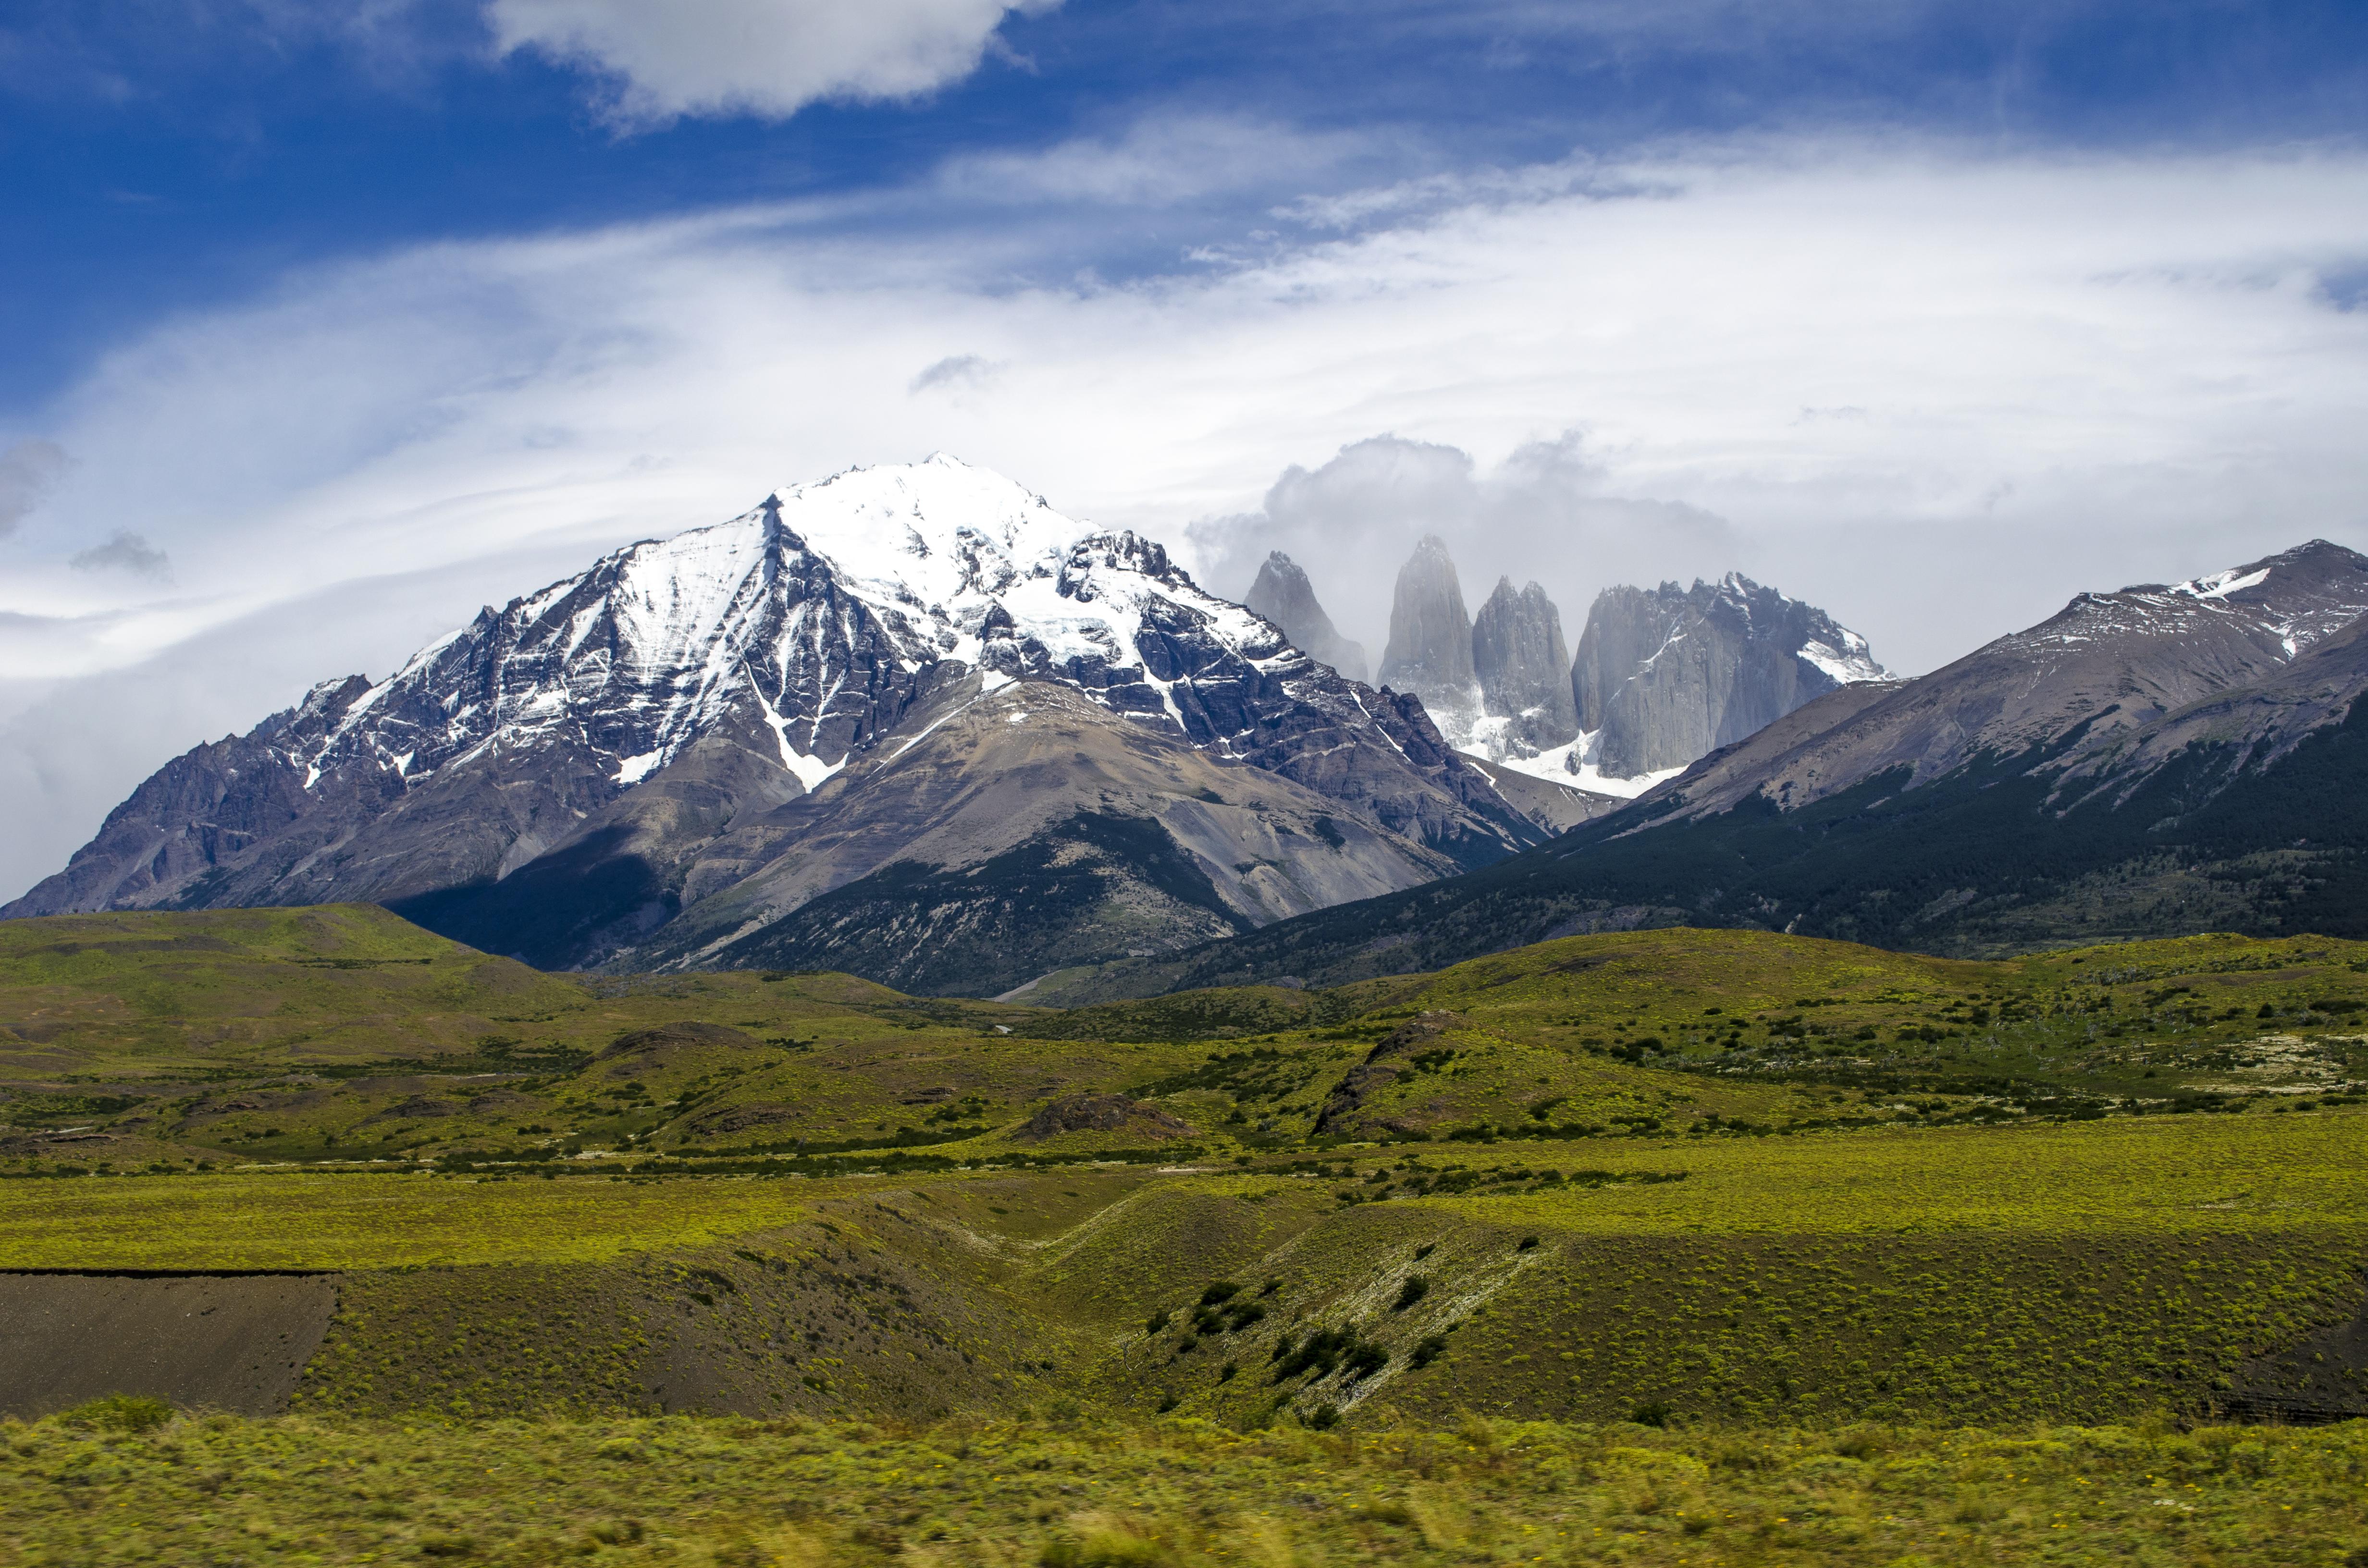
Day Six: Torres Del Paine National Park, Chile
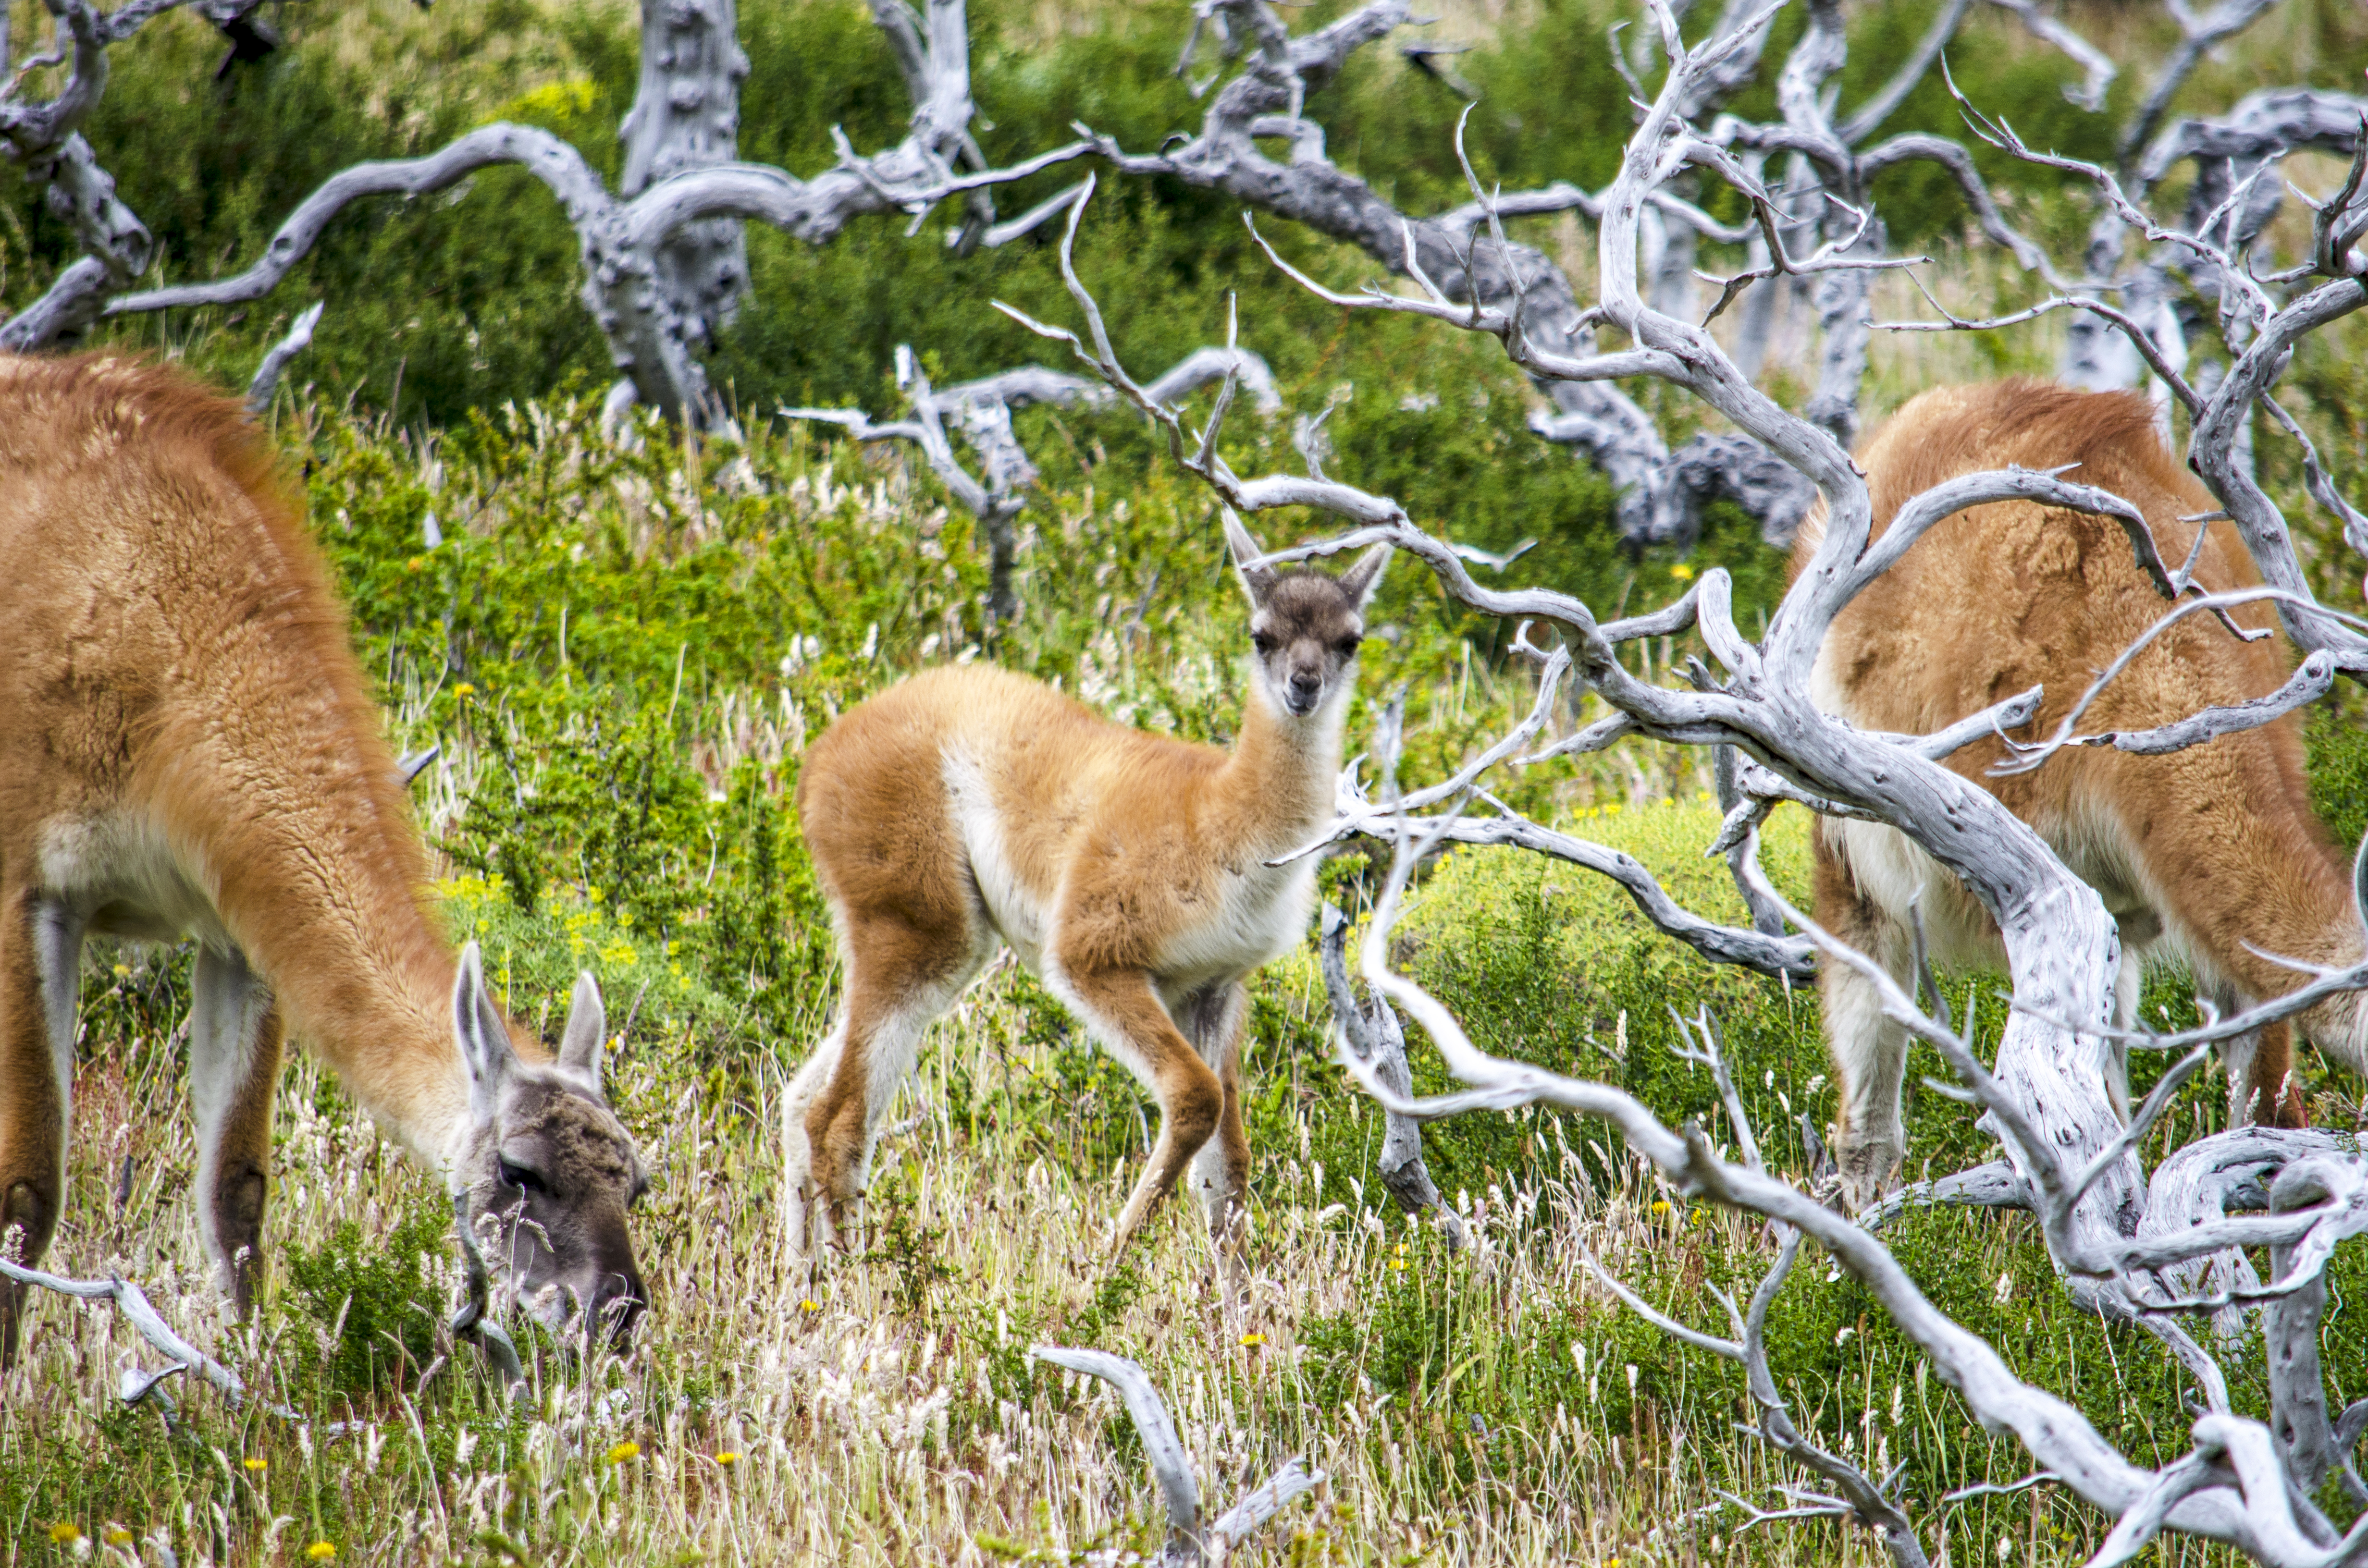
A trip to Patagonia is not complete without a visit to Torres Del Paine National Park on the Chilean side. This entire day’s journey costs about $250 per person (including pickup and drop off from the hotel). Luckily for us, my wife is also a Chase Sapphire Reserve credit card holder, and we were able to apply her $300 travel credit for 2018 to this excursion. This brought the excursion down to a reasonable $100 per person. The tour bus picked us up at 7am, and off we were. The drive from El Calafate to the Chilean border was about two hours. Once there, you must get off the bus twice before crossing into Chile to be checked by Argentinean authorities and again when you’re in Chile. Once there, you get your passport stamped by Chilean border patrol and declare anything that must be declared (don’t be that person). Our tour group had about 30 people, and crossing into Chile took about 45 minutes. Once we were cleared, the journey to Torres Del Paine took about 90 minutes. We were fortunate to have a mostly clear day when we arrived. If you have a clear day, you can see the famous towers. We stopped at the first four viewpoints for pictures before stopping at another point for lunch. They provide lunch, but unfortunately, they don’t offer vegetarian options. This was the biggest issue with this tour operator, and I conveyed to them that it was unacceptable, given the exorbitant cost of the tour itself. Luckily, we bought plenty of granola bars and Gatorade, which was sufficient. After lunch, we stopped at a few more viewpoints for spectacular photo opportunities. Anywhere you stop in the park, there will be an opportunity for a fantastic picture. The last stop was a 90-minute hike (very easy and straightforward) that gave us panoramic views of the surrounding landscape. We also saw guanacos, a species related to the camel and llama. I took a video of the hike, which you can view below.
The towers of Torres Del Paine were visible on this day.
Day Seven: Flight Back to Buenos Aires and New York City.
This was the conclusion of our memorable trip to Patagonia. Our flight back to Buenos Aires departed at 11:35 am and arrived at around 2:10 pm. To get back to Buenos Aires, we flew Aerolinas Argentinas as we did when we arrived. For the flight to New York City, we redeemed American Airlines miles for seats on American Airlines. The redemption was 57.5k miles per person, and although it wasn’t a great redemption value, it was better than United, Delta, and other options we had. We grabbed steak at Al Rawshe, near the smaller airport where we had landed. Argentina’s number one exports are beef and steak, which they do well. And trust me, the steak at Al Rawshe was phenomenal. We then took an Uber to their larger airport and headed back home. Another tip when flying out of El Calafate: Sit on the right side of the plane just as you would when you fly into El Calafate. You get incredible views of the turquoise-blue Lago Argentina upon takeoff and ascent. You can view the video below.
Should I take my kids to Patagonia?
If your kids are interested in the outdoors and can hike moderately challenging trails, I recommend bringing them to Patagonia. You could also carve out a trip for toddlers, but I would not recommend certain activities or excursions for children under eight. Being on a bus from El Calafate to Torres Del Paine National Park in Chile for nearly the entire day would probably make most toddlers impatient. If you want to bring toddlers to Torres Del Paine, you will be better served staying on the Chilean side of Patagonia in the town of Puerto Natales. From there, it is about a two-hour drive to Torres Del Paine, and you don’t have to deal with passport control.
Where can I see Penguins in Patagonia?
If you’re staying in southern Patagonia or near the town of Ushuaia
While we didn’t get to visit areas of Patagonia that have penguin colonies, there are a couple of places that you can visit to see them. If you’re staying in southern Patagonia or near the town of Ushuaia, Isla Martillo is one of the top spots for an up-close encounter with penguins. Situated in the Beagle Channel, this island is easily accessible from Ushuaia, Argentina. Travelers heading to Antarctica should take advantage of the opportunity to visit this thriving colony at the southern tip of Patagonia.
Home to thousands of Gentoo and Magellanic penguins, Martillo offers a chance to observe these unique birds in their natural habitat—nesting on rocky ridges, waddling along the shore, and diving into the water in search of anchovies and sardines. If you’re lucky enough, you might even spot an Emperor penguin that has wandered up from Antarctica.
If you’re staying in Punta Arenas, Chile, or Chilean Patagonia
Twenty kilometers off the coast of Punta Arenas, in the Strait of Magellan, lies Isla Magdalena—home to Chile’s largest penguin colony and one of Patagonia’s most significant Magellanic penguin rookeries. This island hosts over 120,000 tuxedoed residents who migrate from Brazil, Uruguay, and Peru each summer to lay their eggs and raise their chicks. They are very inquisitive, people-friendly, and will approach humans in a laid-back manner. As a friendly reminder, do not touch the penguins or any wildlife during your stay in Patagonia.
When is the best time to visit Patagonia?
December through February are the peak summer months in Patagonia and the southern hemisphere. The average high in El Calafate is in the mid-60s Fahrenheit (18 degrees Celsius), and it can go as high as the mid-70s. Temperatures during the night can dip into the 30s.
What should I bring to Patagonia?
A robust pair of hiking boots (Merrell, Keen, Columbia, etc.), waterproof windbreaker, and a thicker jacket that can insulate you from wind and temperatures in the ’30s but is versatile enough to wear while hiking ( think Northface, Patagonia, Arc’teryx, Columbia, Nike, Lululemon, etc.). I would also bring waterproof pants that have a built-in thermal layer. If you aren’t going to be in elevation, getting one or two hiking shorts is also advisable during the summer months. We packed plenty of granola bars so we wouldn’t have to shop for them in Patagonia, but it goes without saying that on any hike, you should carry plenty of protein bars or granola bars. Also, bring several bottles of water on the hike. It is always better to have more than not have enough. Since you will be in one of the world’s most beautiful areas, I strongly recommend bringing a nice camera.
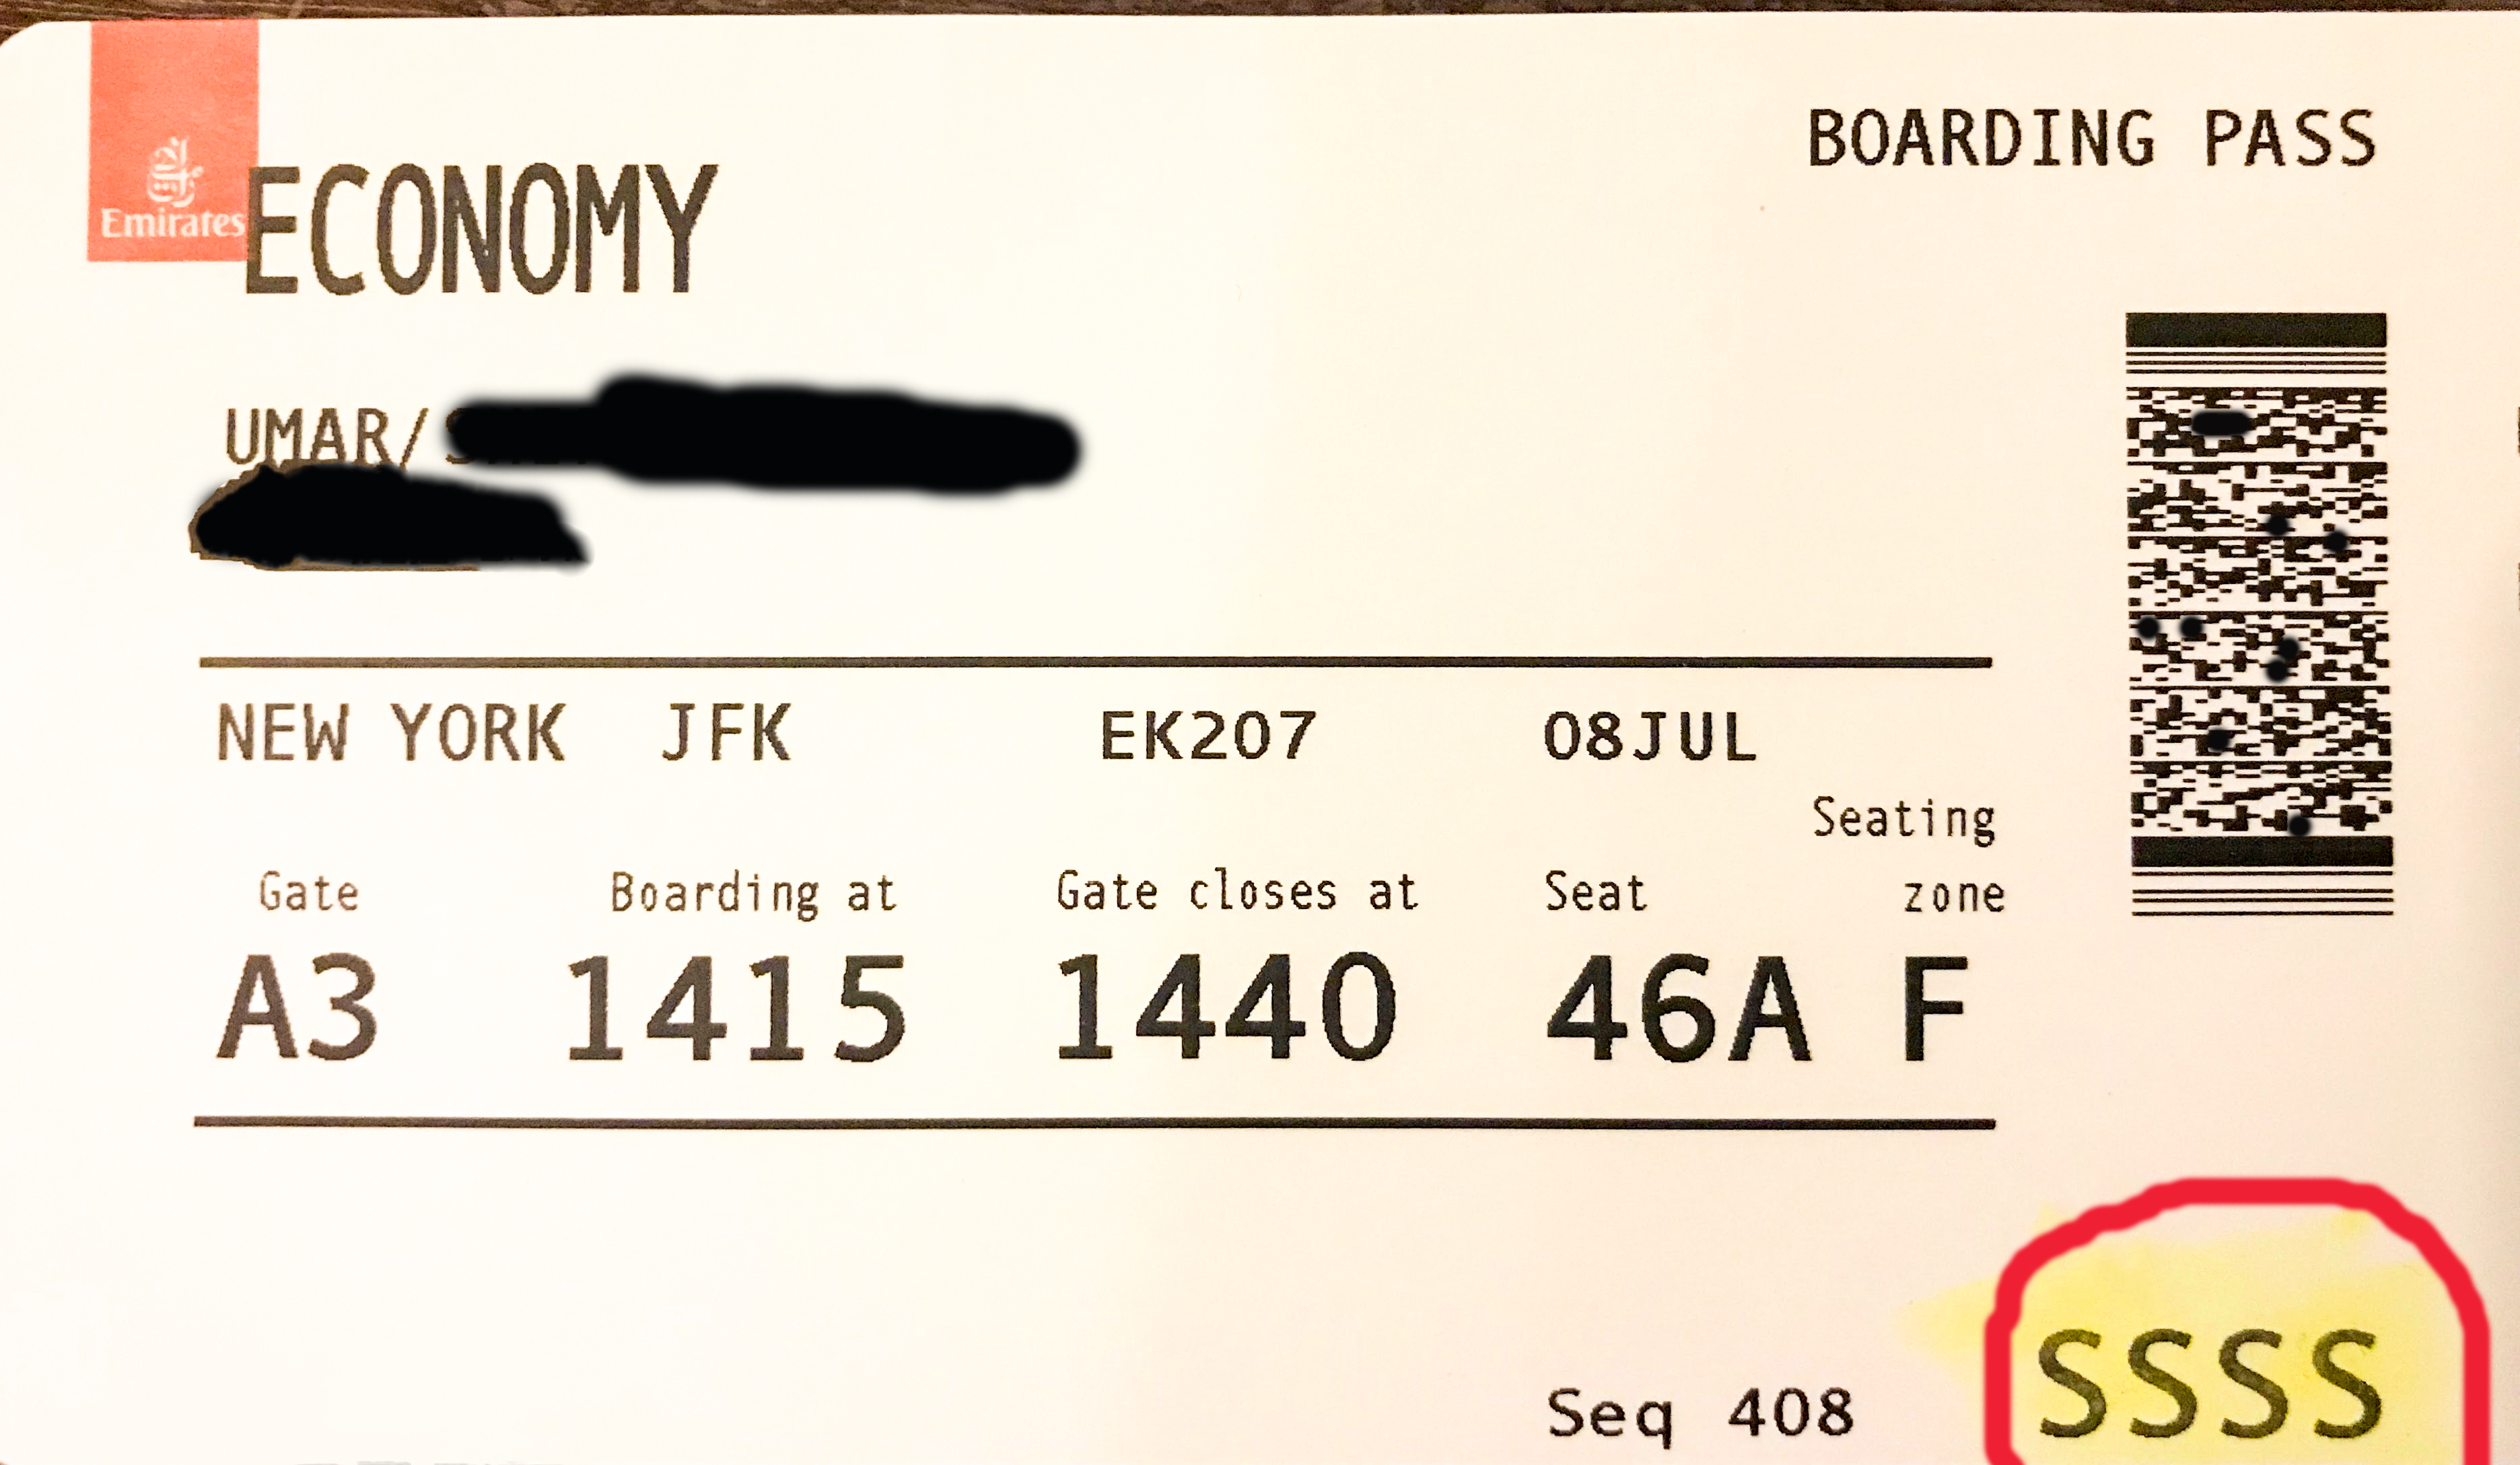
Traveling using frequent flier miles and points certainly has many advantages, such as making business class travel attainable for the casual traveler, and regardless of the ticket class you purchased, you’re saving money compared to booking with cash. However, there are instances where you might book using points from one airline in getting to your destination and use points for a different airline during your return. As far as I can remember, I haven’t ever used miles for the same airline going and coming back. For example, I’ve flown on United miles going to Europe while flying on American miles coming back multiple times. I minimized the miles expenditure by planning my itinerary this way. The only issue? Booking international tickets one way will increase the likelihood of getting the dreaded SSSS on your boarding pass. SSSS stands for secondary selective screening selection. For me, thebiggest giveaway that I’ll end up with SSSS on my boarding pass on the return trip is when I’m unable to check in for my flight 24 hours before takeoff. The mobile app will have some variation of the same message, “check-in unavailable,” or I’ll get an error message. For a traveler who is designated SSSS, the only way to check in is at the ticketing counter at the airport. When you receive your boarding pass at the airport, the capitalized SSSS will be highlighted by the ticketing agent. Once you are in line and the customs officer scans your boarding pass, a red light will flash, or there will be a beeping sound, alerting the agent of your SSSS designation. It’s also important to note that other factors may also be in play. Your name (someone with the same name or similar may be on the watch list), the region you are traveling to and from, and your citizenship status could all play a role.
My SSSS designation from Dubai to NYC last summer
Every country differs in its protocol for conducting secondary screening. In Reykjavik, Iceland, I was taken to a separate room, and all the contents of my carry-on bag were removed. All electronics were swabbed and scanned, and the procedure was completed in 10 minutes. The personnel were friendly and explained what they would do in advance. In San Jose, Costa Rica, the security personnel gave me a pat down and searched my bag right at the gate. I hated this experience since almost everyone on my Southwest flight headed to Baltimore was already in the waiting area. 170 pairs of eyeballs glaring at me as one agent thoroughly searched and swabbed my backpack and all its contents while the other gave me a thorough pat down.
There are also instances where you might get SSSS on your boarding pass when traveling domestically. This occurred in 2015 when my wife and I returned from Istanbul, Turkey. Istanbul was deemed a high-risk travel area then, and anyone returning home from that area was getting SSSS on their boarding pass for the ensuing months. Upon returning, my wife and I had a domestic flight from Chicago (ORD) to NYC (LGA), a flight we had taken countless times. This time, we both received the SSSS on our boarding pass, much to our surprise. The TSA officer asked if we had been anywhere recently. I told him we were in Istanbul the prior week, and he explained that everyone returning from that region was being selected for secondary screening. He wasn’t wrong; even people with TSA Pre-check and Global Entry were flagged from secondary screening. In this instance, we were both given thorough pat downs (more like a massage) and had every electronic device swabbed and scanned. Our laptops had to be taken out and powered on. Even The Points Guy (Brian Kelly) had a similar experience upon returning from Turkey around that same time.If you get an SSSS on your ticket, be cooperative and understand that the security personnel are just following protocol and doing their jobs. It will make the process easier and quicker, and you’ll be on your way a lot sooner.
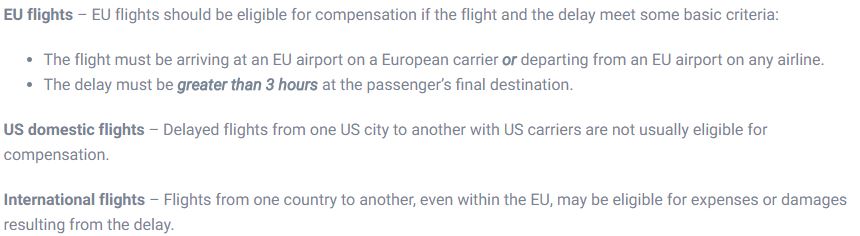
For those of you who have experienced a non-weather related flight cancellation or a delay of 3+ hours on a flight to or from Europe over the last 3 years, you might want to visit http://www.airhelp.com and see if you are eligible for compensation. On a flight from New York City to London back in May of 2015, my flight on Norwegian Airlines was delayed for 5+ hours. When I inquired about the reason for the delay, they said it was due to a scheduling error and not having a pilot available to fly the aircraft. I thought it was a pretty ridiculous excuse for a reputable airline such as Norwegian not to have a pilot available. A few months prior, I had heard about AirHelp and I thought I would give them a shot and have them process my claim. AirHelp has lawyers that process your claim for you in European courts. If the judge awards you monetary compensation (this can be as high as 680 euros), they take half of that (25% service fee and 25% legal fee) and directly deposit the rest into your bank account via Payoneer. If you are not awarded anything, they don’t collect. Classic case of zero risk, high reward. I emailed them my flight info and the reason Norwegian gave me for the delay. They told me right away that cases similar to mine were awarded compensation greater than 90% of the time. They were transparent throughout the entire process and kept me updated on where the case stood. About 14 months after I initially contacted them, AirHelp informed me via email that the judge ruled in my favor and I had been awarded 600 euros. In a funny twist, I received an email from Norwegian Airlines just 2 days later. They were offering me 150 euros as compensation along with an apology (lol, apologizing 14 months later). I immediately contacted AirHelp and they informed me not to accept anything. Norwegian was trying to give me a low-ball offer hoping that I would accept it and reduce their liability. I declined Norwegian’s offer and AirHelp transferred $328 into my bank account via Payoneer 4 business days later. Although the process took a while, there was very little effort in my part to collect the compensation. I paid $397 for the one way flight to Europe so the compensation covered more than 80% of that cost. If not for AirHelp, I certainly was not going to go through the hassle of filing a claim in Europe. If you have experienced a delay of 3+ hours transiting to or from Europe, the image below will guide you on whether you should pursue a claim. You will also find all the info you need on http://www.airhelp.com. You certainly have nothing to lose and they’ll inform you on whether your claim is worth pursuing in court.
It’s unfortunate that the U.S. doesn’t have similar laws that would offer consumers the same level of protection for delayed and cancelled flights. We have our own air carriers that are chronically late and will continue to be late until punitive measures are put in place. As of right now, the worst that can happen to them are a few negative yelp reviews.