If you’re looking for a place to travel with kids and want to choose a place where multiple attractions are close in proximity, D.C. is that place. The best part about D.C. is that most of those sites are free, which large families will truly appreciate. My wife and I traveled here with our 7-month-old, finding places that suited all of us. You can walk to the various tourist sites if you’re staying downtown or anywhere near the U.S. Capitol. If you’re staying outside the city and are driving in, I recommend using an app such as Park Whiz or Spot Hero and parking at a nearby garage for the duration of the day. Metered parking is also available, but they have two or three-hour limits.
Day One- National Mall Area
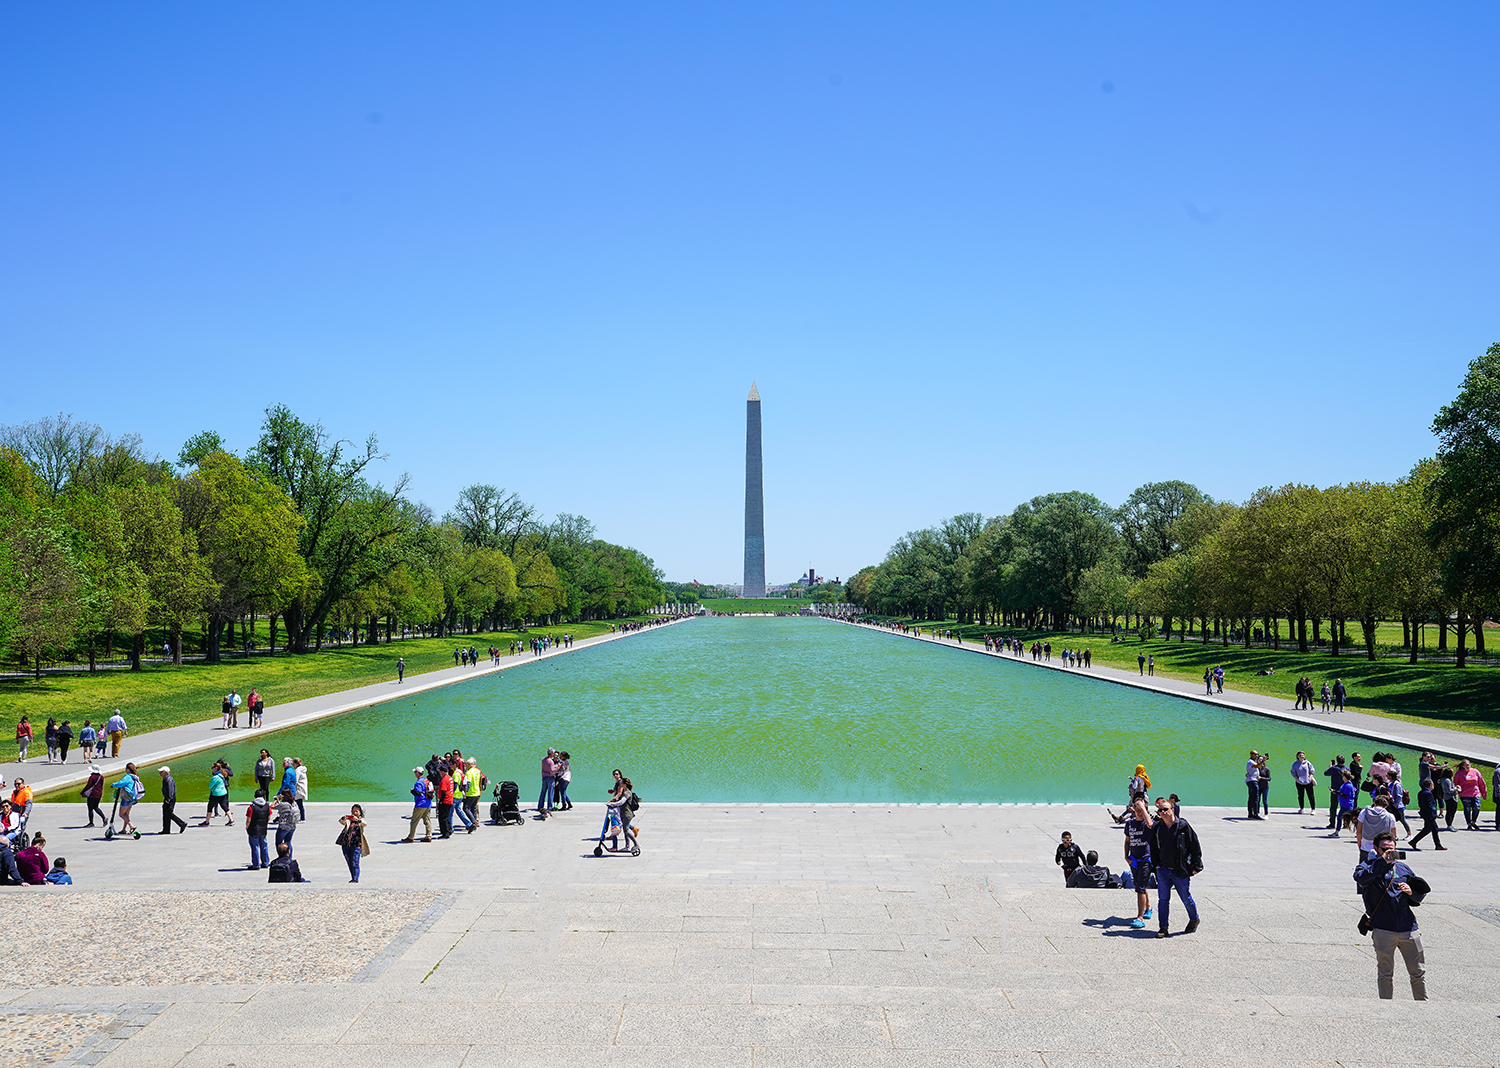
Our first stop was the Washington Monument. It’s the tallest building in D.C. and a great starting point or meetup point because you can’t miss it. The immediate area surrounding the monument was fenced off since it was getting a facelift. Nonetheless, it’s an iconic structure, and the field surrounding the monument is perfect for a picnic or flying kites.
Washington Monument
Continuing our path, our second stop was the World War II Memorial, a short walk to the west. The Memorial itself was excellent, but the highlight of our time here was the presence of WWII veterans.
World War II Memorial Fountain with The Washington Monument in the backgroundWorld War II Veterans
Before coming here, I had only seen 2 or 3 WWII vets. Seeing an entire group of men and women serving our country decades ago was cool. Thank you again for your service! After spending about 25 minutes here, we continued to the Lincoln Memorial.
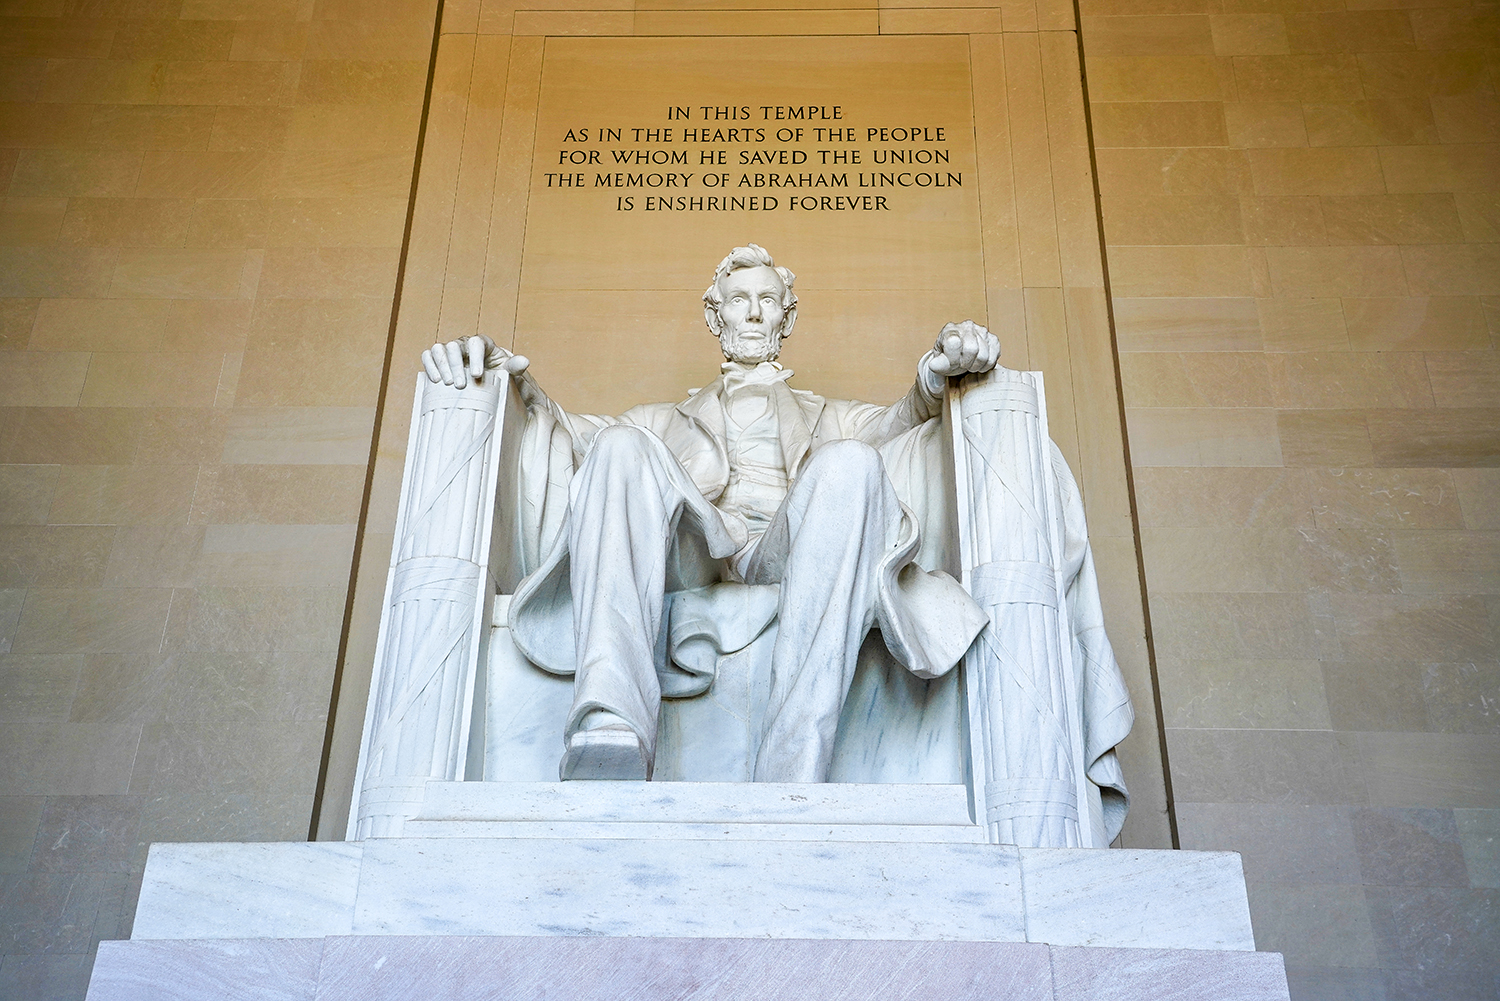
Front of the Lincoln Memorial
The Lincoln Memorial is very popular, and you will find people here even past midnight when the Lincoln statue is illuminated. As you enter, the first floor has information on the Civil War and its impact on the country. The second floor is where the statue of Lincoln is situated. They have elevators if you cannot climb the stairs or have a stroller.
When you climb the stairs and look towards the east (the path we came from), you get a fantastic view of the National Mall and the Lincoln Memorial Reflecting Pool.
After spending 40-45 minutes here, we walked to the Korean War Veterans Memorial and the Martin Luther King Memorial.
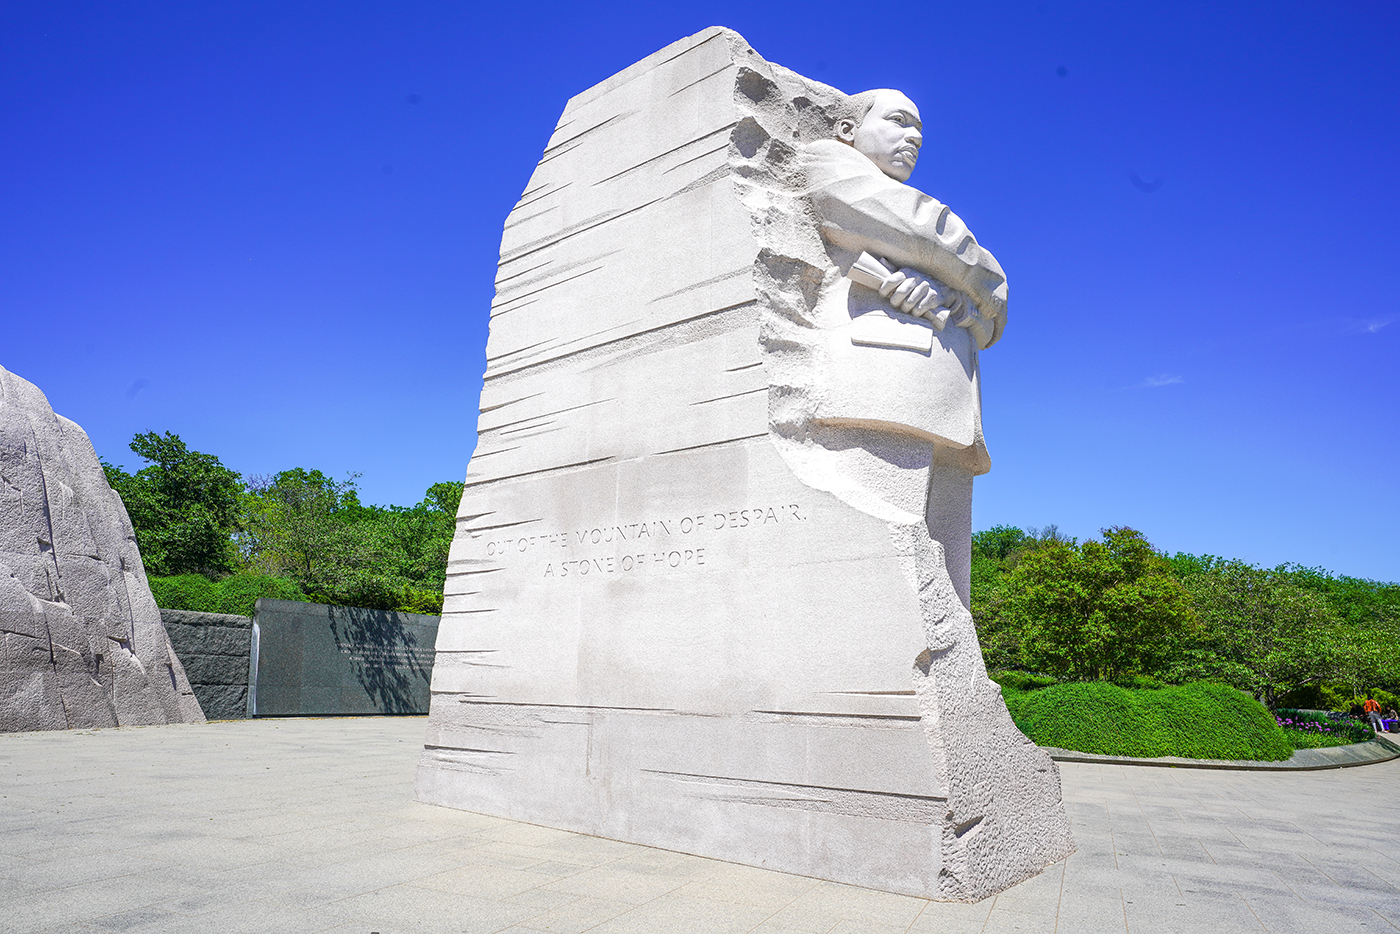
The MLK Memorial. The side of the statue reads, “Out of the mountain of despair, a stone of hope.”
The MLK Memorial is next to the Tidal Basin, and you must walk south of Independence Avenue. The next stops were the Franklin Delano Roosevelt and Thomas Jefferson Memorial.
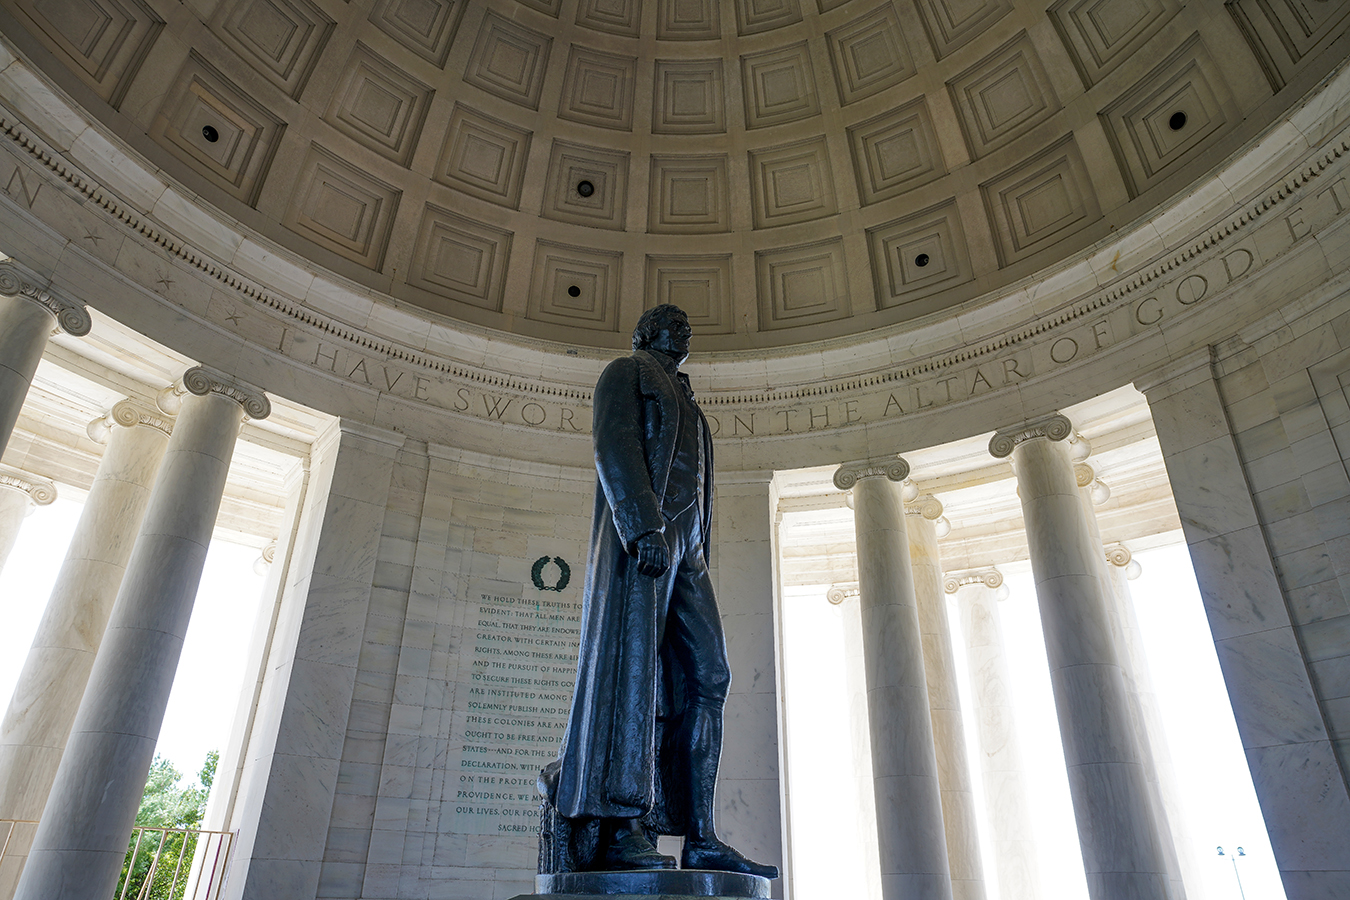
Front entrance to the Jefferson Memorial
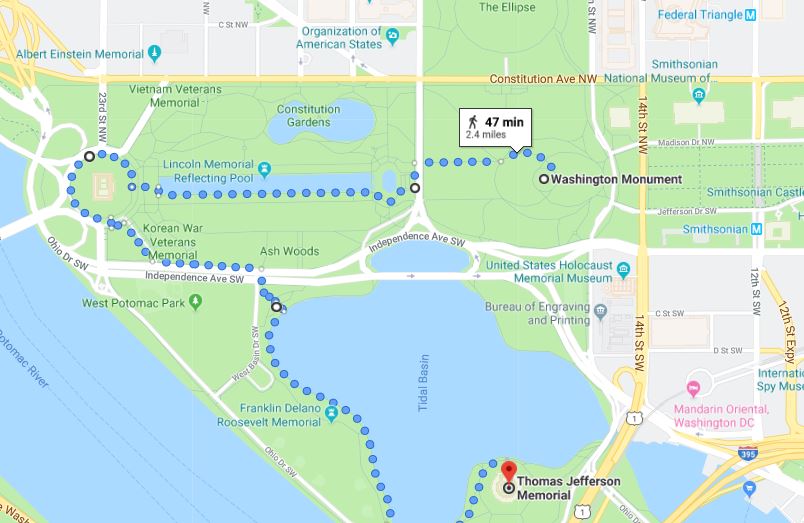
The Jefferson Memorial is a beautiful building influenced by the Pantheon of Rome. It’s the place to be if you’re in D.C. in early April when the cherry blossoms are full. The map below shows our path from the Washington Monument to the Jefferson Memorial. I’d budget around 3 hours if you really want to experience all the monuments and take pictures.
By the time we were done seeing all the memorials, it was time to get my restless 7-month-old son to the hotel so he could take his usual nap. After dinner, we walked to the South Lawn of the White House at night to take pictures.
No matter who is in office, the White House is just a beautiful building. I prefer the night view as the dark backdrop has a certain elegance. Once we were finished taking pictures here, our first day was in the books.
Day Two – Smithsonian Museum of Natural History and Lincoln Memorial at Night
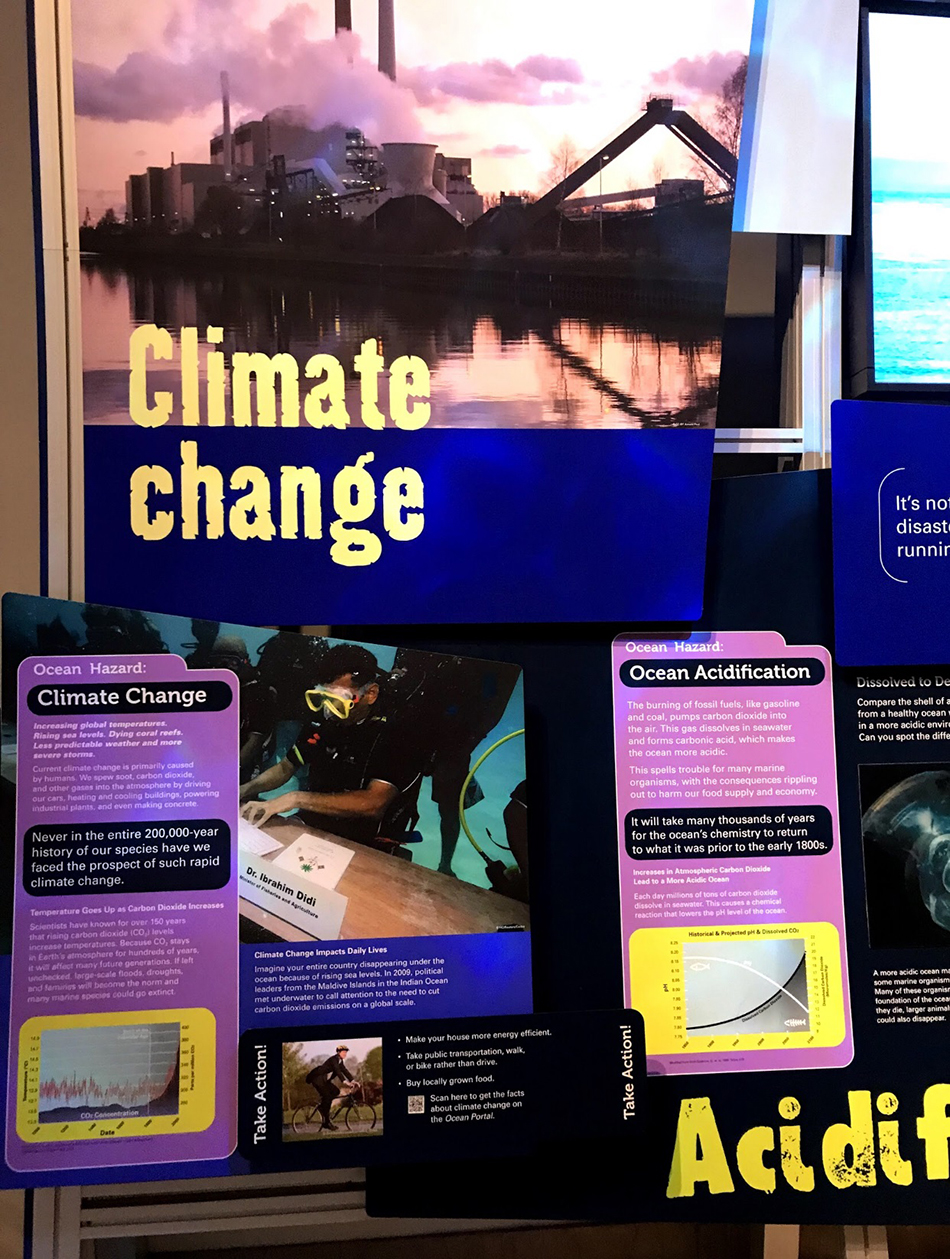
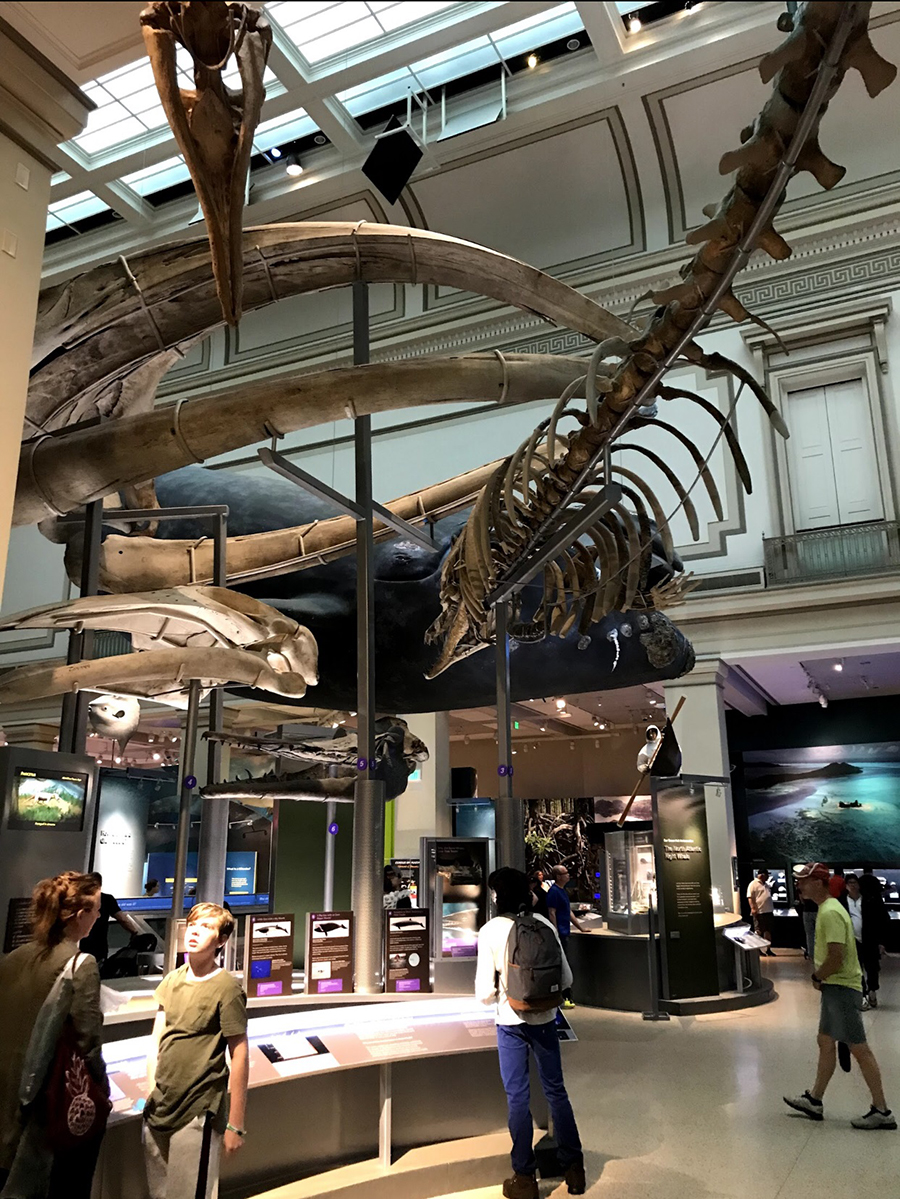
Mother Nature did not want to cooperate with us on our second day in D.C. We had to deal with rain and thunderstorms, which took most of the outdoor attractions out of the picture. Fortunately, D.C. has a lot of excellent indoor attractions, so we took advantage of this and visited the Smithsonian Museum of Natural History. There are some fascinating exhibits at this museum, and it’s also an interactive museum with hands-on activities that kids will enjoy.
The aquarium at the coral reef exhibit was a favorite among many infants and kids, my son included.The famous Hope Diamond
If you want to see everything comfortably, budget at least 1.5 hours for the Smithsonian. After dinner, the rain mostly stopped, and many people recommended walking to the Lincoln Memorial at night. The Washington Monument reflects off the pool, making for a fantastic picture.
The statue at night looks really cool.
Day Three: Capitol Hill and Smithsonian Zoo
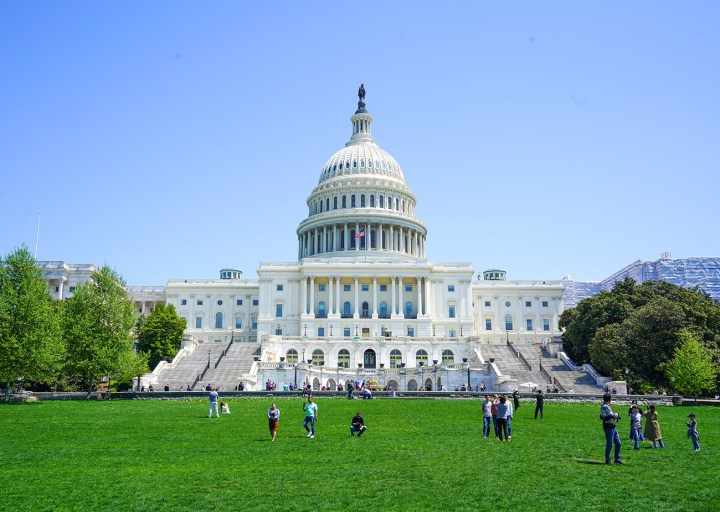
In the early afternoon, we made the 15-minute walk to the Capitol Building. It was a picture-perfect day with no clouds in sight.
View of the National Mall from the Capitol
Unlike all the other sites we had visited in D.C., the Smithsonian Zoo was a 12-15 minute drive from our hotel downtown. Like all the sites we had visited thus far, this one was also free of charge. And for a free zoo, it really had a lot to offer.
We saw lions, tigers, cheetahs, gorillas, giraffes, elephants, and other animals. This place is perfect for kids and offers something for people of all ages.
Other Places of Interest to Consider
Since we were here for three days with a seven-month-old, seeing everything we wanted in that short window would be impossible. If you are going to D.C., consider visiting the Smithsonian Air and Space Museum, The Smithsonian National Museum of African Art, and the Sackler Gallery. The National Museum of Archives is home to the Declaration of Independence, The Bill of Rights, and The Emancipation Proclamation. All these attractions are free, and if you are interested, you can make a small donation when you enter or exit. D.C. is a beautiful city with no shortage of things to do and places to see. It’s a very walkable city and a great place for budget travelers who experience world-class attractions at no cost.
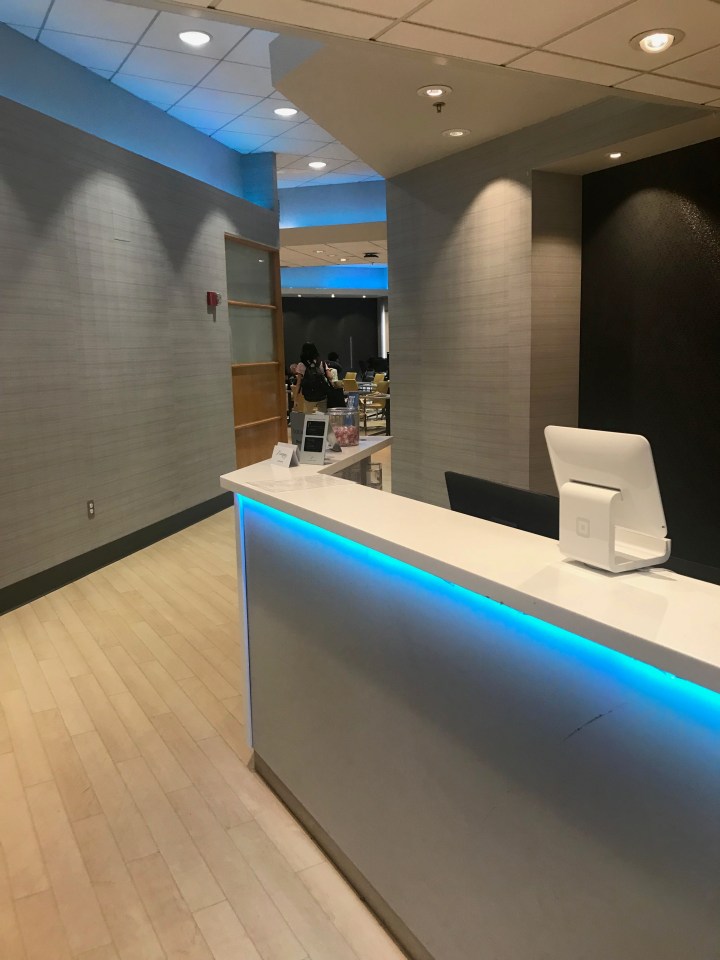
We had a layover in Boston during a recent trip from NYC to Chicago, so we decided to stop by The Lounge at Logan International Airport. It was rather convenient since we would depart from Terminal C, the same terminal where The Lounge is situated. This lounge is part of the Priority Pass network but also serves as a business class lounge for Aer Lingus and TAP Portugal as they depart from Terminal C. I didn’t have any issues getting in since it wasn’t full. Still, I have heard of incidents where Priority Pass cardholders were denied access when The Lounge expected a large influx of business class travelers flying on Aer Lingus or TAP Portugal. Since it is the only lounge in Terminal C, hours between 4 p.m.-8 p.m. are not sure for Priority Pass card holders.
Receptionist Desk at The Lounge
Upon entering, I showed my Priority Pass card, and the receptionist scanned it and told my wife and me we were good to go. The lounge was 3/4 full and filling up when we entered, which is unsurprising considering that we arrived on a Friday at 6 p.m.
If you’re a business traveler who needs a plug outlet, I highly recommend going to the back of the lounge. There, you’ll find outlets and a semi-partition that will give you privacy.
Once we got situated, I went to see the food offerings. I wasn’t hungry, but for the sake of the review, I helped myself with small portions of a few things. They had pasta salad, hummus with pita, a veggie sandwich that consisted of cream cheese and cucumbers, vegetables, salad, soup (clam chowder), and snacks. The pasta salad was ok but nothing special. The hummus was decent and might have been the best item they had out there. The veggie sandwich was simple but surprisingly not terrible. I didn’t have the turkey sandwich, so the jury is out. It seems like their benchmark was just good enough not to be bad. The refrigerator had no shortage of cold drinks, though. That was a big plus.
I don’t partake in drinking alcohol, but for those of you who do, the bar looked like it was stocked pretty well.
Bar area
My biggest gripe during my time here was this lounge’s lack of dedicated WiFi. You are forced to use Logan’s public WiFi, and the speed is painfully slow. It’s certainly not business traveler-friendly. The bathrooms were clean, which was a nice plus. I would rate this place a 3.2/5. If you happen to be in Terminal C, being at this lounge would still be sitting in the gate area. However, if you’re departing from a different terminal, I would not recommend visiting Terminal C just to visit this lounge.
Maui was the first of two islands my wife and I visited during this trip to Hawaii. The second island we visited was Kauai, which you can read about here. Our last trip to Hawaii (Feb 2019) covered The Big Island, and if you are interested in reading about our time there, you can do so here. Maui, also known as the Valley Isle, is the second largest island in Hawaii and has endless beauty. Our three days didn’t cover everything, but it covered most of the main attractions. We had seven days in Hawaii (the first day was more like a half day), three of which we spent in Maui and four in Kauai. The question a lot of people ask is if 3 days is enough to see most of the main sights in Maui. It was enough for us for two reasons: First, we woke up at dawn and started our day early. This is absolutely crucial. It’ll be difficult if you’re not in your car by 8 a.m. daily. The weather was the second thing out of our control, but it worked in our favor. We had sunshine all 3 days, and that’s just us gambling on great weather for 3 days and getting lucky. Ideally, you want to have one or two extra days as a buffer for rain.
How We Got There
You’ll probably notice a trend with just about every itinerary I post. We rarely use cash to reach our destination, and this trip was no different. Remember that my wife and I have schedules that mostly allow us to take these trips during peak travel season. This trip to Hawaii happened to be during the last 9 days of December, which is high season in Hawaii. Likewise, the number of miles airlines require to get to Hawaii is double that of most cities. United usually charges 22.5k miles a person one-way to get to Maui. That redemption rate from Chicago, Newark, and D.C. was 45k miles per person one-way. Fortunately, Denver still had the saver award redemption at 22.5k miles, so we decided to spend two days there (we had never visited Denver) and depart to Maui from Denver International Airport.
Arrival
Even though this was technically our first day, we arrived too late to do anything significant. Our flight to Maui arrived at 4:35 p.m., and by the time we deplaned, got our bags, and picked up our rental car, it was close to 5:45pm. At this point, we only had about 15 minutes of daylight left. We checked into our hotel, the Napili Shores by Outrigger, ate an early dinner, and decided to sleep at 8pm. The next day was going to be very long.
Day One: Haleakala National Park & Papawai Scenic Lookout
If you’re visiting Maui, you simply can’t leave without witnessing the sunrise at Haleakala National Park. It can’t be replicated elsewhere, and it’s magical. The ideal day is when a layer of clouds below you allows the sun to rise above that layer. Sometimes, it can get cloudy enough that there is little to no visibility, and that’s the type of day you want to avoid. Your best bet is to keep an eye on the weather. You must pay $25 per car at the entrance and make a reservation for $1.50 if you go there at sunrise. The ticket for the sunrise is valid for three days and can be purchased up to 60 days in advance. My wife and I got there 2 hours before sunrise to ensure a good parking spot. You should aim to get there no later than an hour before sunrise, or the desirable parking spots and viewing areas will fill up quickly. It’s a relatively slow 45-minute with steep curves and hairpin turns after hairpin turns. It requires your full attention, and if you’re the type that gets distracted by a cell phone easily while driving, turn it off until you’re at the top. If you run into fog, it can get a little challenging, but fortunately for us, it was clear all the way through during our drive to the top.
View of the sunrise at Haleakala National Park
A few important things to keep in mind. When you’re at the viewpoint, you are at an elevation of about 10,000 feet. Not only is it cold, it is very windy! You will need a warm jacket and ear covers, or it won’t be pleasant. The air is obviously much thinner, so If you’re sensitive to elevation or have had trouble breathing in elevation before, please reconsider. Once you’re done with the sunrise, you can stop at other viewpoints on the way down. There are fantastic picture opportunities of the surrounding craters and landscape.
View of the craters from one of the scenic lookouts on the way down
Papawai Scenic Lookout
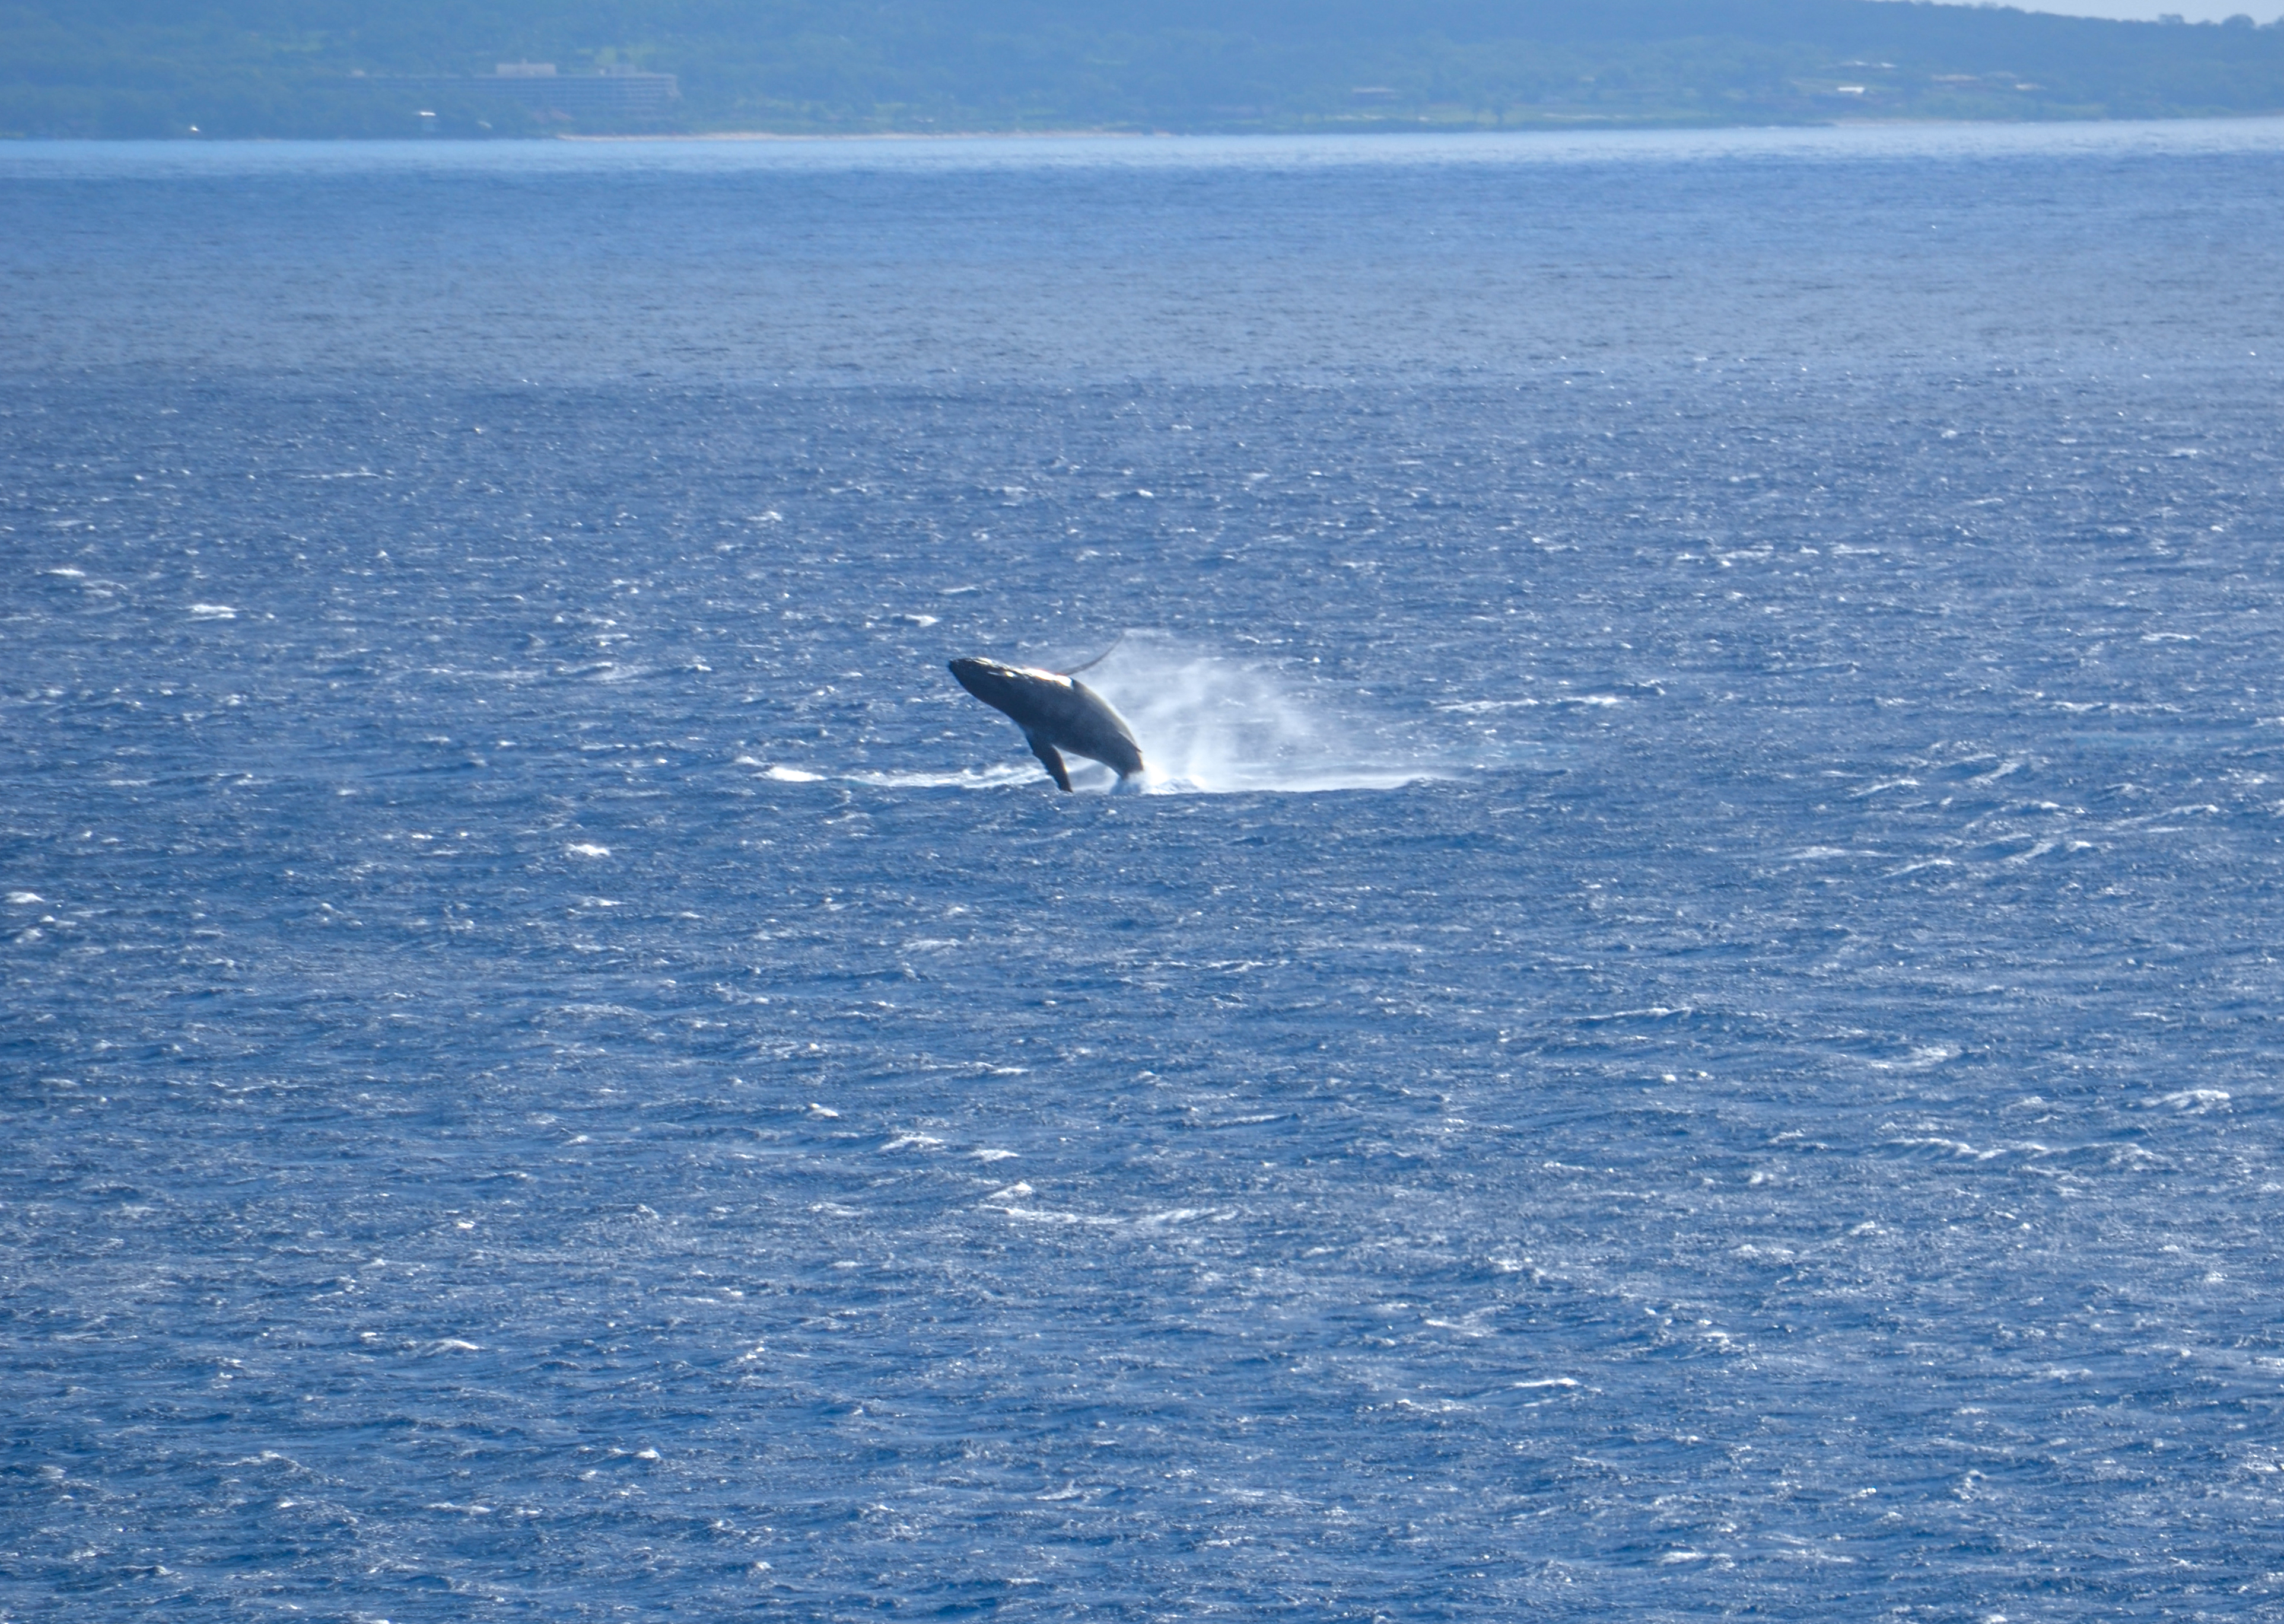
On our way back to Lahaina, we decided to stop at the Papawai Scenic Lookout. Locals recommended this spot as a great place to watch whales from the land. During the winter months, mother humpback whales will birth their calves and teach them essential behaviors in the waters of Maui. It took a little patience, but it paid off, and we got a show of a lifetime. About 15 minutes after arriving, we noticed a water mist sprayed about a quarter mile offshore. And there it was, a baby humpback whale under the watchful eye of its mother practicing breaching behaviors. At first, the calf needed some support to breach halfway.
This was as far as the calf could go the first few times.
After about eight attempts to get halfway up, it completely breached the water. I kept my camera in rapid-fire mode and was fortunate to capture a memorable moment.
The lookout provides excellent photo opportunities even if you don’t see whales.
At night, we walked around Lahaina Town and stumbled upon one of the best ice cream shaves we ever had. It’s called Ululani’s Hawaiian Ice Shave, and they have over 50 flavors. I had the ‘Haleakala,’ a coconut, leche, and condensed milk mix. I wish I had taken a picture to post here, but I guarantee you’ll find whatever you want.
Day Two: Road to Hana
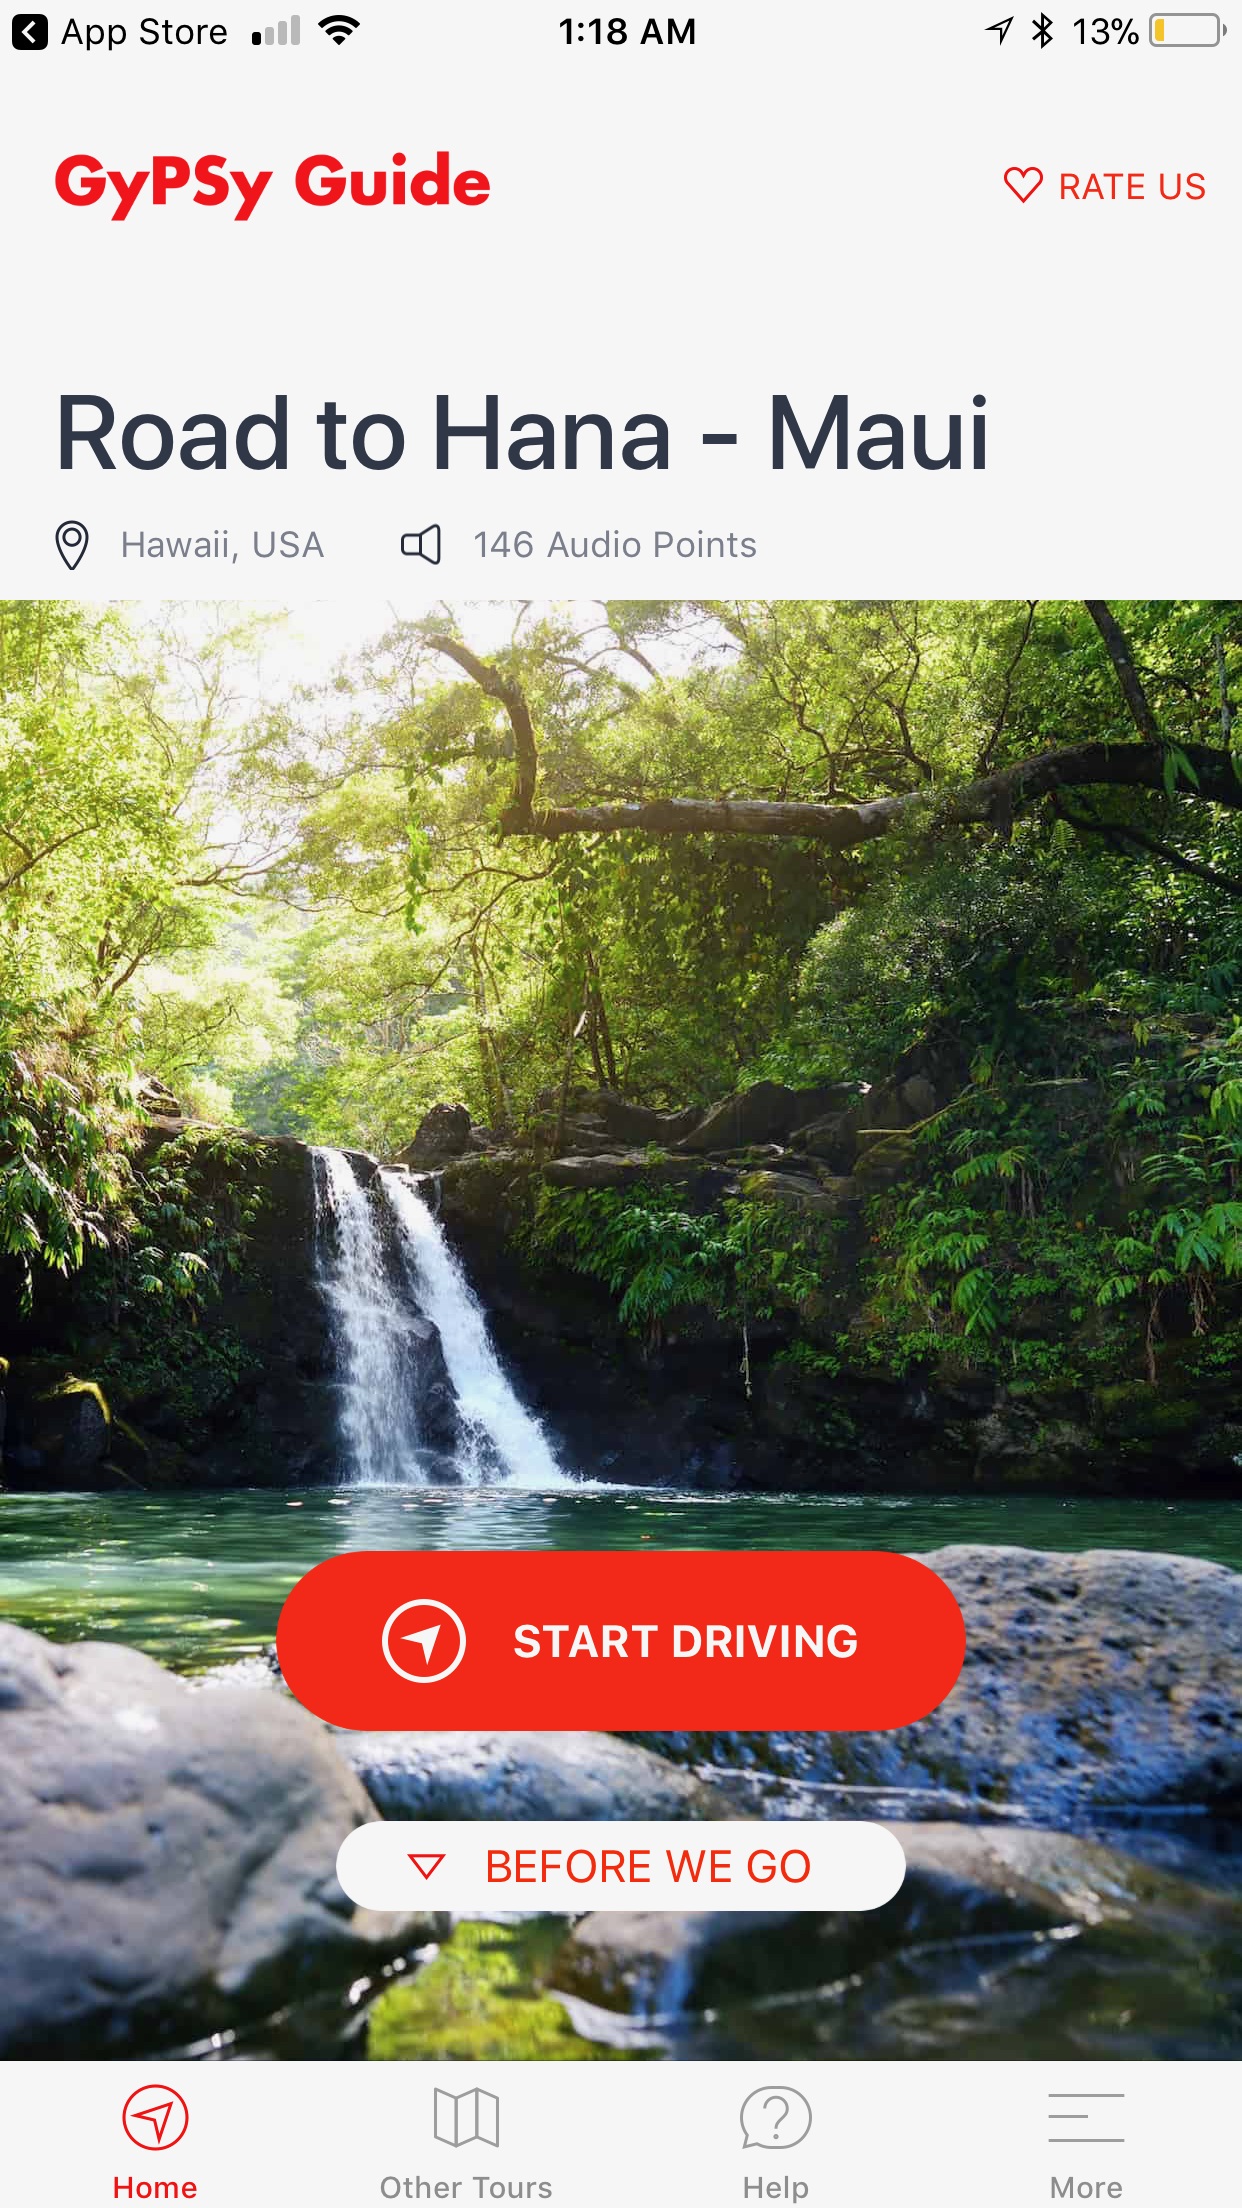
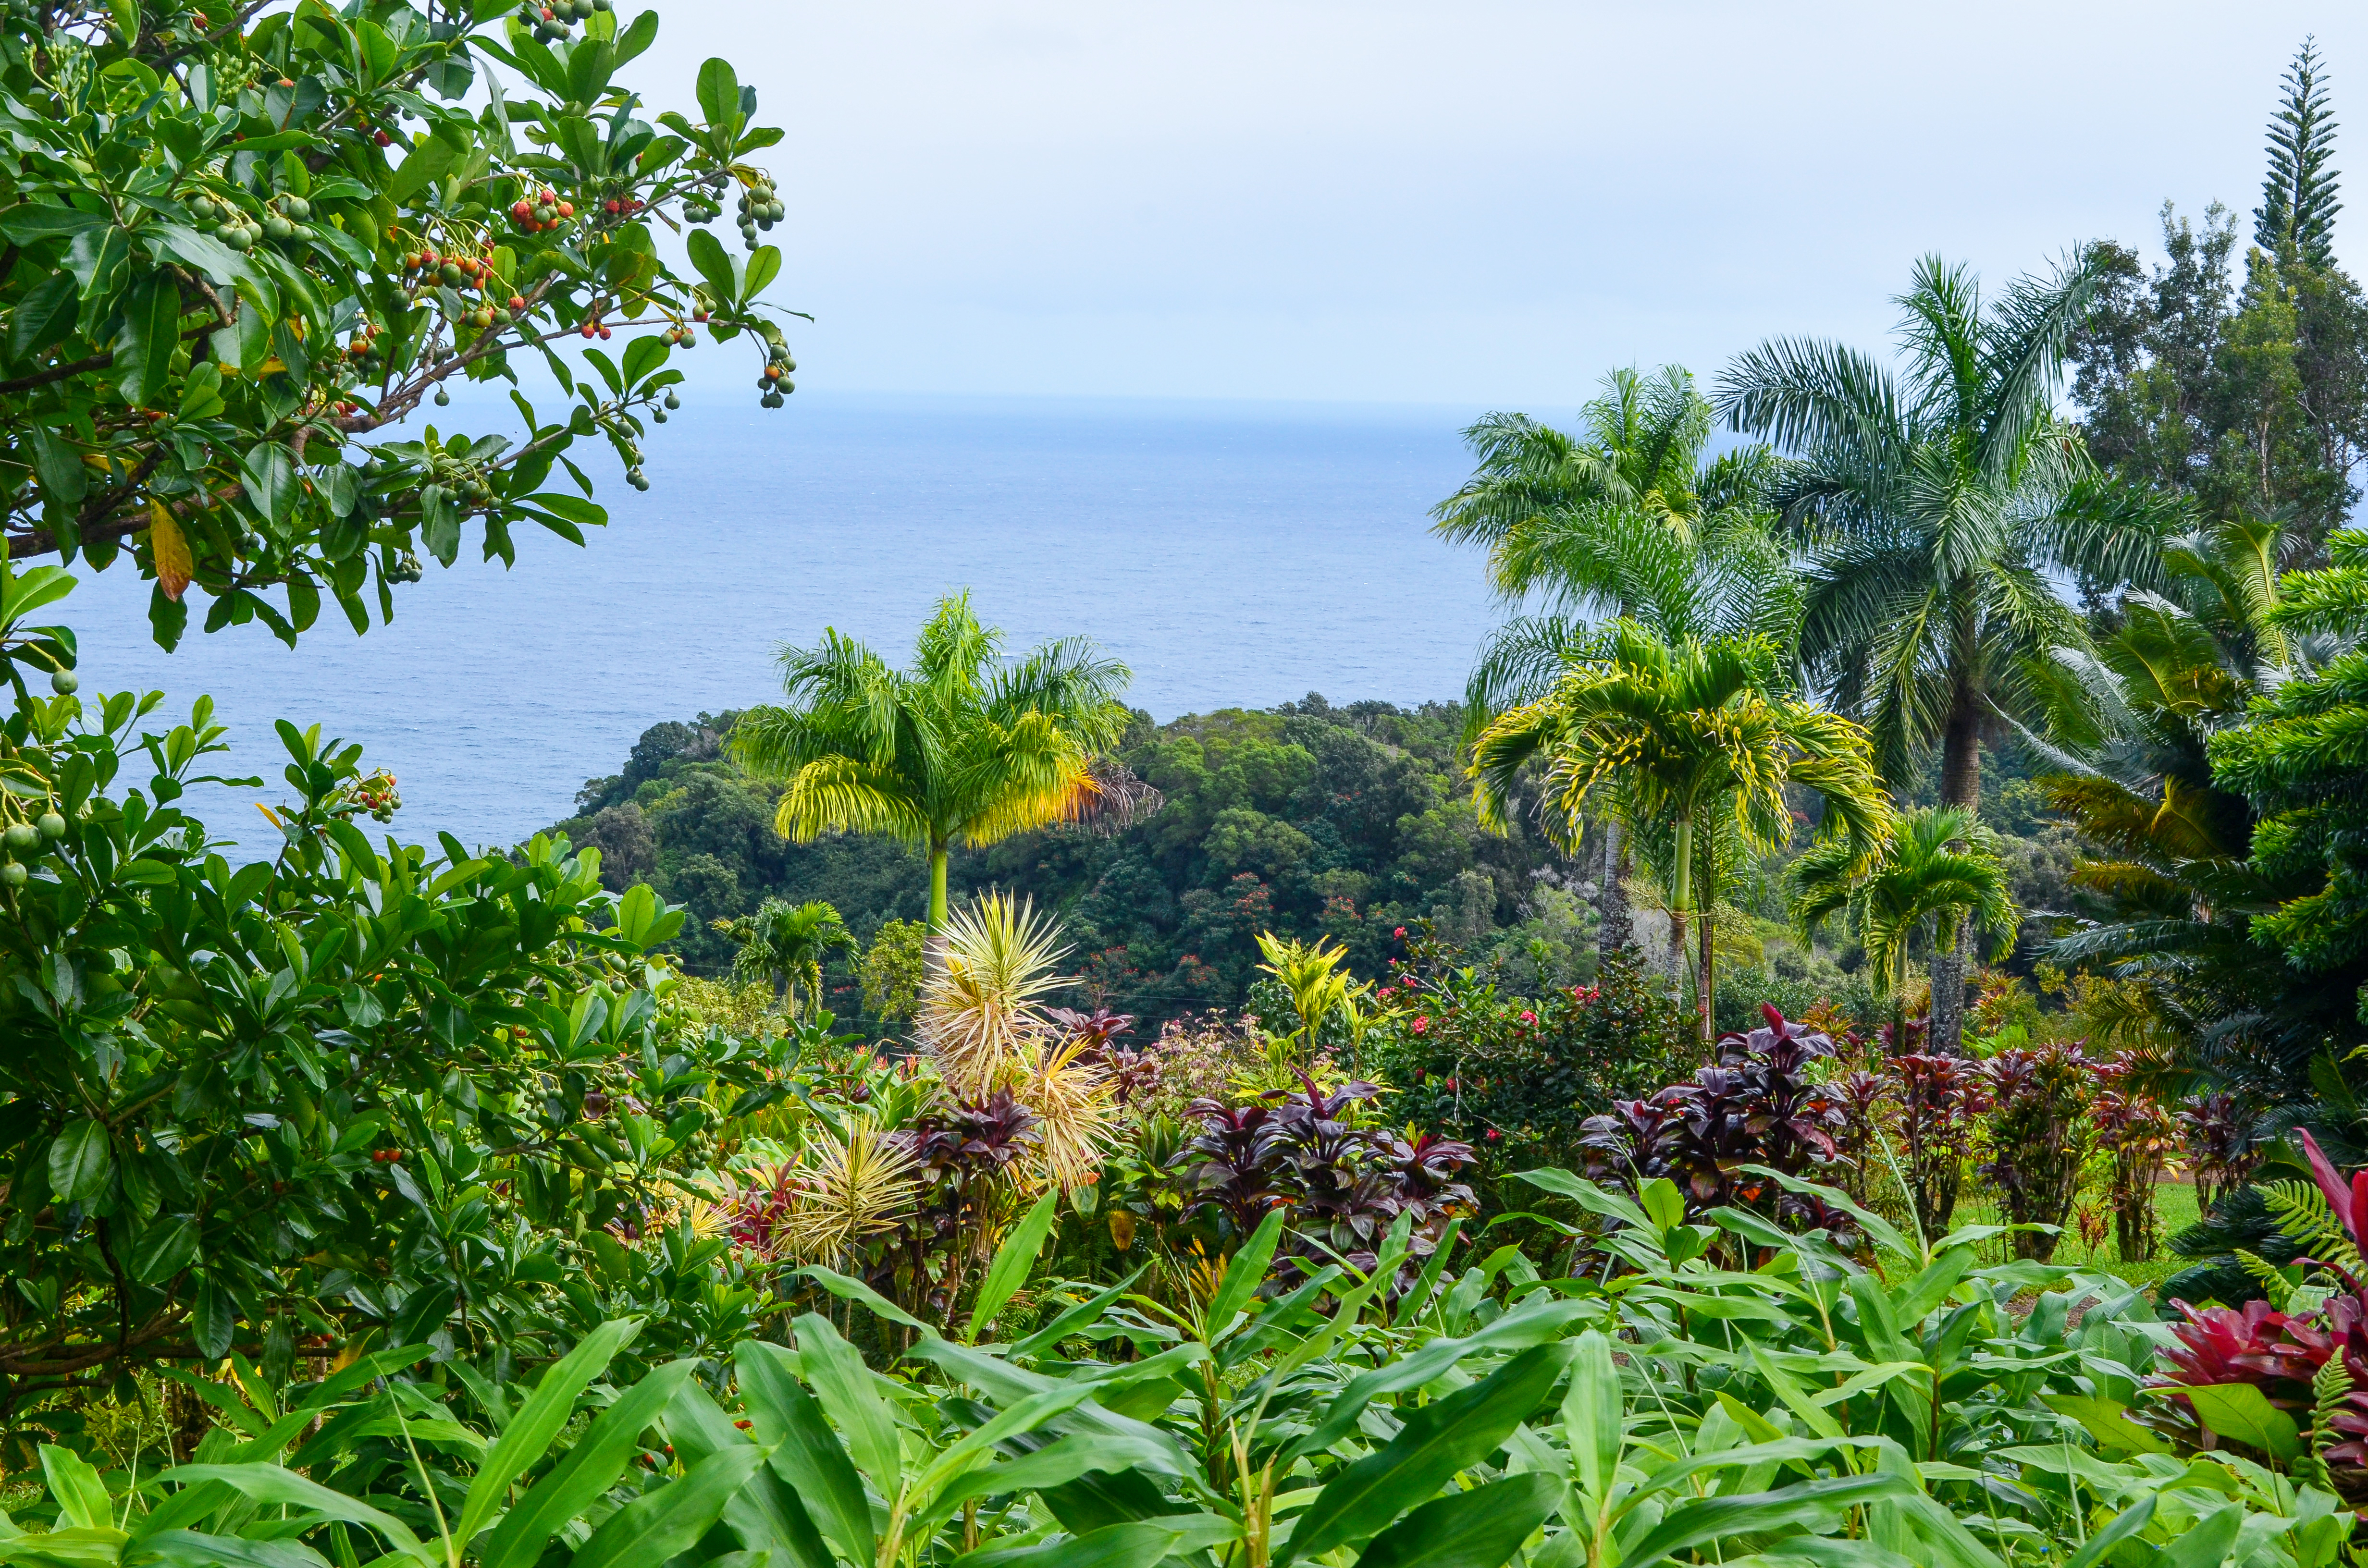
Along with Haleakala National Park, the Road to Hana is another excursion you simply cannot leave Maui without experiencing. It has black sand beaches, waterfalls, bamboo forests, flower gardens, and breathtaking ocean views, and it was one of the highlights of our stay in Hawaii. The Road to Hana from start to finish is about 52 miles. It is a journey that will take most of the day if you factor in the time you will stop at various stopping points. There are over 600 hairpin turns and 54 bridges (46 of which are one-lane), and you will have to concentrate while driving as the roads can get very narrow at certain points. My wife and I had a rental car, so if there were certain stop points we liked better, we could spend more time. You can take a tour bus, but then you’re on their time. If you are driving there, fill up your tank before you start. The last town before starting this journey is Paia, and the gas prices there are high. You’re better off filling up in Kahului. There no gas stations between Paia and Hana. If you are driving yourself, I highly recommend downloading Gypsy Guide – Road to Hana on your iPhone or Android.
It cost me $5, the best $5 I have ever spent on a narration app. The app will recommend which points of interest are worth stopping for, which don’t require much time, and which should be skipped altogether. It felt like we had an actual person with us, and the app even told us about approaching food shacks and cafes. The great thing about this app is that it worked even when we lost data connectivity. On the way back, the app tells you more about the cultural significance of different points in Maui. These are the places we stopped in chronological order:
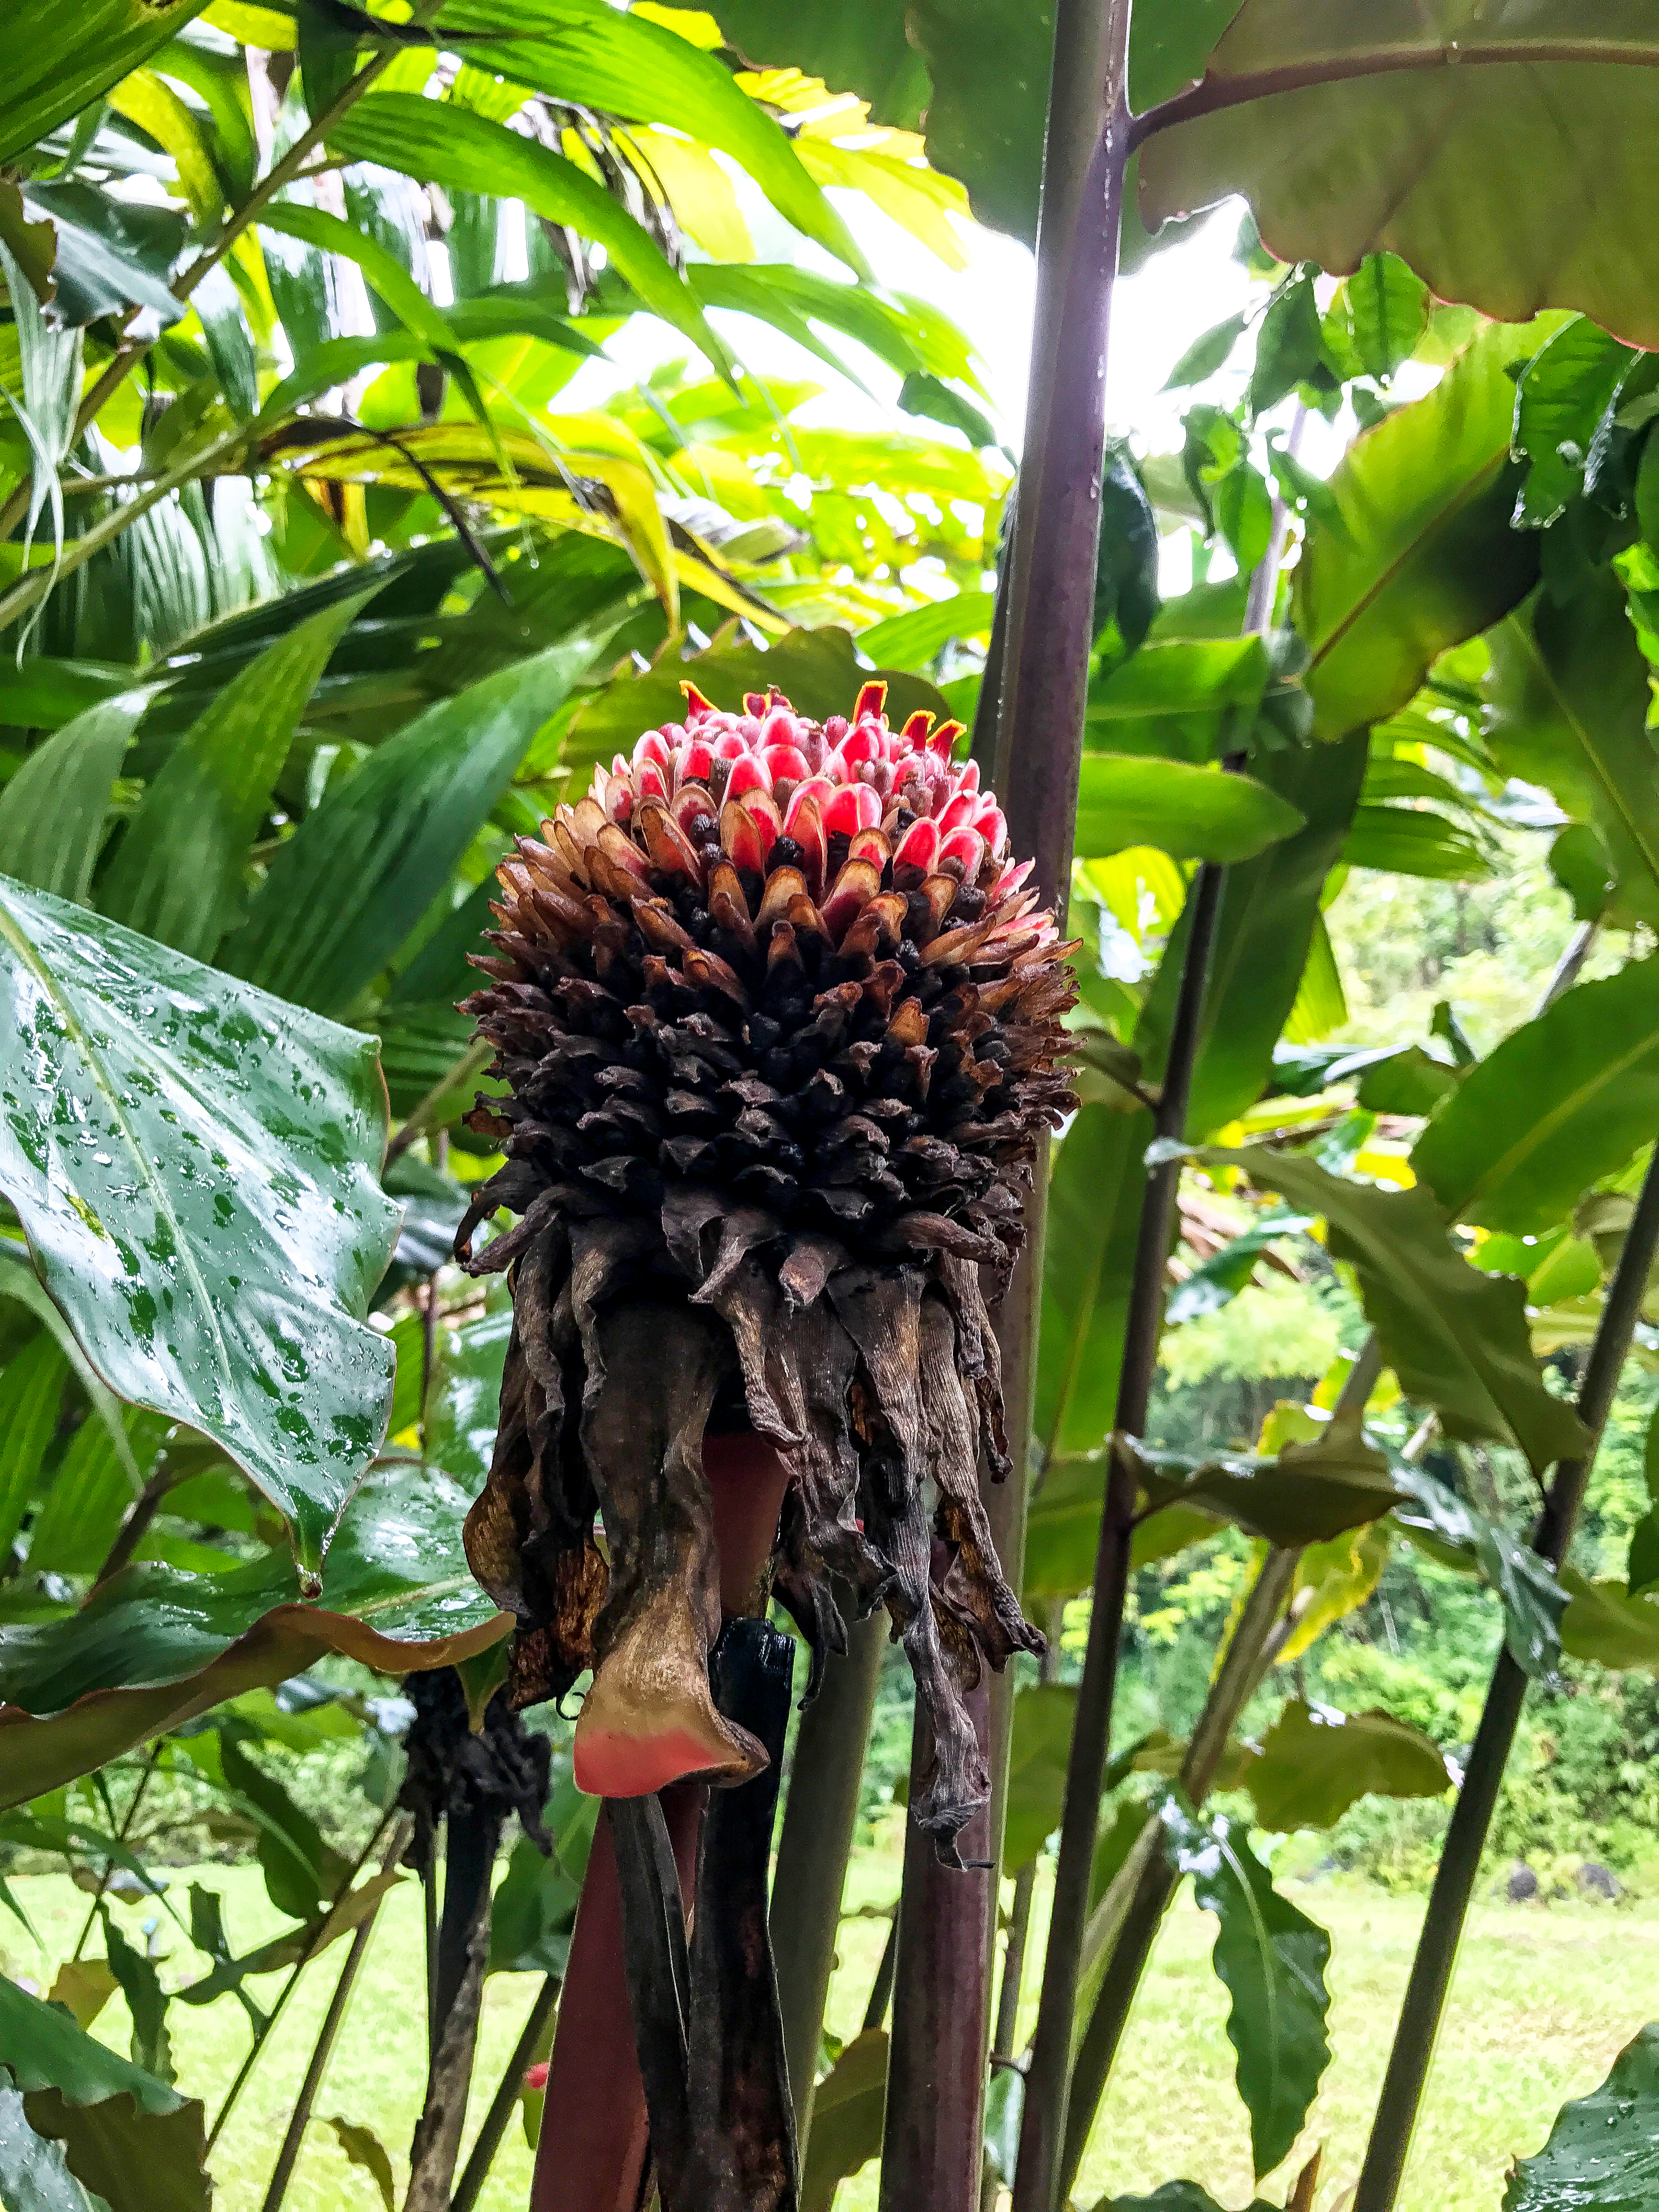
1. Garden of Eden Arboretum
This is one of the only points of interest on the Road to Hana, where you have to pay to get in since it is privately owned. The cost is $15 for adults, $5 for children, and infants are free. They do offer student and AAA discounts. My wife and I found it worth it, and you can budget about 30 minutes here. They have numerous native and indigenous plants, many of which you might have never seen, and they also offer some great photo opportunities. The garden also has a smaller waterfall, and you’ll see peacocks on the premises.
Garden of Eden Arboretum
2. Waikamoi Ridge Trail
This was a hike that really stimulated your senses. The best thing about this trail? There are mango trees all around, and it smells like heaven. They also have one of my favorite trees, the rainbow eucalyptus tree, which looks like the bark has been colored by a pastel. The trail can get extremely muddy, so if you’re wearing flip-flops or don’t want to get your shoes destroyed, it wouldn’t be a bad idea to skip this and spend more time at Twin Falls (which we skipped).
This fruit looks like pineapple, but it is not.
Rainbow-eucalyptus tree
3. Halfway to Hana Stand
They’re known for their banana nut bread, which is delicious. I wouldn’t recommend stopping here if it wasn’t worth the hype. It won’t take long, and you can park on the side of the road.
4. Upper Waikani Falls
There is only room for a couple of cars on the side of the road to see this trio of waterfalls, but they are undoubtedly beautiful and worth stopping at if parking is available.
4. Nahiku Market Place
Two words: fish tacos. This was the perfect place to have lunch. The fish tacos were super fresh and delicious. I wish I had a picture, but I inhaled them before realizing I’d forgotten.
5. Wai’anapanapa State Park
This is one of the places where you absolutely have to stop. It is a beautiful black sand beach with an abundance of volcanic rock. There is also a cave that takes you to the waters, where you can go for a swim. The waves are powerful, so keep that in mind. We spent a solid hour here and honestly wished we could have spent more. As of 2022, you must reserve a time to visit this beach.
Black sand beach and volcanic rocks
There’s a story behind this cave, but I won’t ruin it. Download the app above, and it will tell you all about it
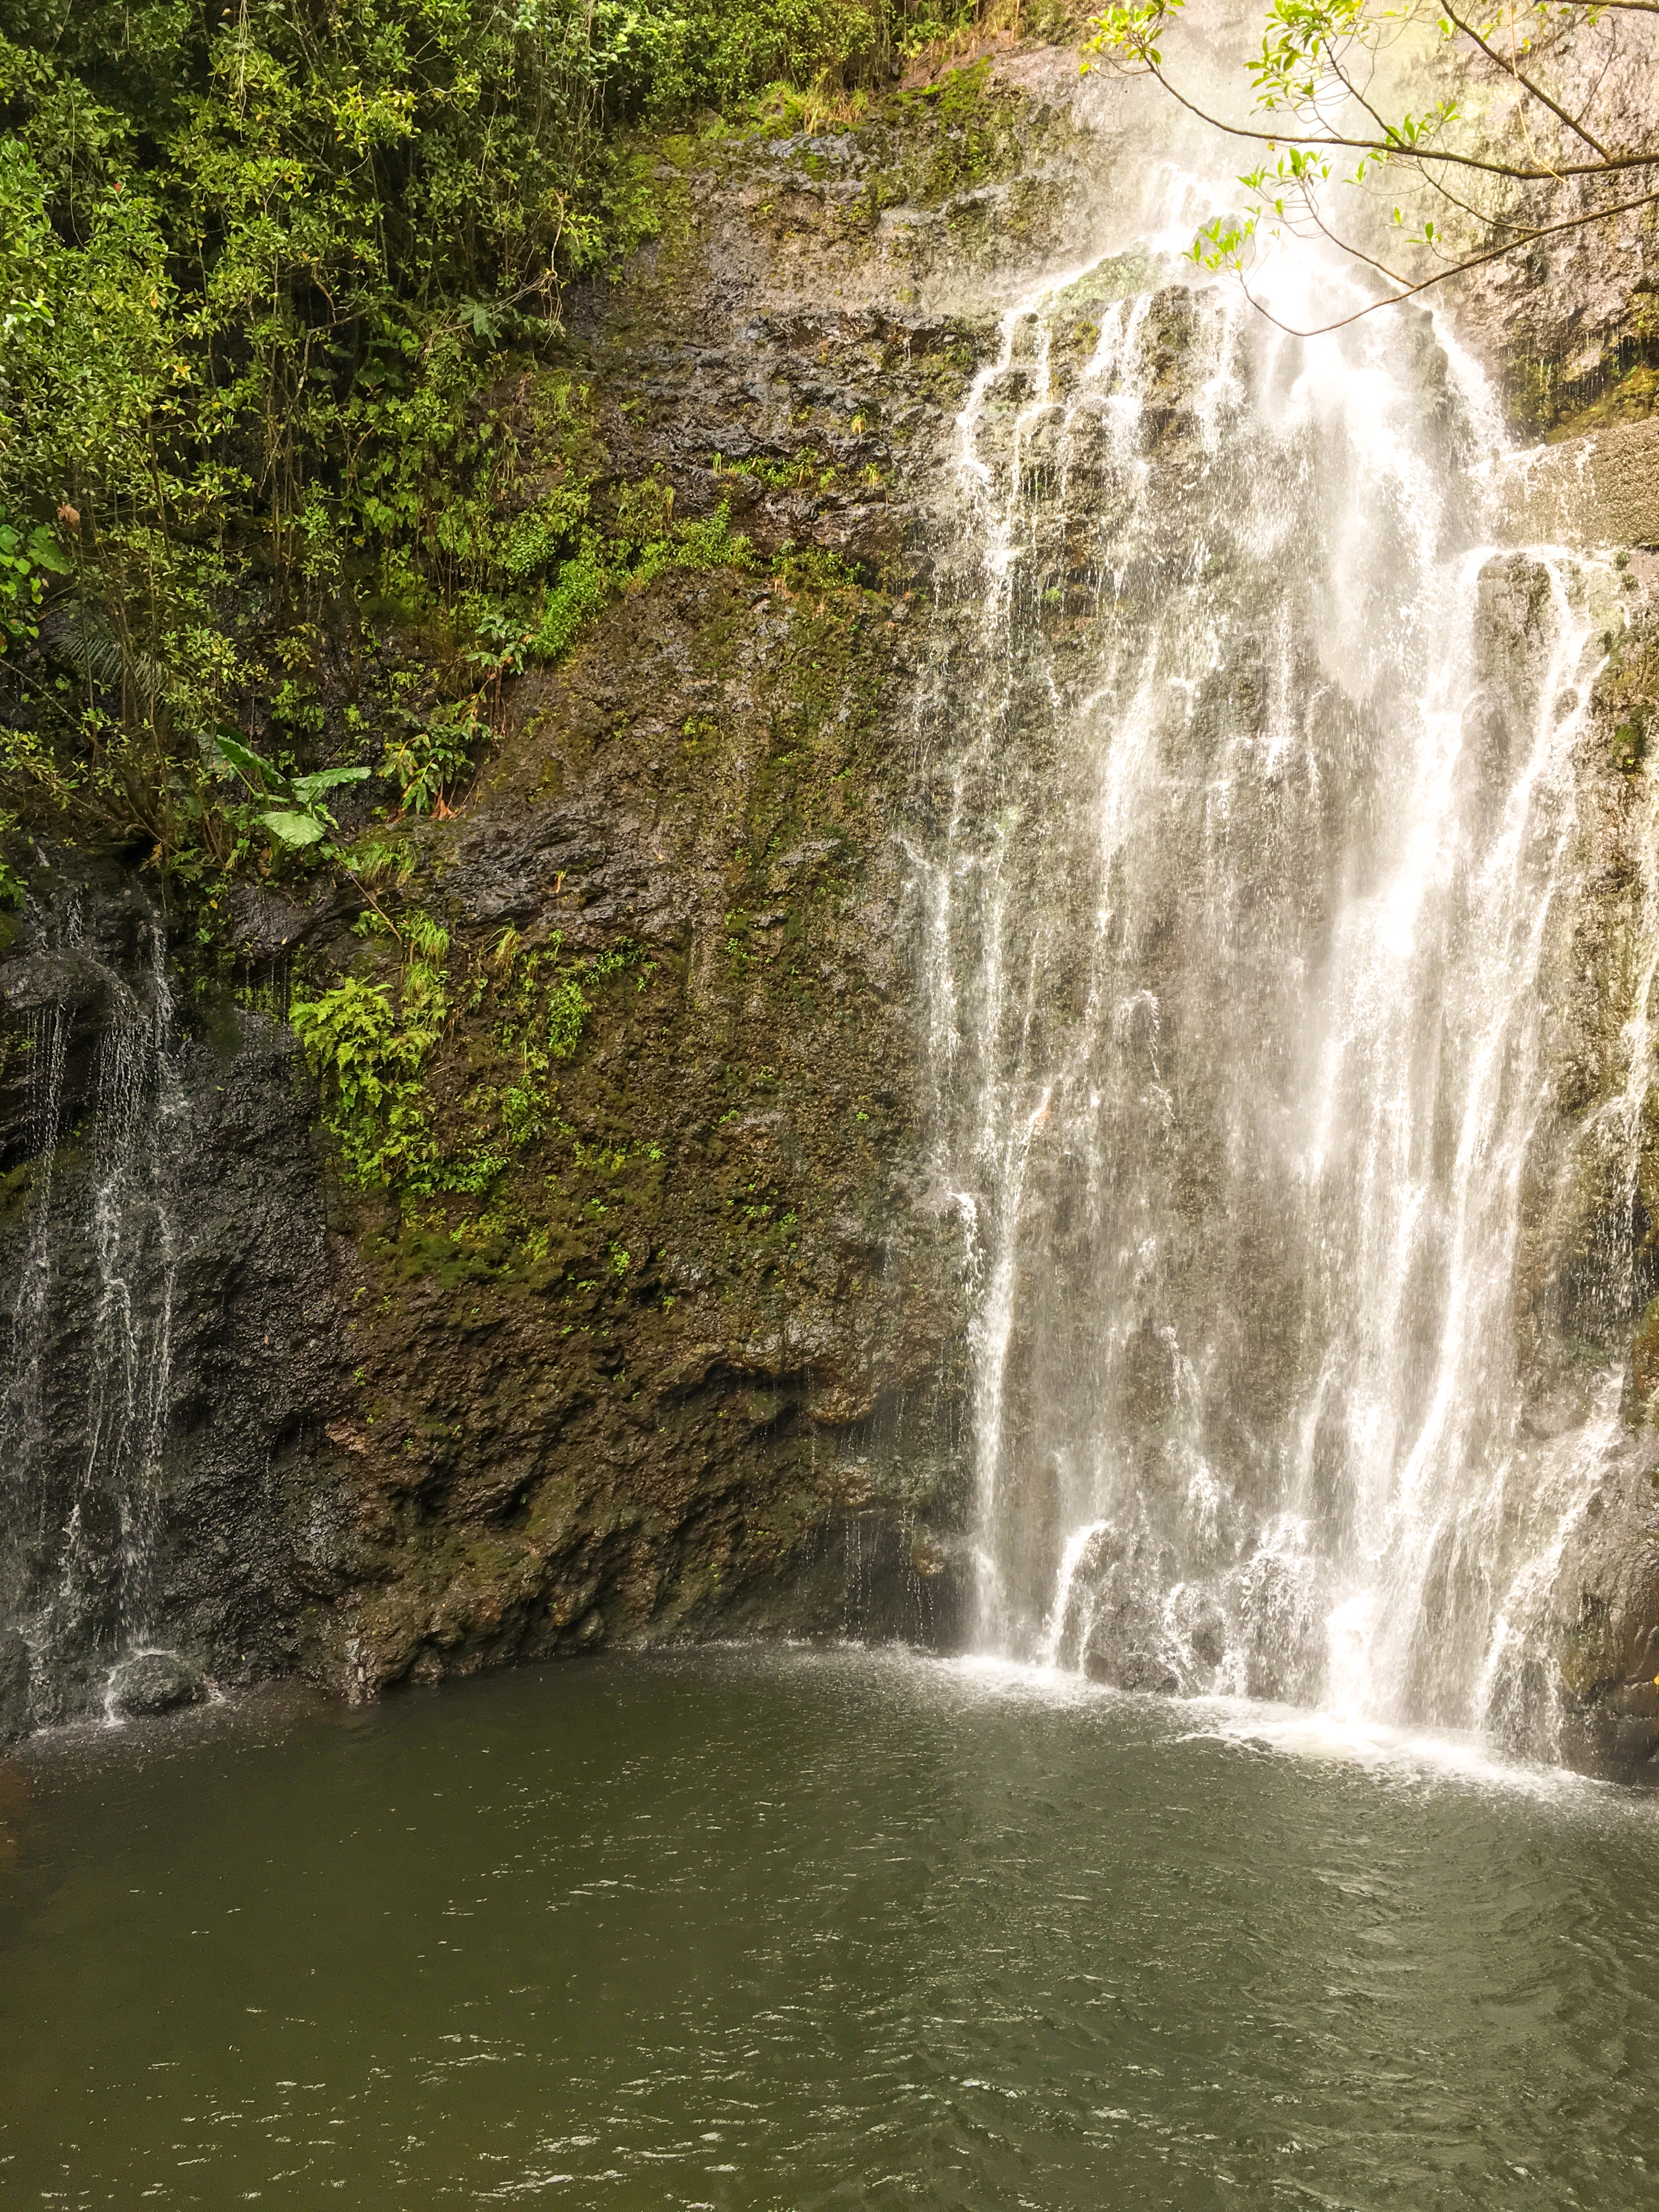
6. Wailua Falls
Another point of interest that you should definitely stop by is that you can park on the side of the road and walk down to the base of the falls. I even saw a few people swimming near the base who seemed comfortable doing so. I don’t know how deep it is, so please be cautious if you go in the water. It’s a beautiful waterfall and probably the largest one on The Road to Hana.
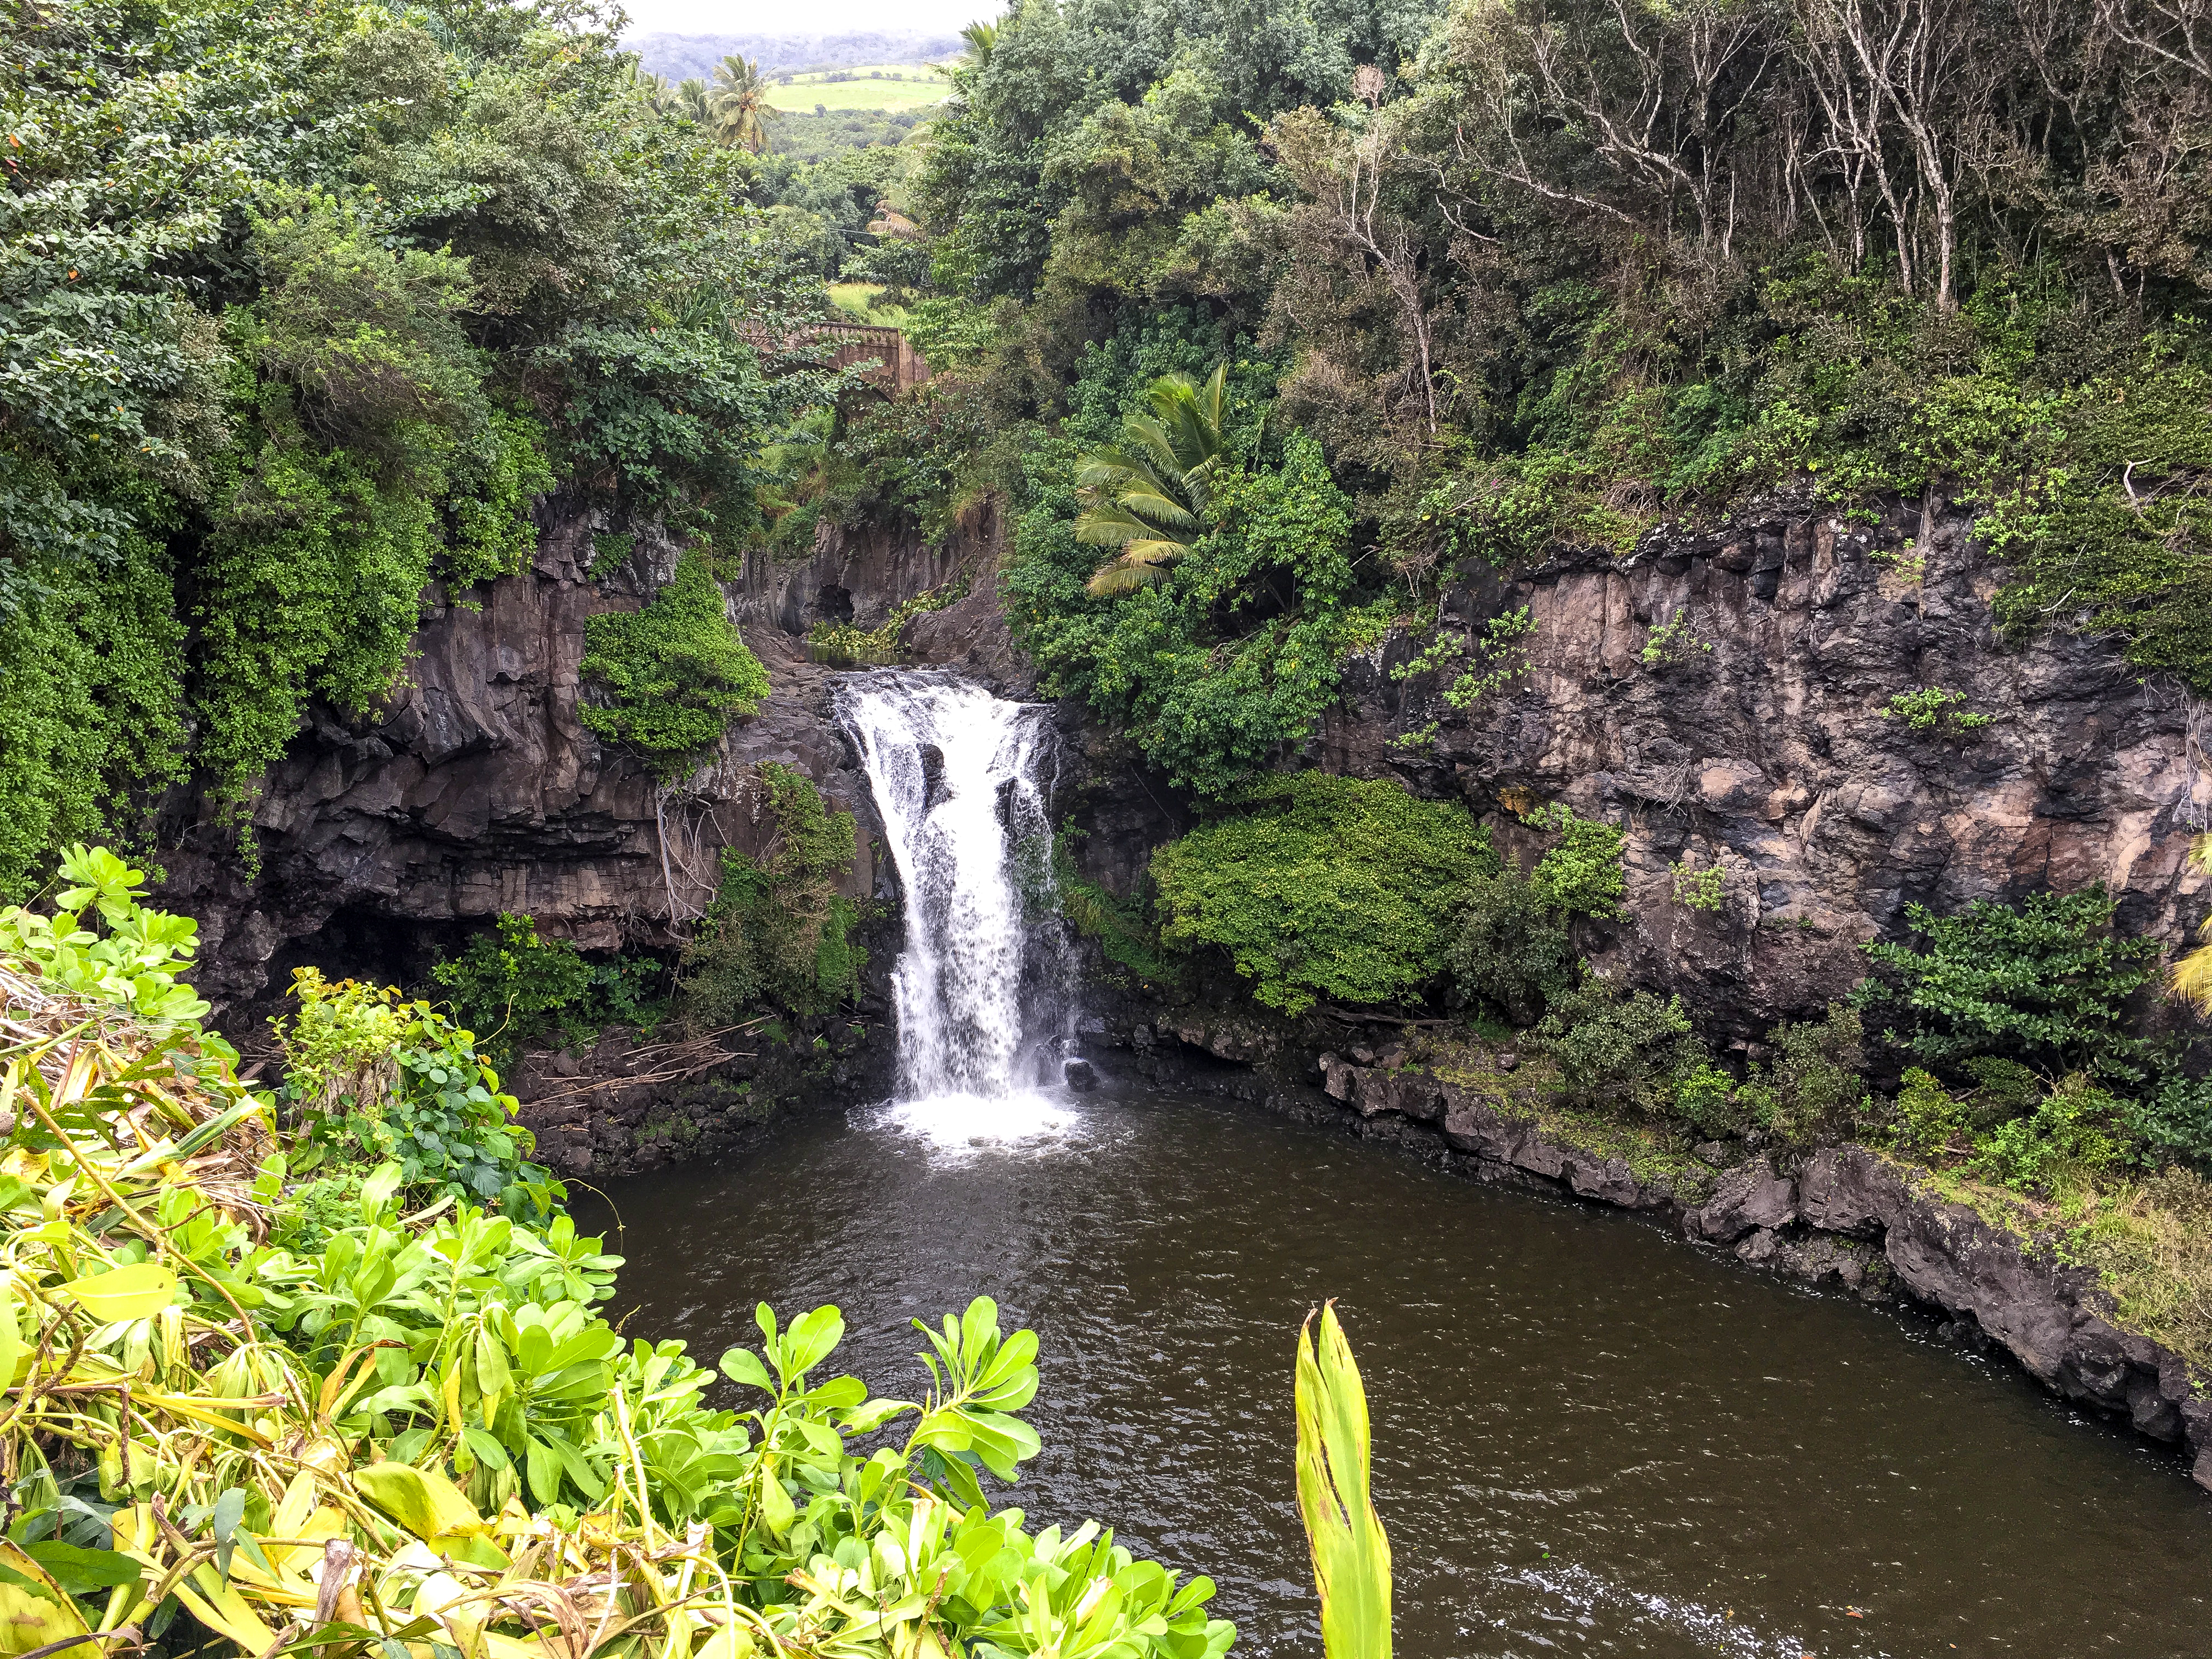
7. Oheo Gulch (7 Sacred Pools)
This was our last stop on The Road to Hana. Unfortunately, due to mudslides, access to these pools was closed during our visit to Maui. We could see some of the falls from the trail, but no one was allowed to swim at the base. Oheo Gulch is located 15 minutes past the town of Hana. Here are significant details to keep in mind. If you go beyond this point in your rental car and if something terrible were to occur, your insurance becomes void! Even your credit card coverage would be voided. The road beyond this point is mostly gravel and dirt; the major rental companies have written this out explicitly in the contract agreement. Many tourists will risk it because some beautiful sites exist beyond Oheo Gulch. But even something as minuscule as a flight tire means you’re alone.
Oheo Gulch
Day Three: Napili Bay
Maui has plenty of amazing beaches where you can spend your day. You can even go beach hopping and taste almost all of them. Since our hotel was at Napili Bay, we decided to spend the day on the beach. This was an excellent spot for snorkeling and seeing marine wildlife. I saw plenty of colorful fish and was lucky enough to see a few sea turtles, one of which was getting by with a missing flipper. You can see the video below.
You can see me snorkeling in the distance with the island of Moloka’i in the background.
If you are in the Lahaina area, I recommend stopping by Gazebo Restaurant for breakfast. Their white chocolate macadamia nut pancakes with homemade whipped cream were terrific, and they were also very generous with their portions.
So, this was Maui for us in a nutshell. We wish we could have stayed longer, but that meant subtracting a day from Kauai. We felt pretty satisfied with our three days here (excluding travel) and thought we accomplished almost everything we wanted to achieve. If you continue reading about Kauai or the Big Island, scroll to the top of this page, and you will find the links. Thank you for reading.
Boston to Dubai, via Toronto: 40k United Mileage Plus miles redeemed per person
First leg of our trip to Dubai was on an Embraer 190 flown by Air Canada. This redemption cost 40k miles per person. When I signed up for the Chase Sapphire Reserve back in September, they had a limited time offer of 100,000 bonus miles upon spending $4k in the first 3 months. Thanks to tuition, I hit that threshold pretty quickly. If you have the Chase Sapphire Reserve or Preferred, you can transfer your points on a 1:1 ratio to United and then use one of their Star Alliance partners to fly. This is exactly what we did.
2nd leg: Toronto to Dubai
This leg of our trip was on the Boeing 787 Dreamliner flown by Air Canada in economy class. This was part of the redemption above. Air Canada is a Star Alliance partner of United.
When using United MileagePlus miles, you can redeem them on any of their Star Alliance partners above.
Abu Dhabi to Male, Maldives: 30k American Airlines miles redeemed per person
My wife and I both signed up for the American Airlines Platinum Select credit card by Citi a few years back and received the bonus 50k miles after hitting the minimum spend threshold (that tuition again). American Airlines is part of One World Alliance but they also have several partners outside the alliance where you can find great redemptions. Etihad happens to be one those partners outside of One World. Others include, Hawaiian Airlines, Jet Airways, Alaska Airlines, and WestJet. One World partners are all below.
American Airlines AAdvantage miles can be redeemed on any of the airlines listed above. This is in addition to several that are not part of the One World Alliance
Male to Rangali Island: TransMaldivian Airways. Partial cost offset by 55,000 American Express points.
When you book a trip to Maldives, there are two ways to get your island: by an expensive speedboat transfer or a ridiculously expensive seaplane transfer. Unfortunately, the sea plane transfer is offered by a single company, TransMaldivian Aiways, which allows them to price the 30 minute flights for as much as they desire. They are not affiliated with any airline alliance so you can’t book them using miles. And it costs $546(!!) per round trip ticket to get to your island if it is only accessibly by seaplane. Since we booked the Conrad in Rangali Island, Maldives using Hilton points, our only option was taking the seaplane transfer. Since I couldn’t use miles and I wanted to reduce the cost burden of the seaplane transfer, I redeemed 55,000 American Express Premier Gold points for $550 in statement credit. AMEX Premier Gold has 20 airline transfer partners as well as the highly coveted Starwood hotels program as a transfer partner. Transferring to almost any of the programs would have given me significantly more value than the 1 cent per point I received by redeeming the points for statement credit. But I also hated the idea of spending $1,092 in cold hard cash for a 30 minute round trip flight. Redeeming the points made it a more palatable $273 round-trip per person. As for the experience itself, it was a very unique and scenic flight. The plane seats about 14 passengers in relatively narrow seats. The plane flies at around 4,500 feet so you get a great view of many islands with their over-water villas on the way to Rangali Island.
I’m not quite sure I’ll ever have another redemption in my life that will require as many points as I needed for the Conrad Maldives. This redemption took a lot of planning and required meeting multiple Hilton Card bonuses to have enough points for an award redemption. Back in 2015, My wife and I both applied for and got the Hilton Honors American Express credit card. It had no annual fee and the bonus was 75,000 Hilton points for spending $1,000 over the first 3 months. In 2016, we both got the Citi Hilton Honors Visa card. This offer was 75,000 points if you spend $2,000 over the first 3 months. I timed my car maintenance expenses and college expenses in a manner which I was able use the Citi Hilton card and get the bonus. My wife’s card was used in a similar manner. So if you’re keeping track, that is now 320,000 Hilton points we have accumulated between the two of us. Then earlier this year, American Express had a 100,000 point offer on their Hilton Surpass card. The annual fee was $75 but it came with automatic Hilton Gold Status. The benefit of having Gold status was significant. It ended up paying for the annual fee many times over. Both of us were able to achieve the 100k bonus due to miscellaneous spending + partial tuition. Point count: 535,000 between the two of us. At this point, we had enough for 3 nights but due to the unpredictability of the weather (it was technically going to be rainy season in July), we really really wanted to get that in that 4th night. It was around this time that Hilton started a new feature in their Hilton Honors program in which you were now able to combine your points with 10 other people. This was the break we needed. I asked my mom and dad if one of them was willing to apply for the no annual fee Hilton Honors AMEX card and get the 75k bonus after spending $2k in the first 3 months. Since they had a relatively large expense upcoming, they obliged and received the bonus. I was able to transfer those points into my account. Point count: ~ 620,000. Now we had enough points for 4 free nights at one of the best accommodations in the Maldives. Nightly rate if paid for in cash? $670. But the best part of this redemption is the Hilton Gold status that came with having the AMEX Hilton Surpass card. As Hilton Gold members, Conrad upgraded us from the superior over-water villa that we had booked to a retreat over-water villa. The cash value of the upgrade per night is about $130 a night. Multiply that by 4 and the upgrade is worth about $520. Hilton Gold members also had other benefits at the hotel such as free tea, biscuits, and lunch sandwiches between 4 and 5 pm and free mocktails between 5 and 6 pm. Buying lunch or mocktails at the Conrad with cash is not cheap. I’d peg this value at about $60 per day between two people. Multiply that by 4, that’s an additional $240 in value. For paying a total of $150 of annual fees between the two Hilton AMEX Surpass cards ($75 each), we derived about $760 in value. In addition, we both get a free night during our card member anniversary.
Male, Maldives to New York City, via Dubai
This was the part of our trip that really helped in reducing the overall miles/cash expenditure of our entire vacation. Sometimes you just get a little lucky. Back in early May, one of the travel blogs I follow sent out an alert on twitter about a mistake fare for a 1 way ticket from Maldives to NYC on Emirates. The mistake fare was $201 per person (!!!) for the 1 way ticket with dates extending as far out as December. Since Maldives was a trip I had been planning anyway, I thought I’d book the ticket and wait and see if Emirates would honor it. 24 hours after booking, I received an e-mail from Emirates that our tickets had been cancelled and that they would not be honoring the mistake fare. I was slightly disappointed but was prepared for this outcome. One week later, I received a call from Emirates asking me if I was still interested in that one way ticket. I told the rep I absolutely was. The booking/reservations agent informed me that there was a reversal in their decision and that they would be honoring the mistake fare. $201 per ticket from the Maldives to NYC is a steal. To put this into context, this flight would have cost $1,400 in cash per person or 70,000 Emirates miles (which I did not have) and additional $100+ in taxes person. Once this domino fell, everything else fell into place. Sometimes you just get a little lucky.